360 View of the Allegheny Honors Hub
Power
Turning On a Classroom/Desktop Computer
- On the back of the computer monitor will be the computer
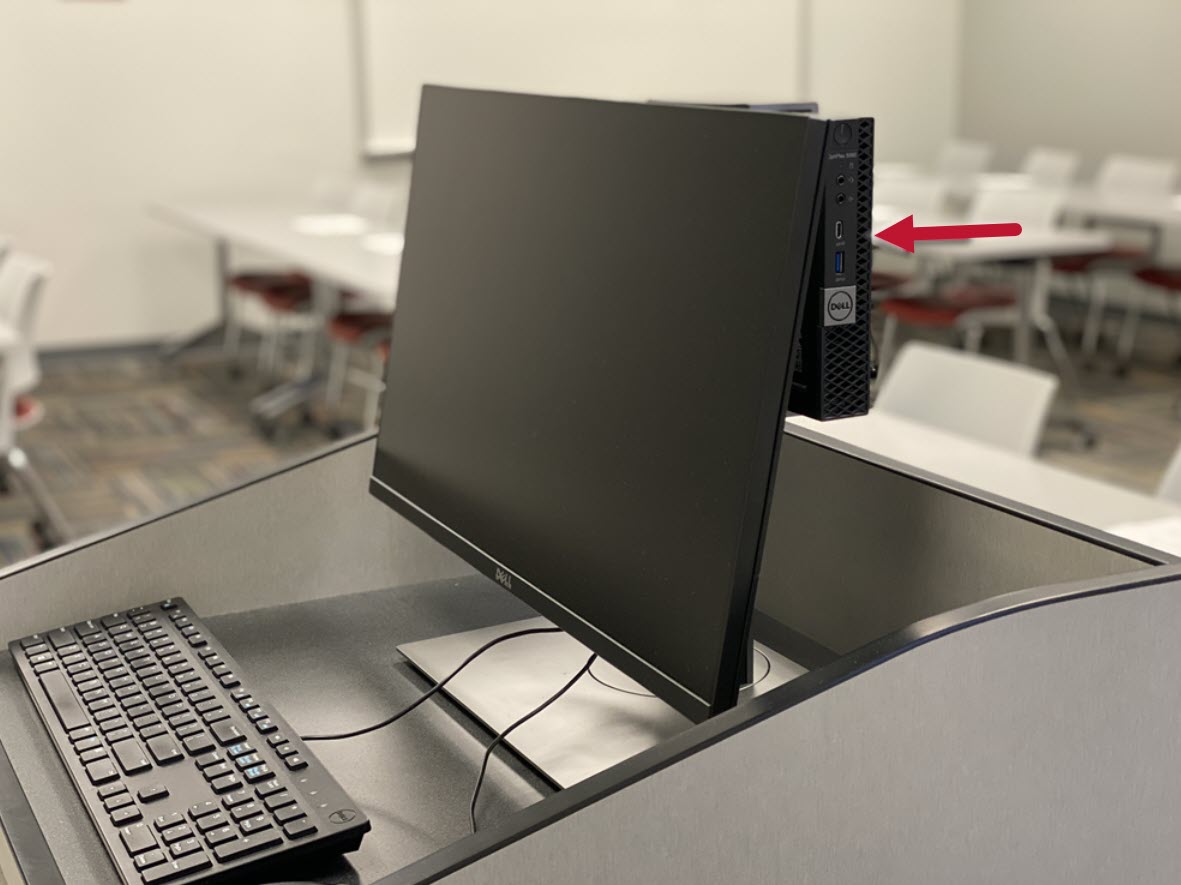
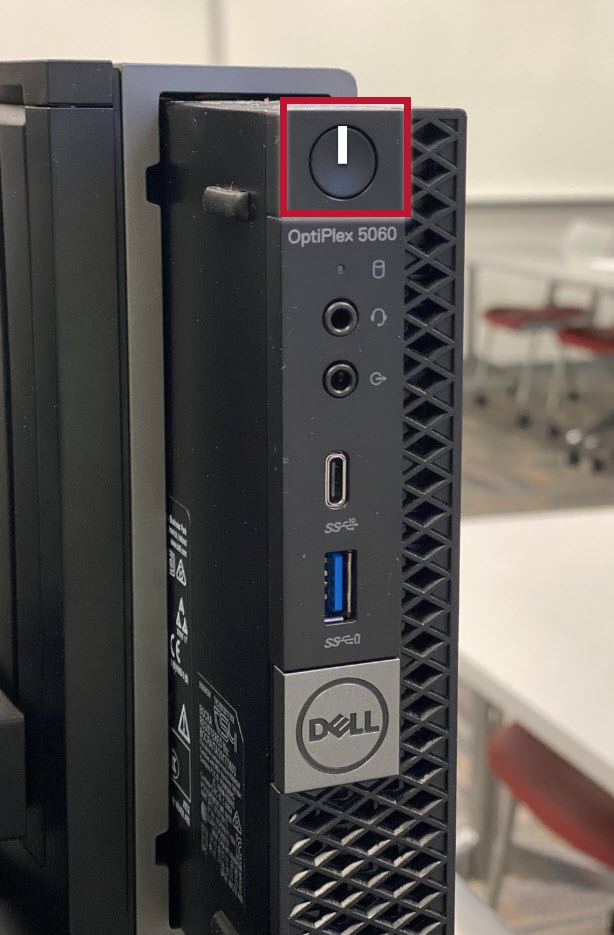
- Press the button on the top of the computer; this is the power button

- The power button will turn white when powered on
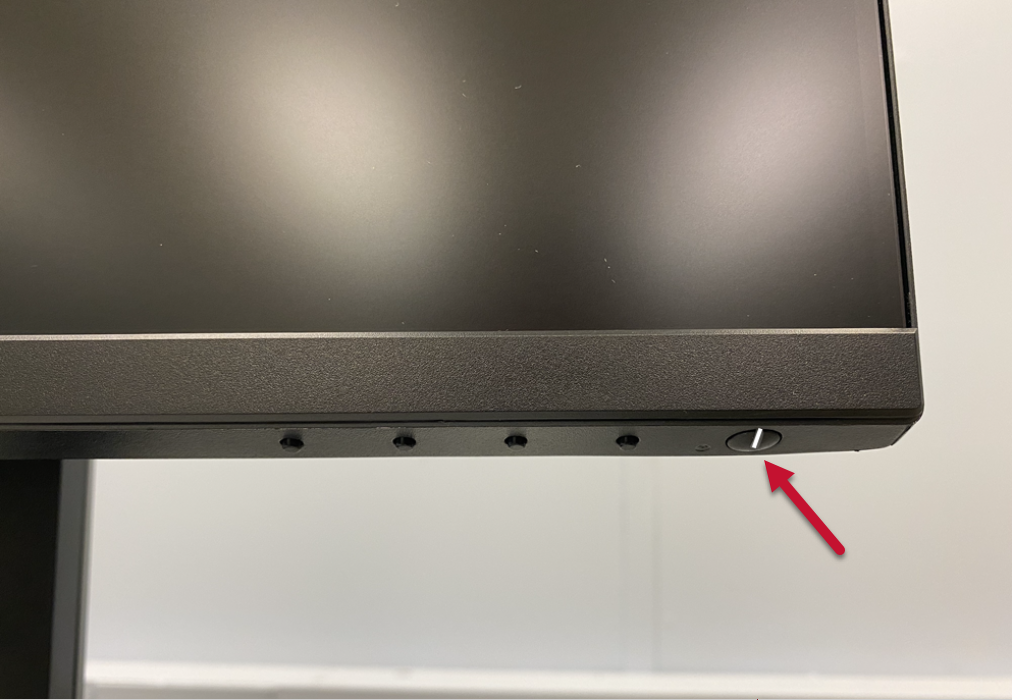
Turning On a Classroom Computer Monitor
- Locate the bottom right of the computer monitor
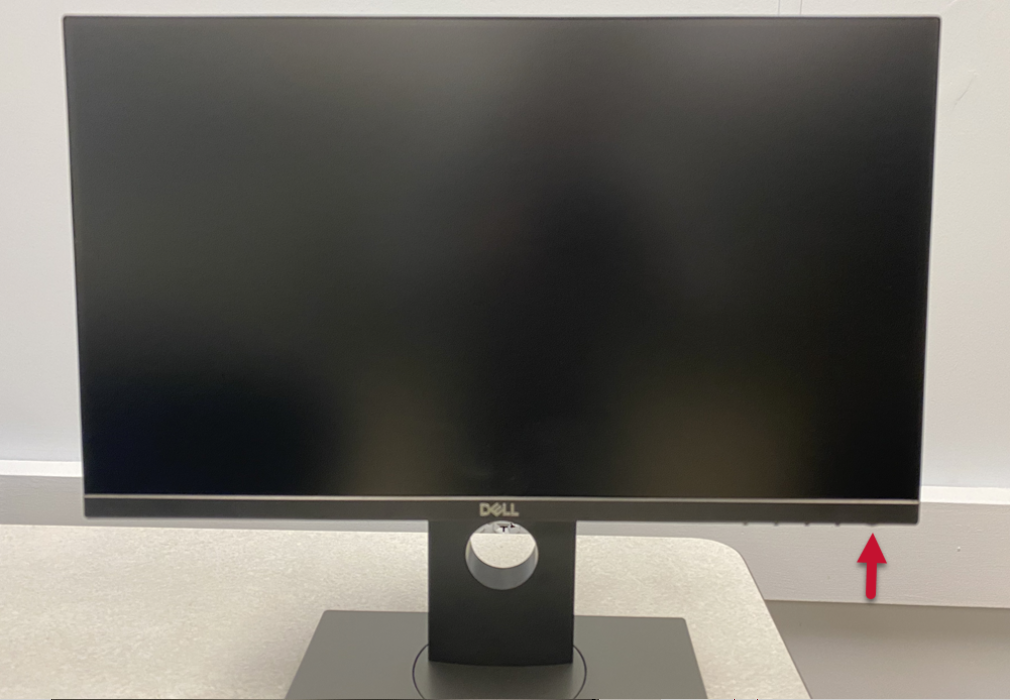
- Press the button on the far right
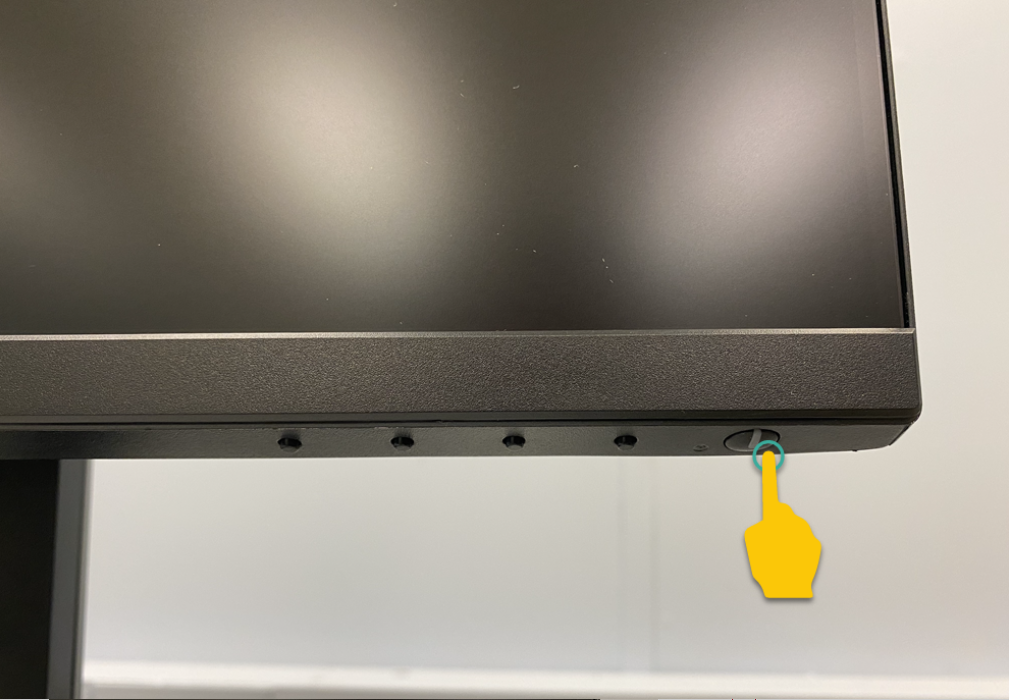
- The power button will turn white when powered on
Turning On the Equipment with the Touch Panel
Note
This will turn the room system on, including the Clear Touch monitor and cameras. If you are using the room PC, you will still need to power on the PC and the monitor.
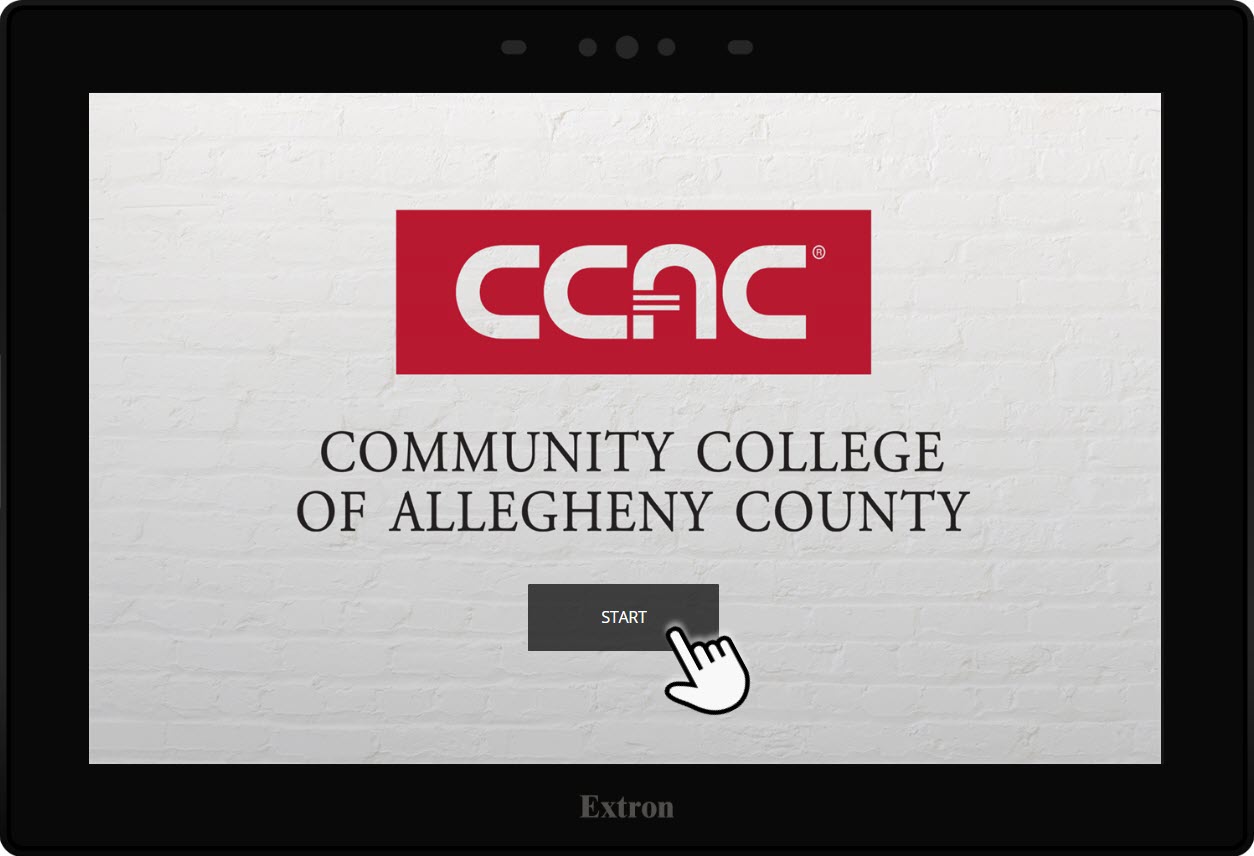
- If the touch panel screen is black (sleeping), press the screen to wake
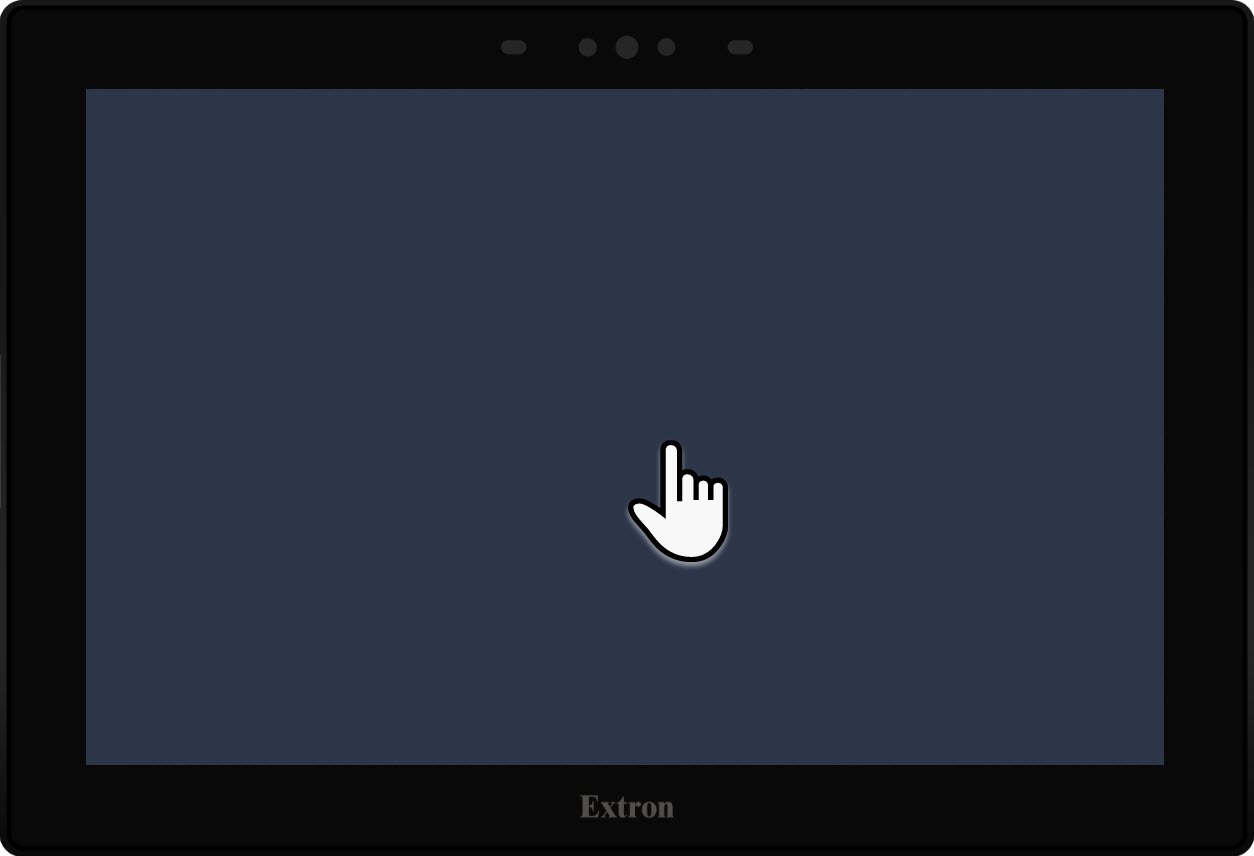
- Select Start
Turning Off the Equipment with the Touch Panel
Note
In addition to powering the system off, you must log out of your profile on the PC. The touch panel does not power the PC on or off.
- Press the Power button on the touch panel

- Confirm that you would like to shut the system down by pressing Power Down

Video
Display the Instructor Computer Screen using the Touch Panel
- On the touch panel, select the PC source

- The instructor's computer screen will now be projected on the Clear Touch monitor
Show a Blu-ray/DVD using the Touch Panel
Note
The Blu-ray player is intended for in-room instruction only and cannot be used to share over Zoom.
The Blu-ray player is inside the instructor's station cabinet, below the PC.

- Select the Blu-ray source on the touch panel

- Press the Eject button on the Blu-ray player

- Insert your Blu-ray/DVD into the tray

- Press the Eject button again to close the tray

- Use the navigation buttons on the touch panel to play your Blu-ray/DVD

Display a Personal Device using the Touch Panel
- Locate the Cable Cubby on the instructor's station

- Connect the HDMI cable to your laptop
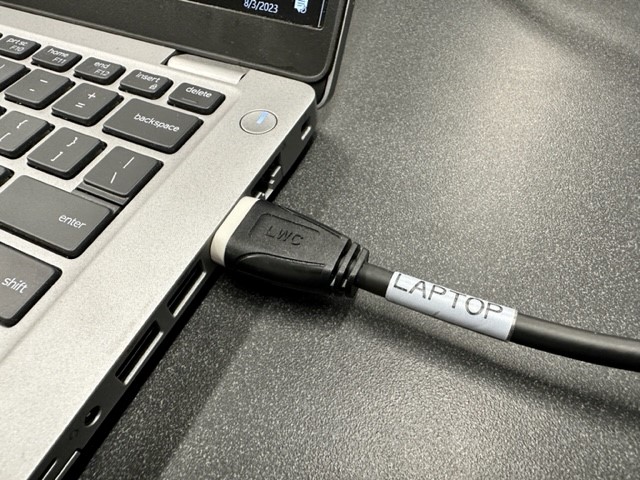
- Connect the HDMI and the USB cables if you want to utilize the Clear Touch capabilities with your device
- Connect the HDMI and the USB cables if you want to utilize the Clear Touch capabilities with your device
- On the touch panel, select the Laptop source

Connecting a Document Camera to an ITech Classroom
Before you begin
- Faculty can check out a document camera from any campus library on a semester basis.
- After powering the PC and Touch Panel On, select the PC input.
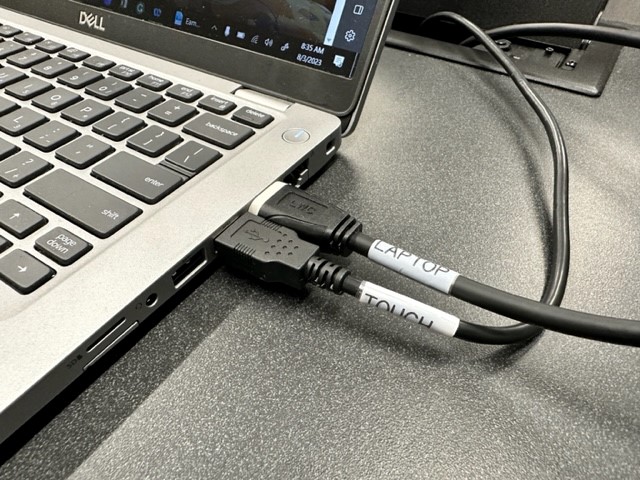
- Locate the Cable Cubby on the instructor station

- Locate the document camera's cable

- Plug the cable into the document camera

- The computer will make a device-connected noise
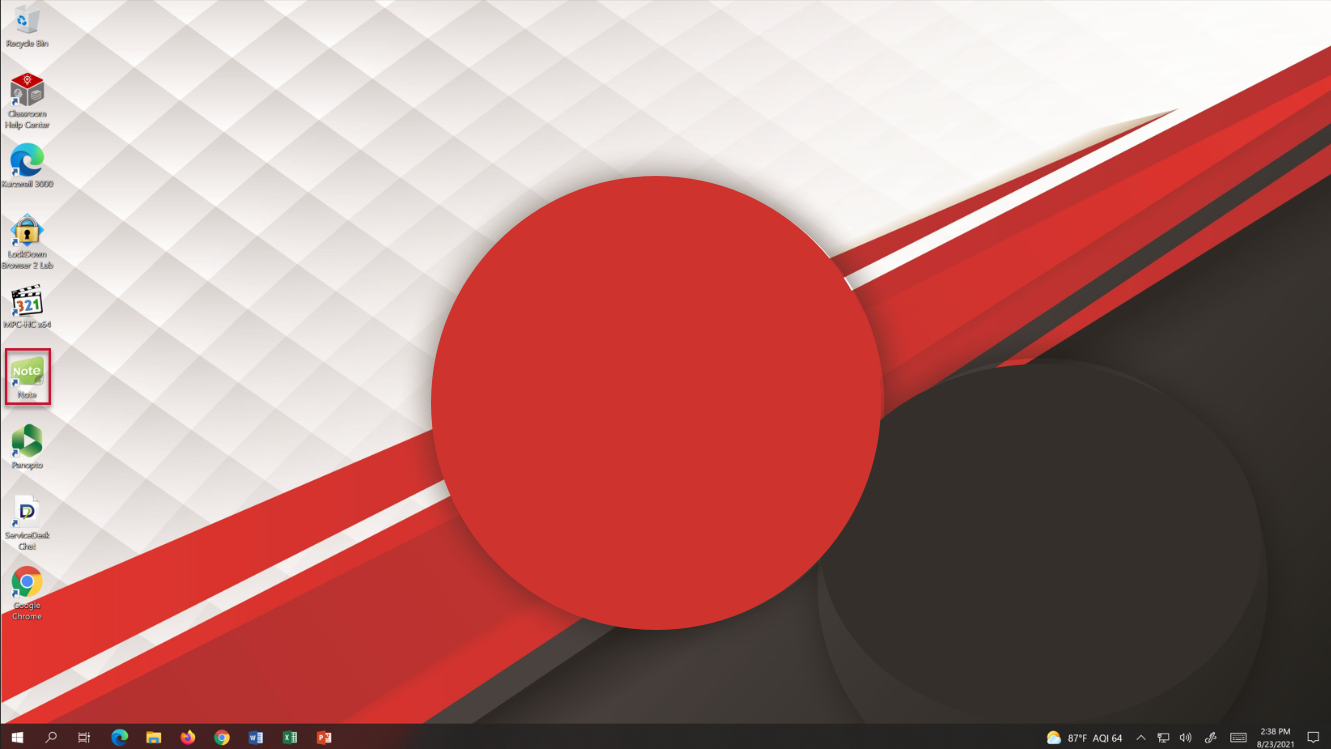
- Open the Note program
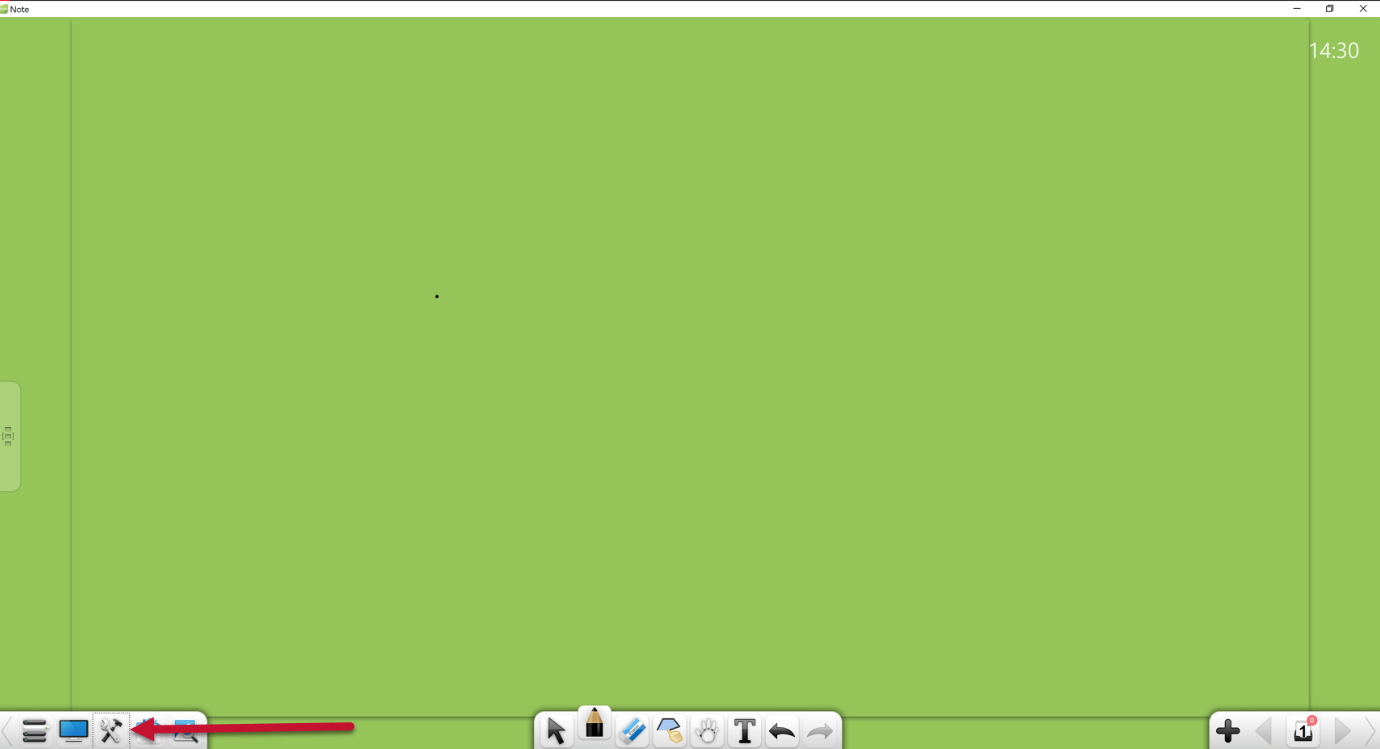
- Click on the tools icon
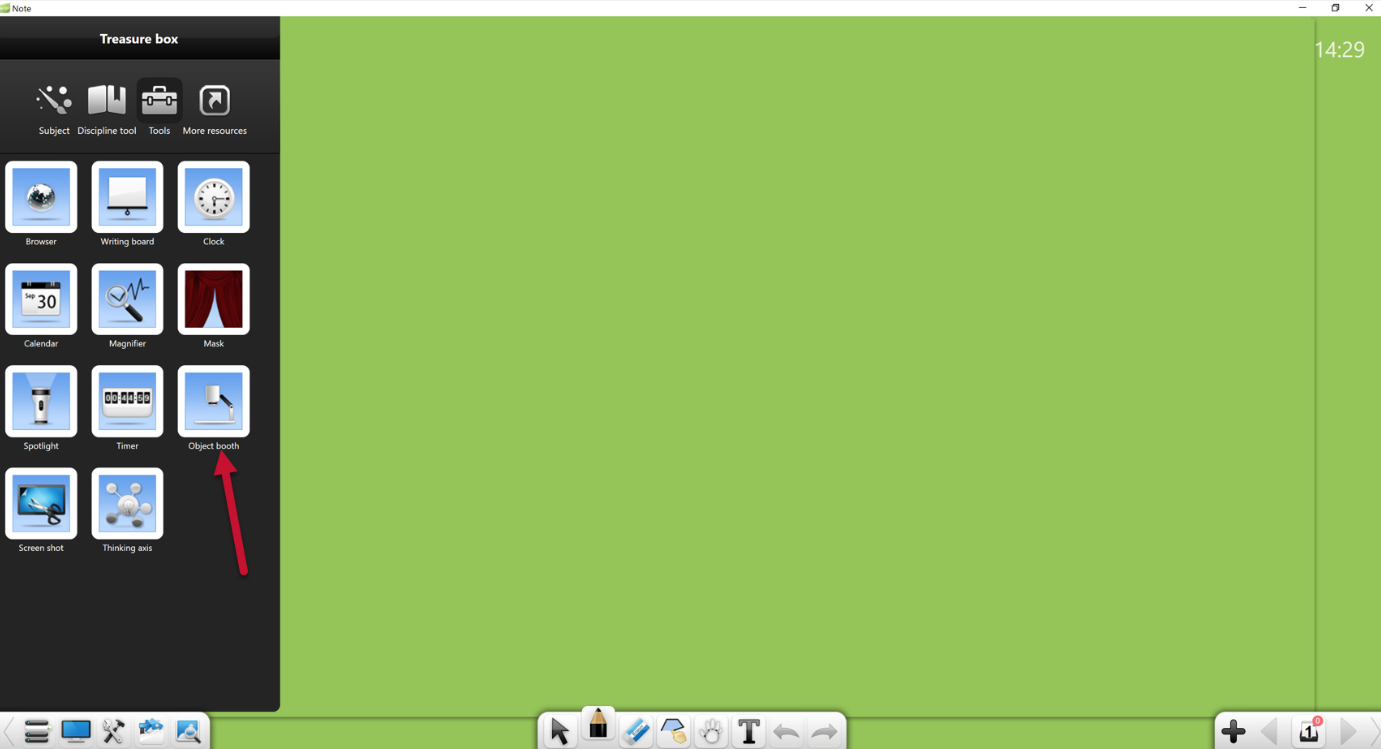
- Click the Object Booth
Starting a Zoom Meeting in Class
Note
There are various ways to start your Zoom meeting for class. You can launch the Zoom App on the PC, sign in to the App, and select your prescheduled meeting from there. You can also open your Outlook invite and click the link in the invite to start the meeting.
For more information on Zoom meetings, please see the Zoom Meeting Basic Guide and the Zoom Meeting Advanced Guide.
If the remote participants cannot see or hear the class, please ensure that the right camera and mic are selected in the Zoom window.


- After launching the Zoom meeting on the instructor's PC, turn to the touch panel to choose a Camera angle for your remote participants
- On the PC input, select Camera Control

- Select a Camera Preset

- After selecting a Preset, you can fine-tune the camera angle using the directional arrows for the camera

- The Plus and Minus buttons will allow you to Zoom In or Out

Hiding/Display Mute using the Touch Panel
Note
The Mute Display button allows you to make the Clear Touch monitor black. This will hide any content from the class and can be used on any video source selected.
- Press Mute Display

- Press Display Muted to send content back to the Clear Touch monitor

Connecting a USB Drive
- Underneath the computer monitor on the left side, there is one USB port
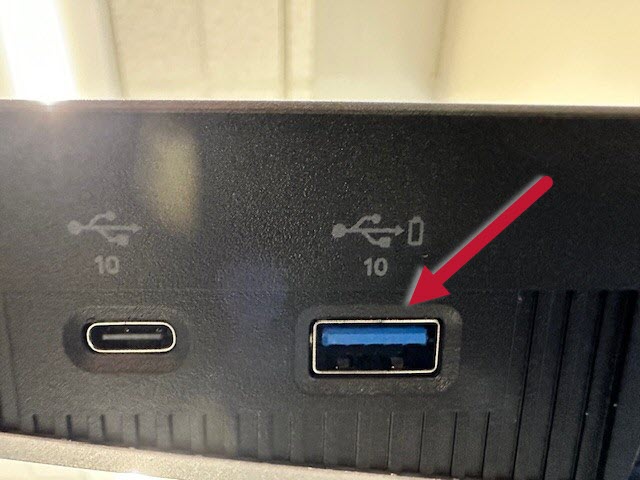
- On the front of the instructor's computer, there is 1 USB port
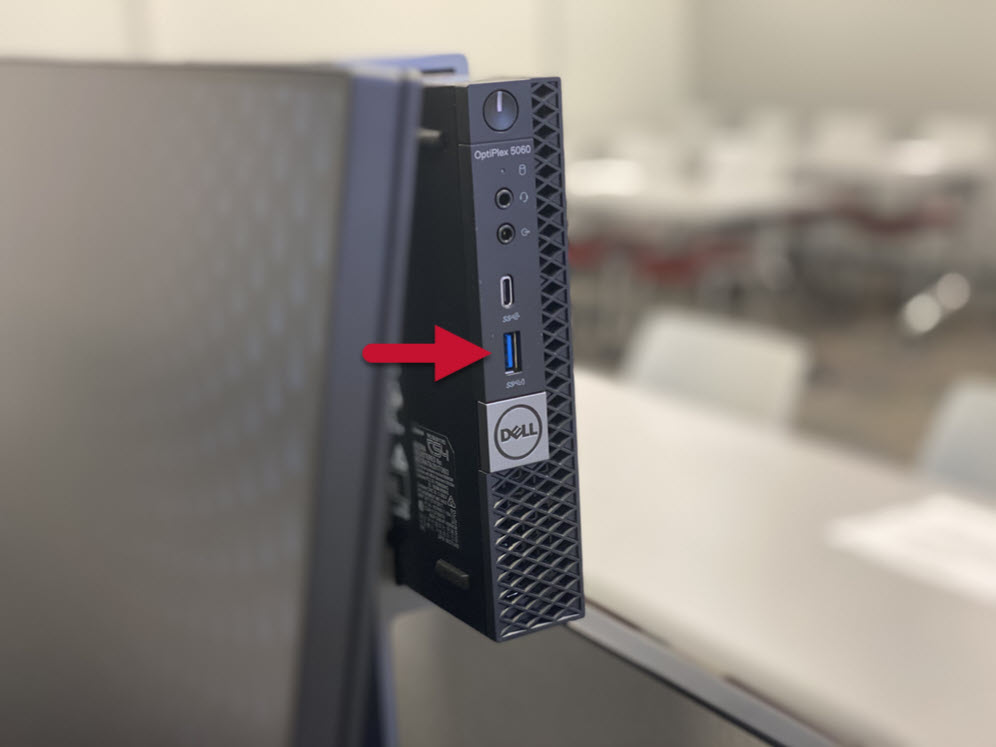
- On the front of the Clear Touch display on the bottom right side, there are 2 USB ports
Audio
Volume Controls on the Touch Panel
- To adjust the system volume in the room, use the Volume + or - icons

- To mute the room audio, press Mute Audio

- To unmute the room audio, press Audio Muted

Microphones
Note
The Allegheny Honors Hub has two microphones for use in a Zoom meeting or recording your class lecture for Panopto.
The presenter's lanyard microphone is on the Instructor Station, and the classroom microphone is mounted below the Clear Touch monitor. Both work simultaneously and are muted simultaneously when mute is enabled using the Mic Privacy button. It is important to note that the lanyard microphone located on the Instructor Station has a mute button in addition to the touch panel Mic Privacy button. Before you start your Zoom meeting, please make sure the lanyard mic is not muted (the Mute button is located on the side of the microphone).

These microphones are not used for sound reinforcement in the room.
Using the Presenter Lanyard Microphone
- Remove the lanyard microphone from its charging station

- Using the magnetic clasps on the lanyard, attach the microphone around your neck

- Before beginning a Zoom meeting, ensure the microphone is unmuted
- When the meeting is over, return the lanyard microphone to its charging station

Muting/Unmuting the Microphones
Note
The microphones can be muted in three ways. If your Zoom remote participants cannot hear you presenting, please ensure that the Mic Privacy button is disabled on the touch panel, the Mic is unmuted in the Zoom app, and the Mute button is not engaged on the lanyard microphone.
Muting/Unmuting on the Touch Panel
- To mute the microphones, press Mic Privacy (this mutes both mics)

- To unmute the microphones, press Mic Privacy again (this unmutes both mics)

Muting/Unmuting on the Lanyard Microphone
- To mute the lanyard microphone, press the X button located on the side

- To unmute, press the X button (now red) again

Muting/Unmuting in the Zoom App
- To mute, click the microphone icon at the bottom of the Zoom app

- To unmute, click the microphone icon at the bottom of the Zoom app again

Classroom Phone
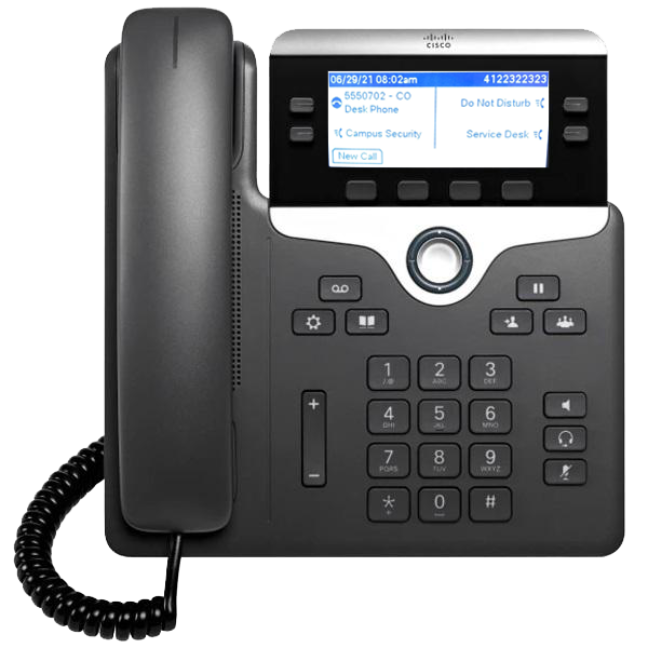
Internal Phone Calls Only
- Your Classroom Number and Extension
- Campus Security Button - Calls your Campus's security
- ServiceDesk Button - Calls the ITS ServiceDesk
- Do Not Disturb Button - Mutes the Phone Ringer