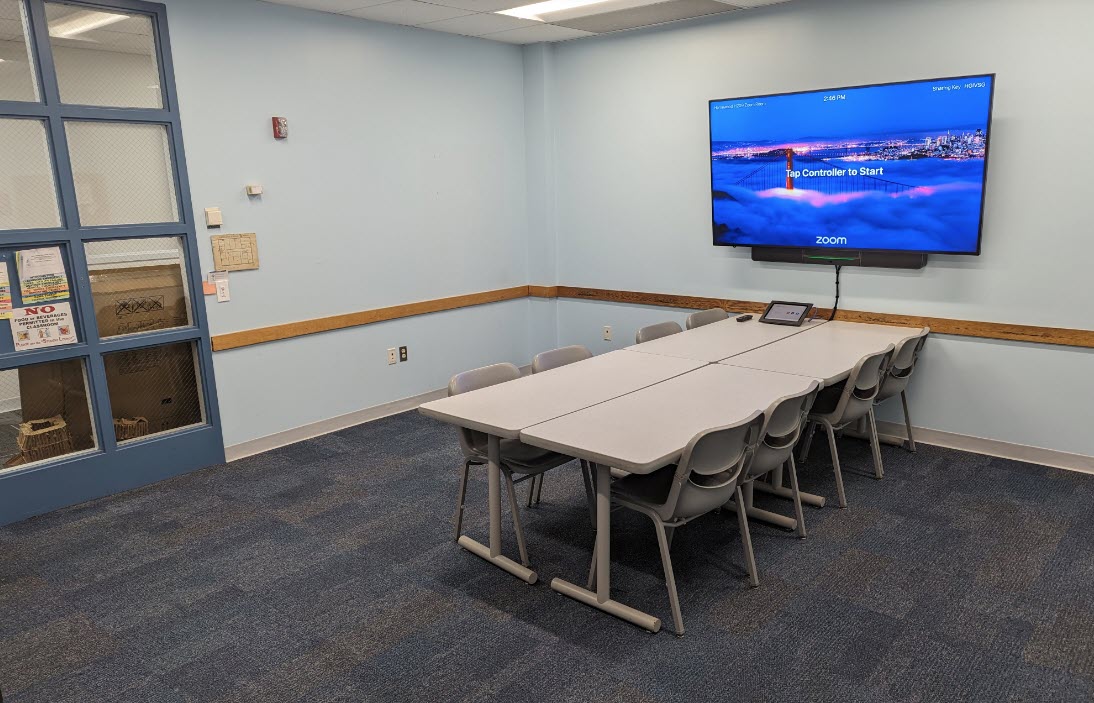
Note
If the TV display is powered Off when entering the Huddle Room, please power it On using the remote control on the table.
Scheduling and Starting a Zoom meeting for Class
Scheduling a Zoom Room for Class
- Reserve your Huddle Room(s) or Classroom(s) using Astra Schedule Event and Resource Scheduling
- Please reference the Help Center article, Scheduling a Room in Ad Astra, if you need assistance
- Schedule your Zoom meeting
- Please reference the Help Center article, Scheduling a Zoom meeting if you need assistance
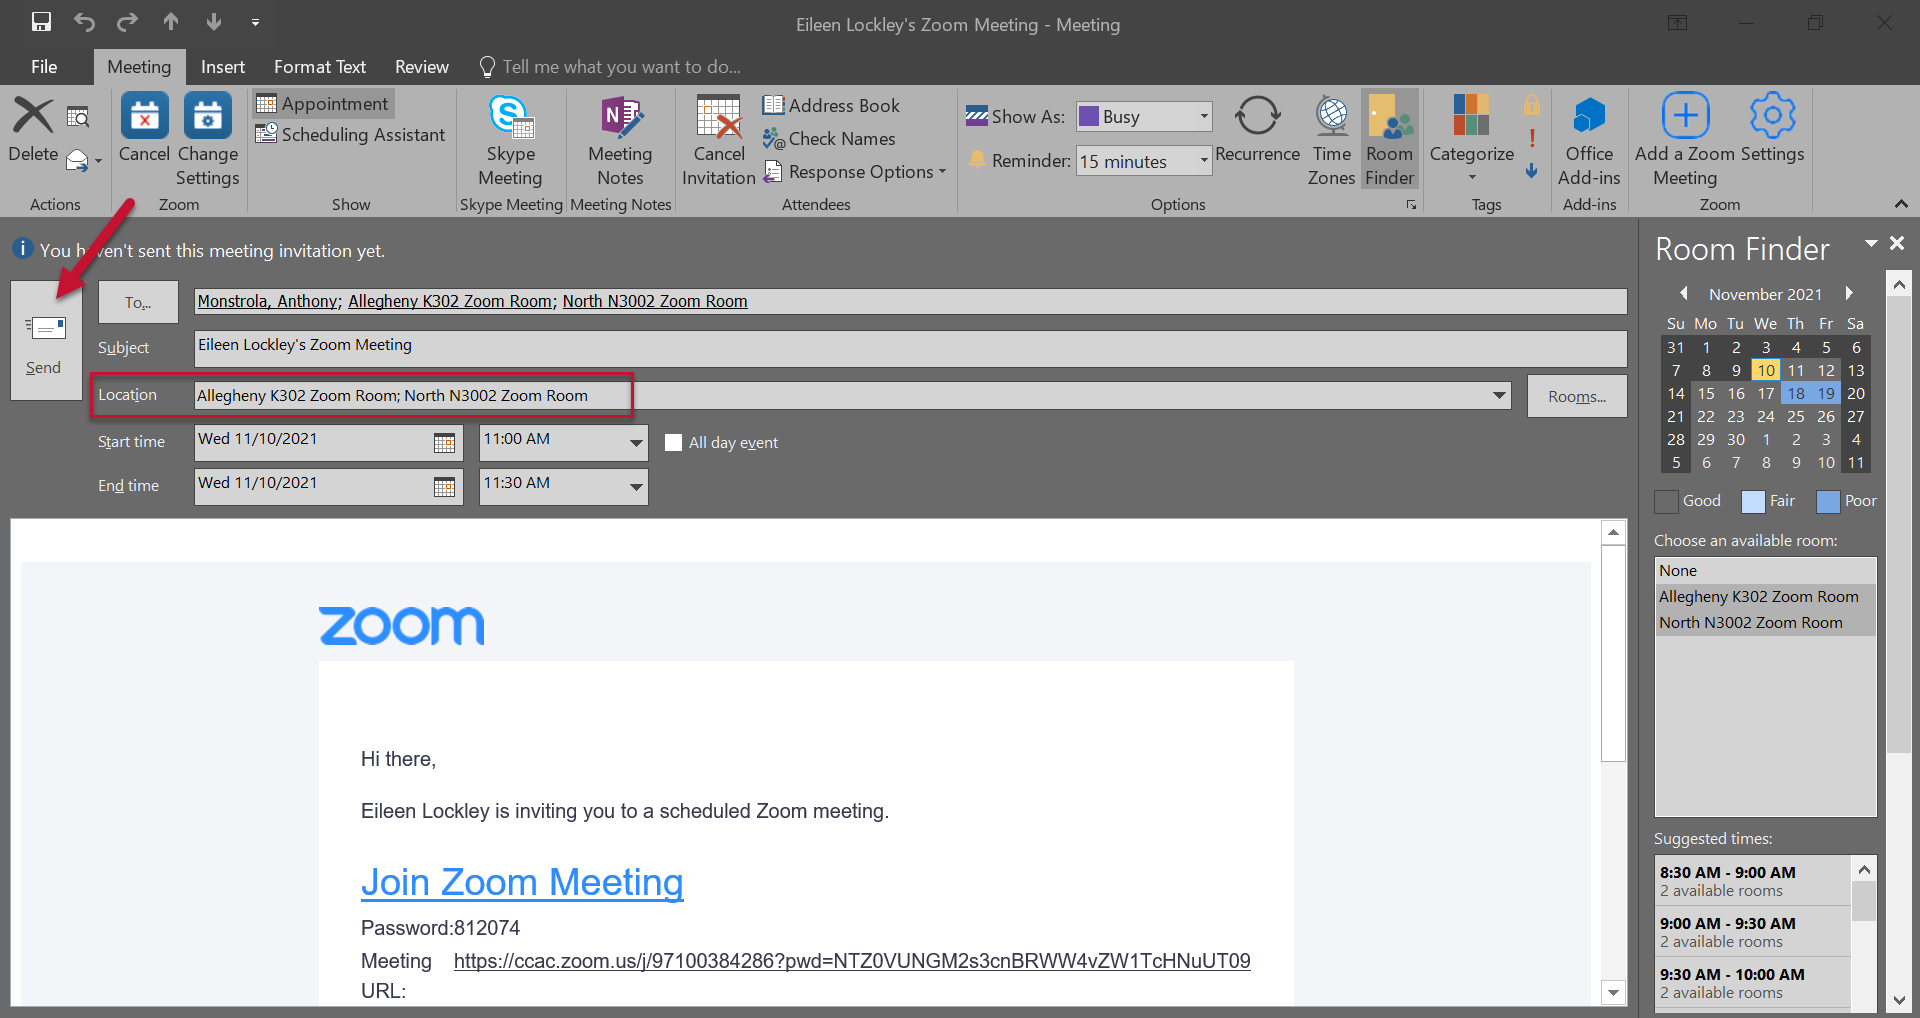
- With your Zoom meeting open, add the necessary CCAC Zoom Room(s) you wish to connect and or the meeting attendees
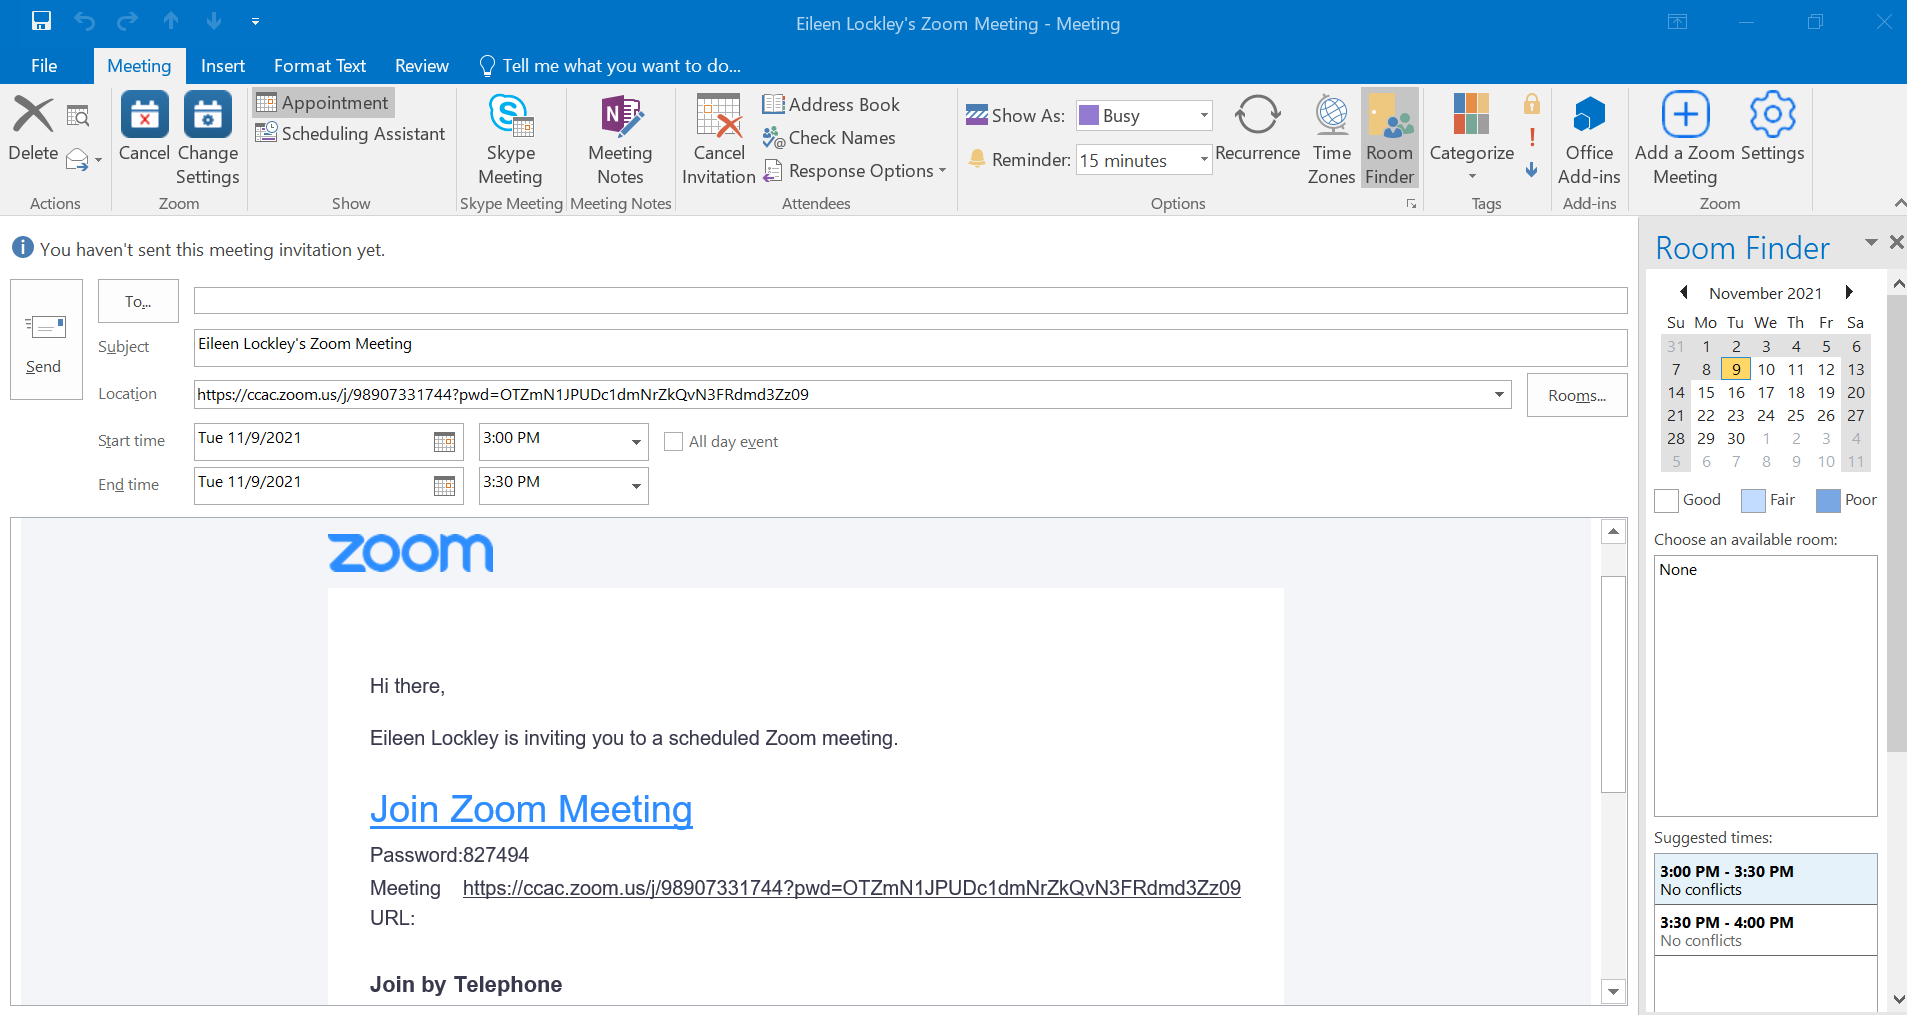
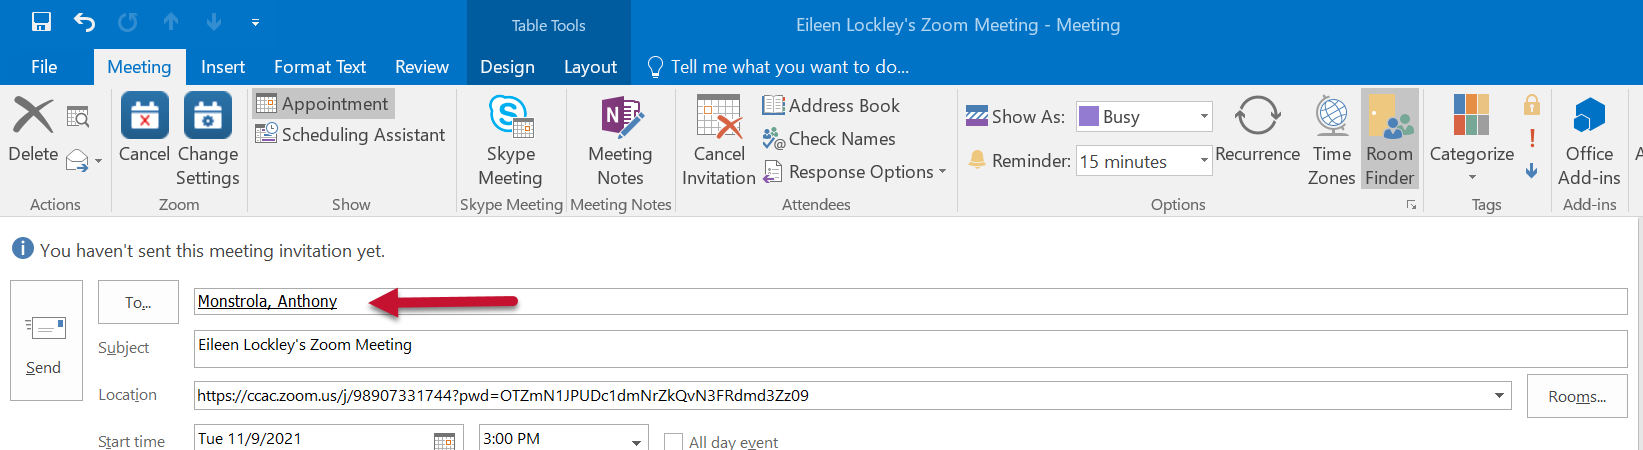
- Add any necessary attendees in the To… field
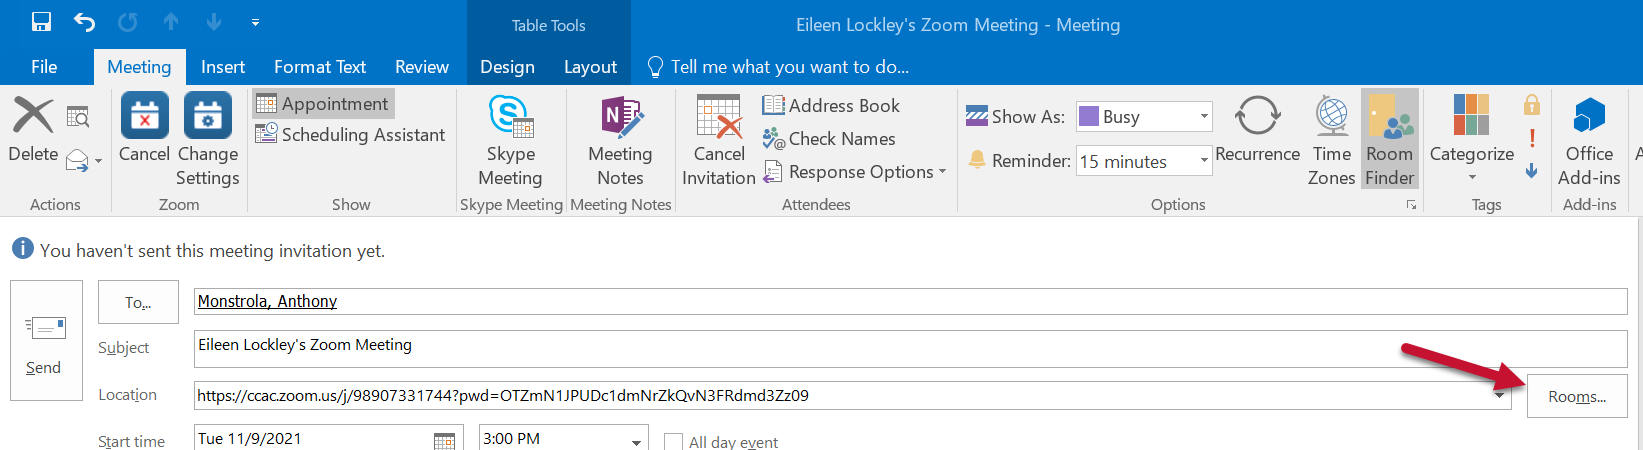
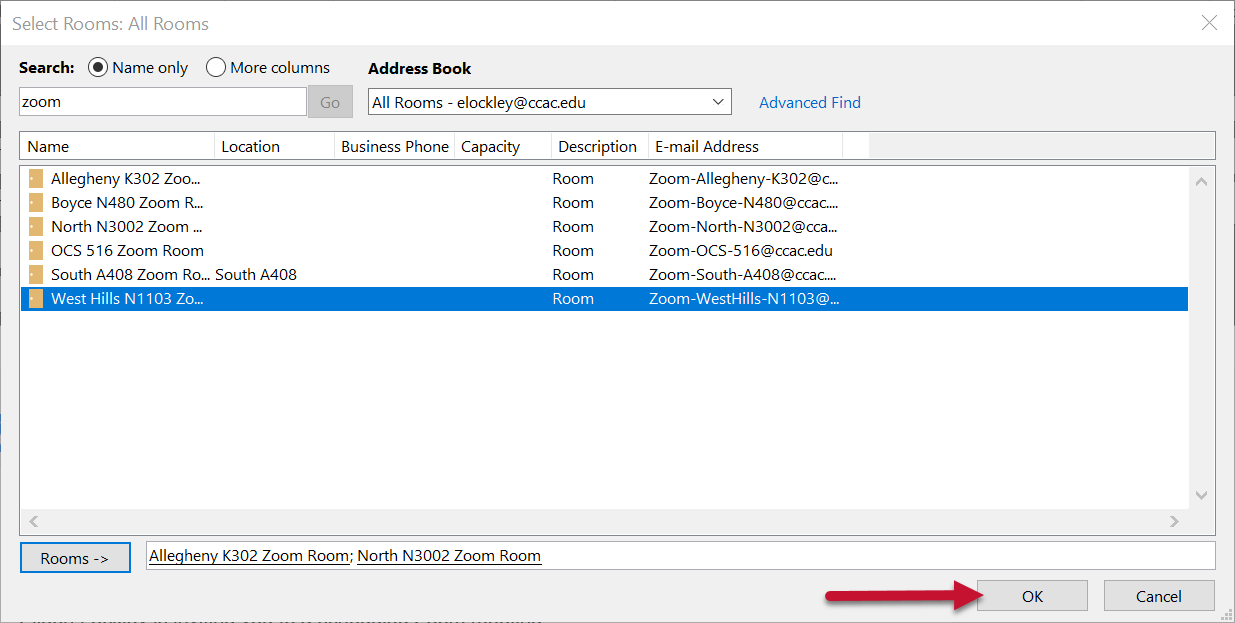
- Click on the Rooms button
- Select All Rooms from the Address book dropdown

- Select the desired Zoom room(s) and click the Rooms button
.png)
- Select OK
- After selecting OK, you will receive a pop-up asking if you would like to update the room location. Select, Yes

- Click Send once finished
Joining or Starting a Zoom Meeting for Class using the iPad
Info
There are multiple ways to start or join a Zoom meeting. This article will detail the options you have for joining a class in a Zoom Huddle room.
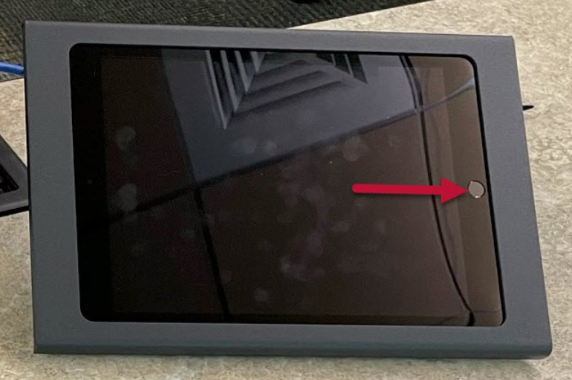
- If the iPad is sleeping, press the Home button to wake
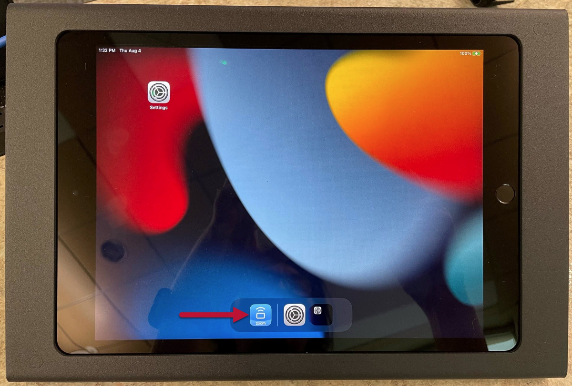
- If upon waking the iPad, the Zoom App is not showing, select the Zoom App icon to launch
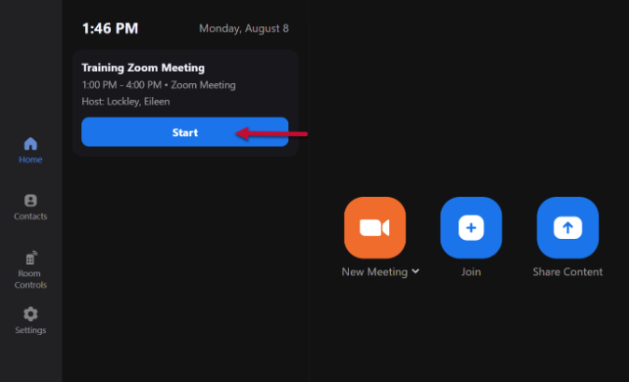
Joining a Pre-Scheduled Zoom Meeting
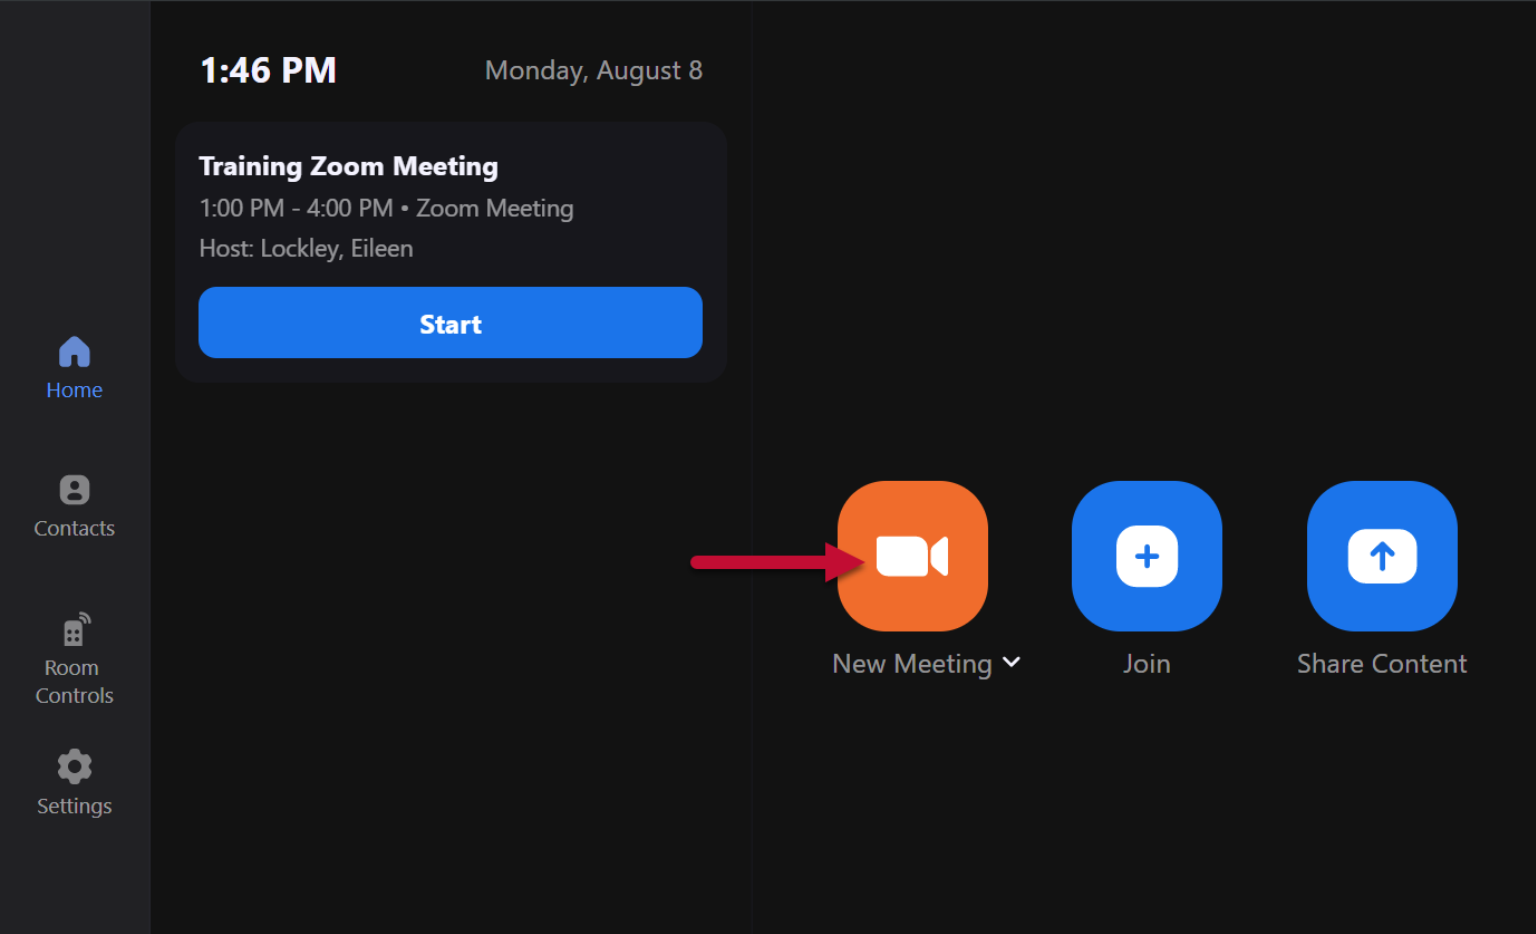
- Locate your class from the schedule on the home screen and press Start
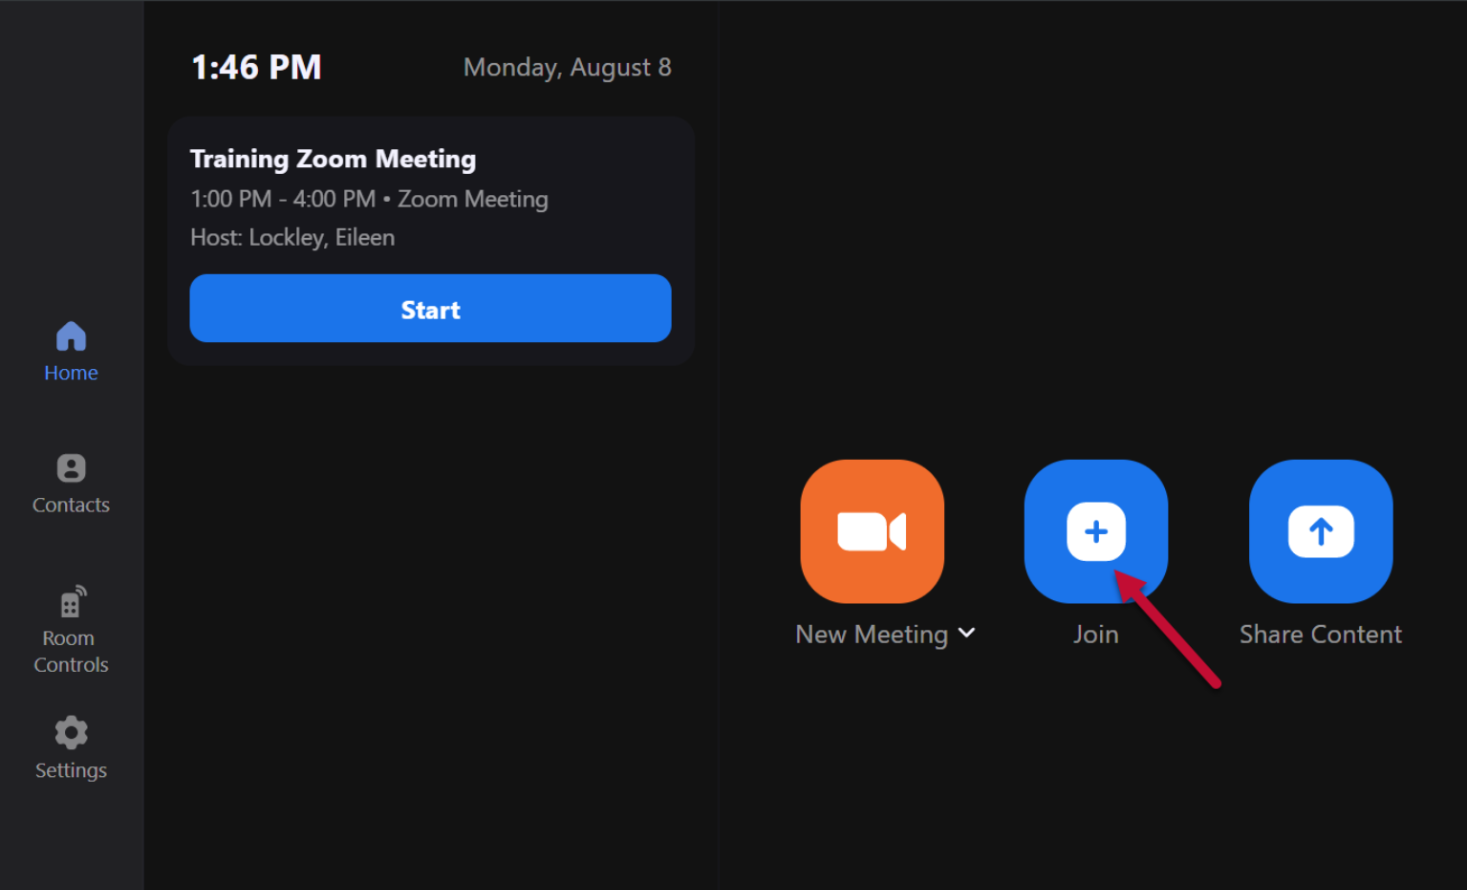
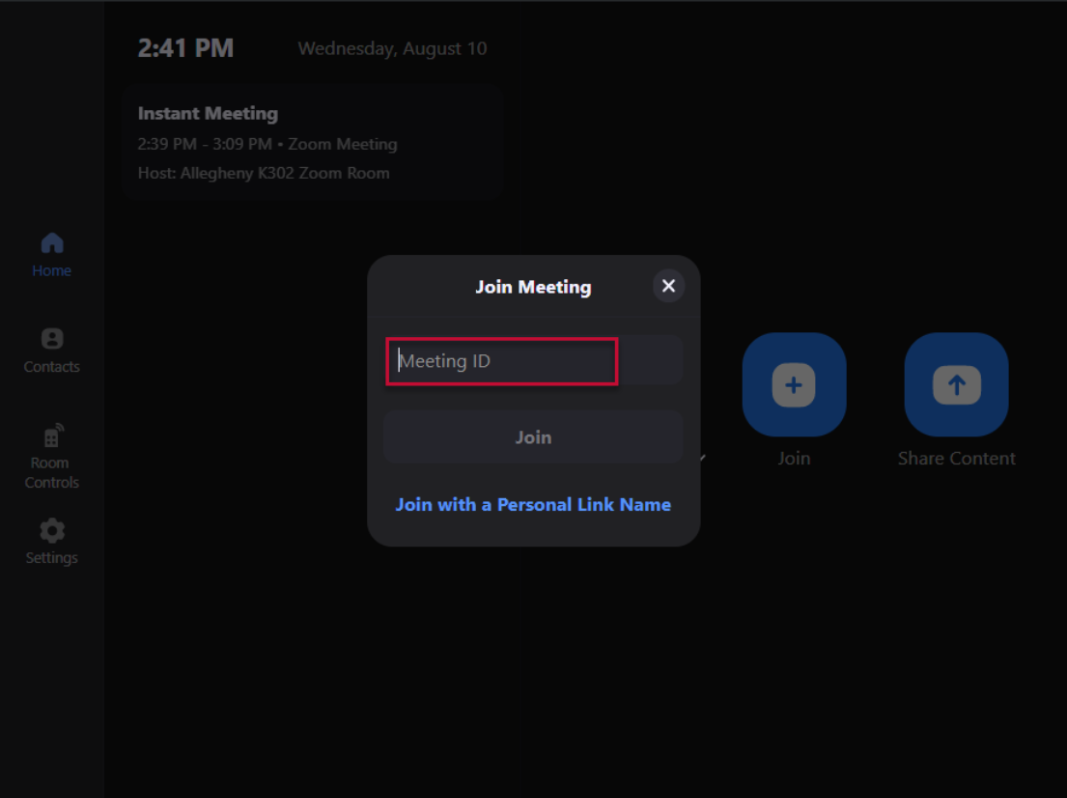
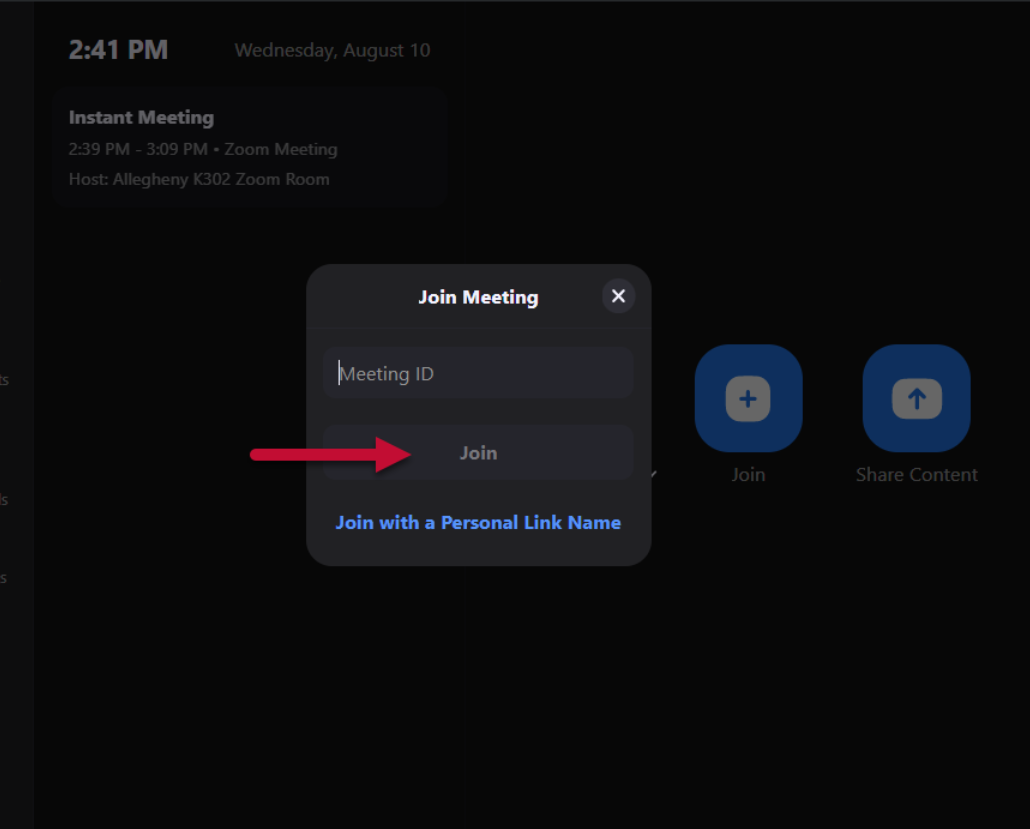
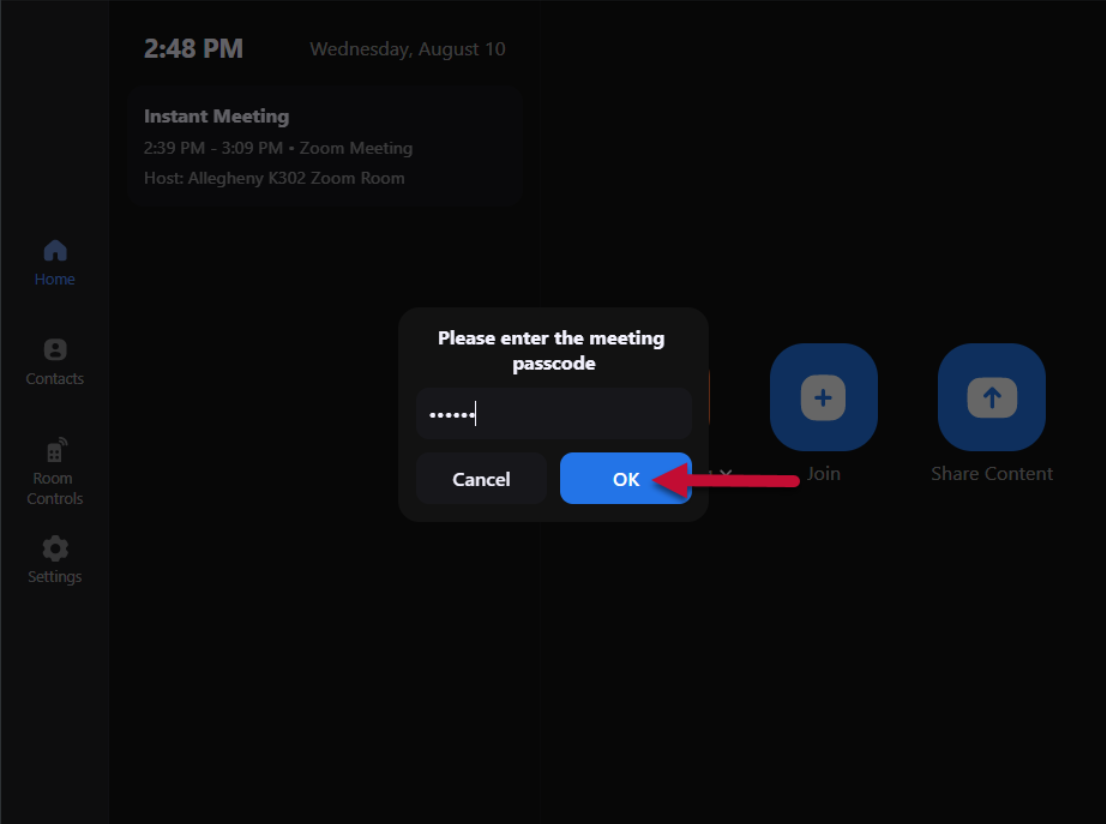
Joining a Zoom Meeting manually using the Meeting ID and Passcode
- Select the Join button
- Enter the Meeting ID
- Select Join
- Enter the Passcode
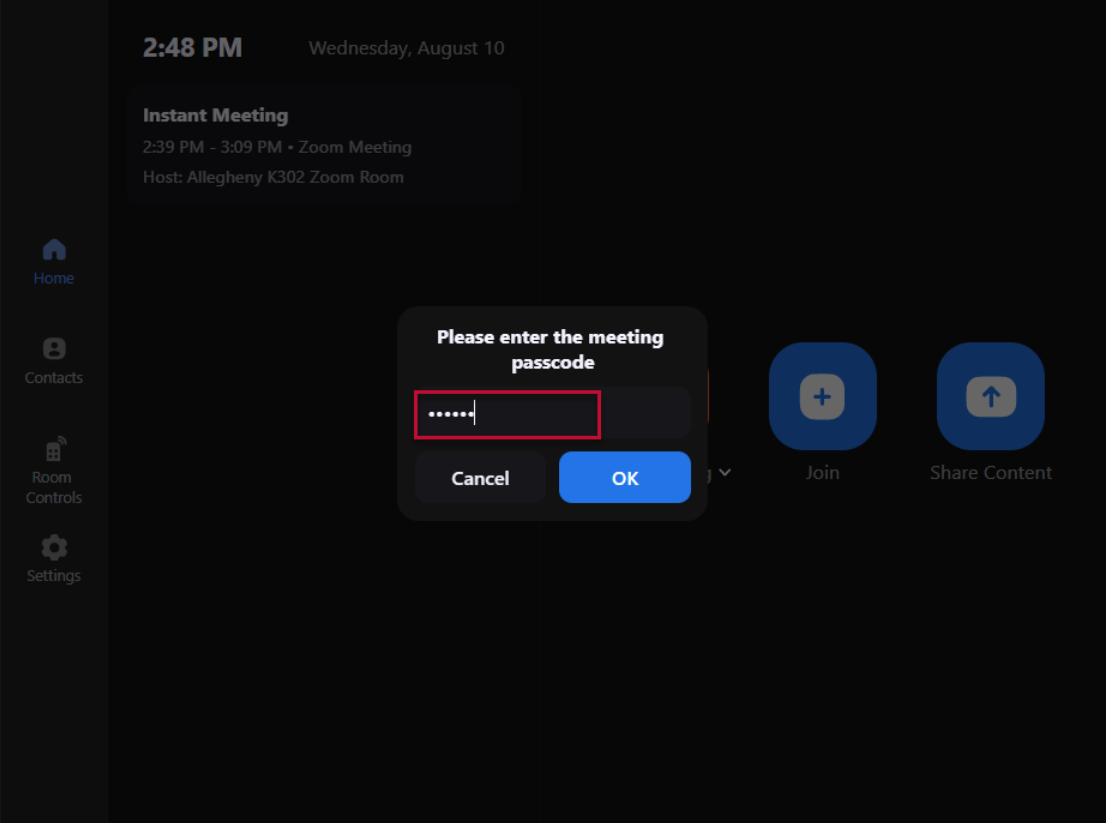
- Select OK
Starting a Zoom Meeting (using the Invite Option - Contacts)
- Select New Meeting

- To add someone to your meeting, select Invite

- You can search for anyone at CCAC by typing their name, email, or CCAC username in the Search bar
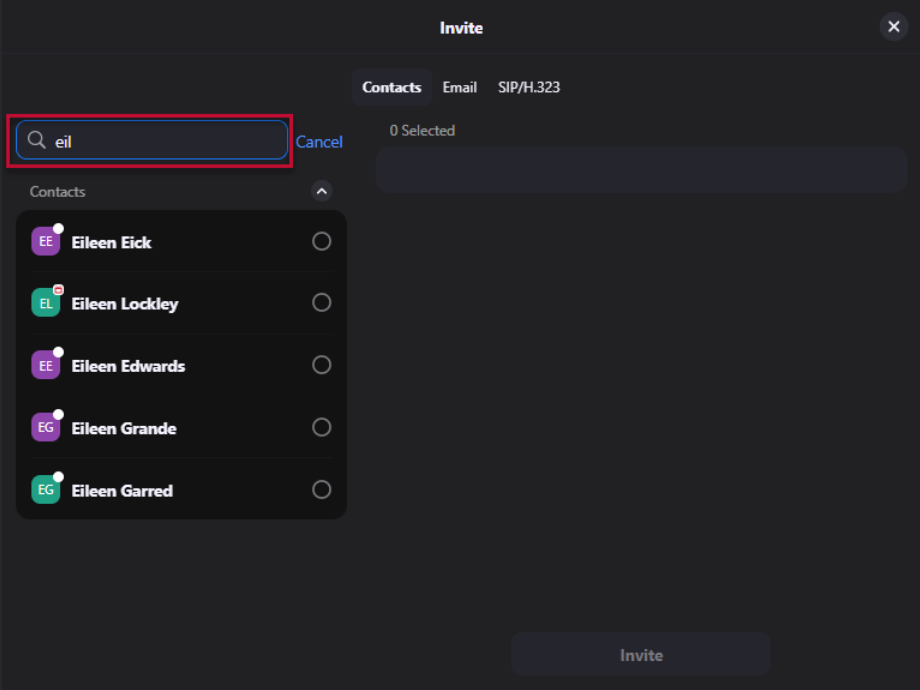
- Select the person
- Repeat the search process for each person you would like to add
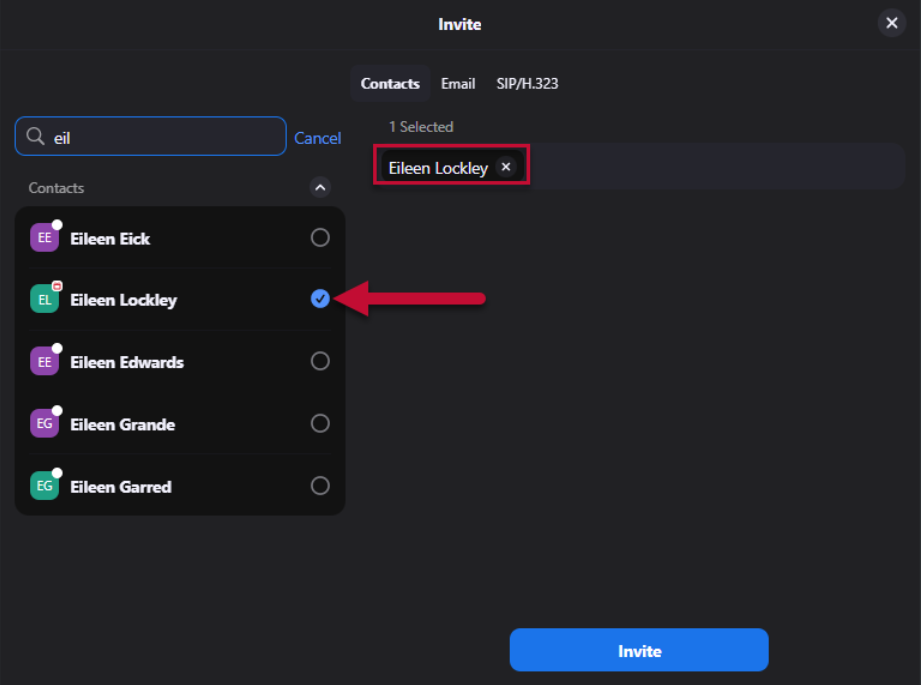
- Select Invite
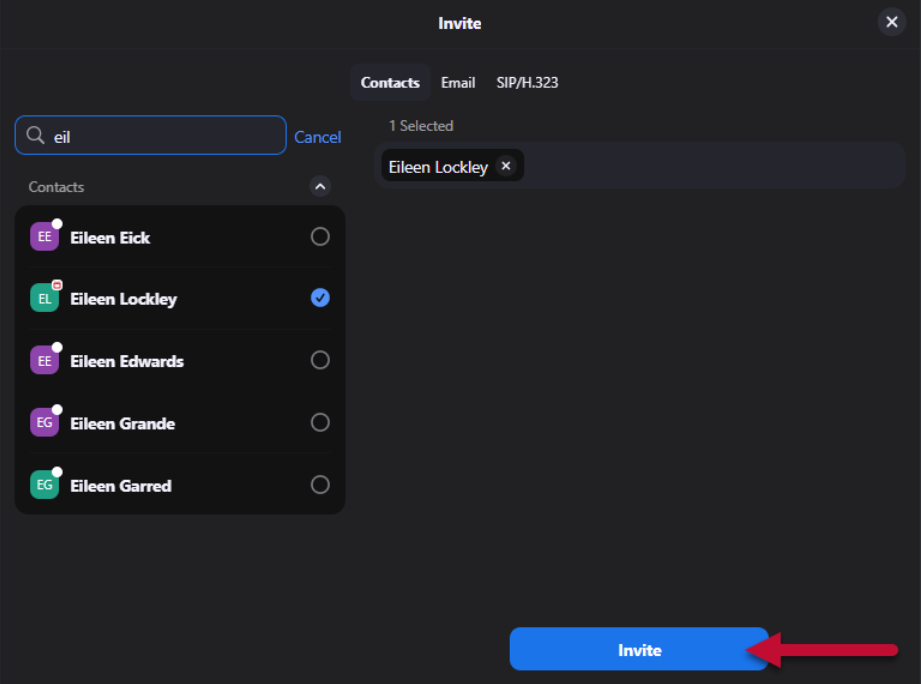
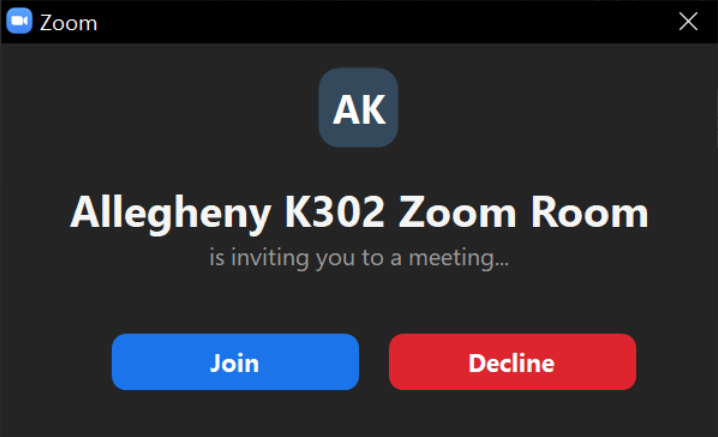
- The person you invited will see this on their PC and they can choose to Join or Decline the invite
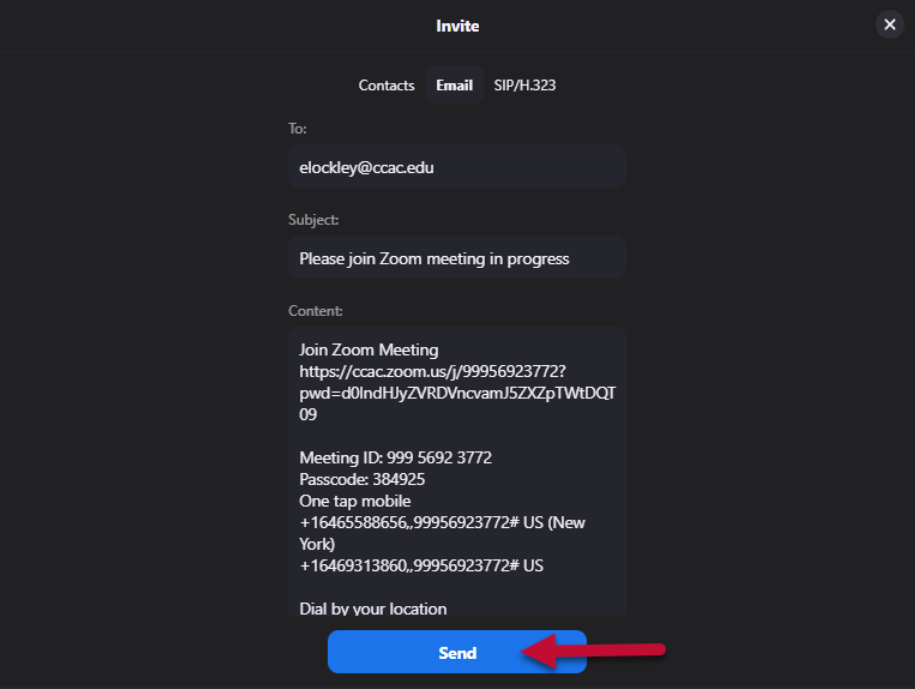
Starting a Zoom Meeting (using the Invite option - Email)
- Select New Meeting
- To add someone to your meeting, select Invite

- Select the Email option
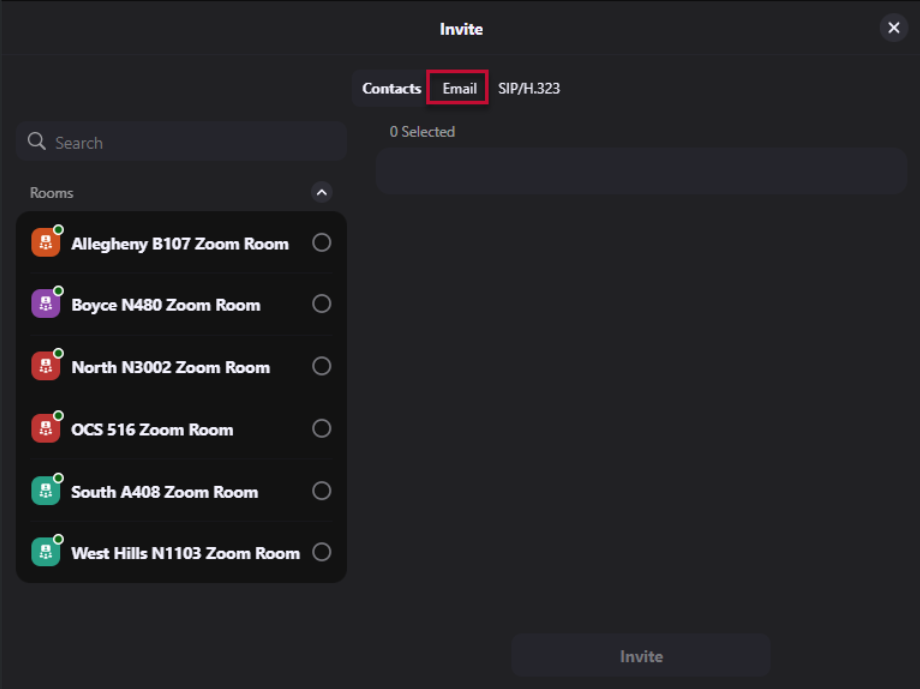
- Enter the Email address
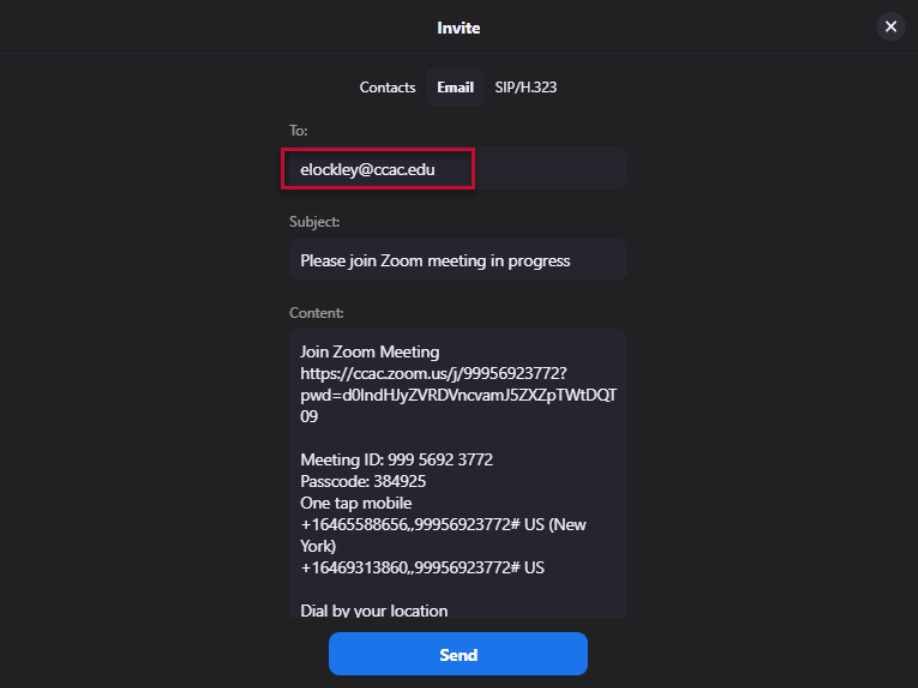
- Select Send
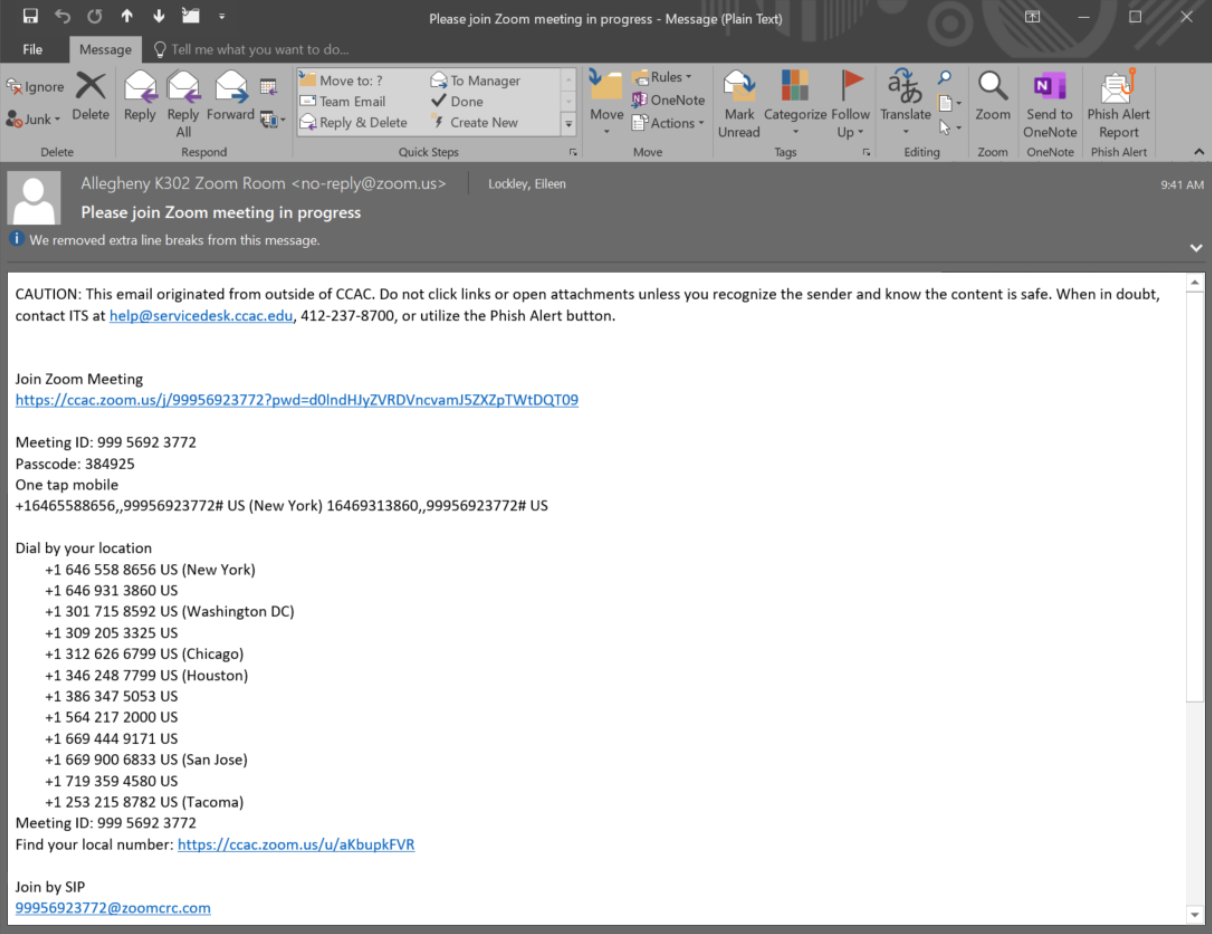
- The person you emailed the invite will receive an email like this inviting them to join your meeting
Starting a Zoom meeting using Contacts
- Select Contacts

- You can Invite participants by using the Search or Email option

Joining a Zoom Meeting for Class Laptop Option
Info
In addition to joining the LiveSync class using the iPad and room system, you can use one of the eight laptops and headsets located in the cabinet.
Both the laptops and headset are charging in the cabinet. When finished, please return them to their charging location in the cabinet.
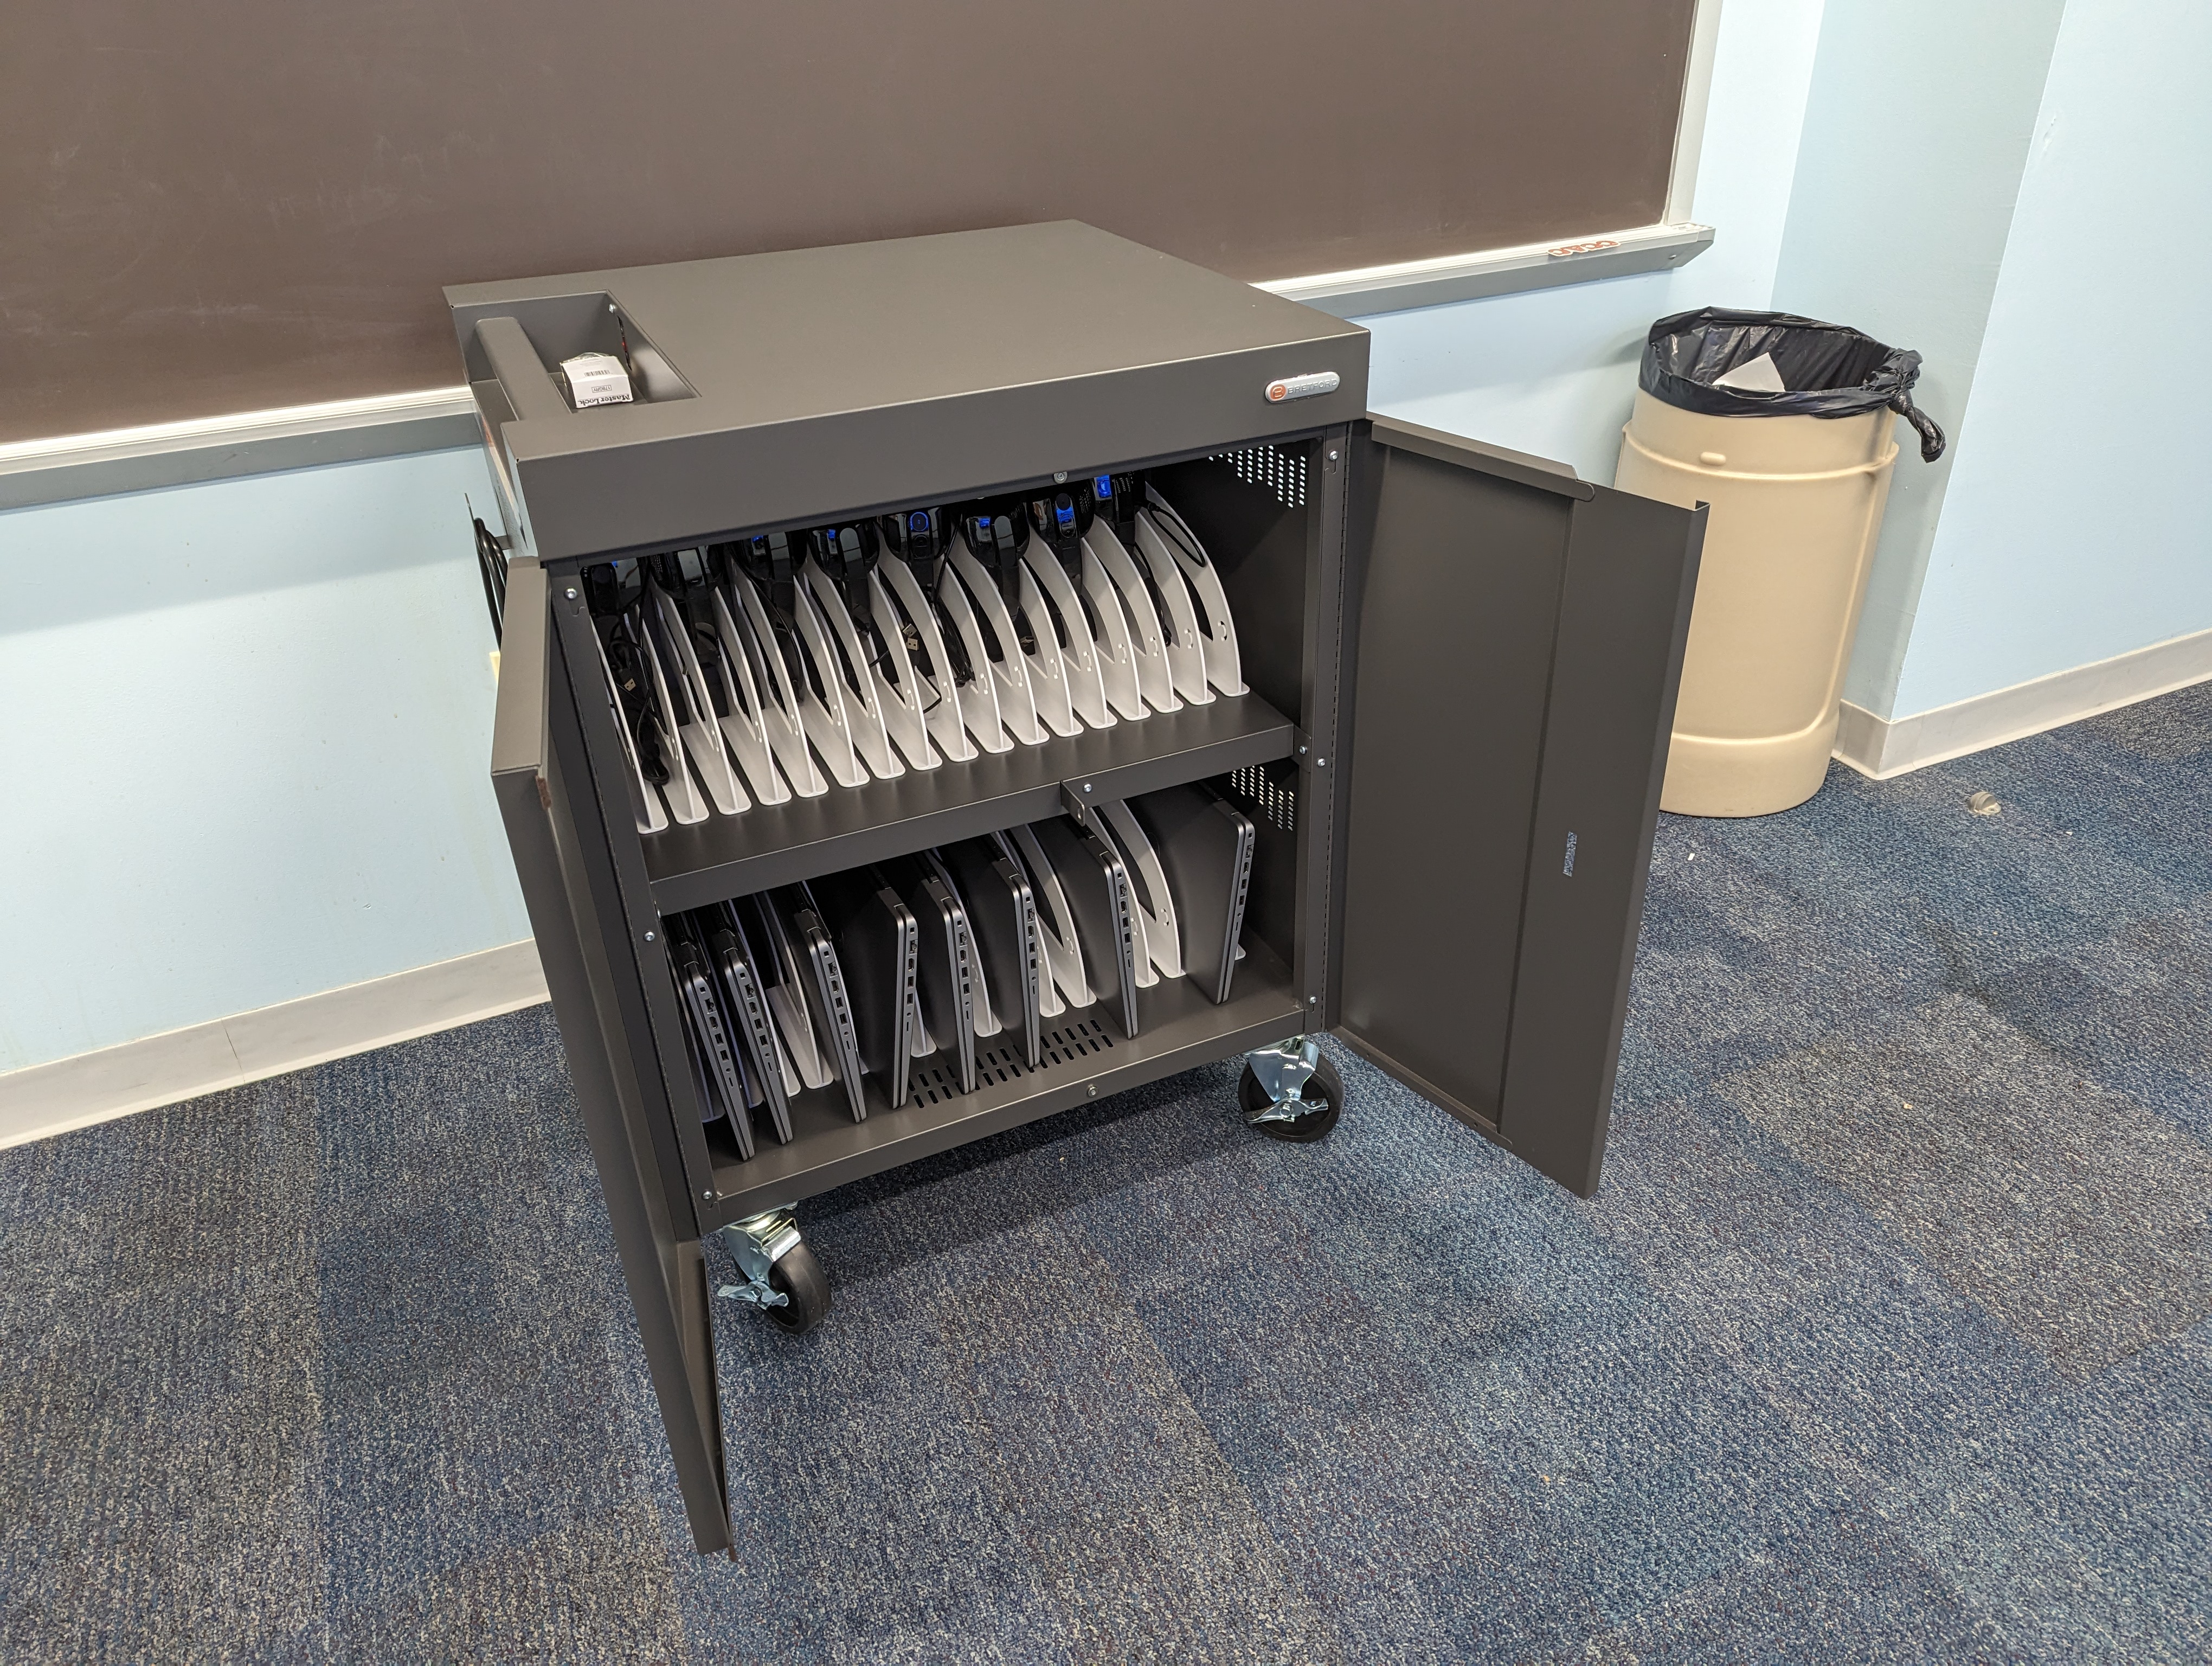
- Select a laptop and headset
- Log onto the laptop using your CCAC NetID and password
- Connect the USB cable for the headset
- Join the Zoom meeting using the provided link
- When finished, return the laptop and headset to the cabinet to charge
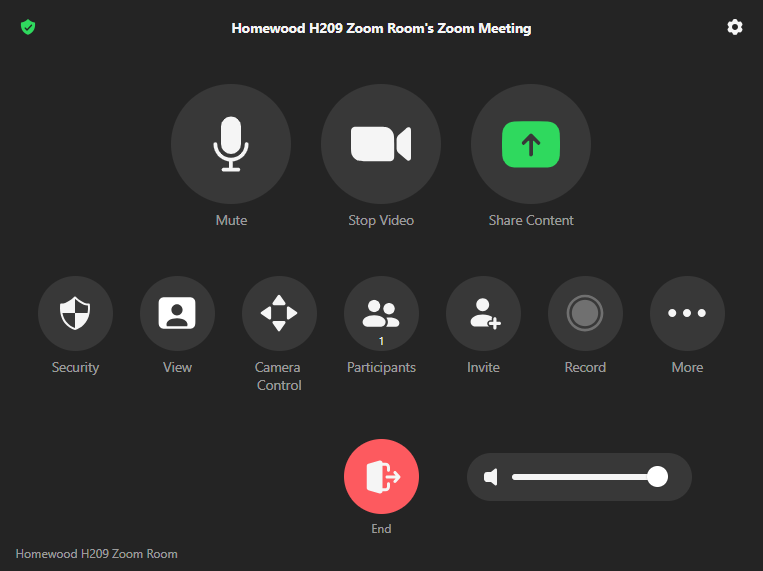
Basic Zoom Meeting Functions
Using the Zoom Room iPad Controller
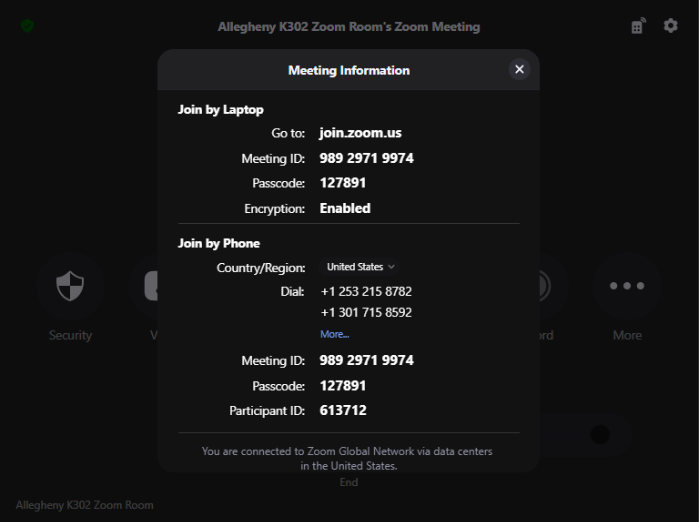
Meeting Information
The Meeting Information button will display the Meeting ID, Passcode, and options for joining by the web or phone.

- After selecting the Meeting Information button you will see the Meeting Information Screen.
Room Controls
This is where you would select the Presentation Source for Screen Sharing.
In addition, Camera Preset Control will allow you to select a preset view for the camera.

- After selecting the Room Controls button, you will see the following sources to choose from.

Settings
The Settings button will show you what Microphone, Speaker, and Camera are selected. This button is locked, and you will not be able to make adjustments.

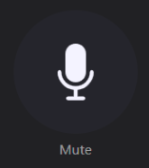
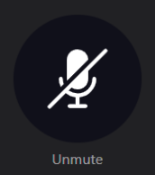
Mute/Unmute Microphone
The Mute/Unmute button will mute or unmute the room microphone.
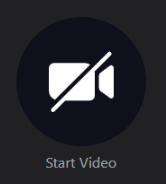
Stop/Start Video
The Stop/Start Video button will turn the room camera On or Off.

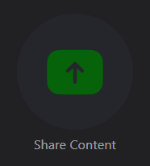
Share Content
The Share Content button will allow you to send content to the remote participants in the Zoom meeting.
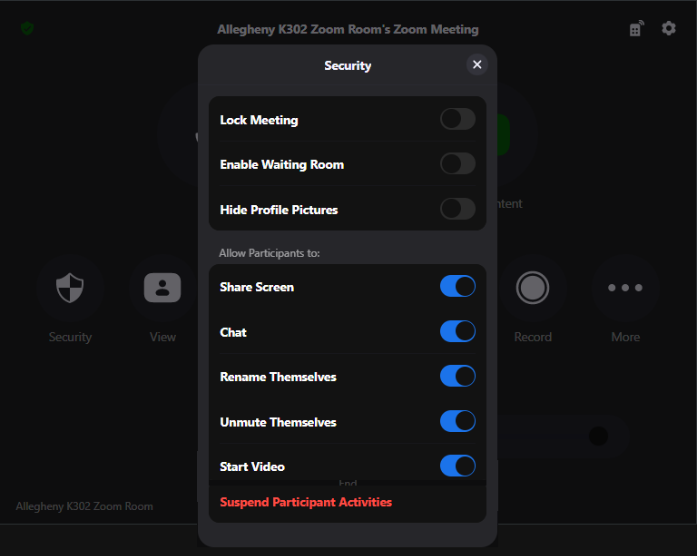
Security
The Security button will allow you to access in meeting security settings.

- Once you select the Security button you will have access to the following functions: Lock Meeting, Enable Waiting Room, Hide Profile Picture, Share Screen, Chat, Rename Themselves, Unmute Themselves, Start Video, and Suspend Participant Activities.
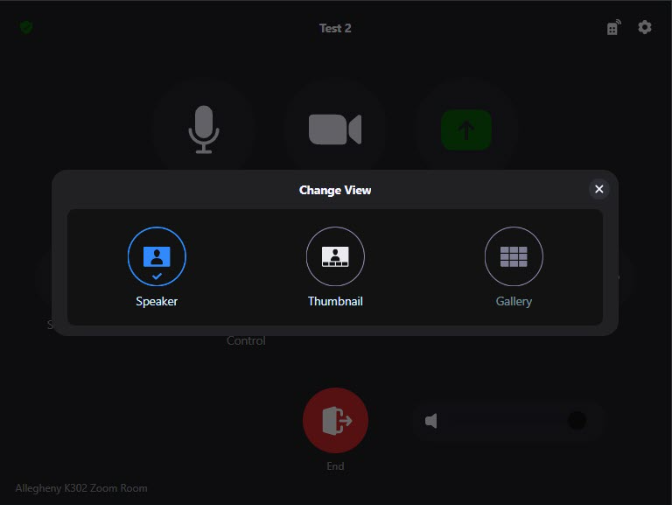
View
The View button will allow you to change the view of the Zoom meeting participants.

- Options include Speaker, Thumbnail, or Gallery view.
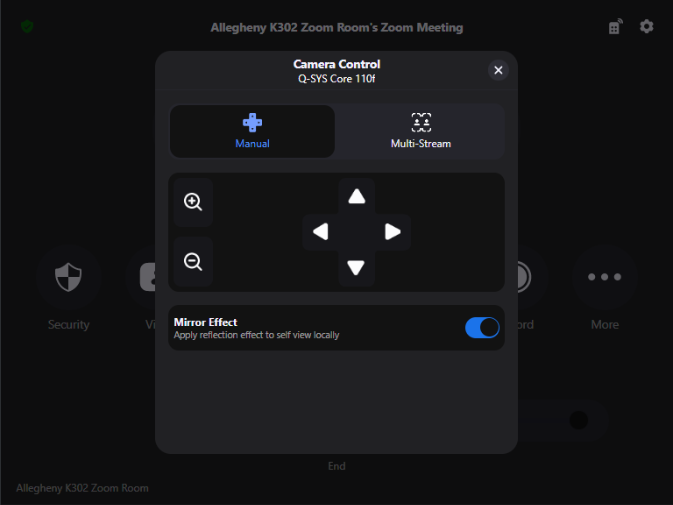
Camera Control
If the Camera Presets don't suit your needs (located under the Room Controls button), you can manually adjust the view of the camera by selecting the Camera Control button.

- From this screen you can manipulate the camera position by using the arrows on the screen. You can also, zoom in and out using the magnifying glass icons.
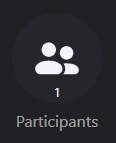
Participants
The Participants button lists who is currently in the meeting and some control over the participants.
- Since the Zoom room takes over as the meeting host, you can mute and turn off the participant mic/camera from touching the icons next to the participant's name. You can also Mute All.
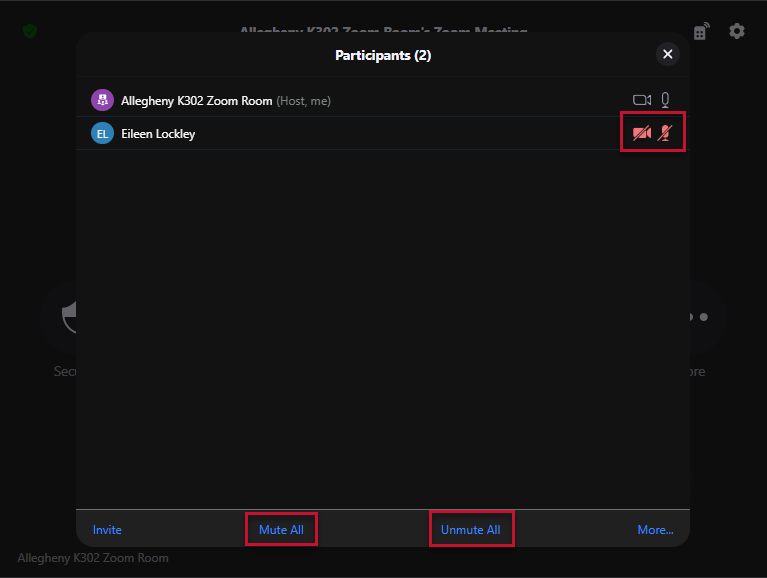
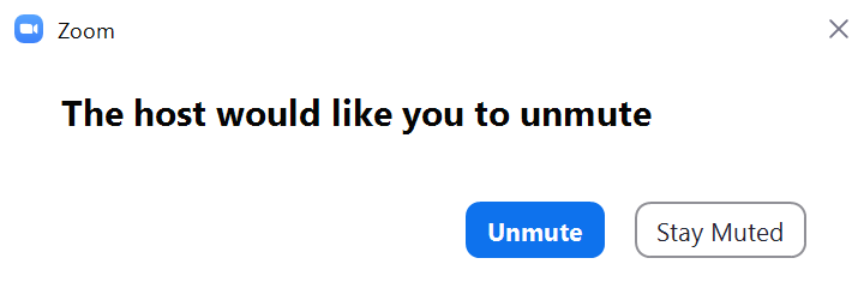
- If you want the remote participant(s) to turn their mic or camera On, press the icon again. The remote participant will get a message saying, “The host asked you to start your video”
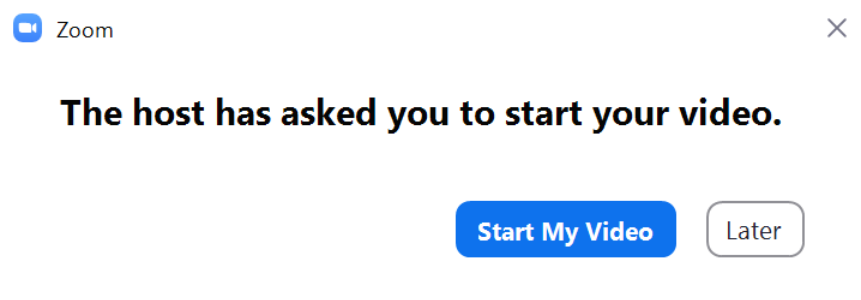
- or “The host would like you to unmute”
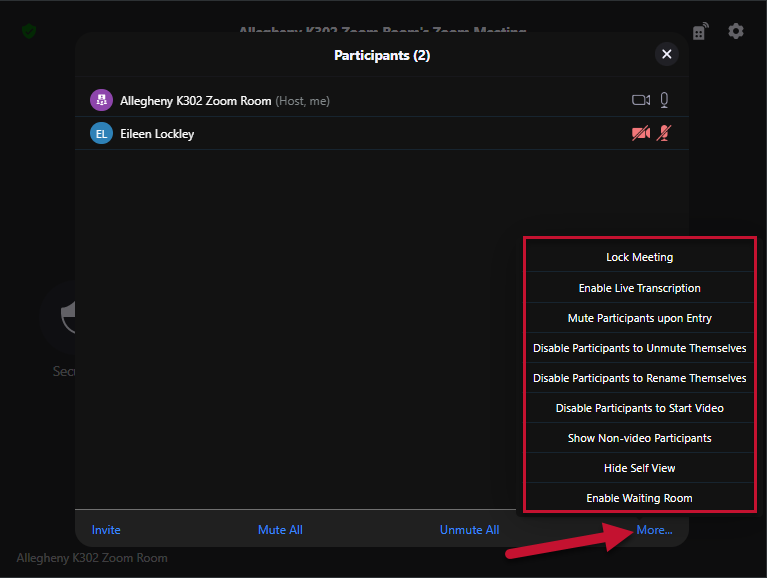
- The More button will give you access to additional features such as Lock Meeting, Enable Live Transcription, Mute Participant upon Entry, Disable Participants to Unmute Themselves, Disable Participants, to Rename Themselves, Disable Participants to Start Video, Show Non-Video Participants, Hide Self View, and Enable Waiting Room.
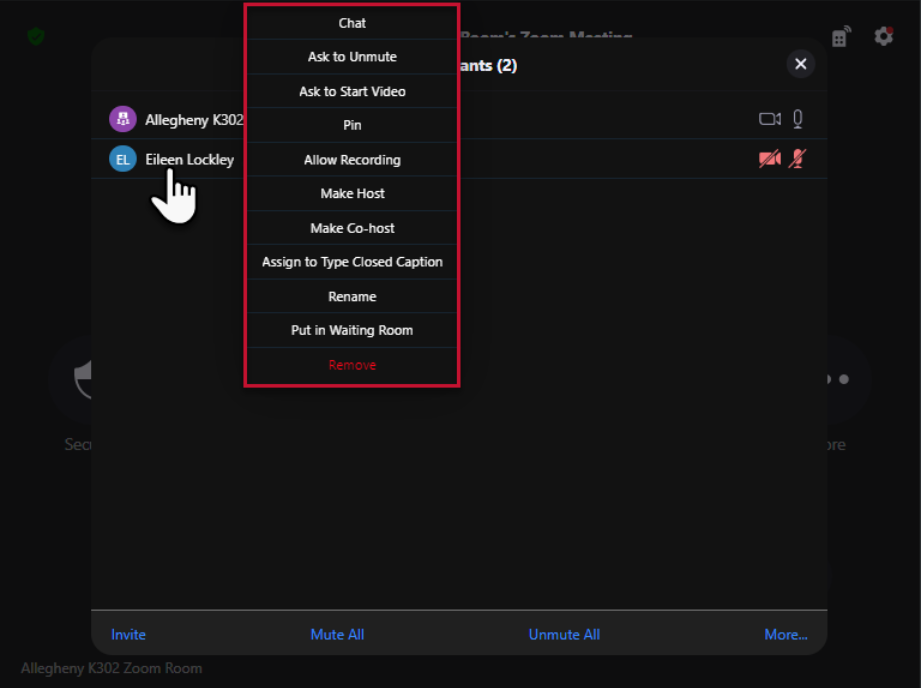
- You can tap on a participant's name to reveal the following settings: Chat, Ask to Unmute, Ask to Start Video, Pin, Allow Recording, Make Host, Make Co-Host, Assign to Type Closed Caption, Rename, Put in Waiting Room, and Remove.
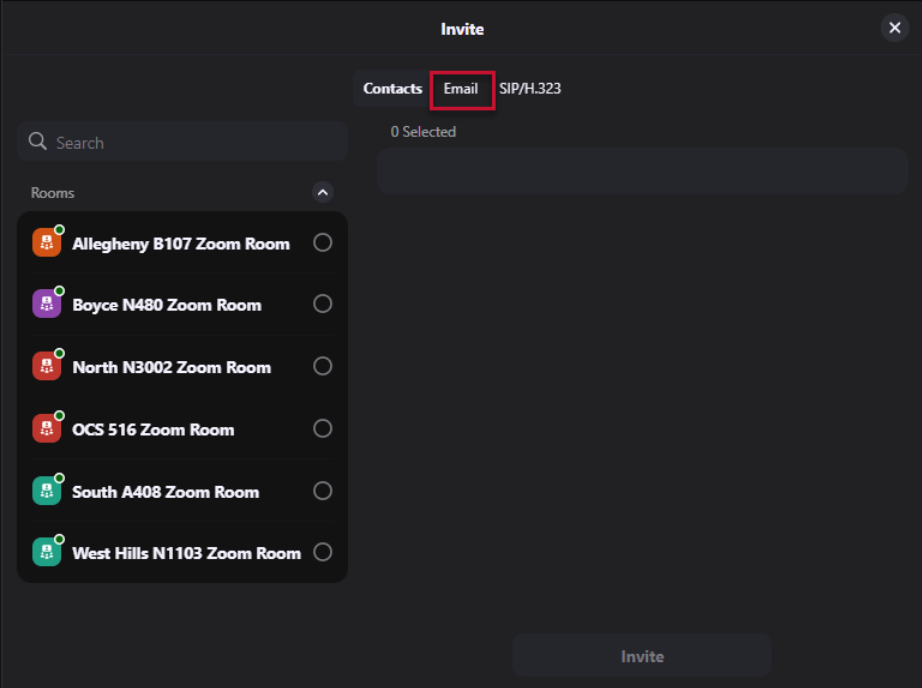
Invite
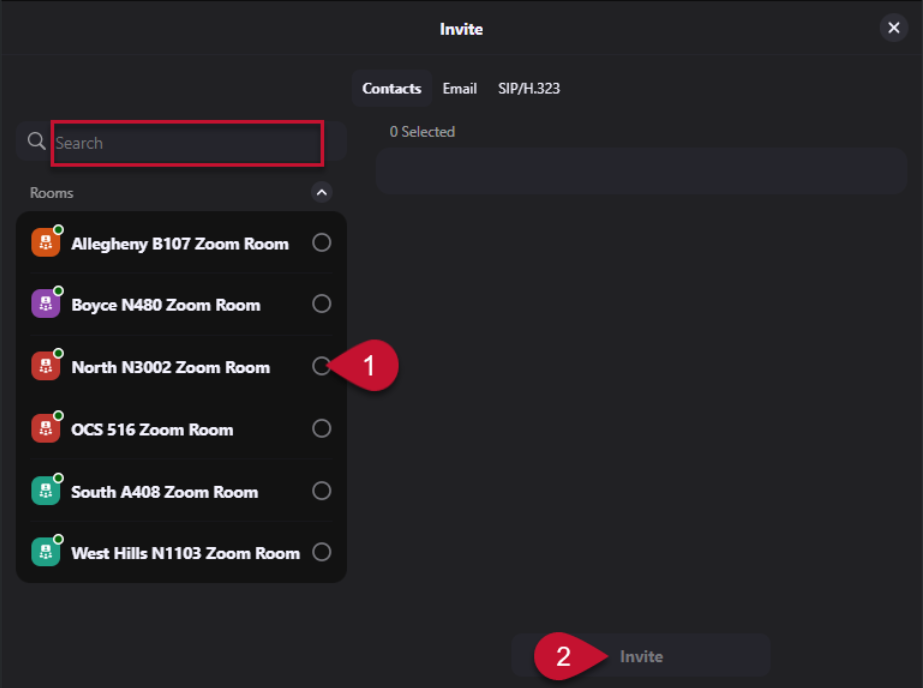
The Invite button will allow you to search the CCAC directory by typing a person's name or username into the search bar. If you need to call another Zoom room directly, select the room you would like to invite and then press the Invite button.

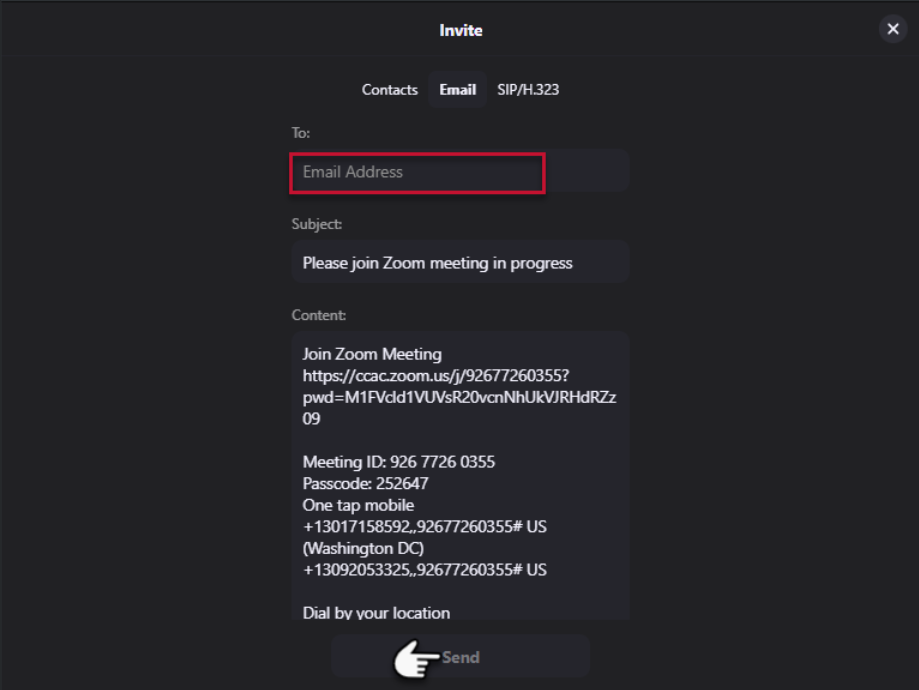
- You can also send an invite using the Email button.
- Once you select the Email button, you will be prompted to enter an Email Address and then select Send.
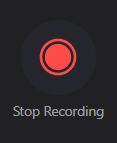
Record
Select the Record button to record your Zoom meeting.
Warning: The record option is only available when you have invited the Zoom room to a meeting using your Outlook invite. For detailed instructions on the process, please see the article, Scheduling a Zoom Room for Class.

- To stop a recording, select the Stop Recording button.
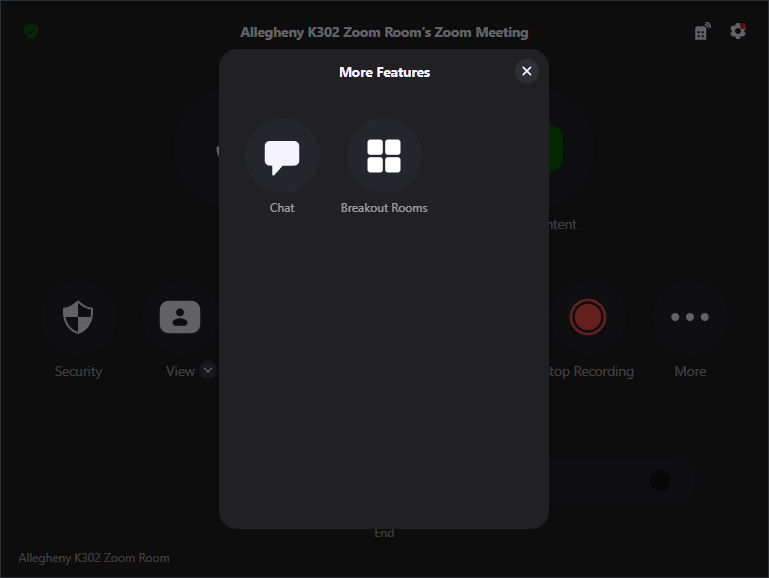
More
Select More to access some interactive features.

- More features include Chat and Breakout Rooms.
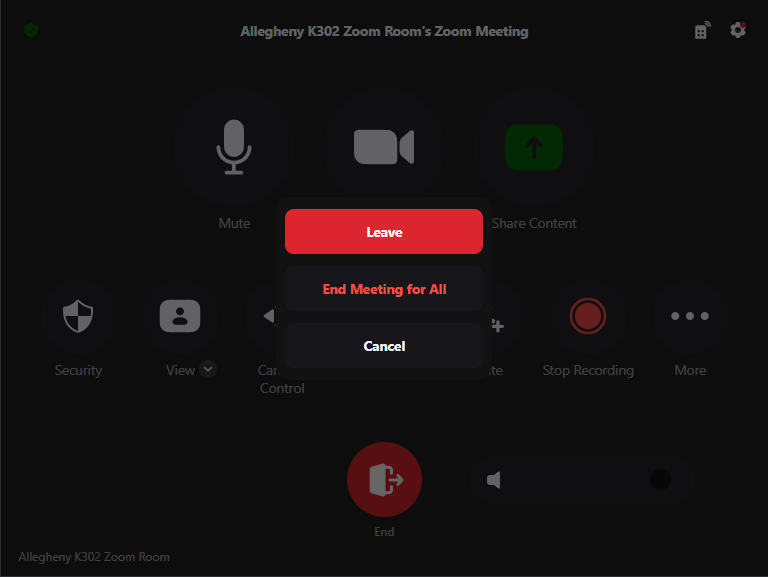
End
Selecting the End button will remove the room from the meeting.

After selecting End, you will be given three options.
- Leave will allow you to leave the meeting and assign another participant as the Host
- End Meeting for All will end the meeting for all participants
- Cancel will take you back to the meeting
Volume
The Volume slider controls the volume for the room speakers.