Power
Info
When using the self-service option, you have two touch panels that mirror each other and can be used to control the system. One is located on the lectern, and the other is on the wall to the side of stage left.
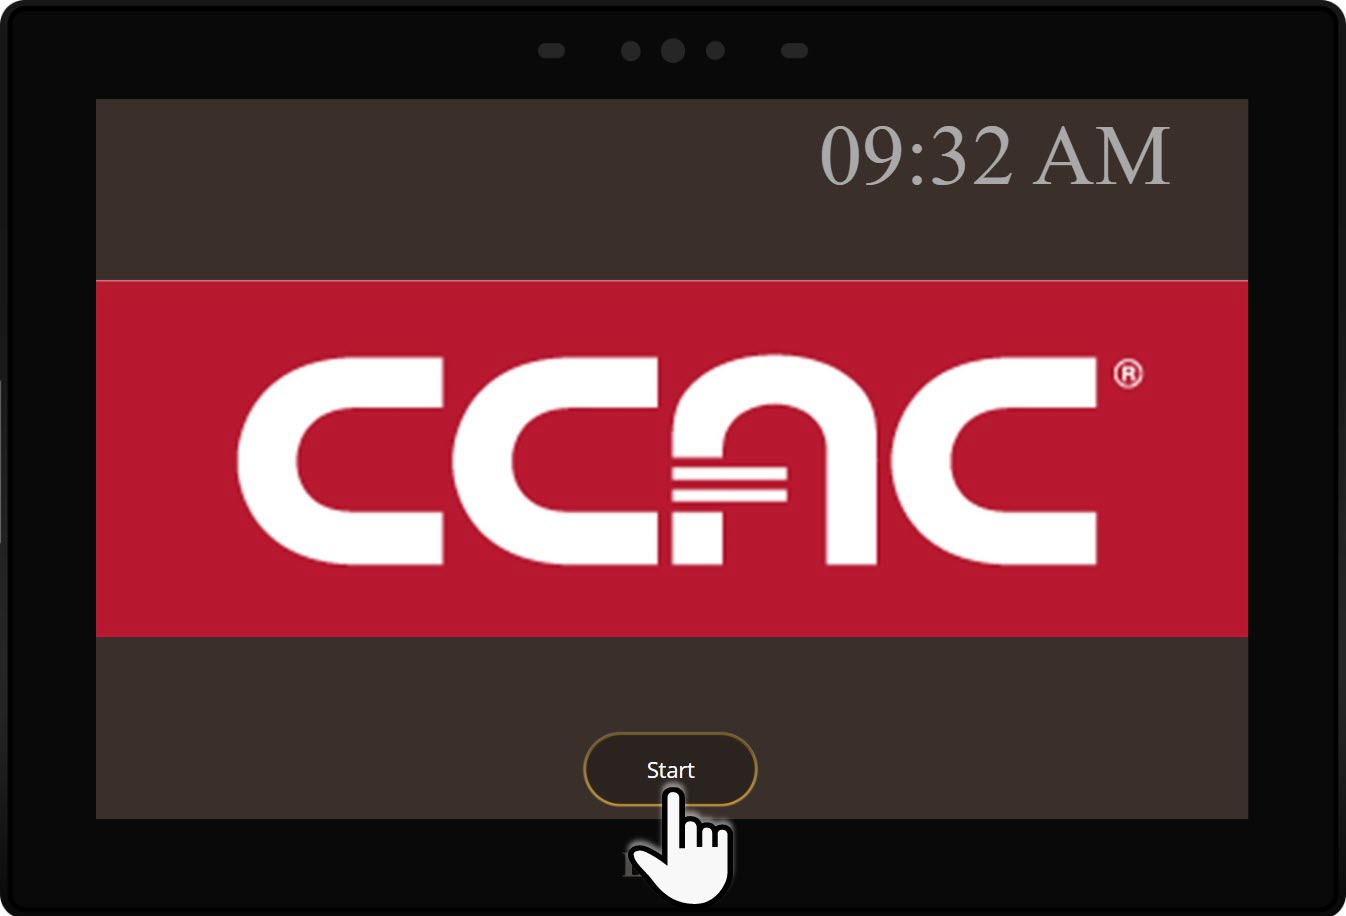
Turning On the Equipment with the Touch Panel
- If the touch panel screen is black (sleeping), press the screen to wake
- Select Start
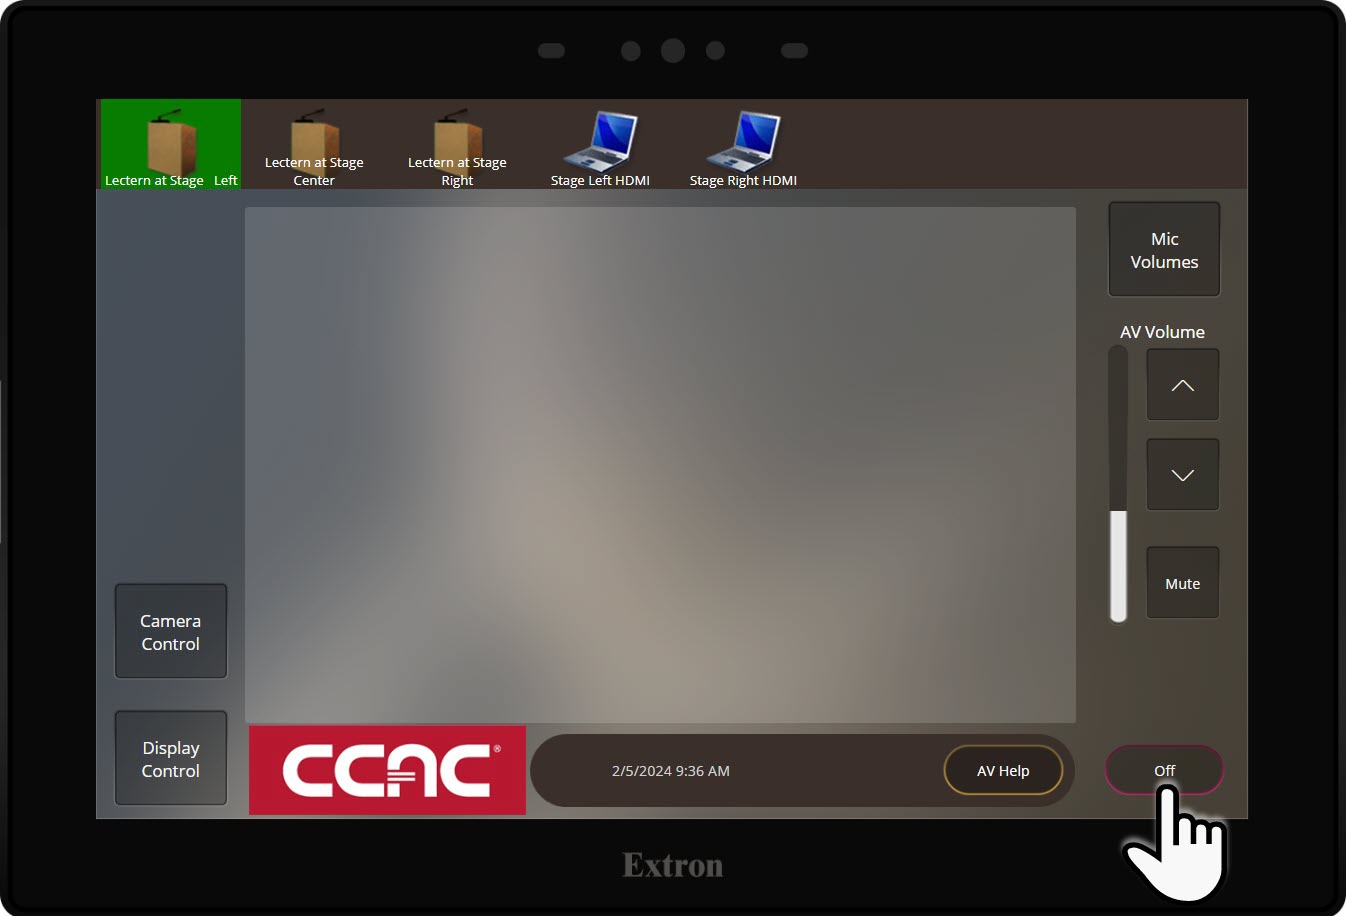
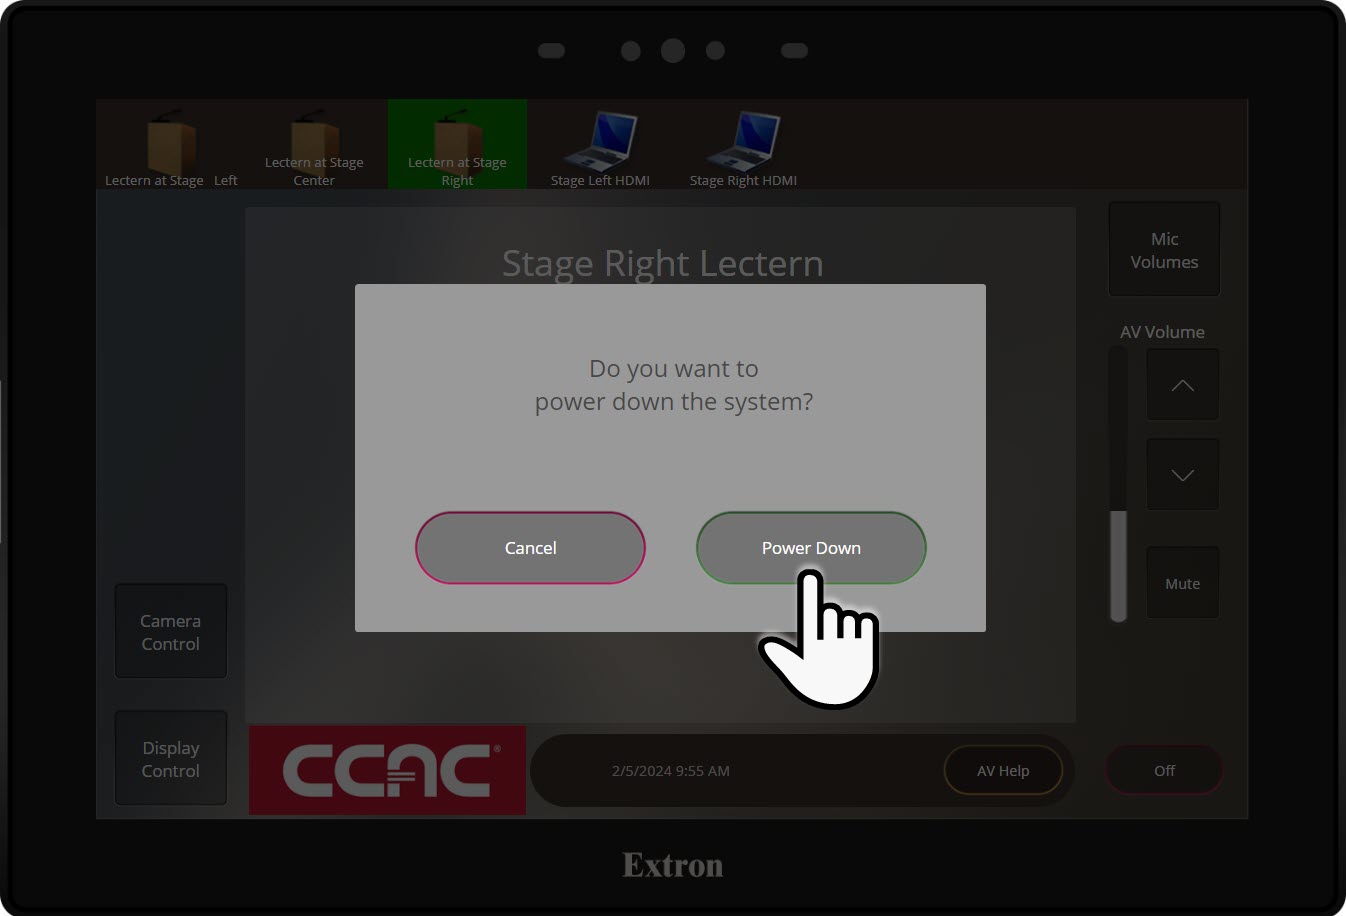
Turning Off the Equipment with the Touch Panel
- Press the Power button on the touch panel
- Confirm that you would like to shut the system down by pressing Power Down
Video
Info
The projector screen remains down by default. When the system is powered on, the projector automatically powers on. To raise the projector screen or turn the projector off, please use the directions below.
Display a Personal Device using the Touch Panel
- Locate the Cable Cubby on the lectern
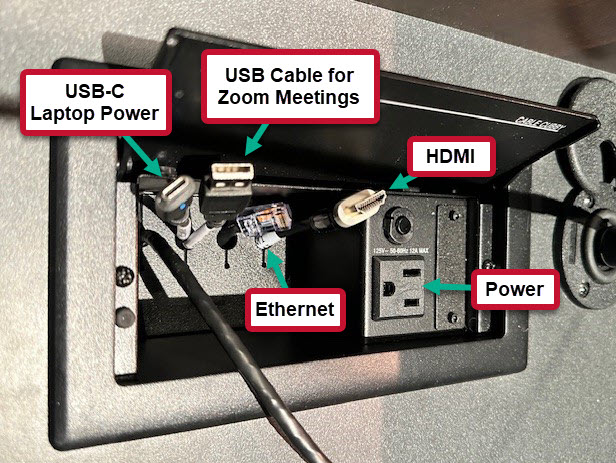
- Connect the HDMI cable to your laptop
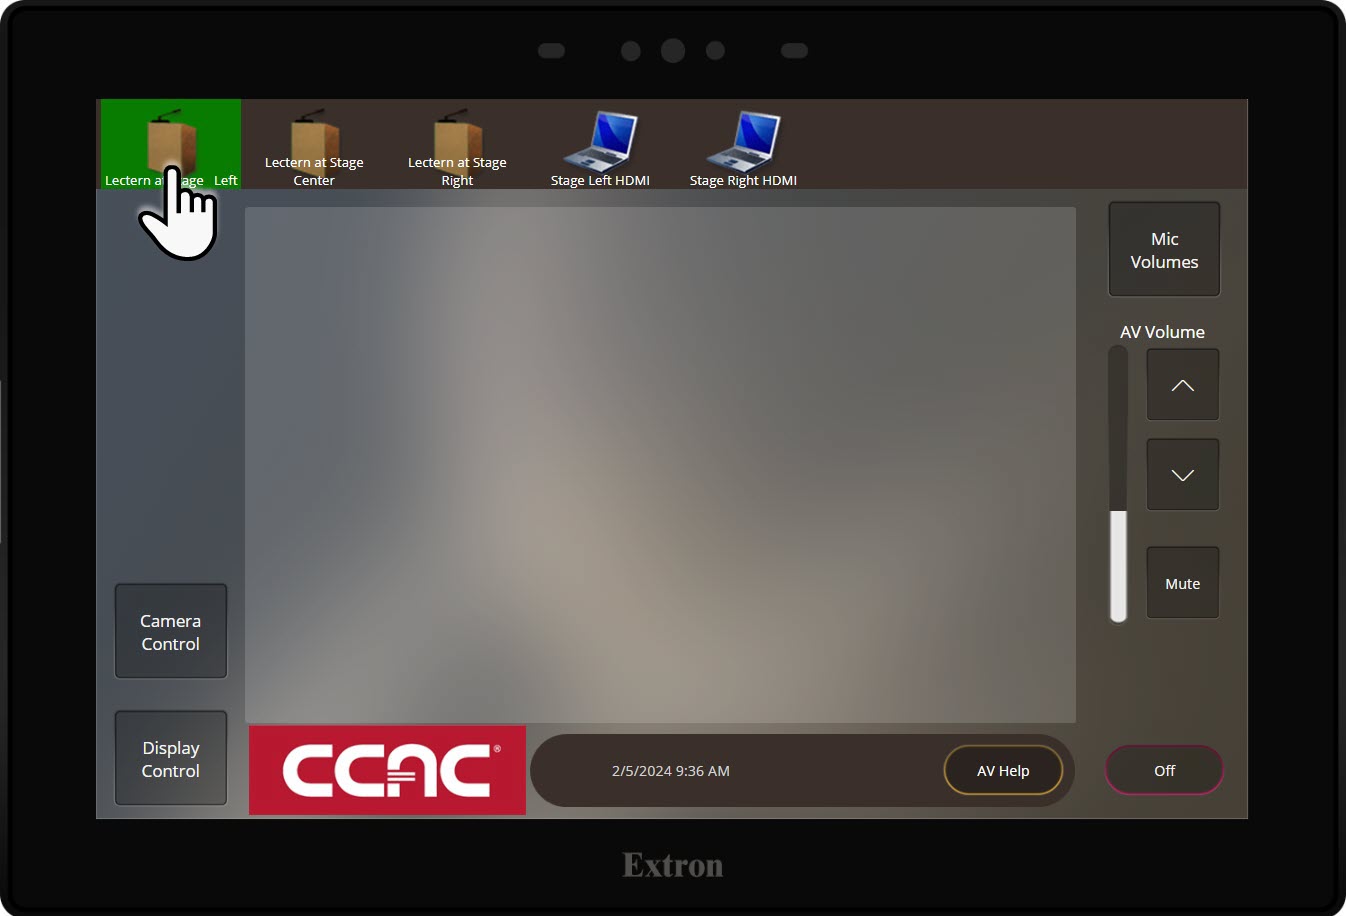
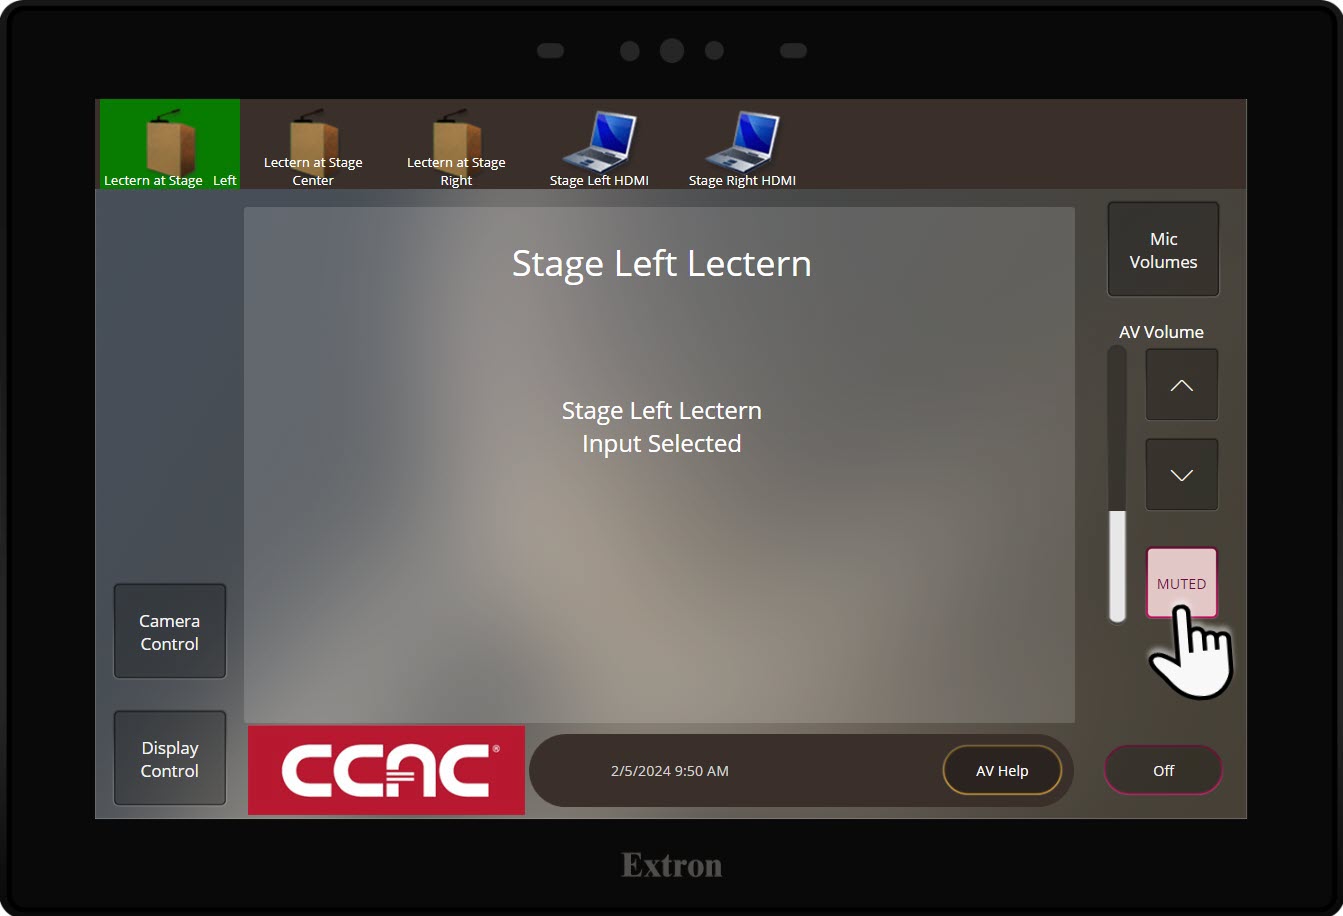
- Ensure that the correct lectern source is selected; Lectern at Stage Left is the default source
Starting a Zoom Meeting from Your Device
Note
There are a variety of ways to start your Zoom meeting. You can launch the Zoom App on the PC, sign in to the App, and select your prescheduled meeting from there. You can also open your Outlook invite and click the link in the invite to start the meeting.
For more information on Zoom meetings, please see the Zoom Meeting Basic Guide and the Zoom Meeting Advanced Guide.
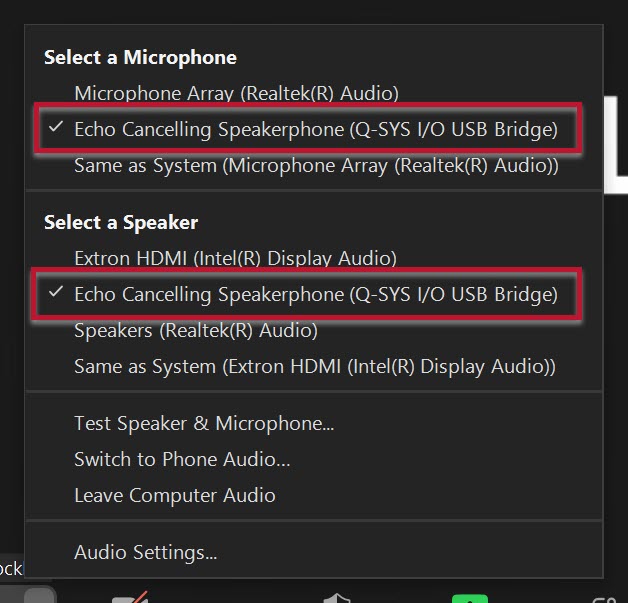
For the remote participants to hear you or the audience, you must use the lectern mic or handheld microphone(s).
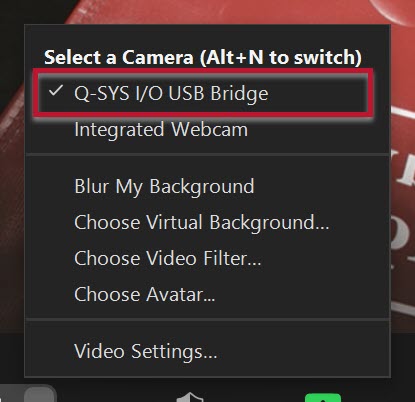
If the remote participants can't see or hear you, please make sure that the right camera and mic are selected in the Zoom window.
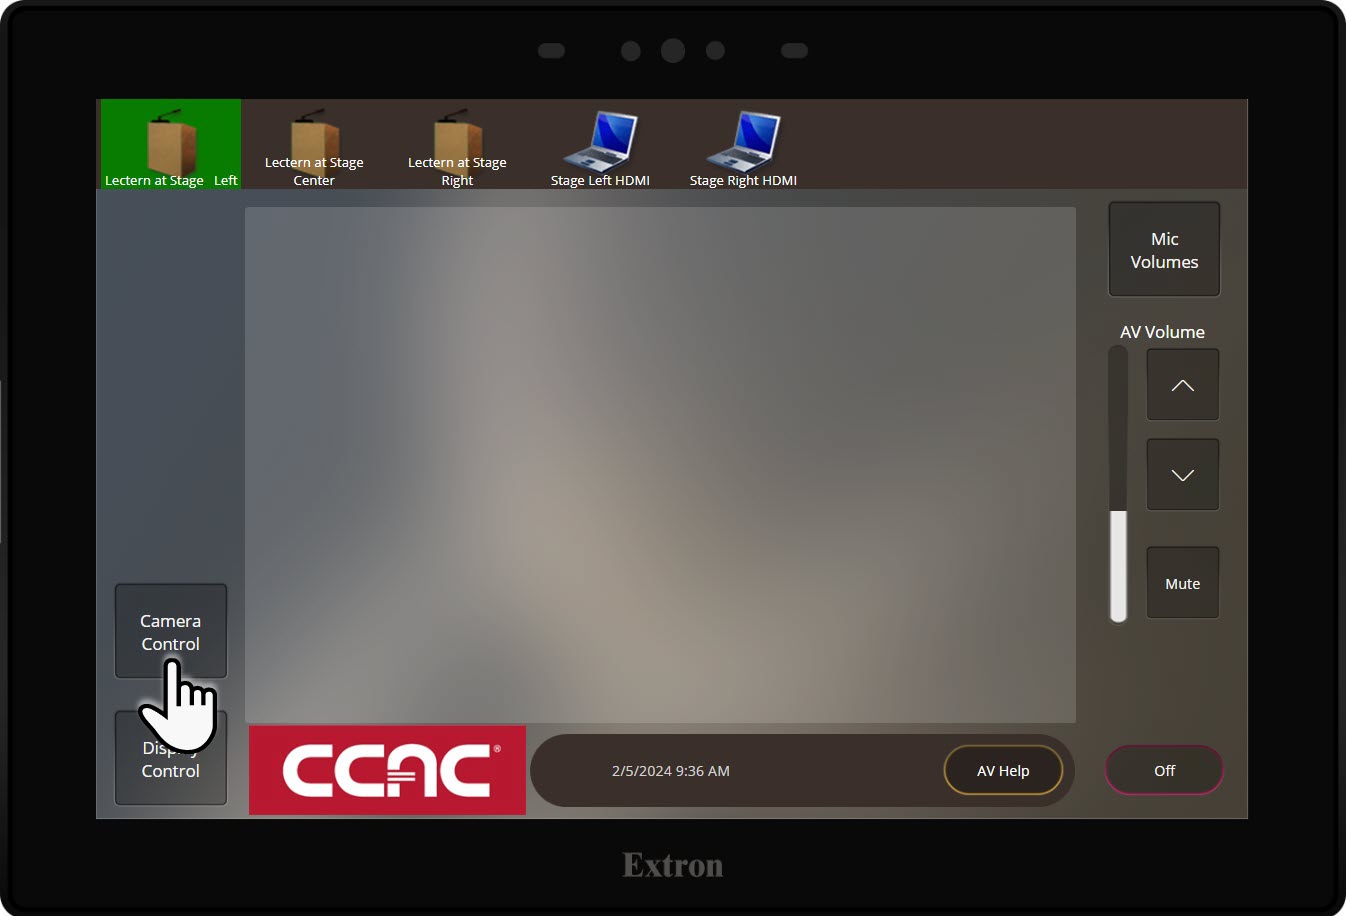
- After launching the Zoom meeting on your laptop, turn to the touch panel to choose a Camera angle for your remote participants
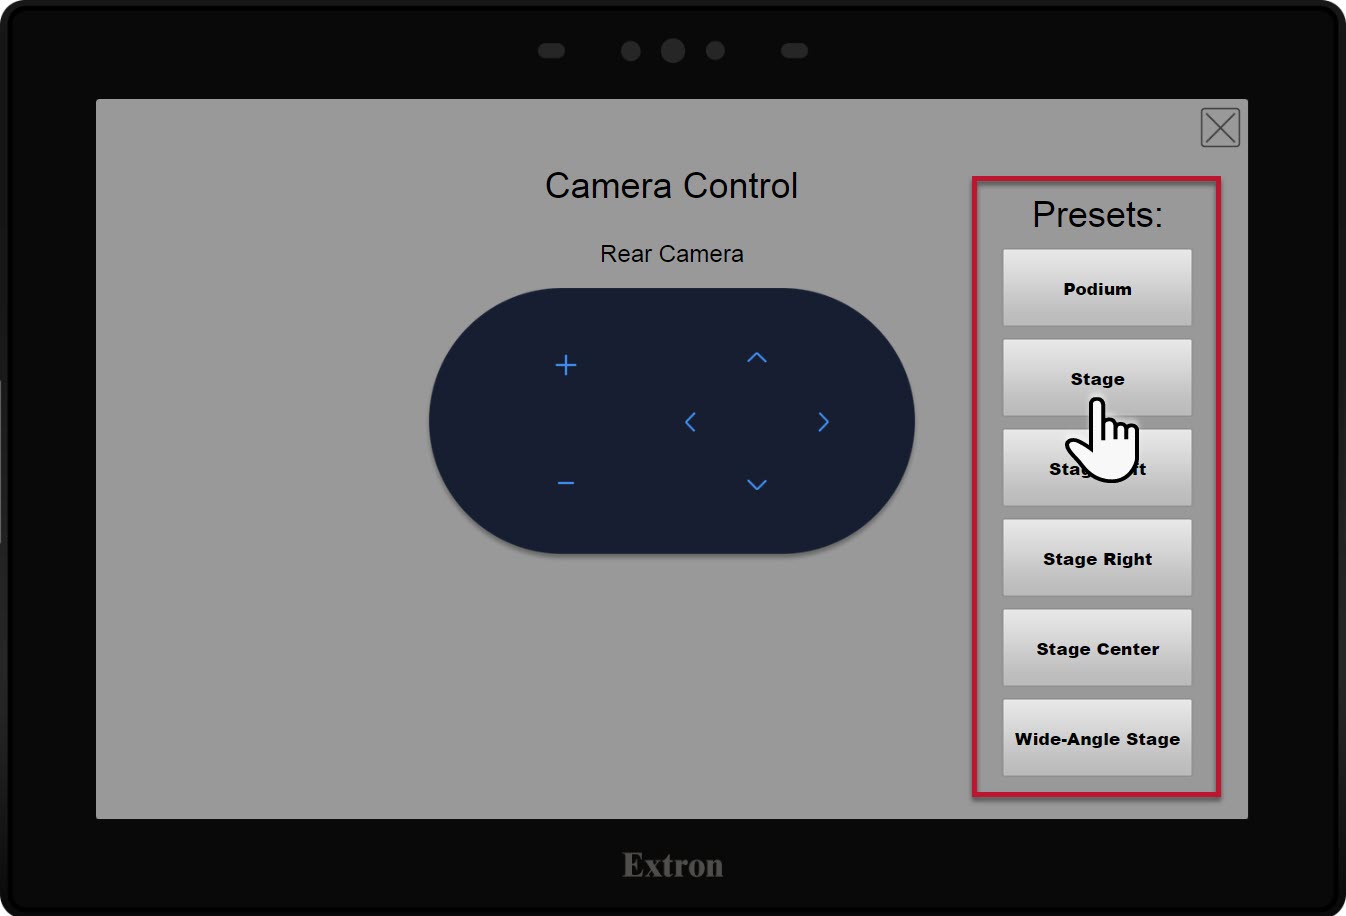
- Select Camera Control
- Choose a preset camera angle
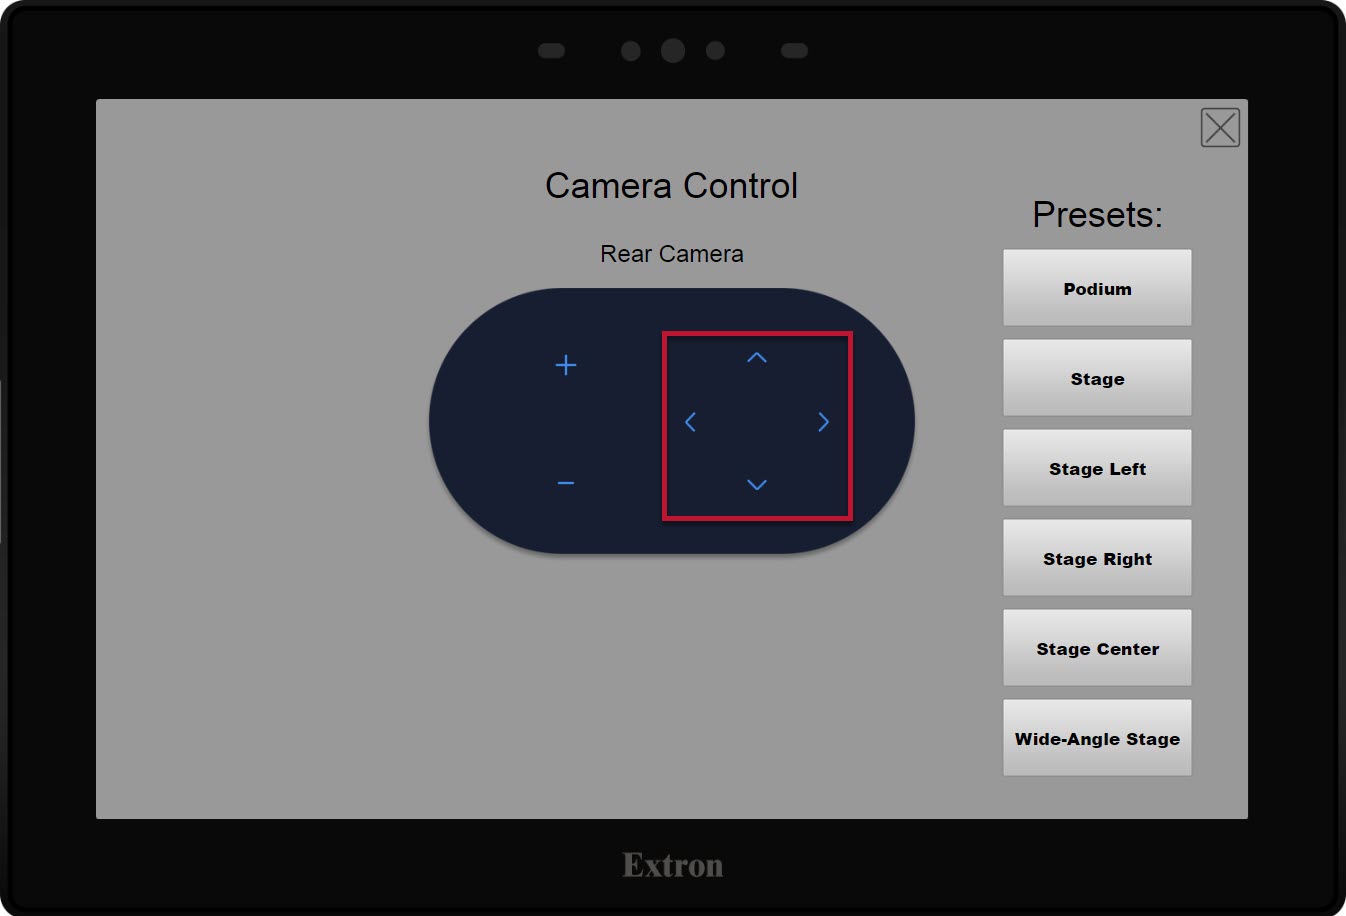
- You can also set a custom camera angle using the directional arrows
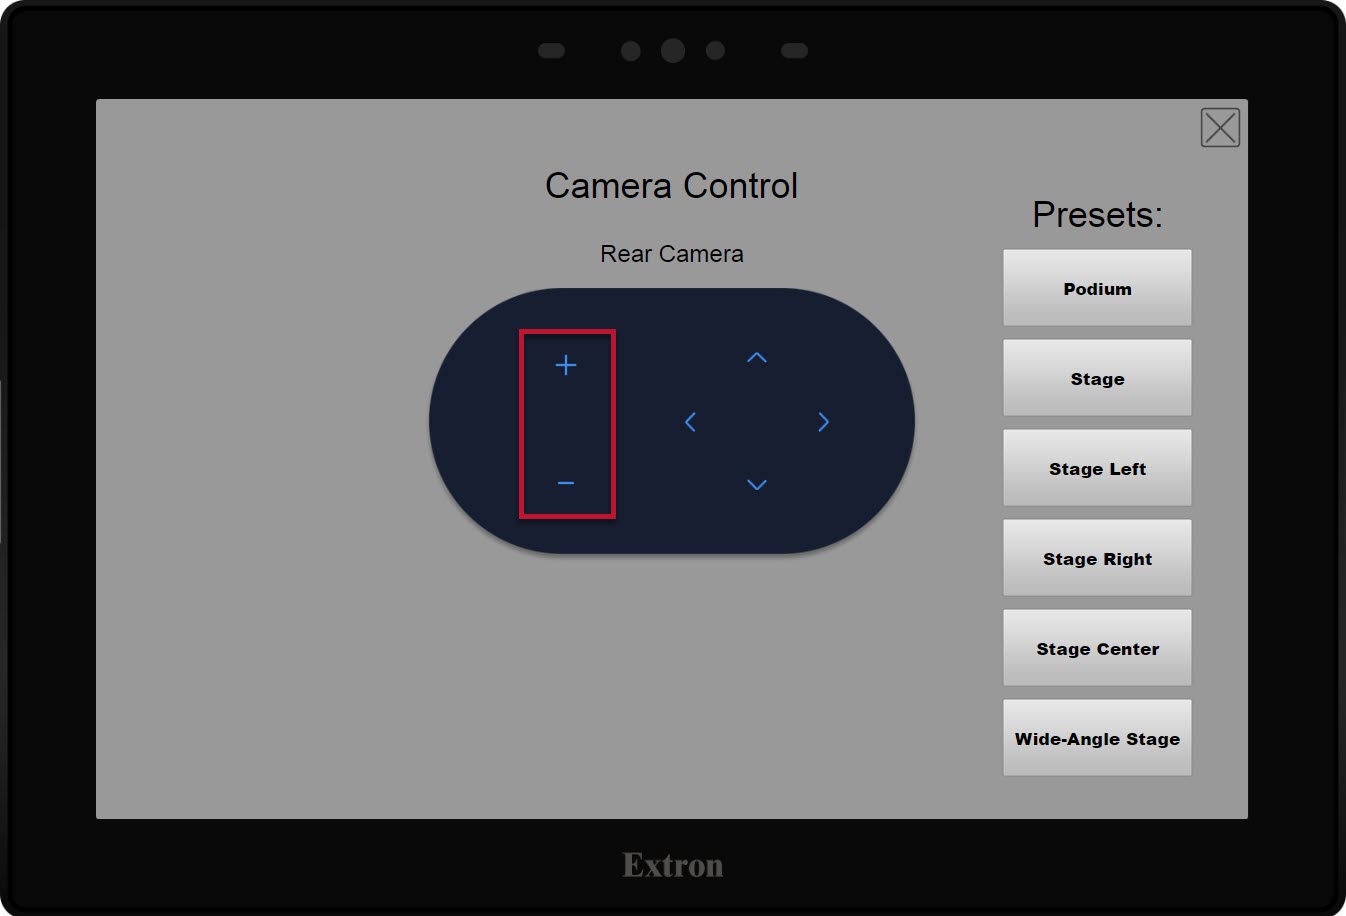
- Zoom In or Zoom Out using the plus or minus icons
Turning the Projector Off
Info
By default, the projector powers on when the system is turned on using the touch panel. If, for some reason, you need to power the projector off independently from the system, please feel free to use these directions.
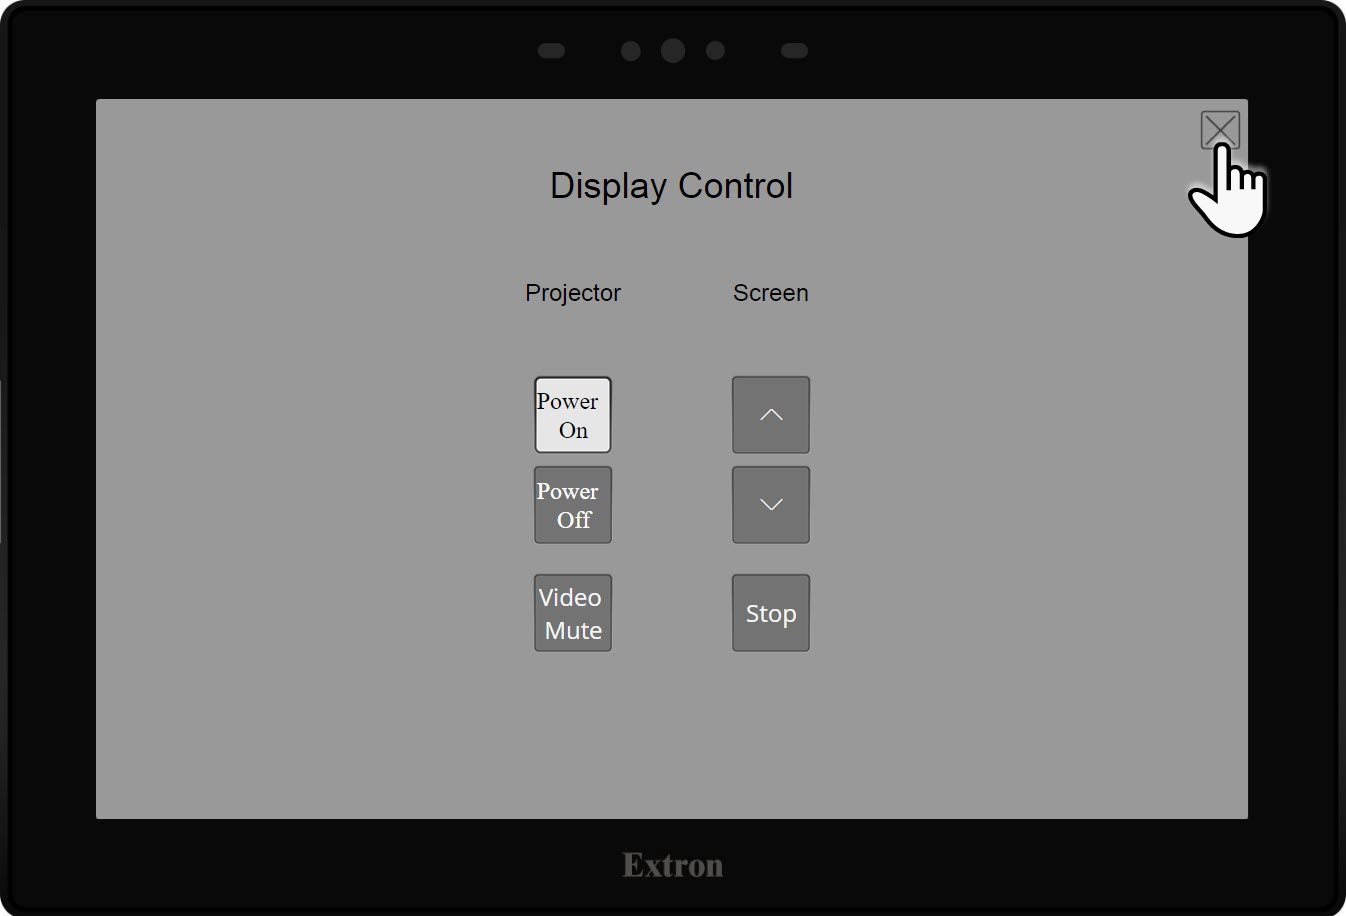
- Select Display Control

- Select Projector Power Off
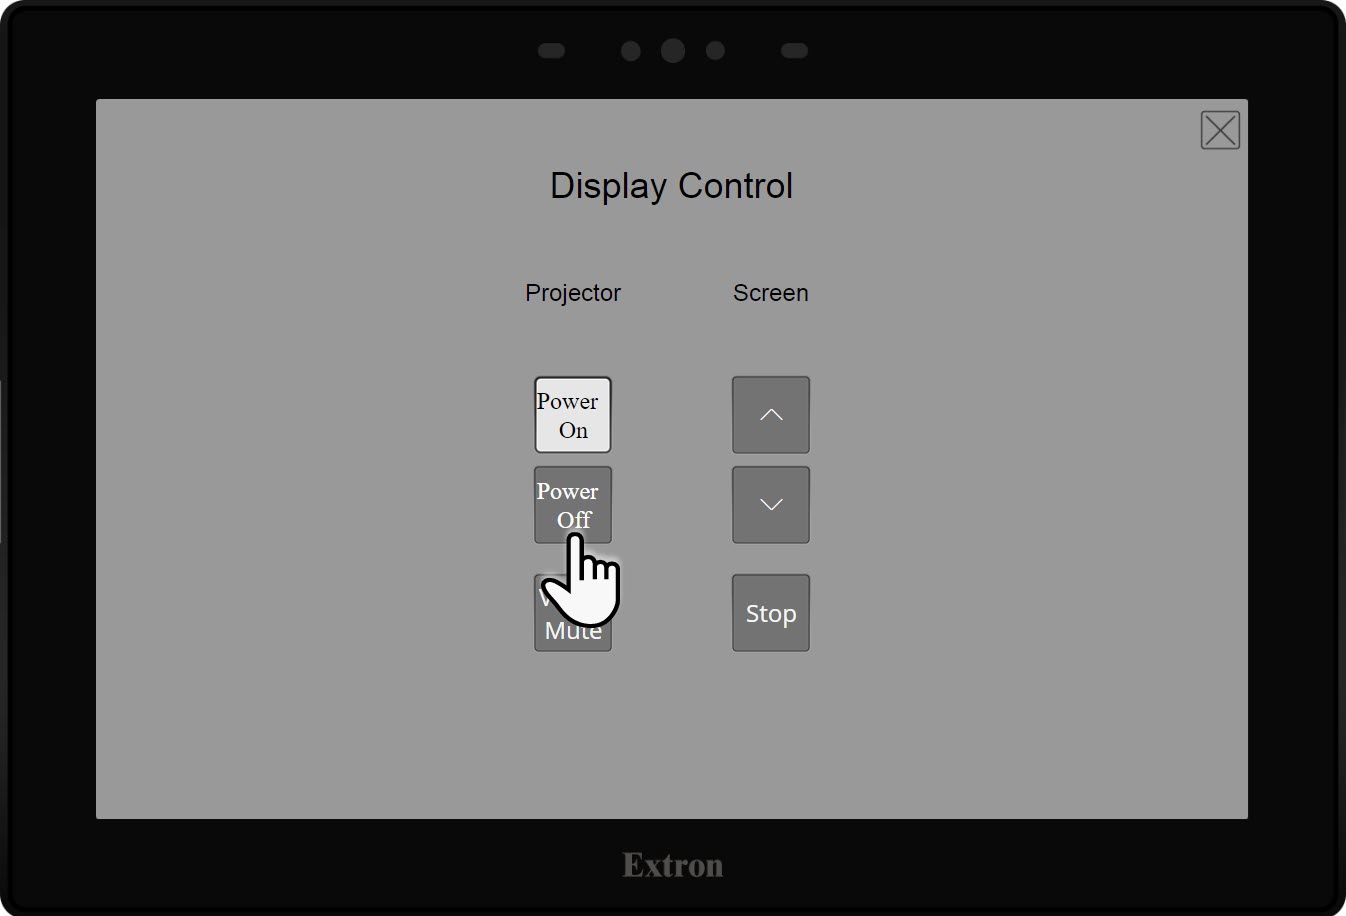
- To return to the main screen, tap the X to close this window

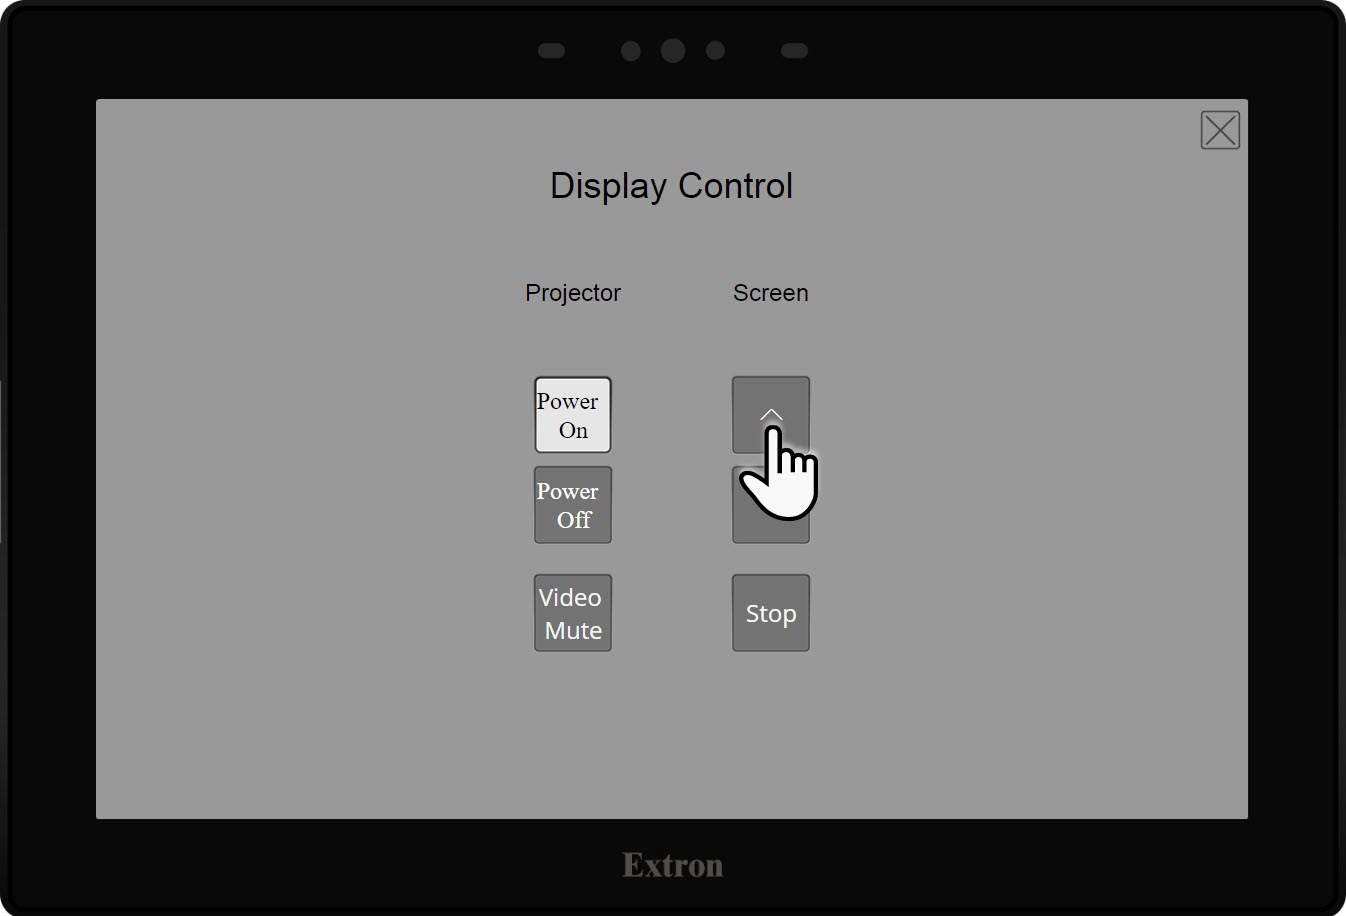
Raising/Lowering the Projector Screen
Info
By default, the projector screen remains down. You can raise or lower the screen using the touch panel if necessary.
- Select Display Control

- Select the up arrow to raise the screen
- Select the down arrow to lower the screen
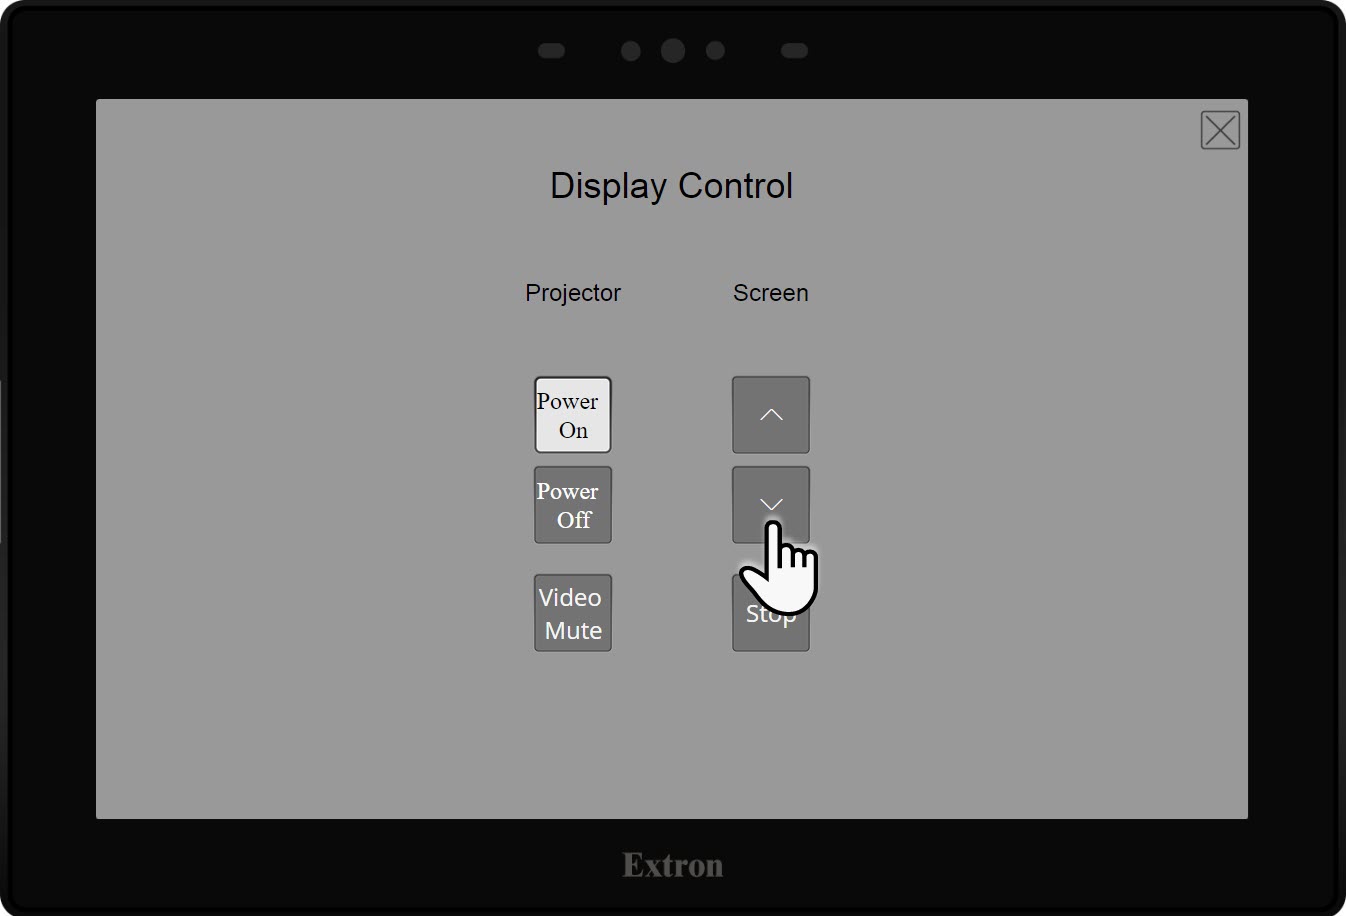
- To return to the main screen, tap the X to close this window

Hiding/Video Mute using the Touch Panel
- Select Display Control

- Select Video Mute
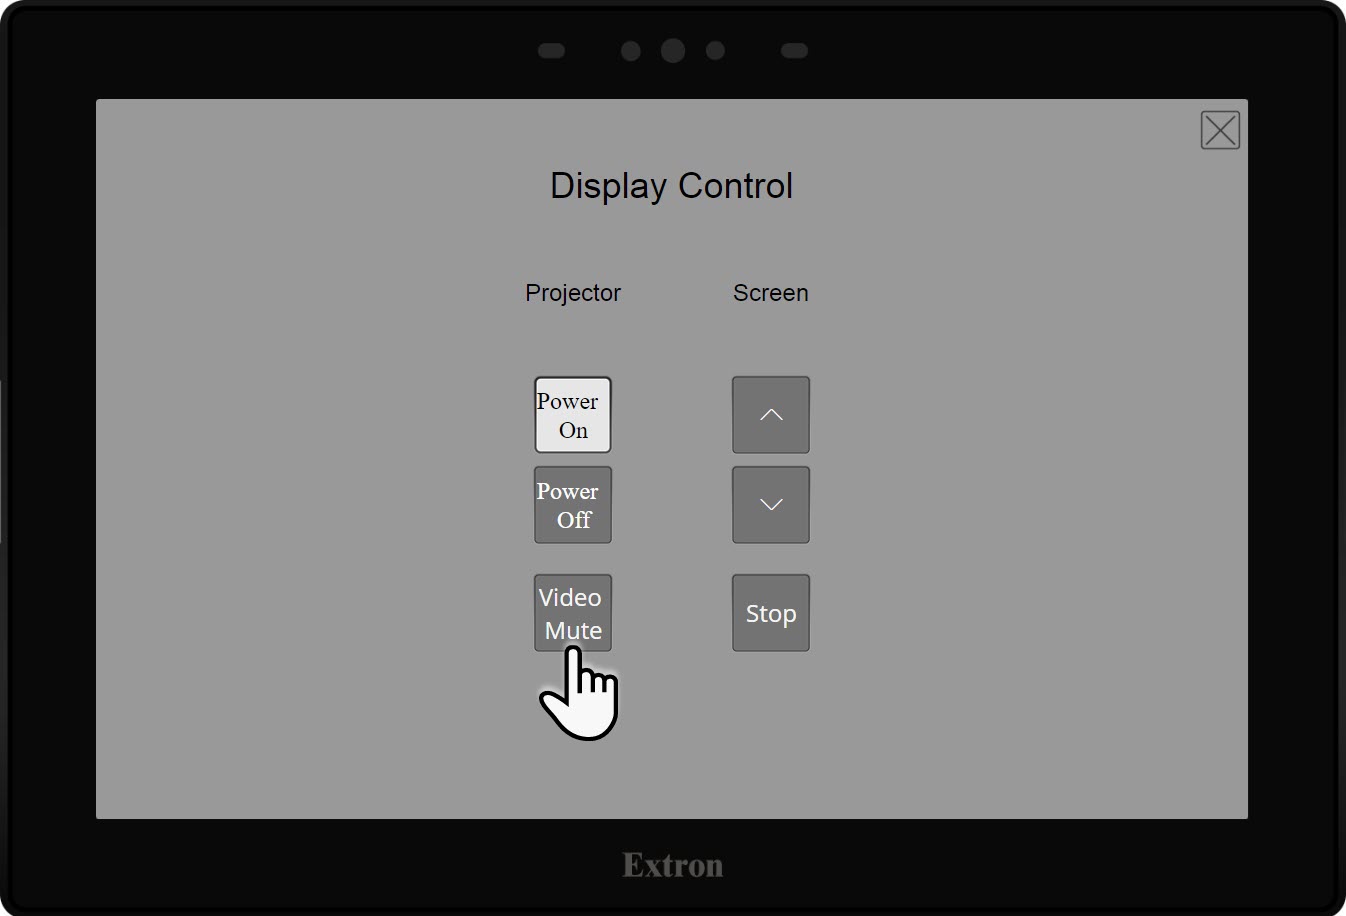
- To unmute the video, select Video Mute again

- To return to the main screen, tap the X to close this window
Audio
Volume Controls on the Touch Panel
- To adjust the system volume in the room, use the AV Volume buttons
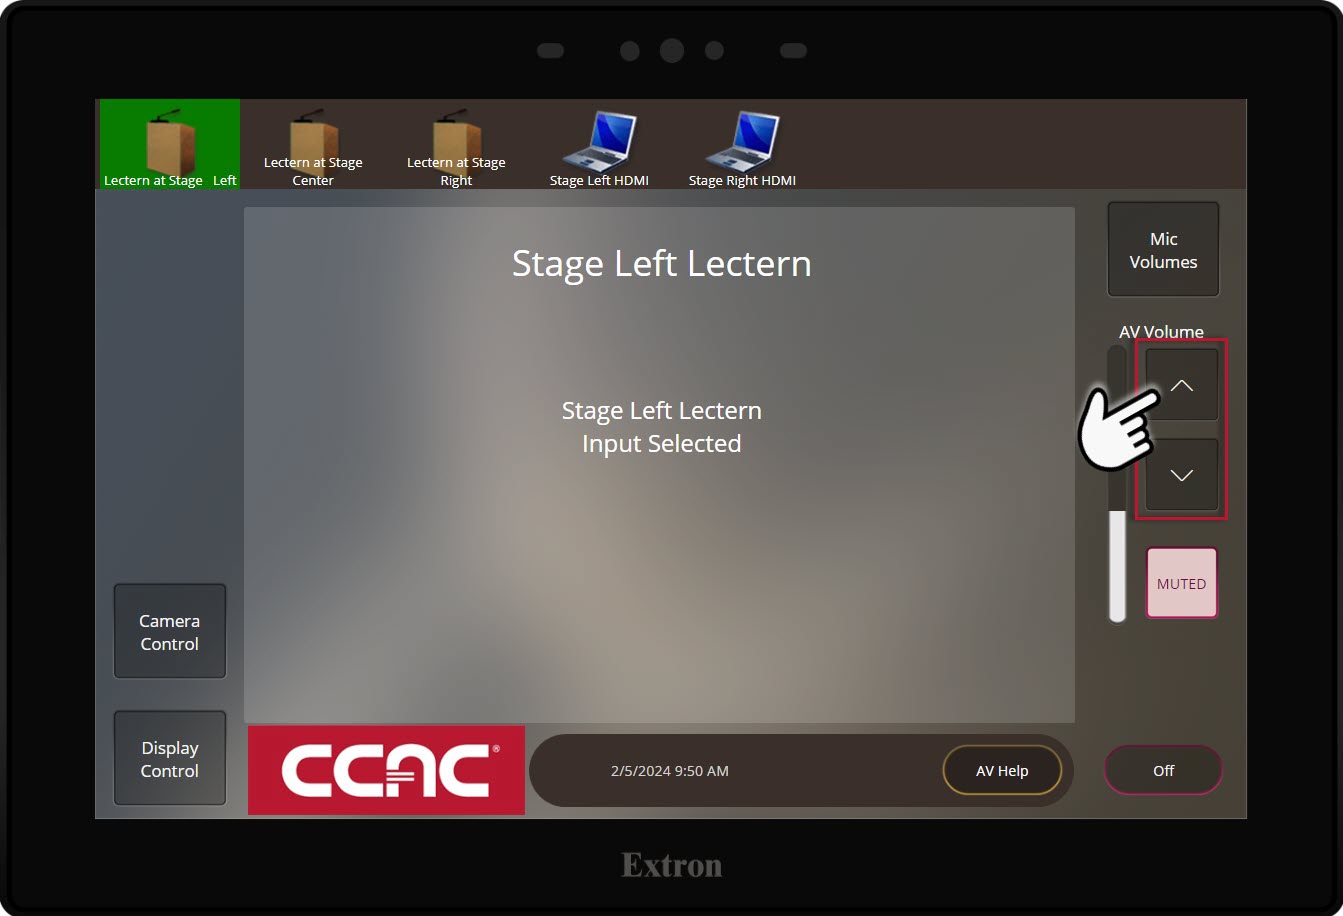
- To mute the room audio, press Mute Audio
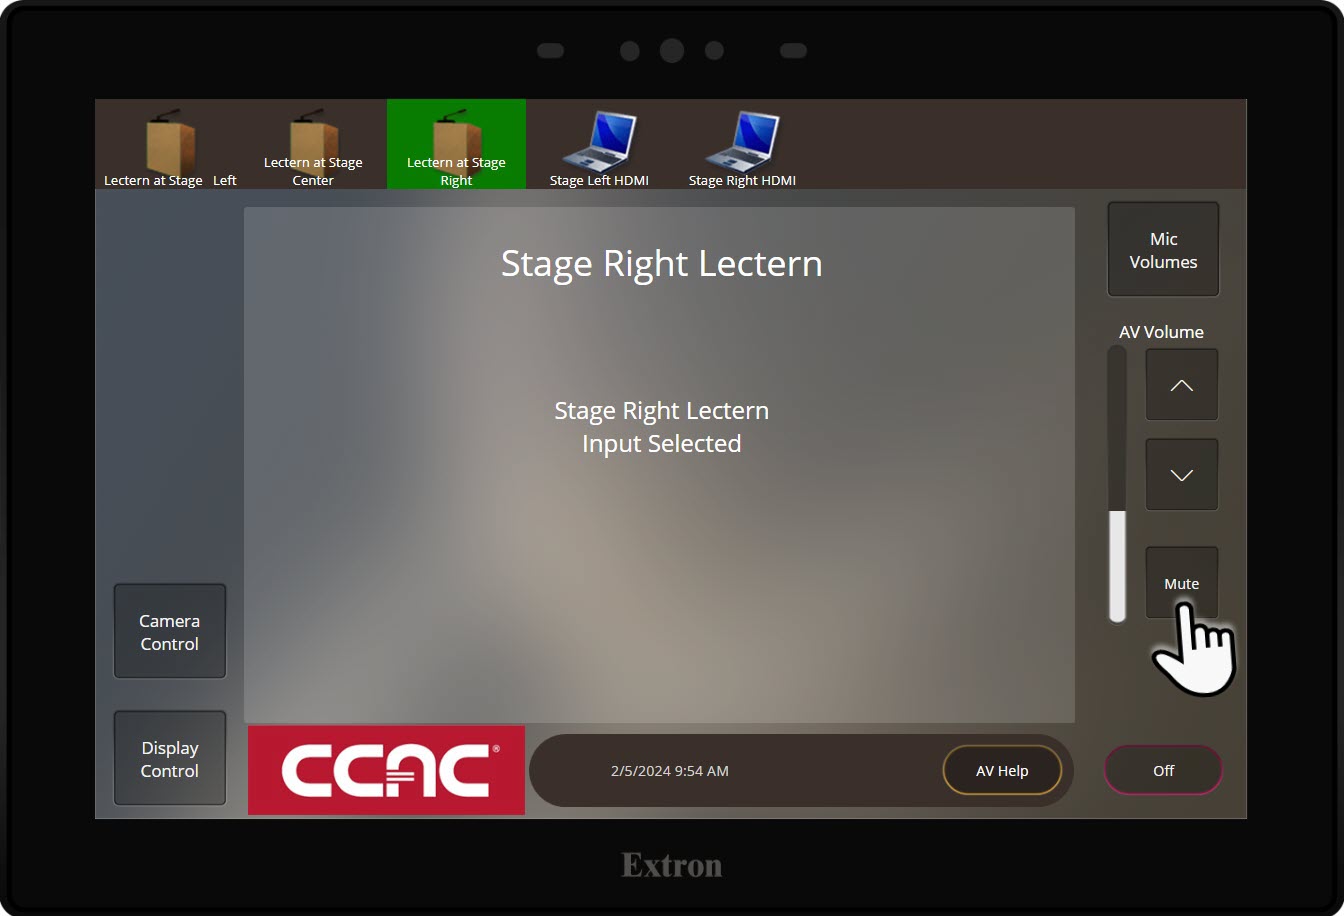
- To unmute the room audio, press Muted
Wireless Handheld Microphones
Info
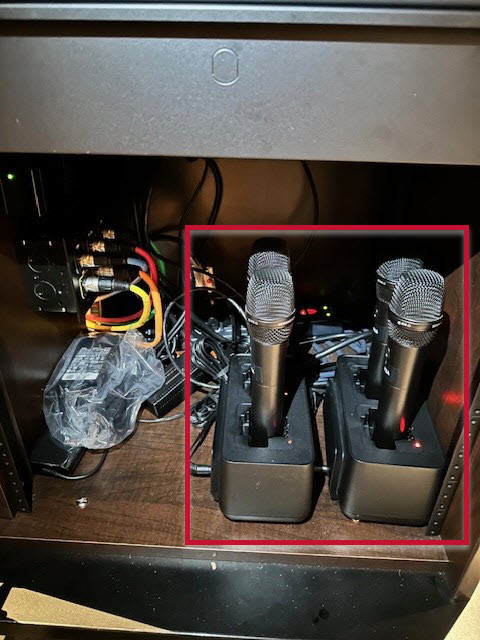
You will need to contact security to unlock the lectern cabinet to access the wireless handheld microphones.
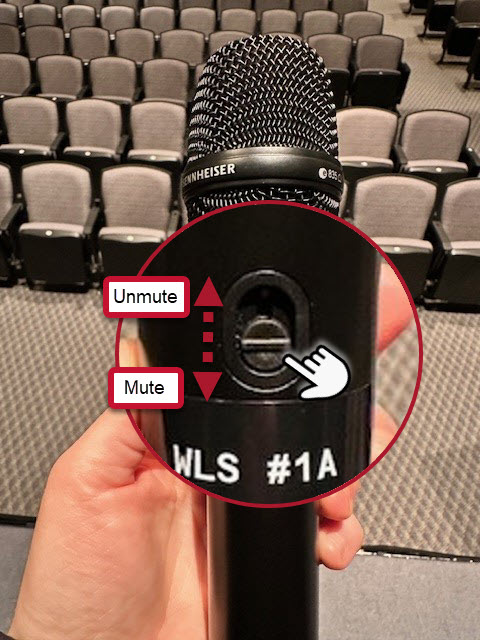
These instructions detail using the touch panel to mute/unmute the microphone. The system mutes the microphones by default. It's important to note that there is also a mute button on the microphone itself.
You can toggle the switch down for a quick pause. Toggle up to unmute.
- Remove the handheld mic(s) from the charging base located inside the lectern cabinet
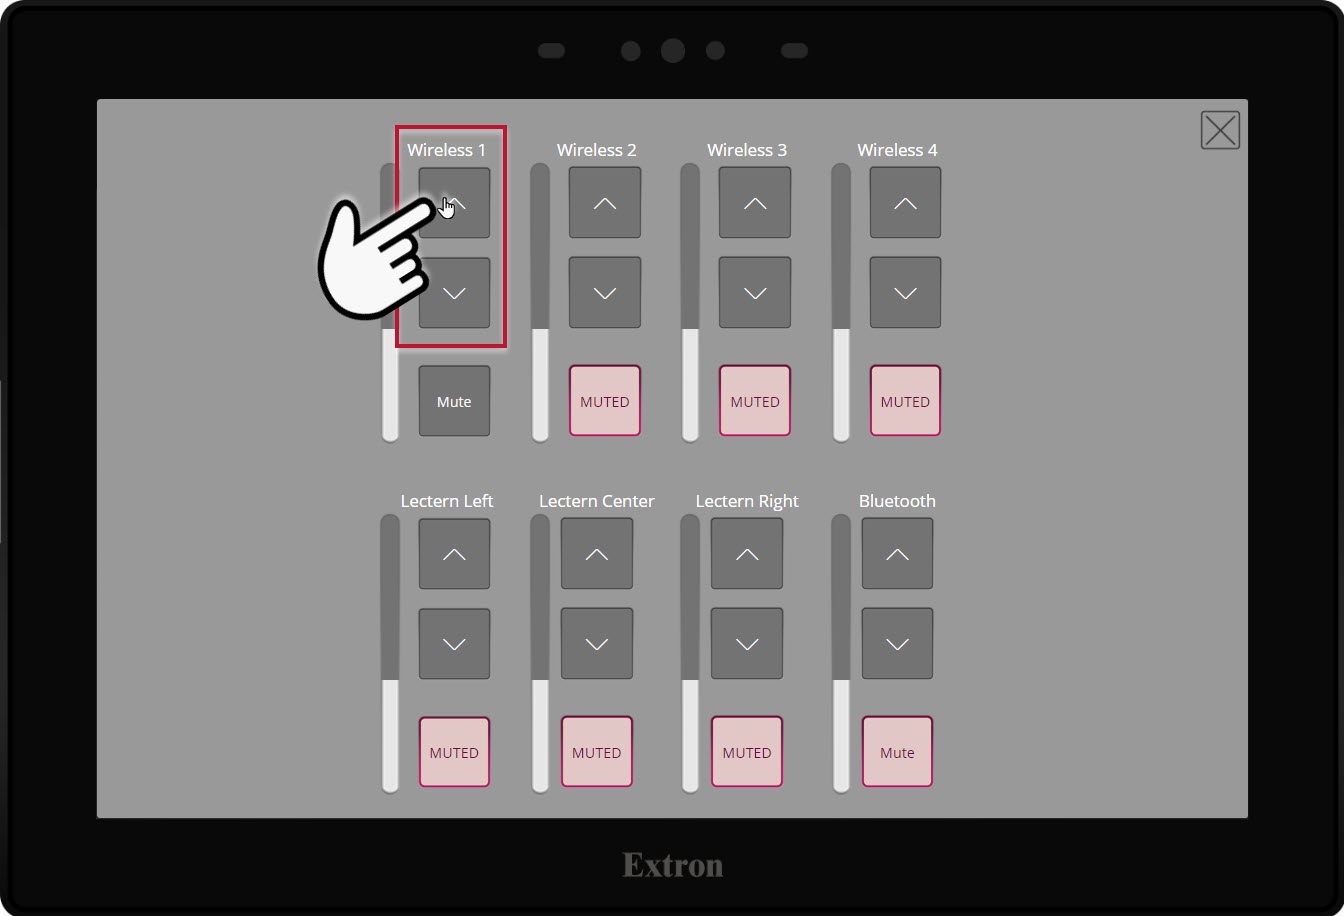
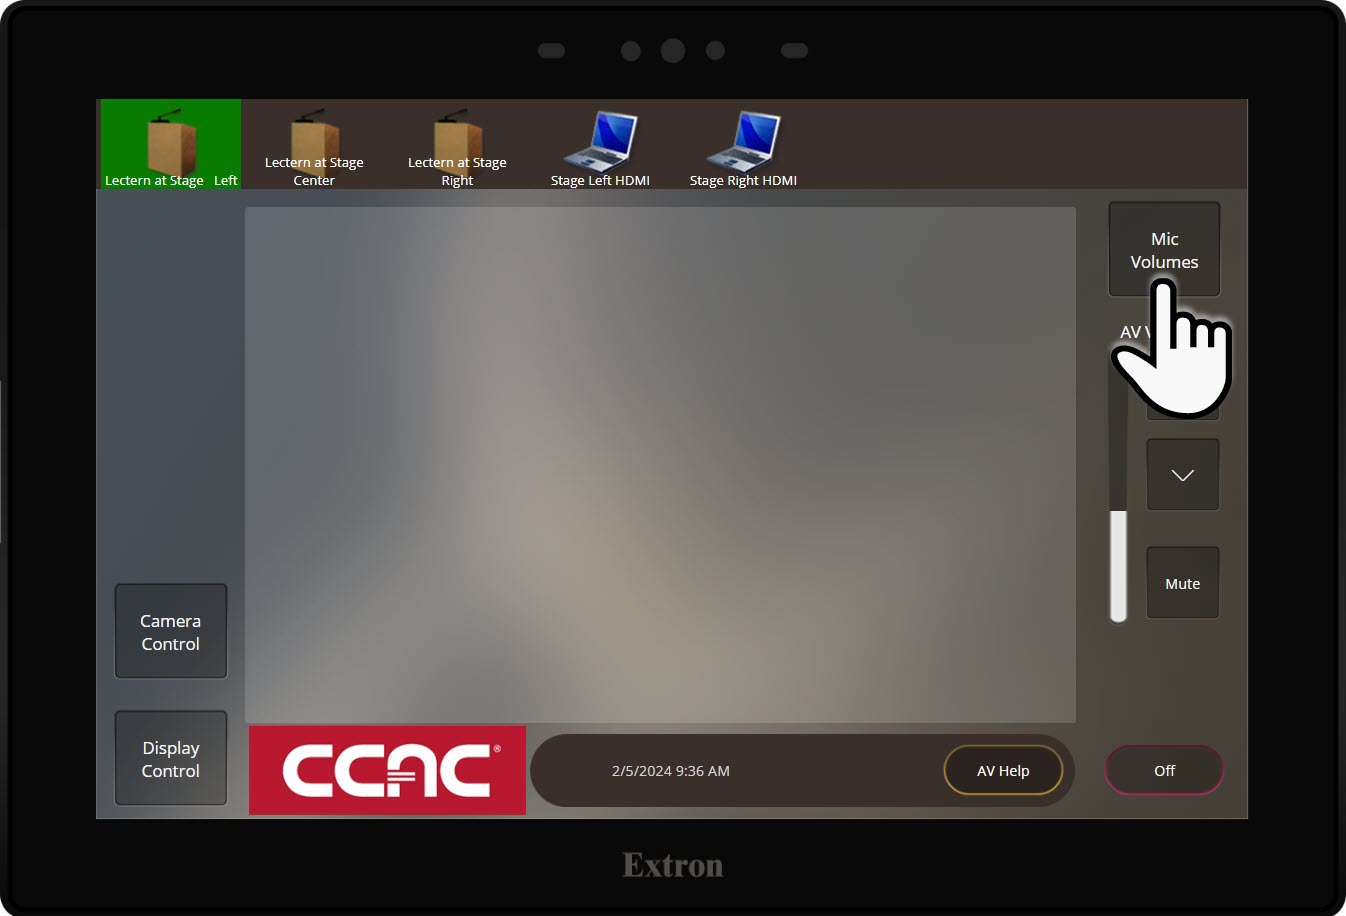
- On the touch panel, select Mic Volumes

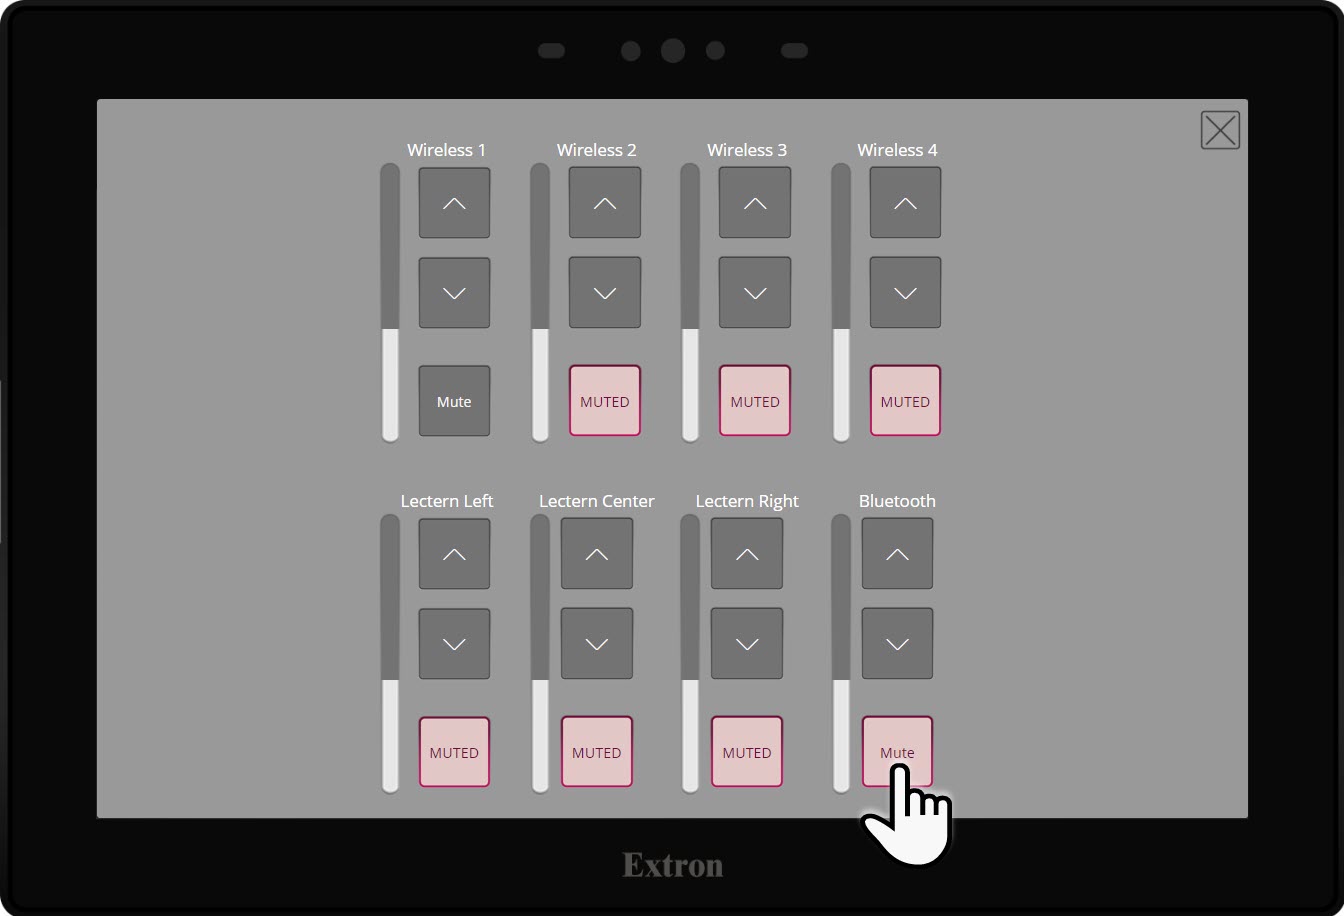
- The mic is muted by default; press Muted to Unmute (check your mic for the correct channel number)
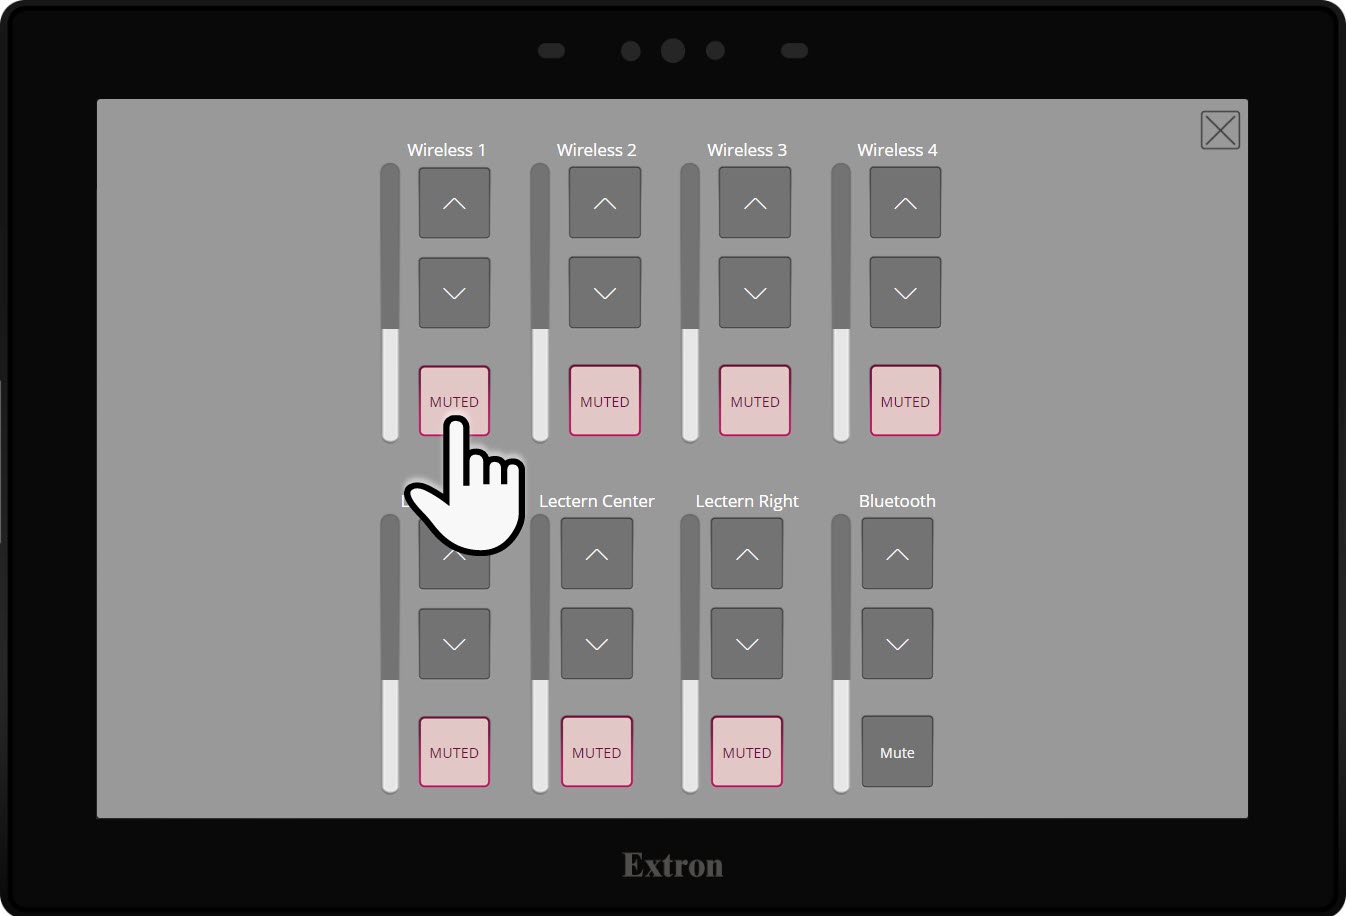
- Adjust the volume using the volume increase or decrease buttons as necessary
- When finished, return the mic to the charger

Lectern Microphone
Info
These instructions detail using the touch panel to mute/unmute the lectern microphone. The system mutes the microphones by default.
- Locate the Lectern mic
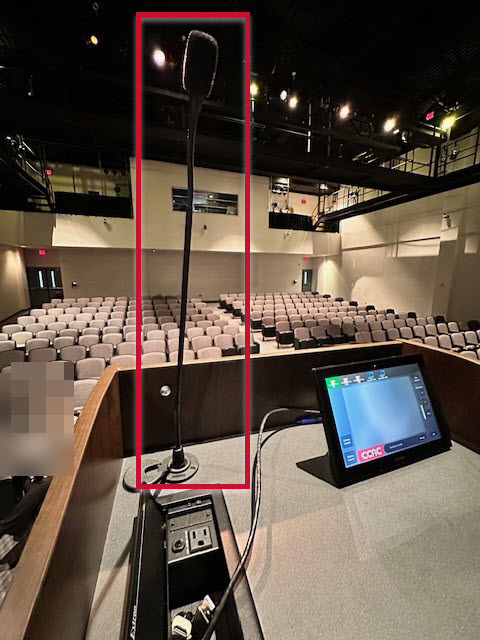
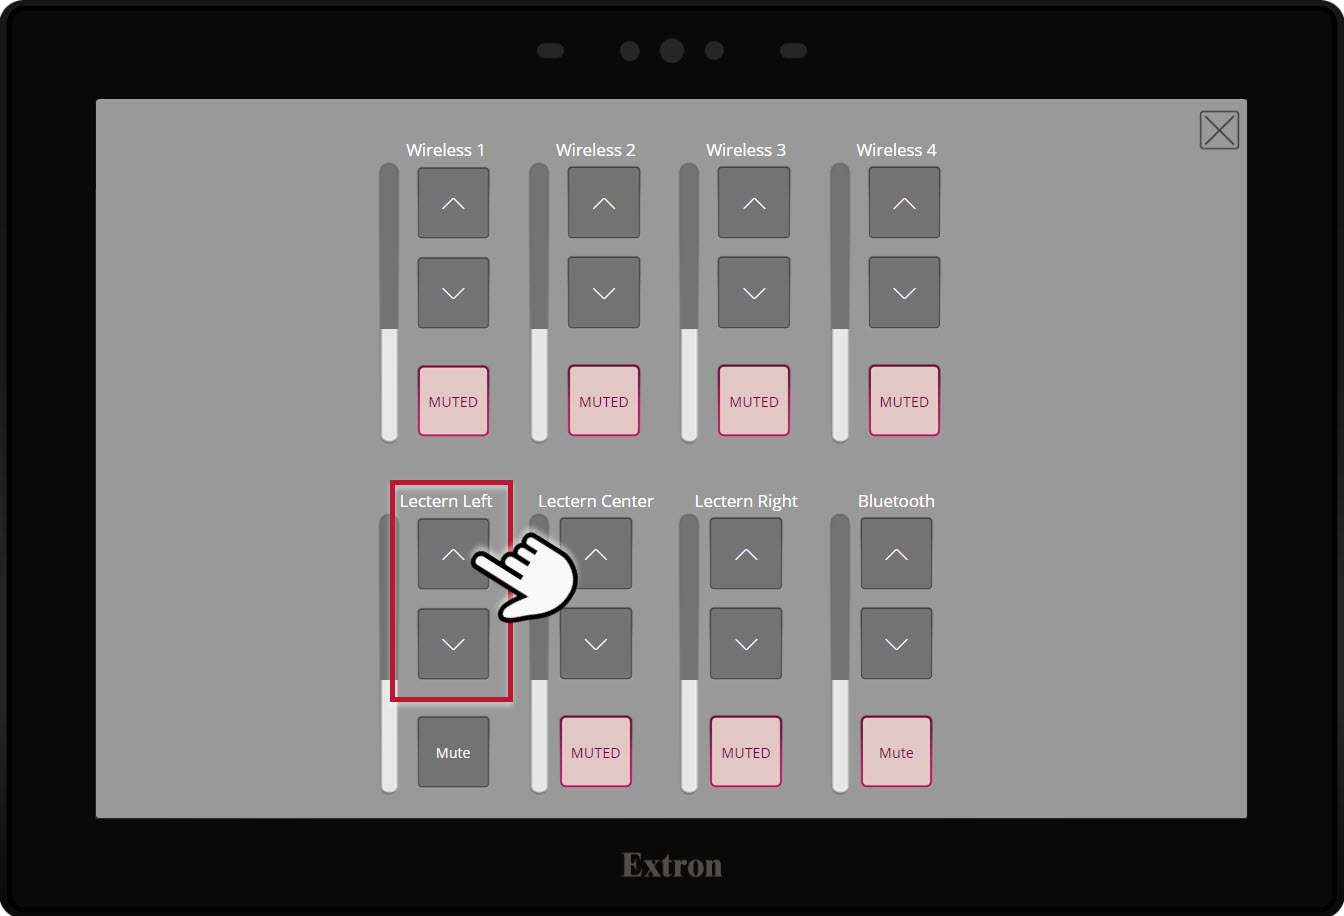
- On the touch panel, select Mic Volumes

- The Lectern Left mic is muted by default; press Mute to Unmute
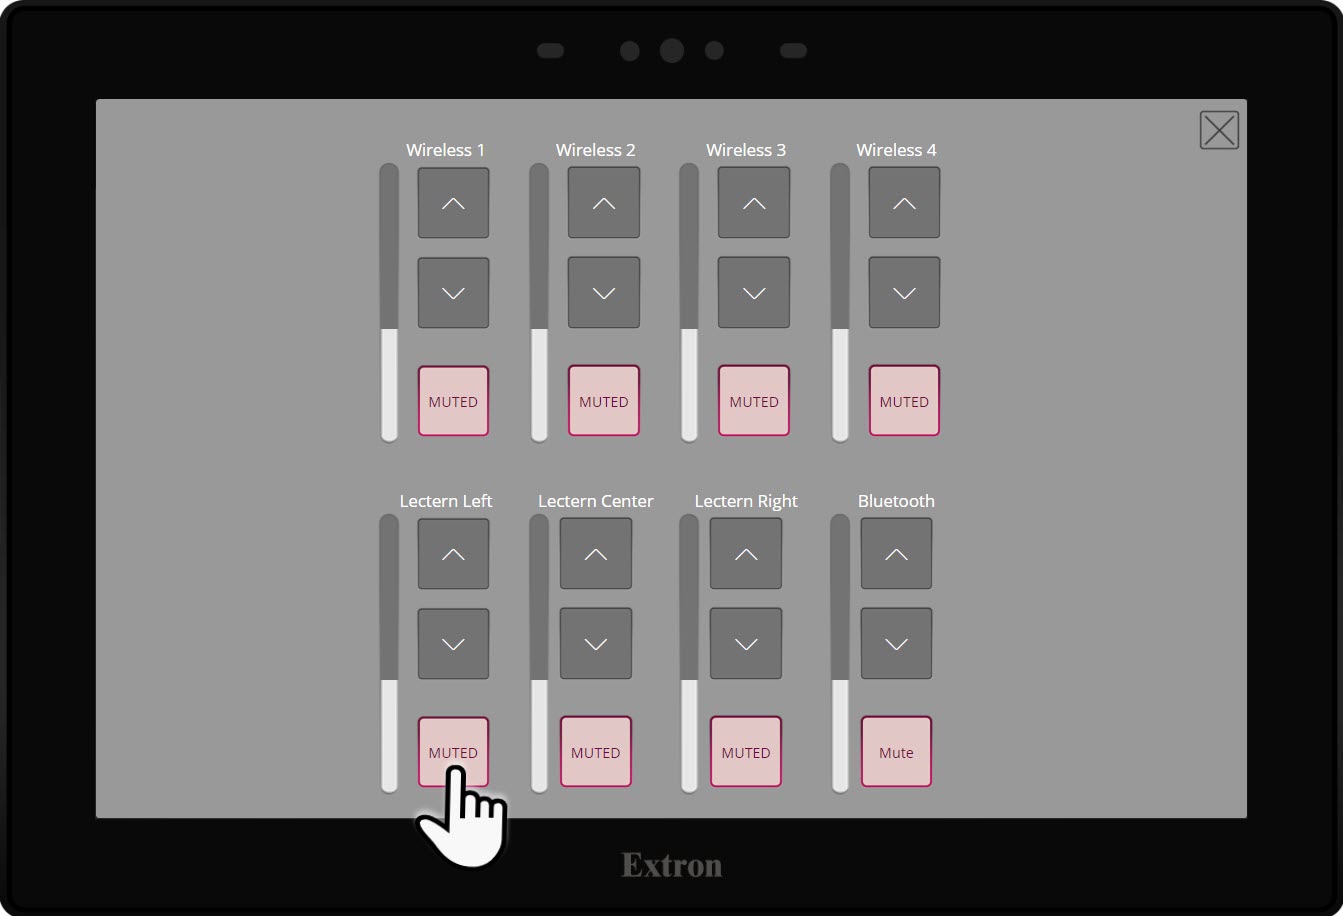
- Adjust the volume using the increase or decrease buttons as necessary
Connect using Bluetooth
Before you begin
- Make sure Bluetooth is on for the device
- Make sure the system is turned on
Note
Only one device can be connected to the Bluetooth receiver at a time.
Pairing the Device
- Locate the Bluetooth receiver to the left of the touch panel located on the wall near stage left
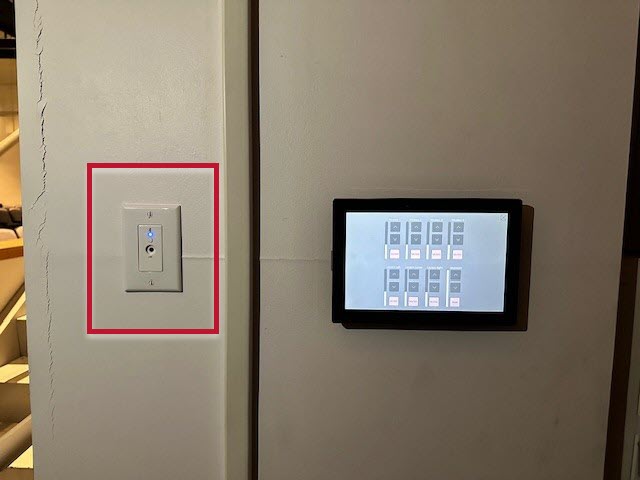
- Press and hold the pair button for 3 seconds, and the blue light will begin to flash when the mode is activated
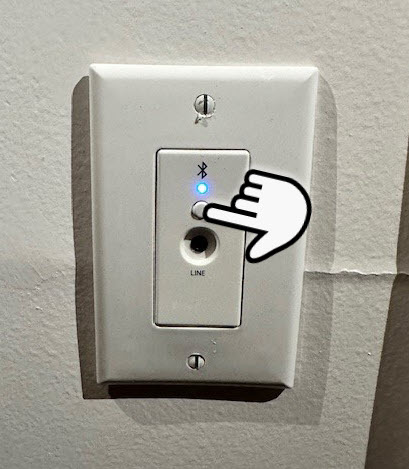
- From the device you want to connect, locate the Bluetooth settings
- Select BT1-15:33:d0
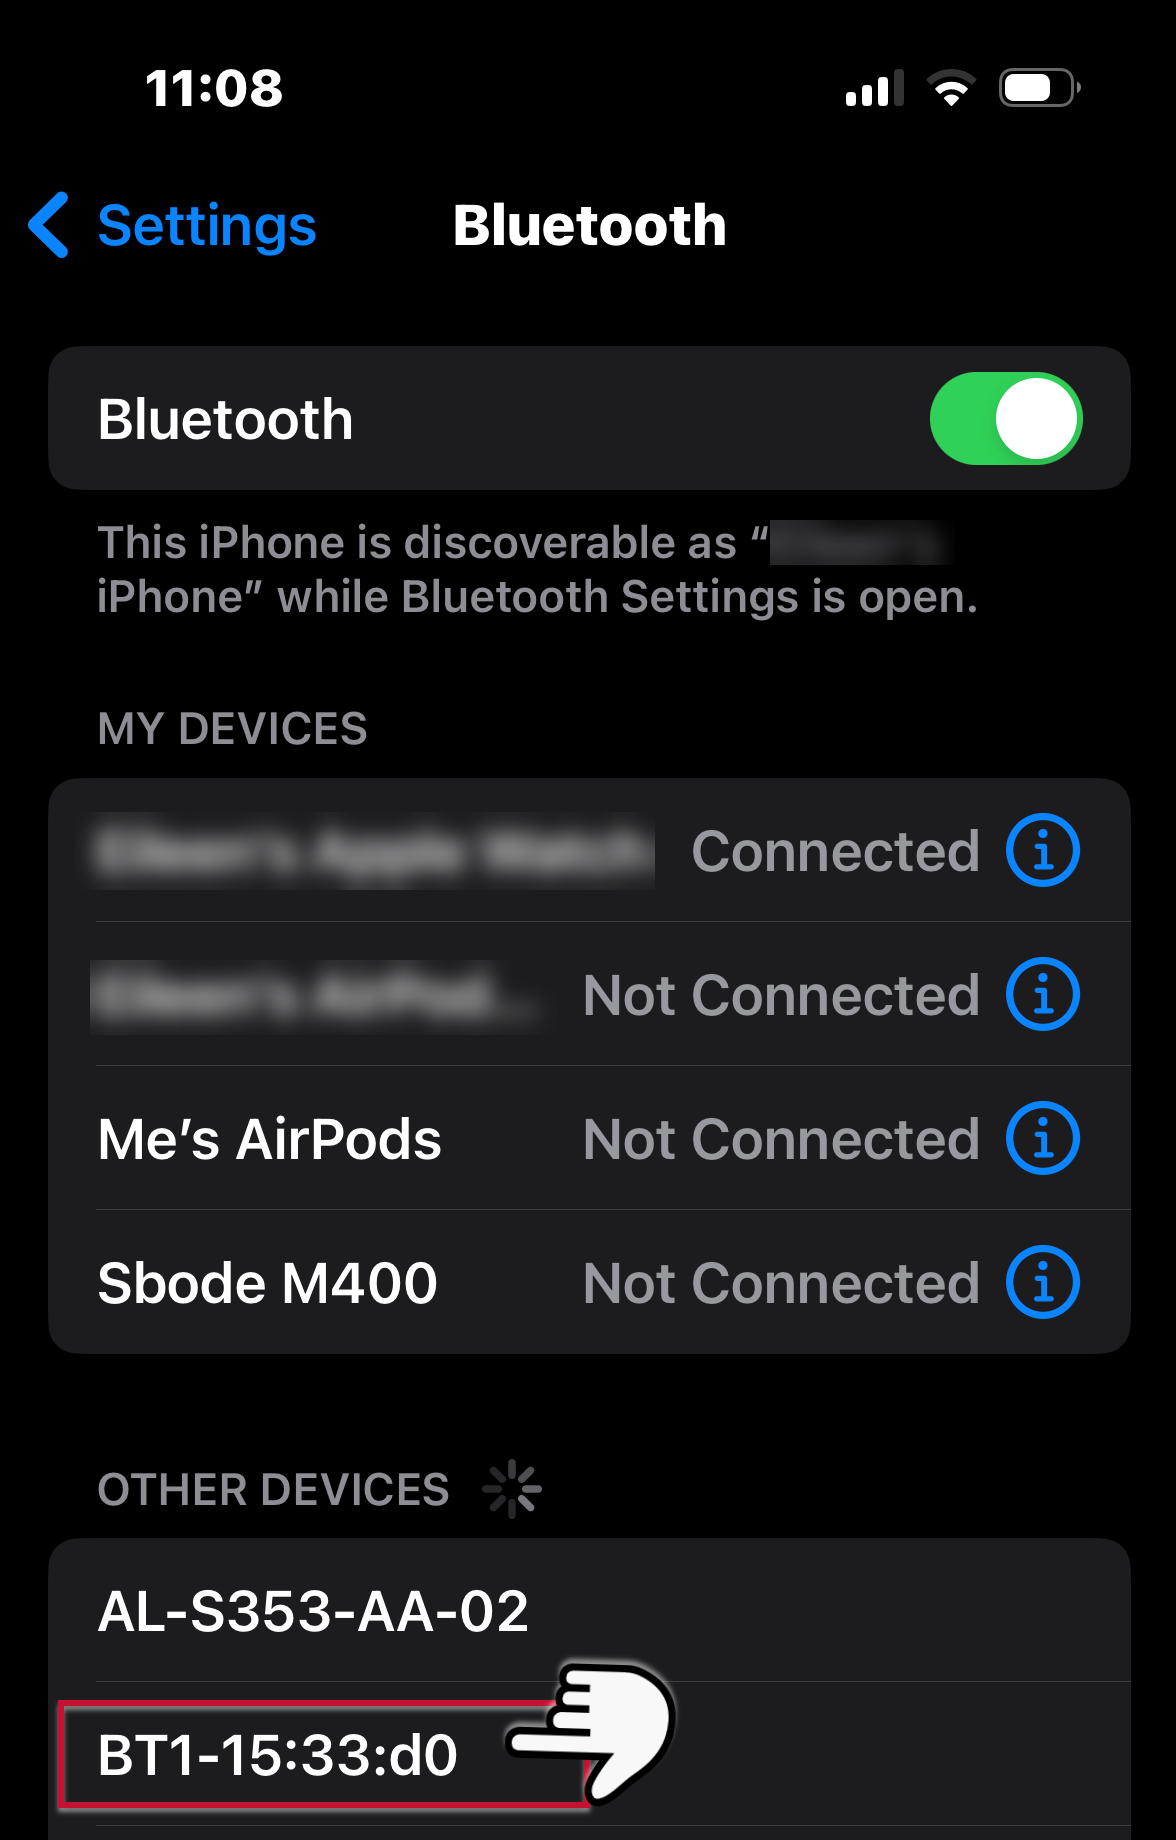
- Pairing will happen, and your device will say it's connected
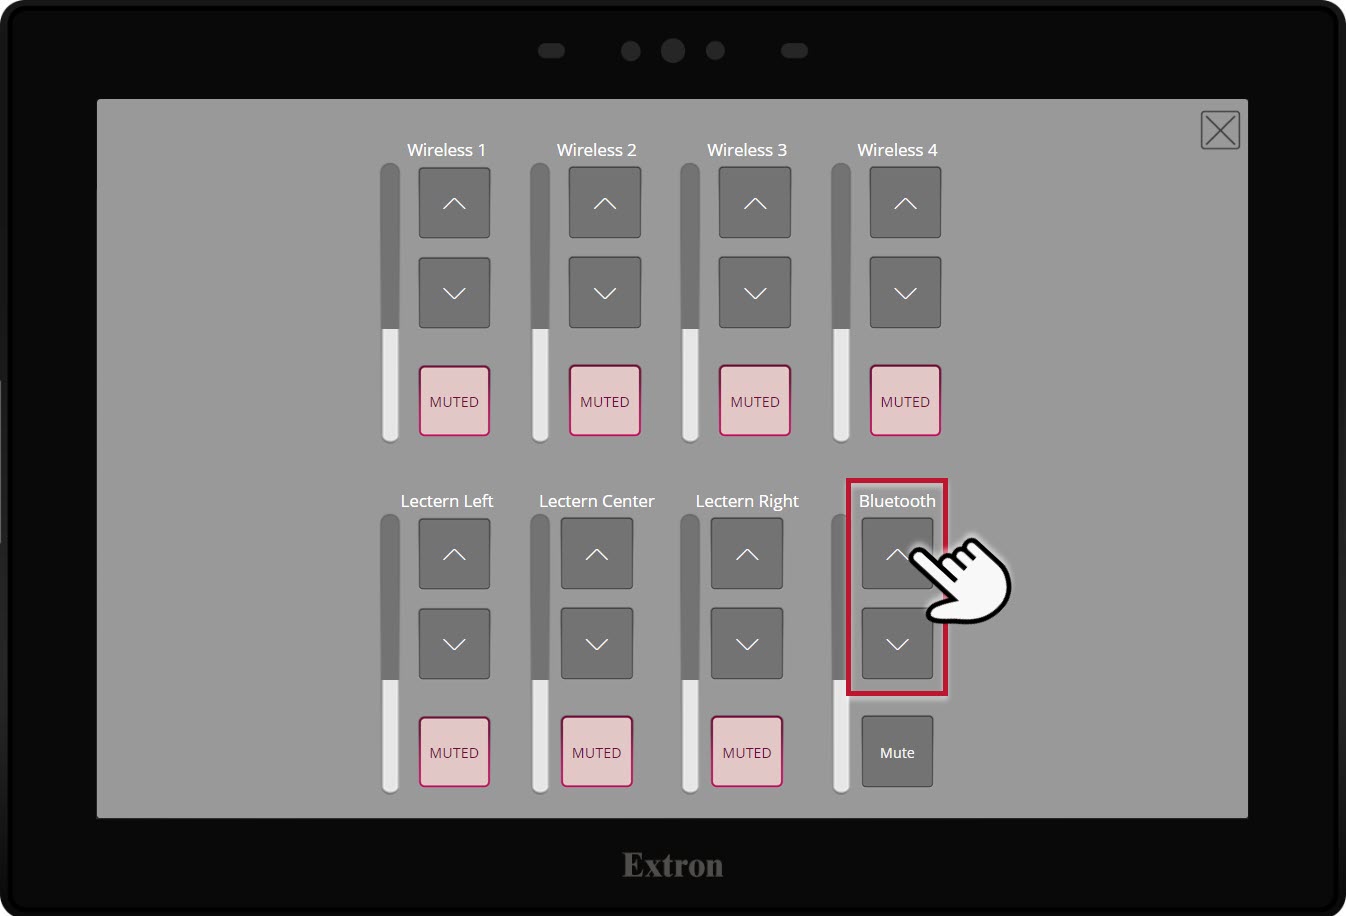
- On the touch panel, select Mic Volumes
- Select Bluetooth Muted to unmute
- Adjust the volume as necessary (you may need also to adjust the volume on your device)
Lighting
Info
The light panel, located above the system touch panel on the wall near the stage, offers a variety of options for your event. The presets are numbered and include a description below.

|
|
|
|
|
|
|
|
|
|
|
|
|
|
|
|
|
|