1. Log into Verbit
- Please reference the Help Center article, Logging into Verbit if you need assistance.
2. Click on Book Now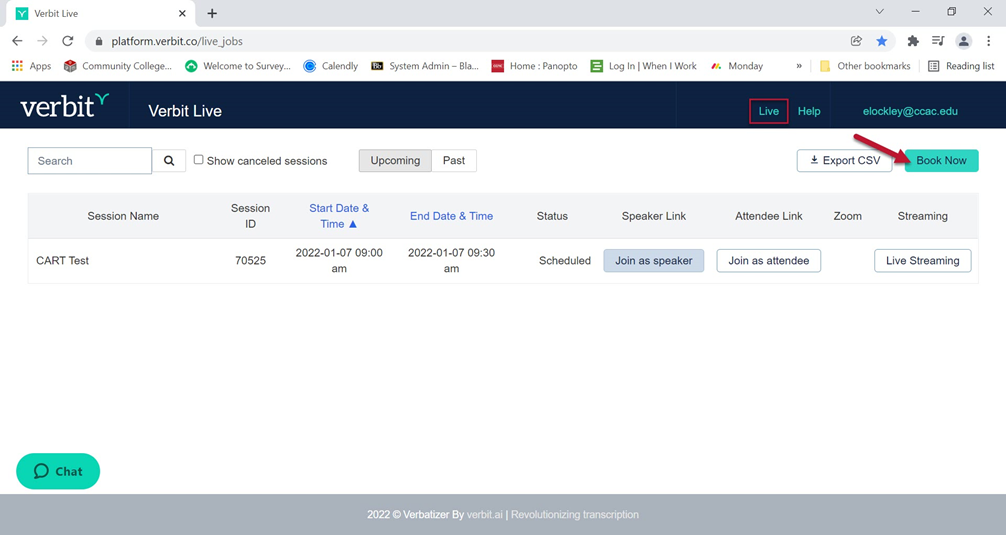
3. Under Session Details, select your type of session from the dropdown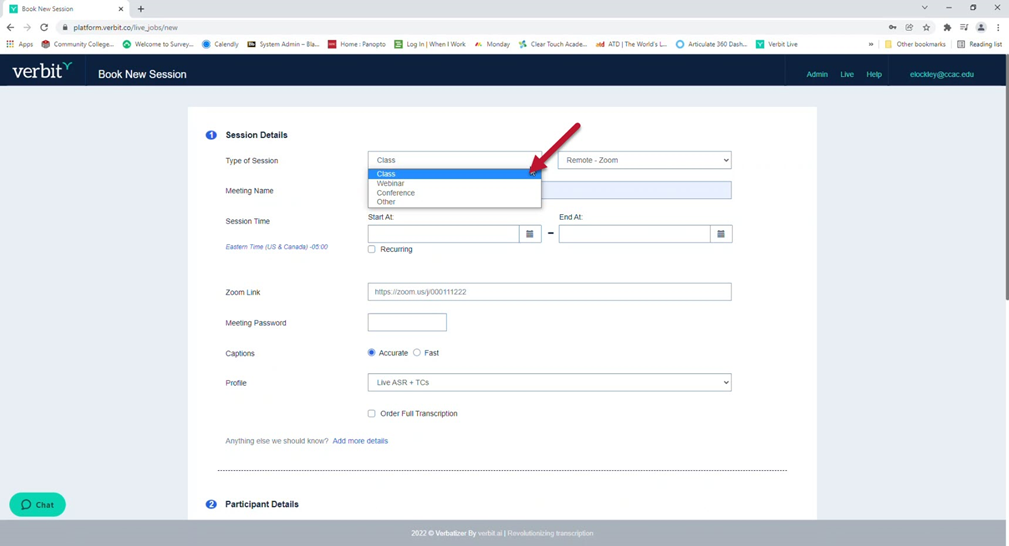
4. Select On Site from the drop down for a Live Verbit session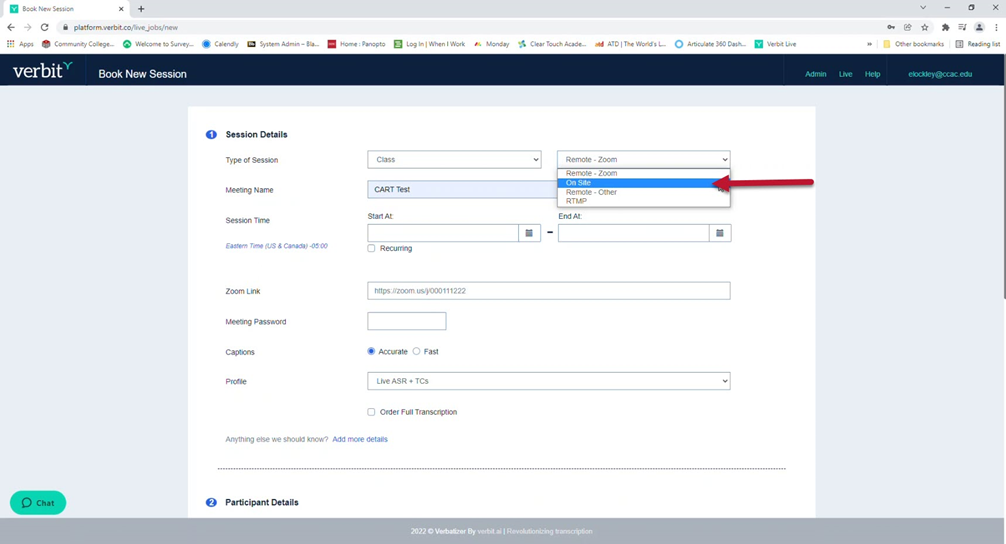
5. Enter your Meeting or Class Name
6. Under Session time, Click on the calendar icon in the Start At section to set the session date/time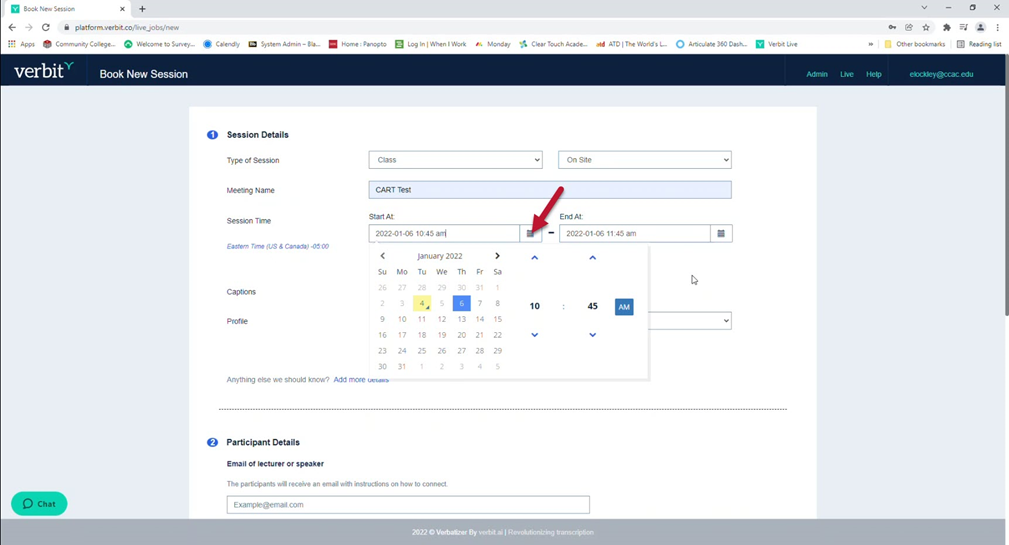
7. Here you can click on the date, click to adjust the time, and click to toggle between AM & PM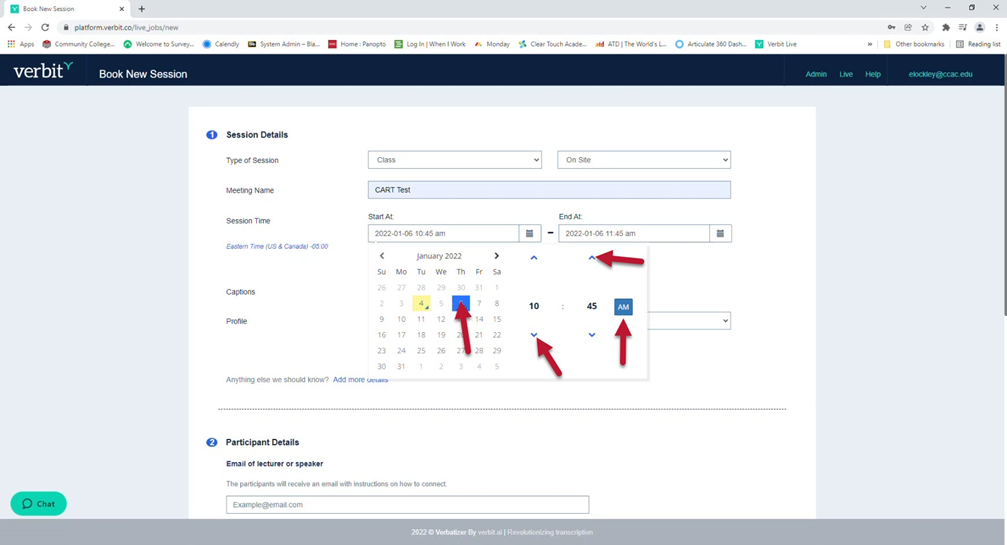
- Please repeat the same steps as the Start At section to adjust the End At time/date.
8. If the session you’re booking is recurring, select the Recurring option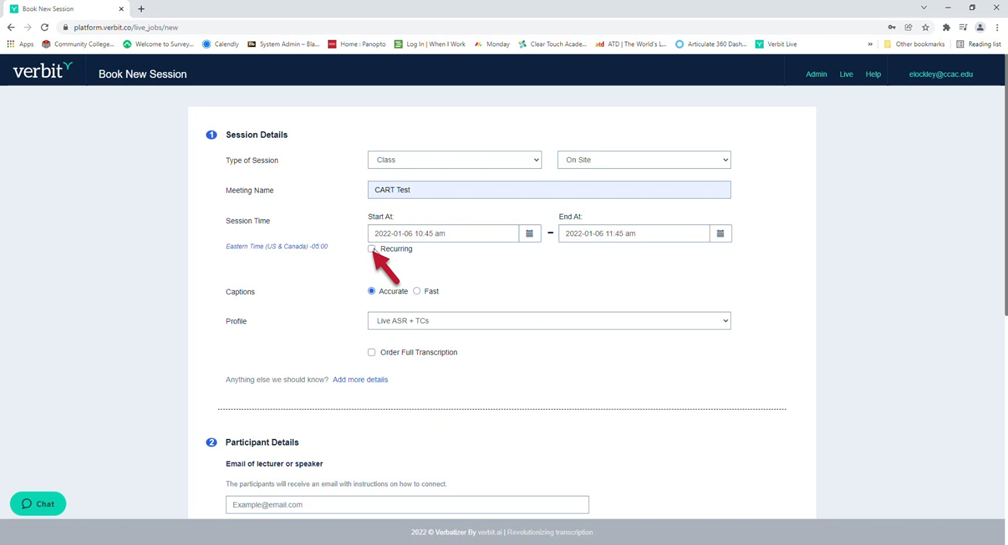
- Now select the details to customize frequency of the recurring session

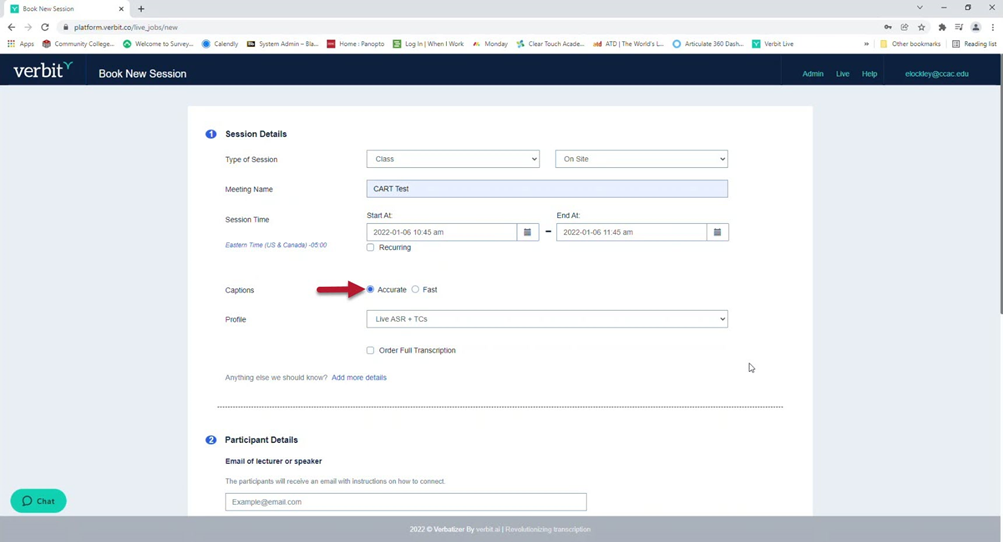
9. Select your default Captions setting for the live session(s)
- This can be adjusted while in the session in real time as well
10. Set your profile to using Live ASR (Automated Speech Recognition) + TCs (type-correctors)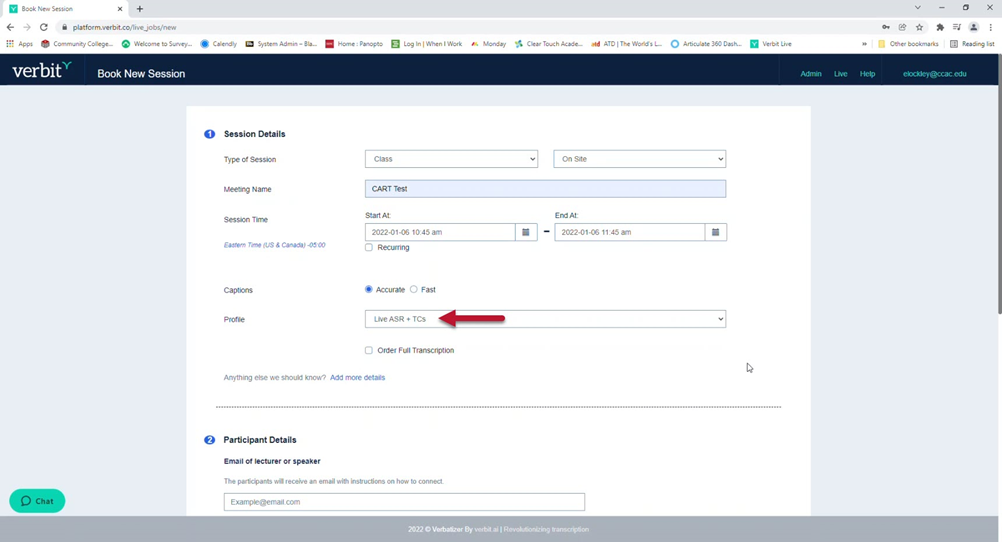
11. Under the participant details, enter the email address of the lecturer or speaker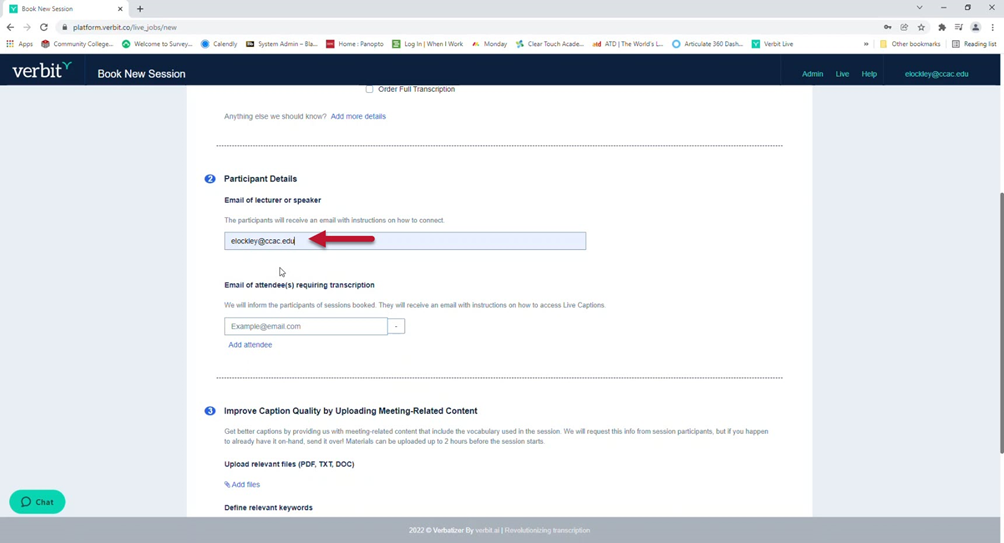
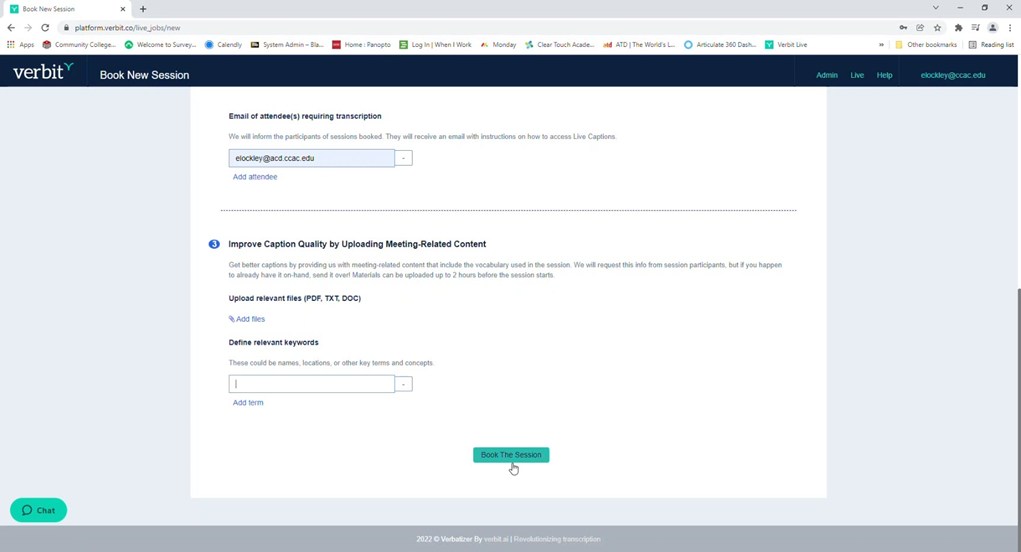
12. Enter the email address of the attendee(s) requiring transcription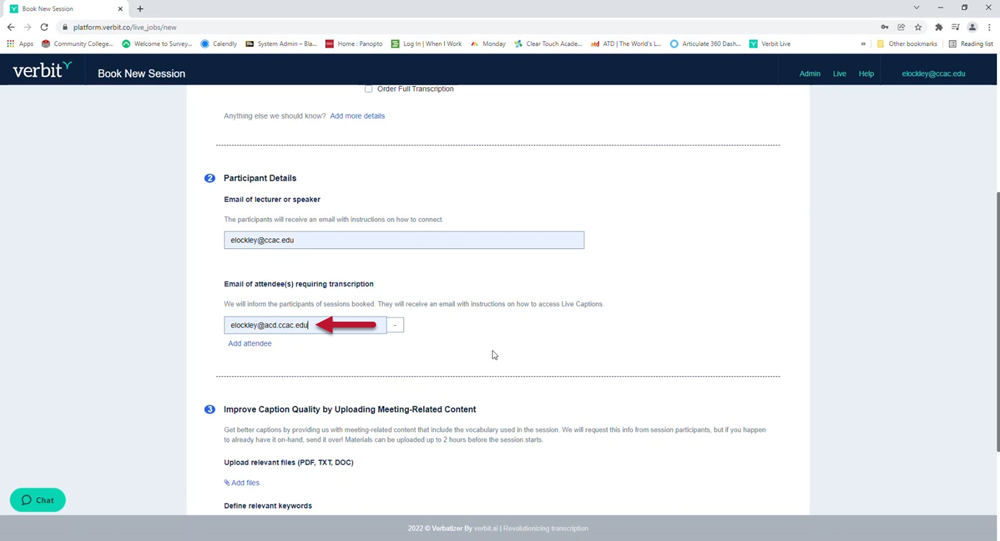
13. Under the Improve Caption Quality by Uploading Meeting-Related Content section, you can attach files by clicking on the Add Files button
- This can include content specific vocabulary that might be used in the session to improve caption accuracy.
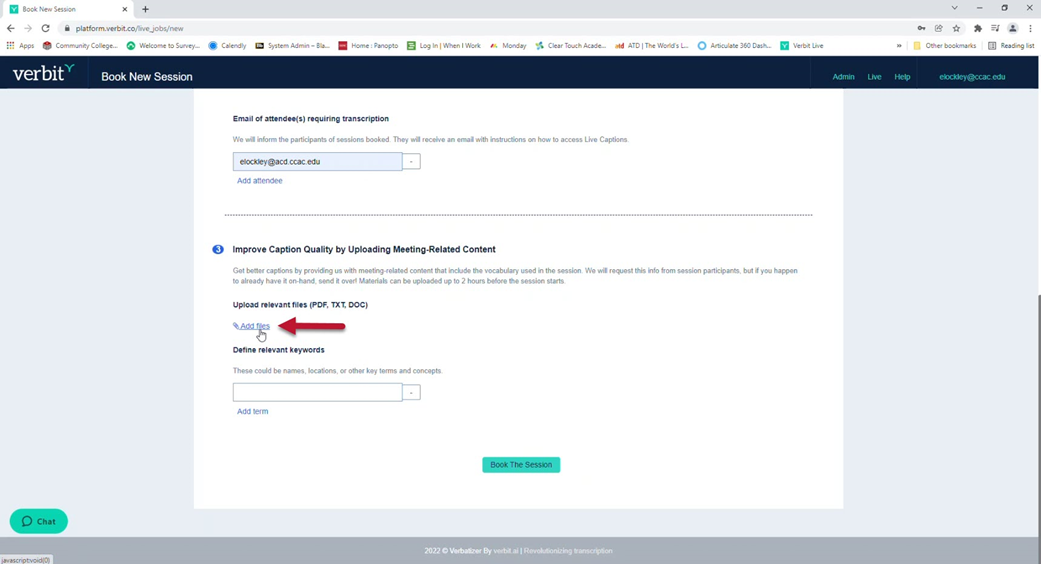
14. You can also, add key terms by typing them in the box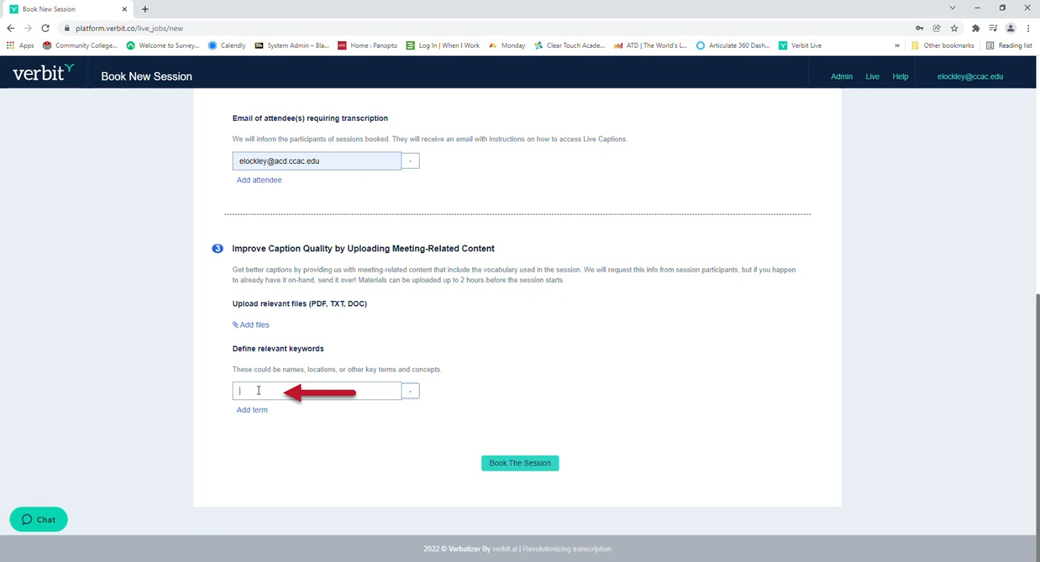
15. Click on Book the Session to complete the request