Power & Setup
Turning On Equipment
- Locate the touch panel on the left side of the stage as you walk up the stairs on the stage
- If the system doesn't wake, tap the screen
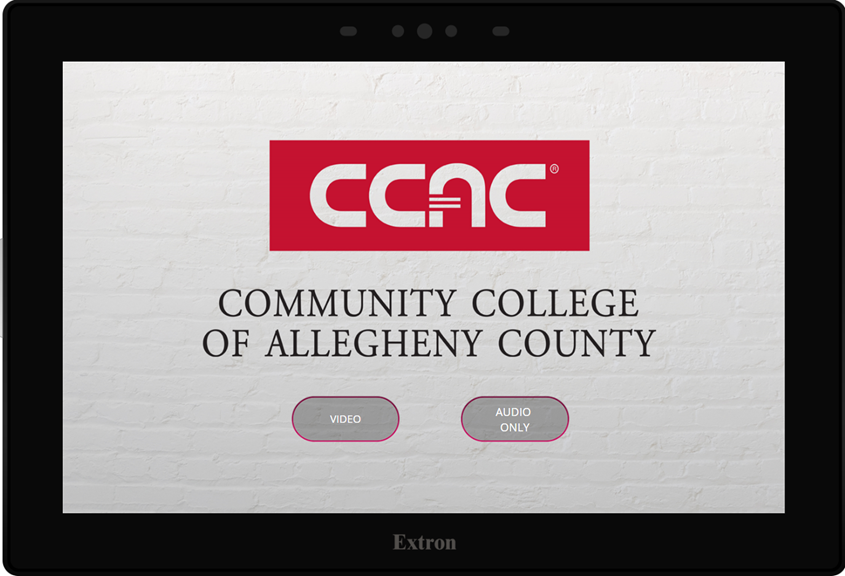
- Tap “Video” if you wish to use the projector & screen. The screen will turn on and look like this:
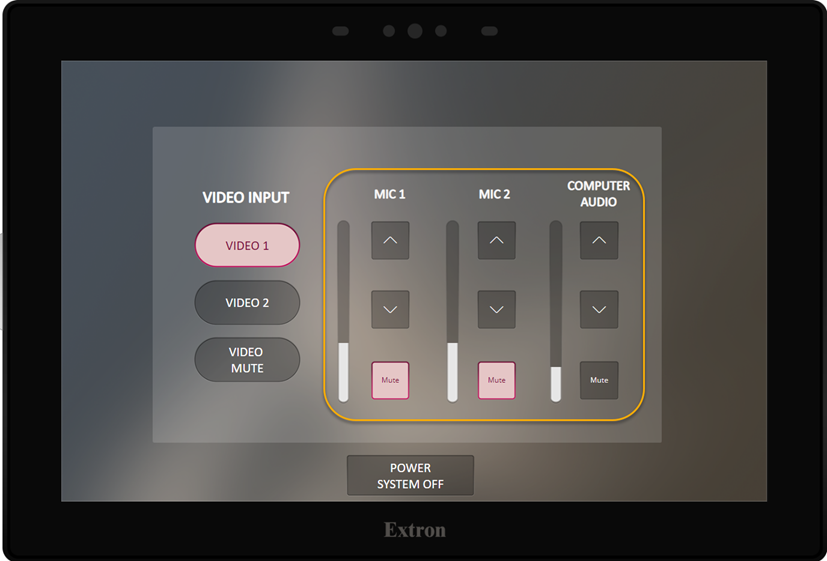
- Tap “Audio Only" if you wish to only use audio within the space. The screen will turn on and look like this:
Turning Off Equipment
- Locate the touch panel on the left side as you walk up the left stairs on the stage
- If the system doesn't wake, tap the screen
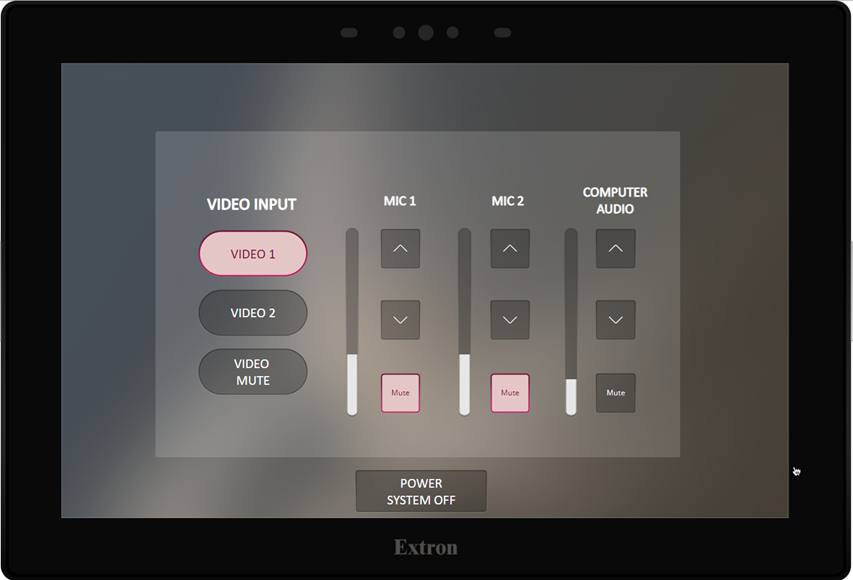
- Tap the Power System Off button in the bottom of the screen. This may also be on the bottom right.

- Confirm you want to shut down by selecting the Power Down button
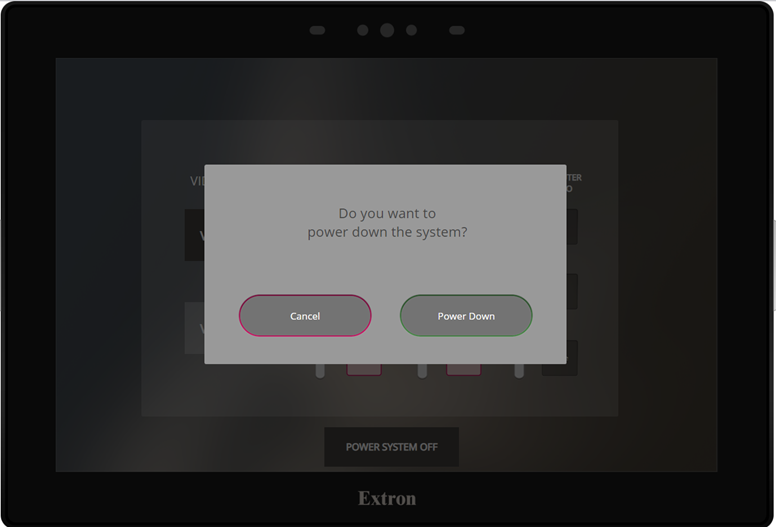
- The system will begin shutting down and will return to the start screen when complete
Connect to Video 1
- Plug cables in as pictured at the top of the steps

- If you are using a CCAC computer, plug HDMI cable and network cable in to your CCAC laptop
- If you are a guest of the college, plug only the HDMI cable into your laptop
- Make sure the system is turned on
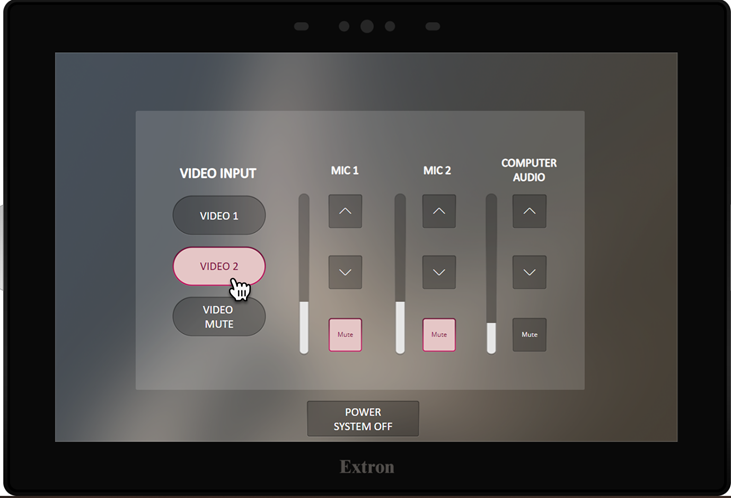
- Select Video Input: Video 1

Connect to Video 2
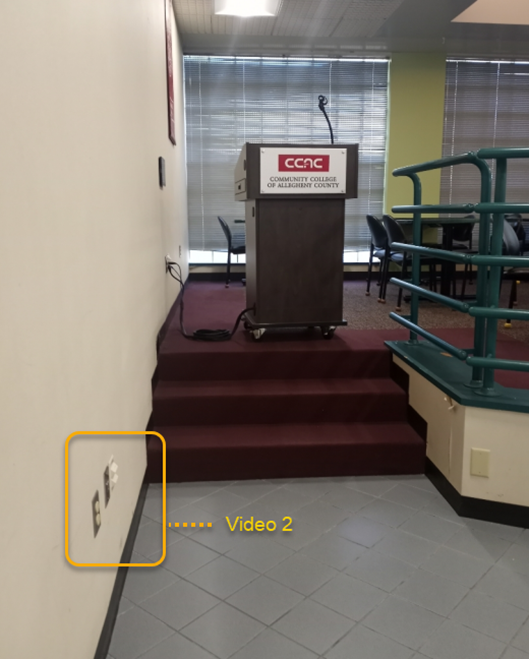
- Plug cables in a similar fashion, but at the bottom of the steps
- If you are using a CCAC computer, plug HDMI cable and network cable in to your CCAC laptop
- If you are a guest of the college, plug only the HDMI cable into your laptop
- Make sure the system is turned on
- Select Video Input: Video 2
Disconnecting Cabling
- Make sure the system is turned off
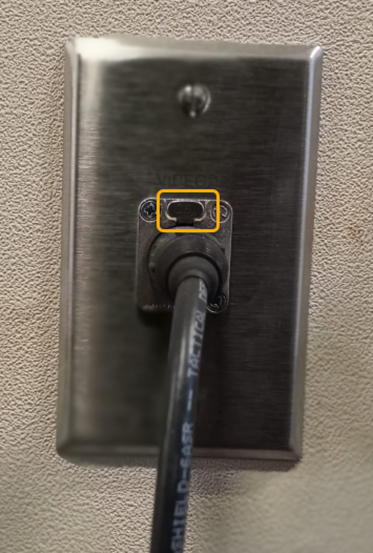
- On each input there is a silver tab, press and hold the tab in
- While holding the tab in, pull the cable out from the input
Delete
Video
- Press Video Mute to black out the projector screen but leave the rest of the system on.
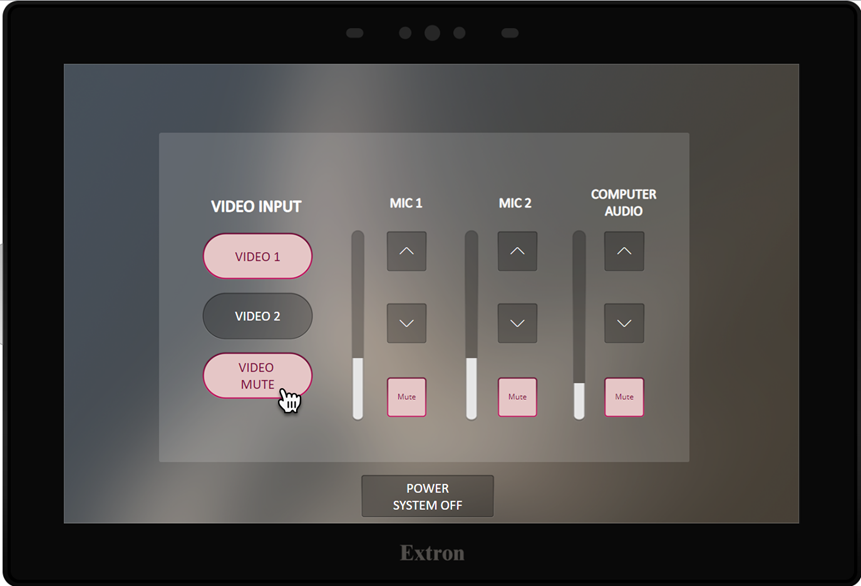
Audio
Adjusting an Individual Volume Microphone or Computer
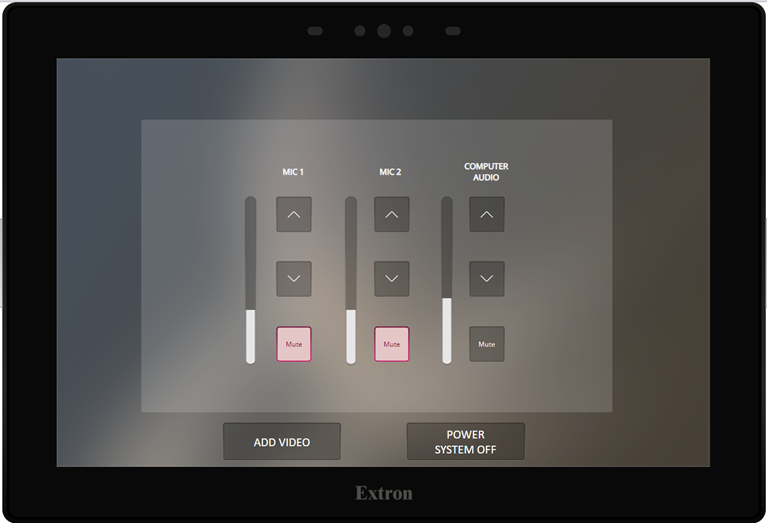
- By default, all microphones are muted.
- Identify if you are adjusting the volume for the microphones or computer
- Choose the △ button to make the volume louder
- Choose the ▽ button to make the volume softer
- Choose the Mute button to mute the sound
- Red mute button is Muted
- Grey mute button is Unmuted
Equipment List
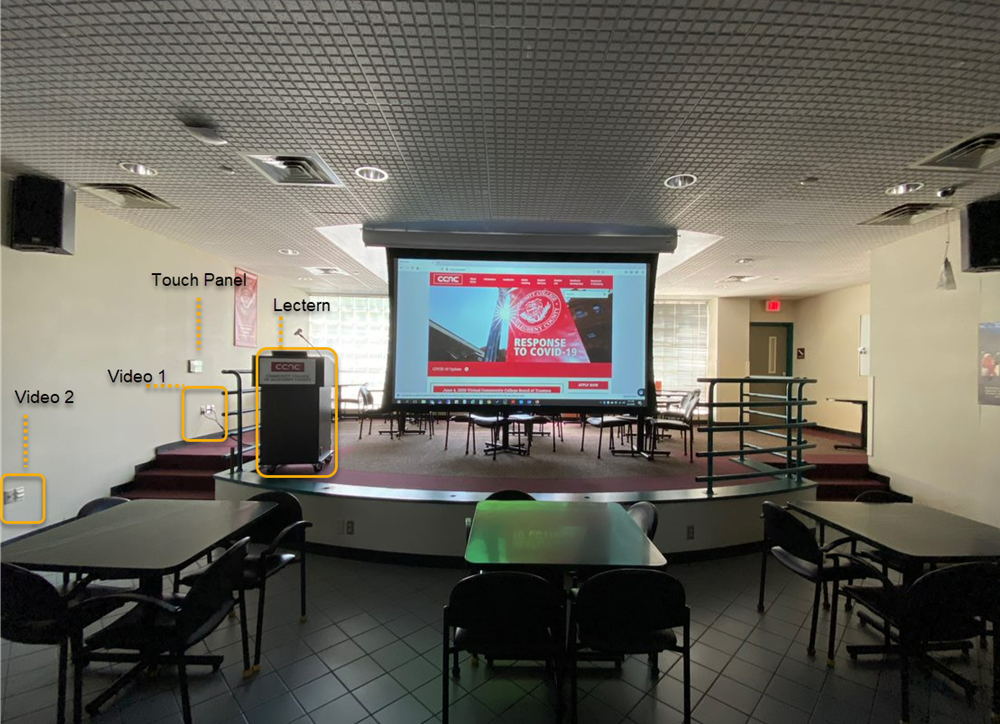
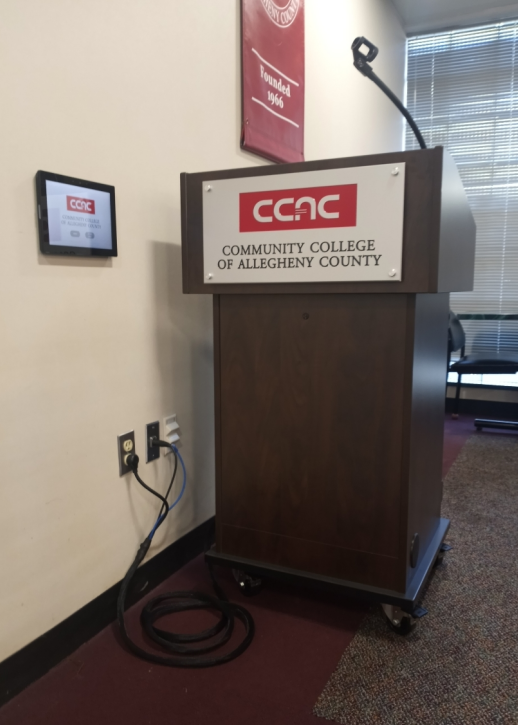
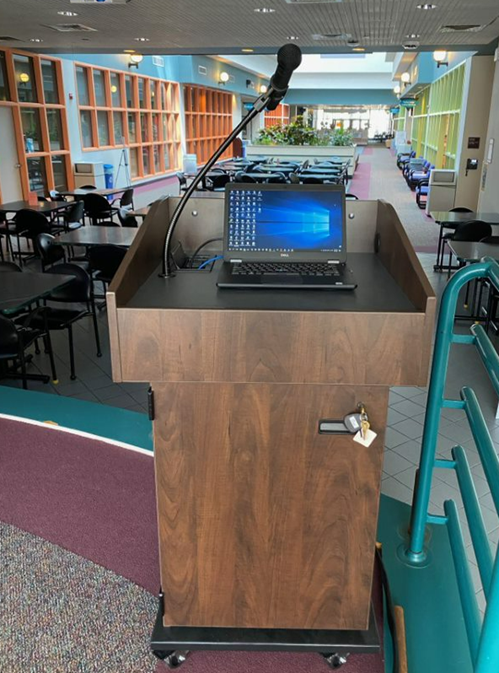
Lectern
Location
- Located on the stage and typically remains plugged in at all times
Features
- Lectern with Microphone Holder
- Cable Cubby on top of lectern
- HDMI Cable
- Ethernet (Internet/Network) Cable
- Audio and Video Connection Cables coiled and ready to connect
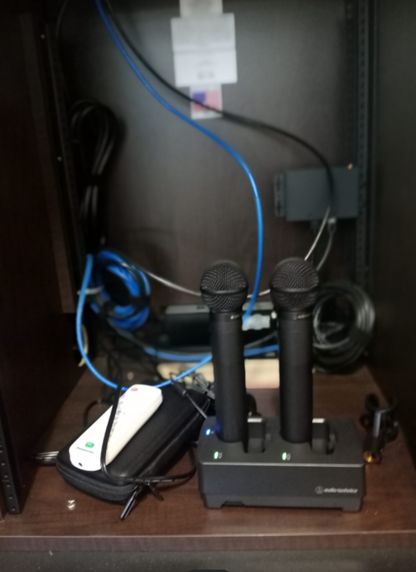
Microphones
Location
- Located within the lectern on stage
- You will need to provide your ID in security to have them unlock the door
Features
- 2 Wireless Handheld
Touch Panel
Location
- Going up the left stairs, on the left side of the wall
Features
- Auto awakes
- Allows you to control the projector/video and microphones & input/audio
- Controls to power off the system
Wall and Floor Inputs
Video 1 & 2 Locations
- Typically the lectern is located near Video Location 1, at the top of the stairs
- Video Location 2 is located at the bottom of the stairs

Features
- Allows you to connect audio and video to the projector/video and microphones & input/audio
- Cables and inputs are color coded and labeled