Power
Note
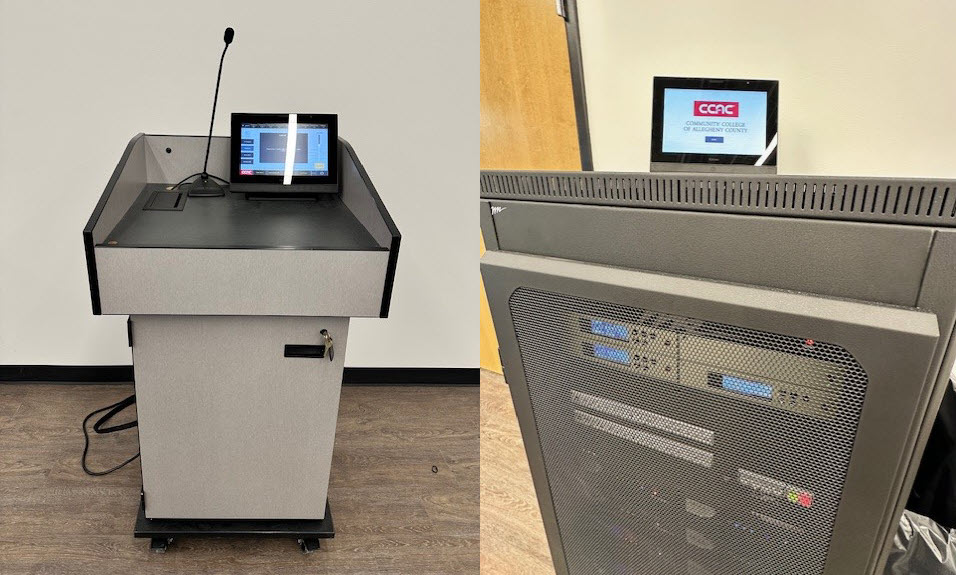
There are two touch panels in this space. One is located on the lectern, and the other is on top of the equipment rack. They mirror each other and perform the same functions.
The lectern is mobile and can be connected at any of the three connection wall plates throughout the room. Please see Lectern Connection Options under the Video tab of this article for more information.
Turning On the Equipment with the Touch Panel
- If the touch panel screen is black (sleeping), press the screen to wake
- Select Start

Turning On the Equipment with the Touch Panel
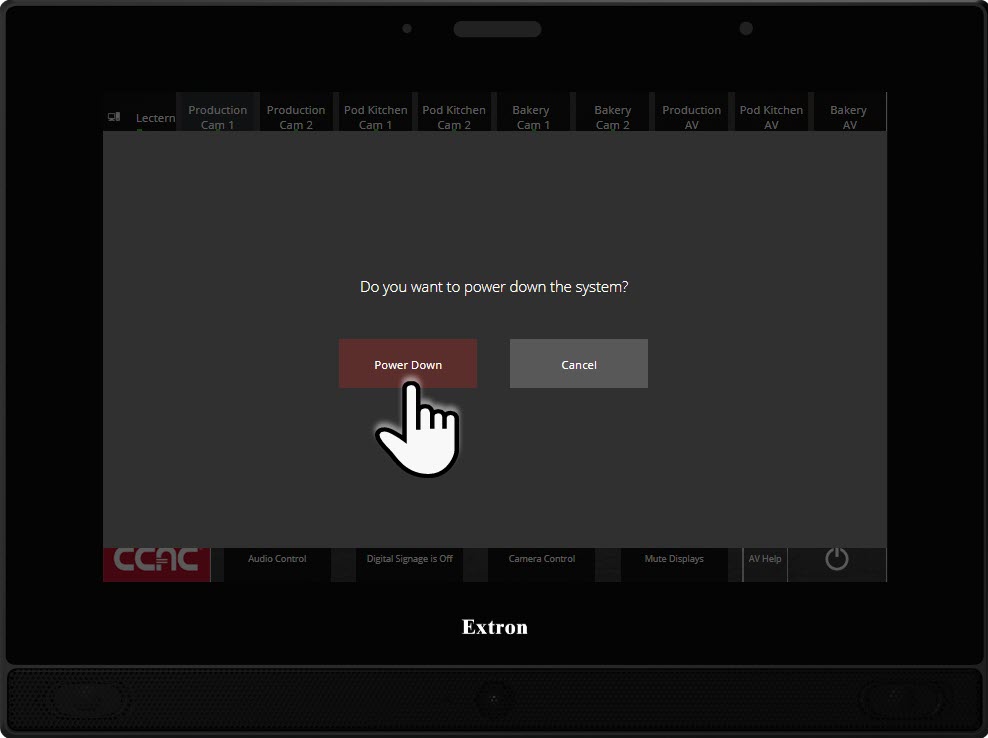
- Press the Power button on the touch panel
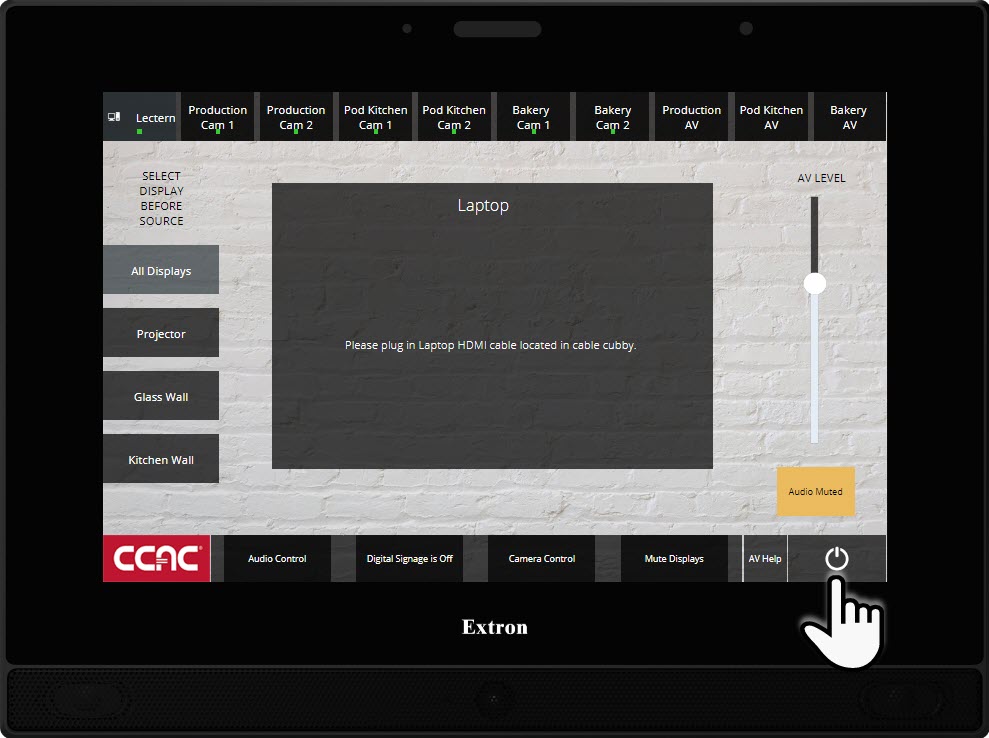
- Confirm that you would like to shut the system down by pressing Power Down
Video
Info
The Teaching Restaurant is designed to allow you to bring your own device to display content on any or all three available displays.
Lectern Connection Options
Note
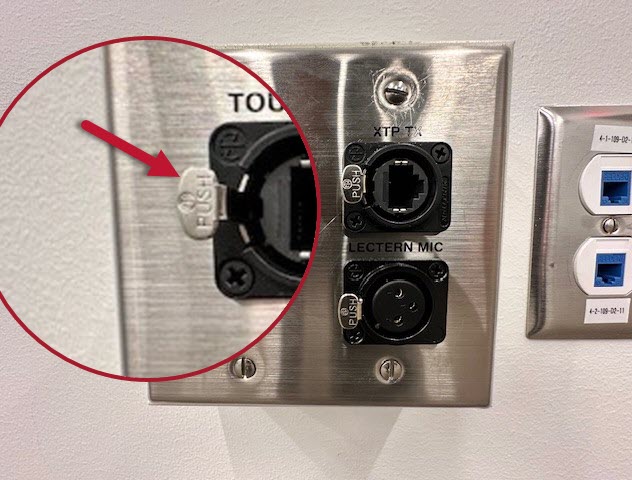
The Teaching Restaurant offers three wall plate locations to use the lectern. The lectern is mobile and can be connected using the three connection cables and a power cable. It is important to note that the push tab to the left of the connection on the wall plate must be pushed in when removing a cable to avoid damaging the cables.
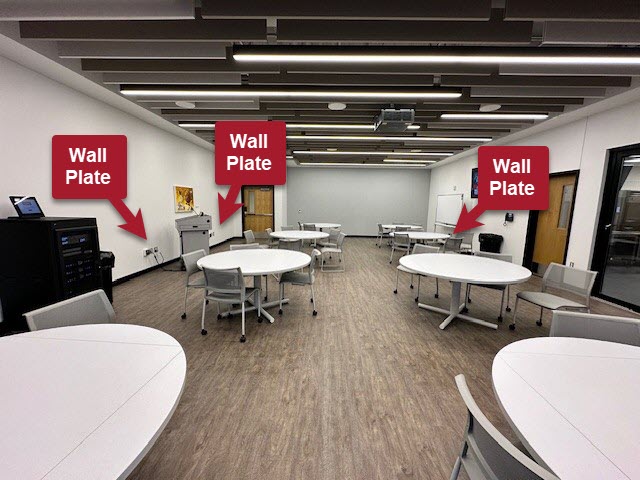
Here is a diagram of the available wall plates for connecting the mobile lectern in the room
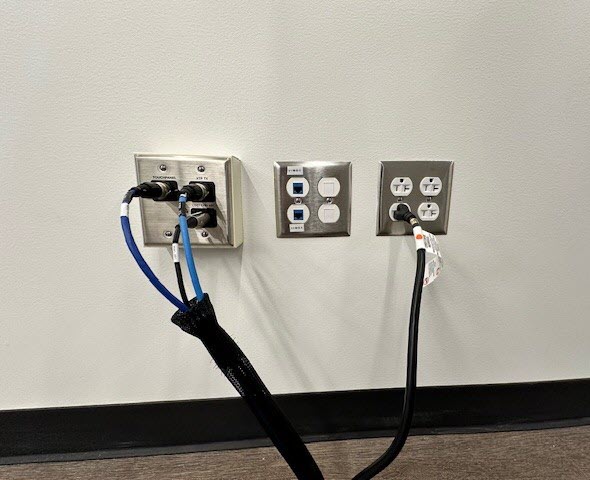
- Match the labeled cable to its wall input. Here is an example of a successful connection
Display a Personal Device using the Touch Panel
- Locate the Cable Cubby on the instructor's station
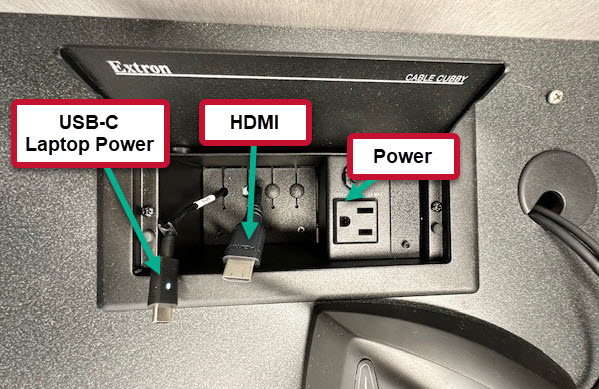
- Connect the HDMI cable to your laptop
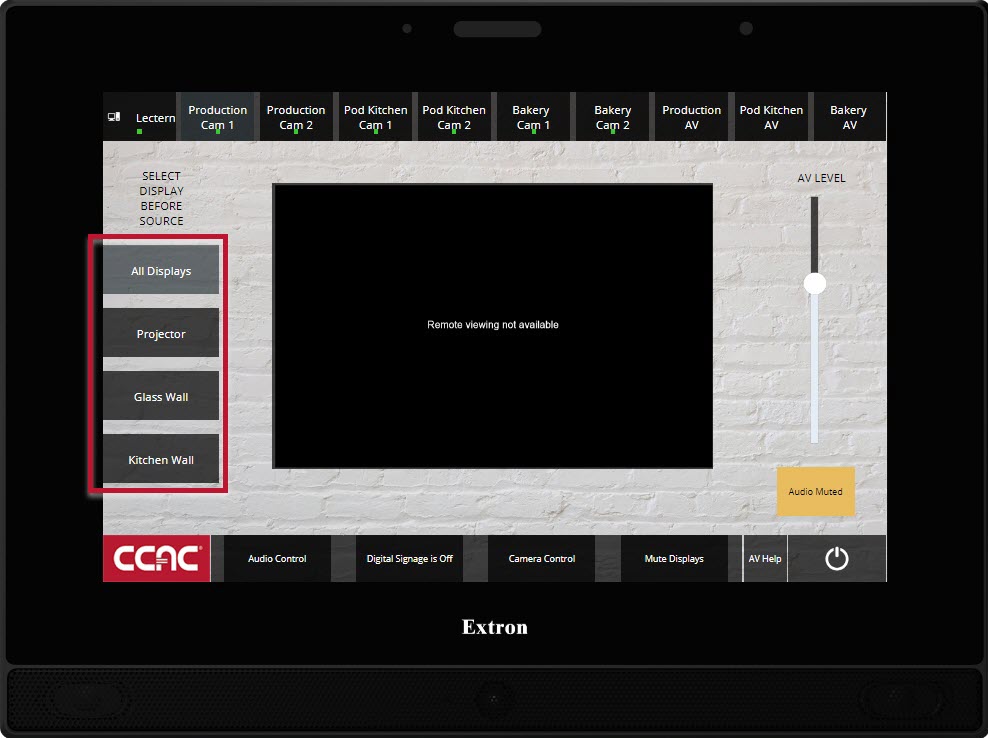
- On the touch panel, select All Displays or individual displays

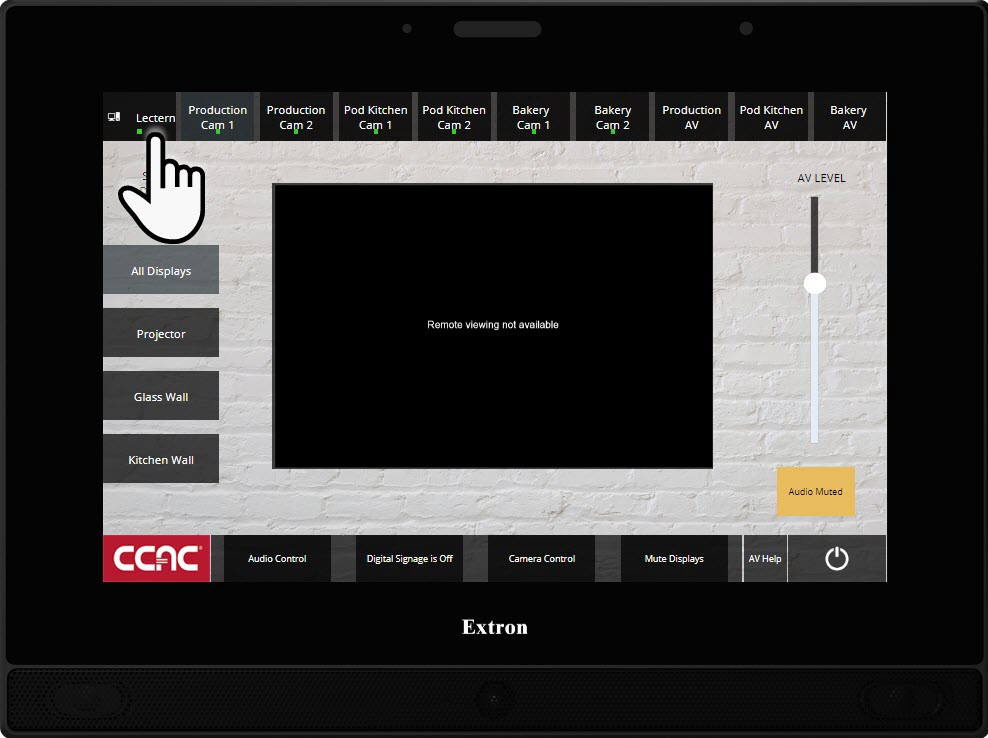
- On the touch panel, select the Lectern source
Sending Kitchen Cameras to Individual Displays
Info
When starting the system, you can choose to send content from your device to All Display or individual displays. In addition, you can send any of the camera sources to All Displays or individual displays (projector, glass wall, or kitchen wall).
- Select All Displays, Glass Wall, or Kitchen Wall
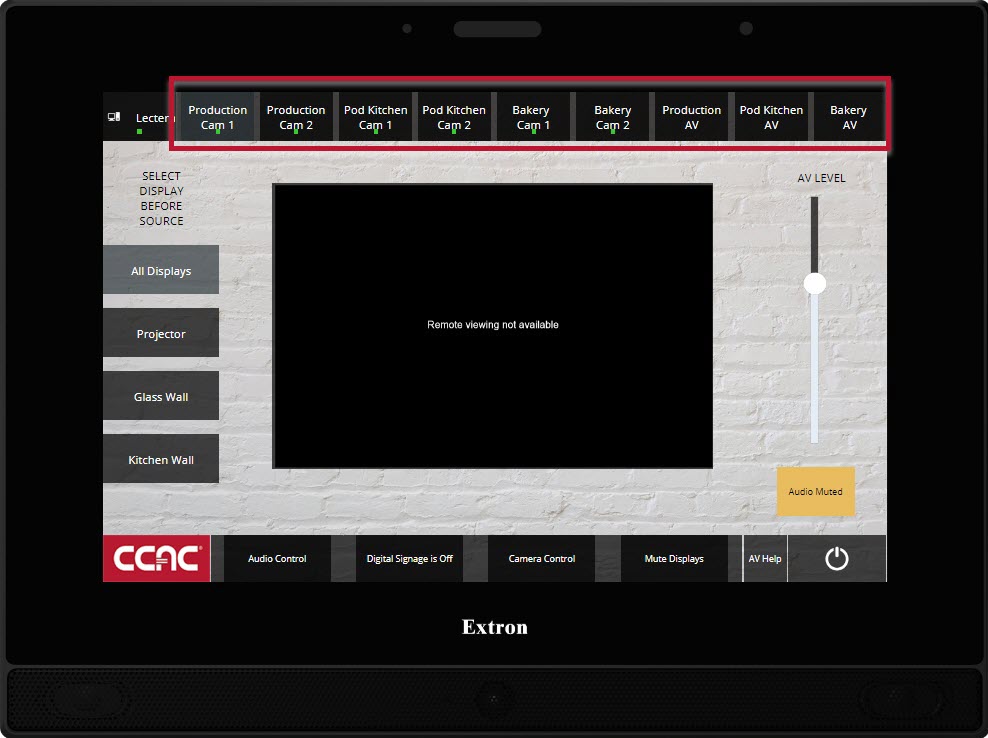
- On the touch panel, select your camera source
Turning Digital Signage On/Off
Info
By default, Digital Signage displays on all the monitors in the Teaching Restaurant until the system is powered on. Once the system is on and your device is connected to the lectern, the images on the monitors switch to whatever is being displayed at the lectern.
You can turn the signage on or off using the touch panel and send it to one, two, or all monitors.
- Press Digital Signage is Off (to turn it on)
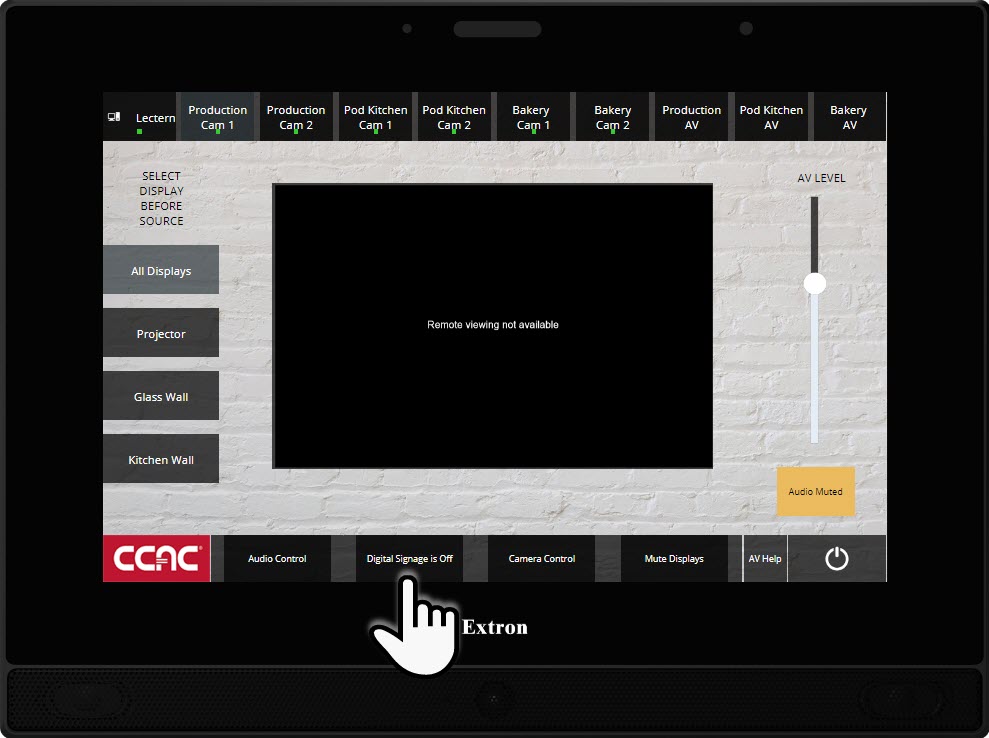
- If you would like to turn Digital Signage off, select Digital Signage is On

Camera Control
Info
Each camera source is set to a default view when selecting it. You can fine-tune the camera's position using the Camera Control button.
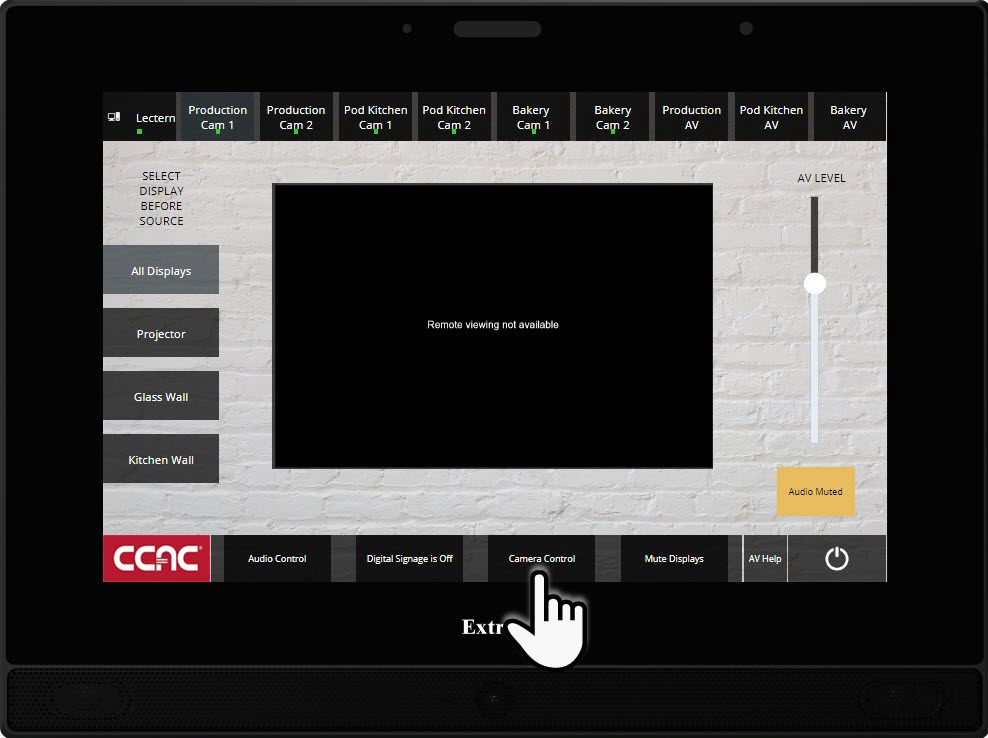
- Select Camera Control
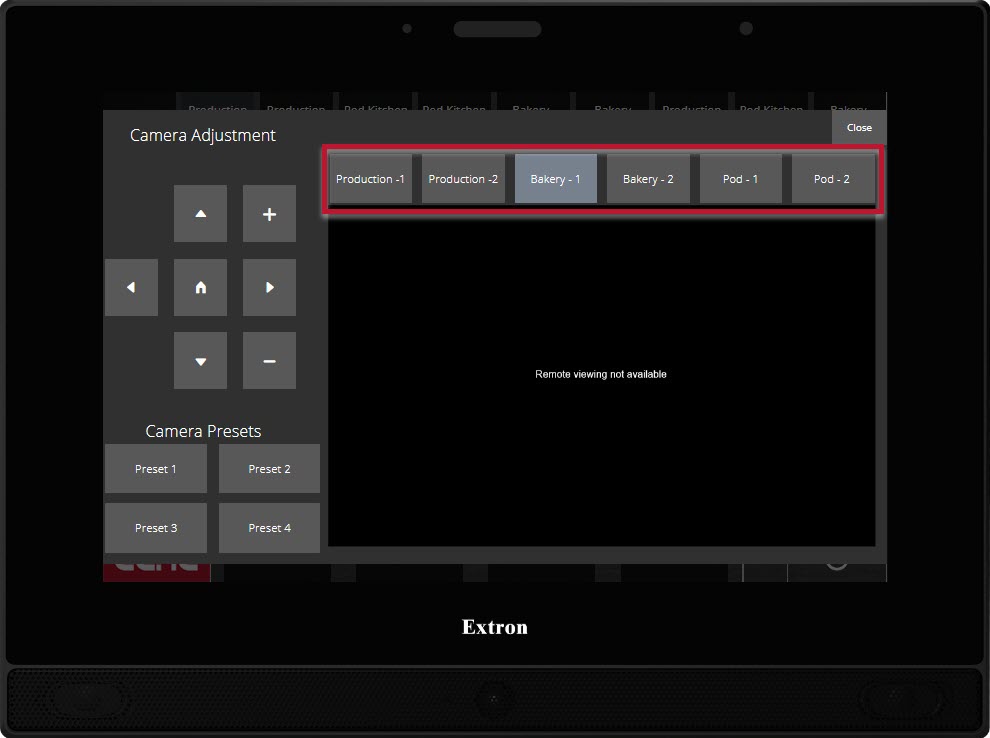
- Choose a camera source that you would like to adjust
- You have four preset camera angles you can choose from
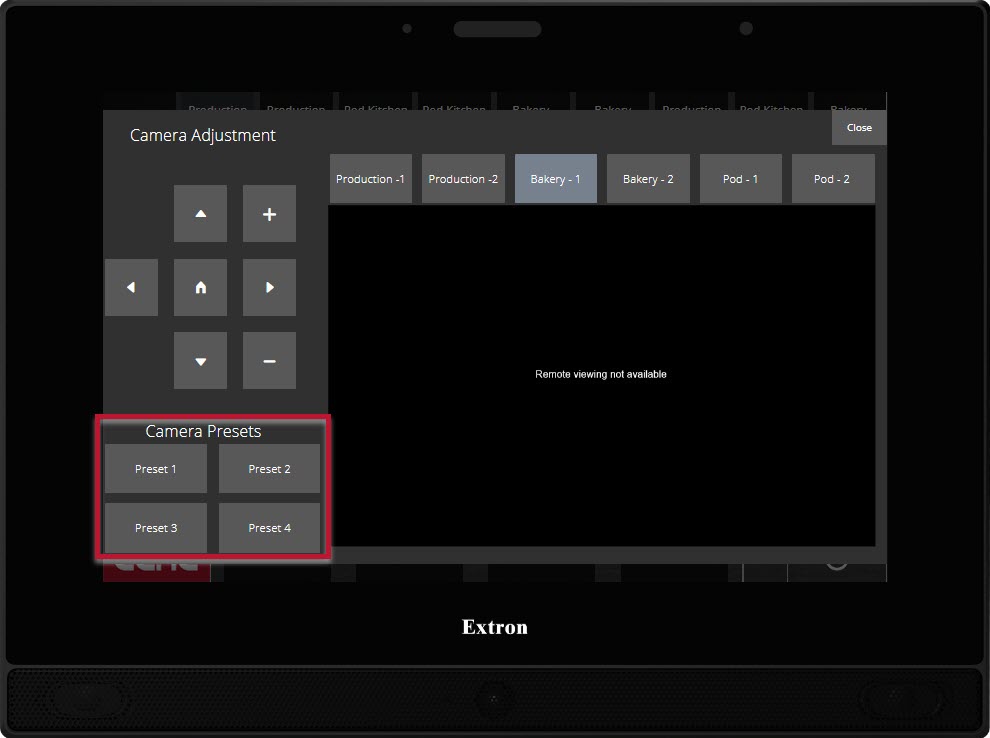
- If you need to fine-tune a camera angle, use the directional arrows to move left, right, up, and down

- Use the + and - buttons to Zoom In or Zoom Out
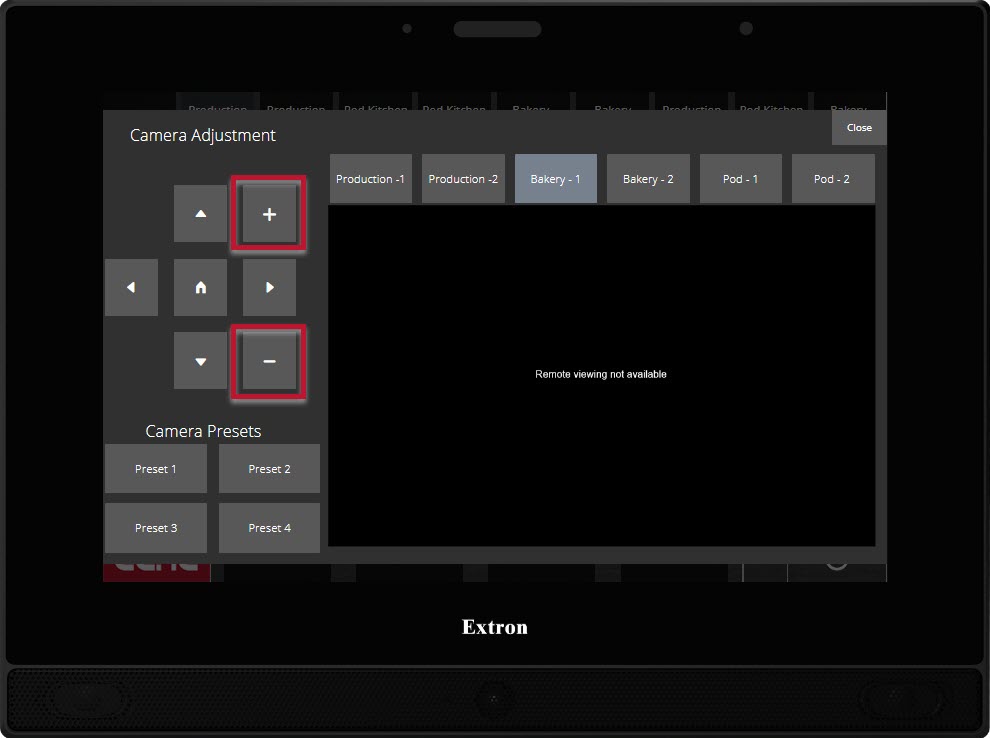
- You can also select the Home button to reset to the default angle

- Select Close to return to the main screen

Hiding/Display Mute using the Touch Panel
Note
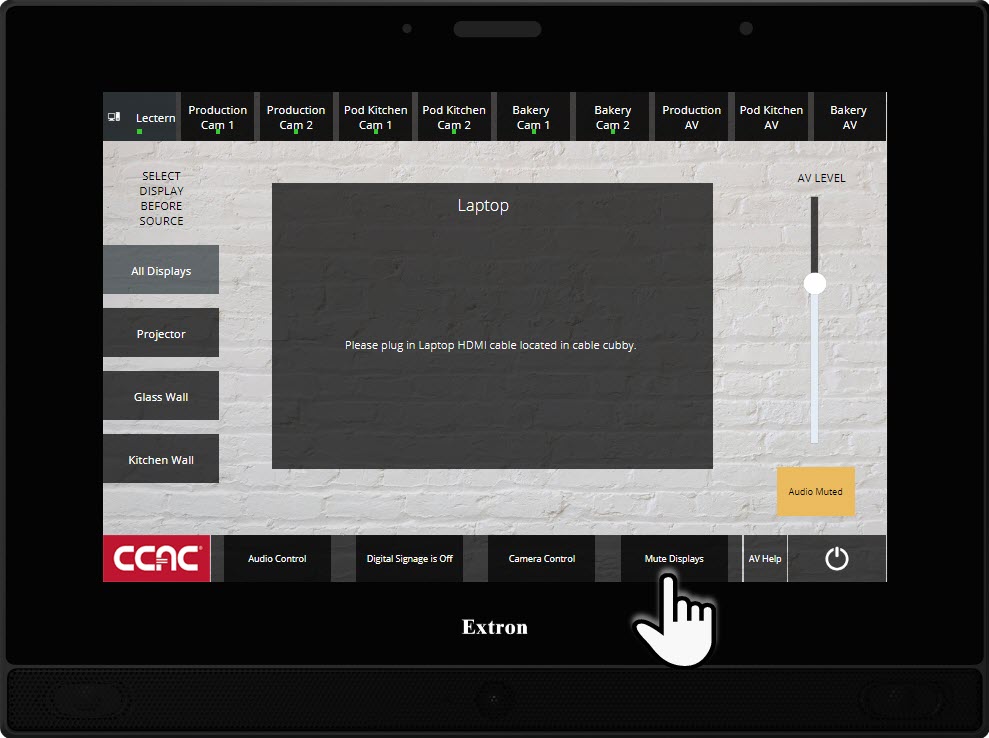
The Mute Displays button will allow you to make the Displays go black. This will hide any content from the class and can be used on any video source selected.
- Press Mute Displays
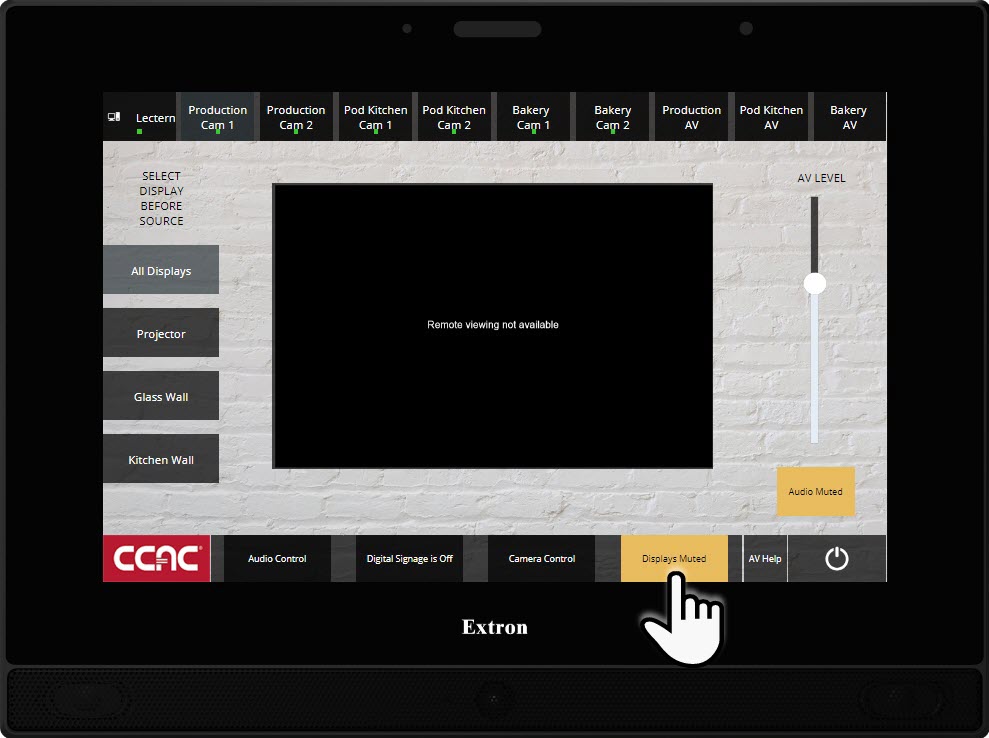
- Press Displays Muted to send content back to the displays
Audio
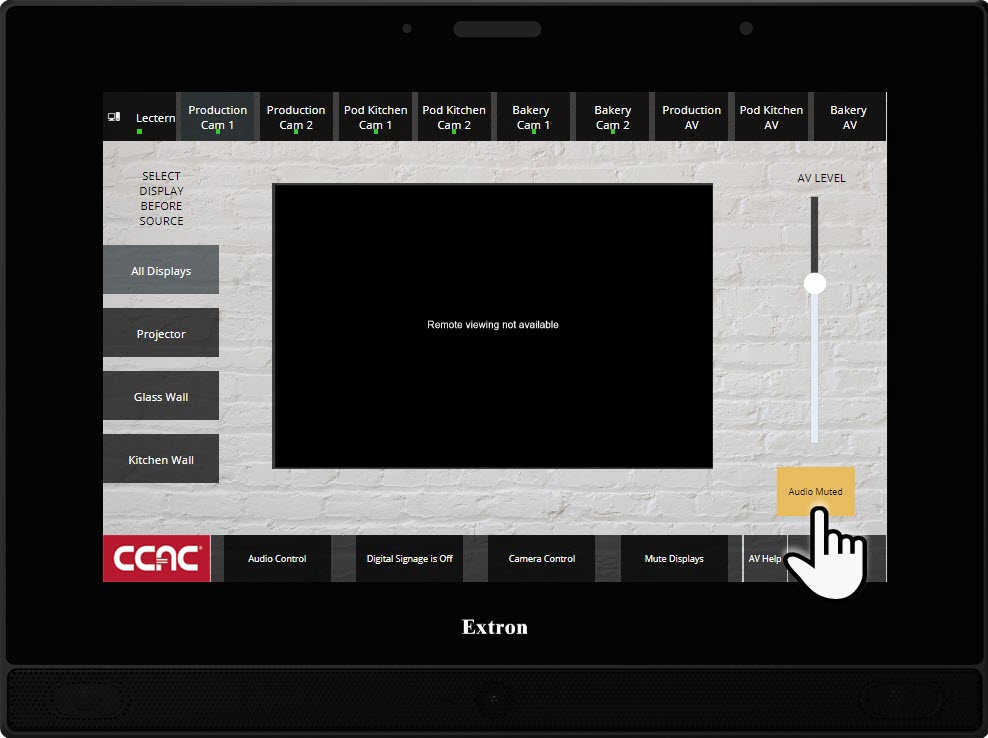
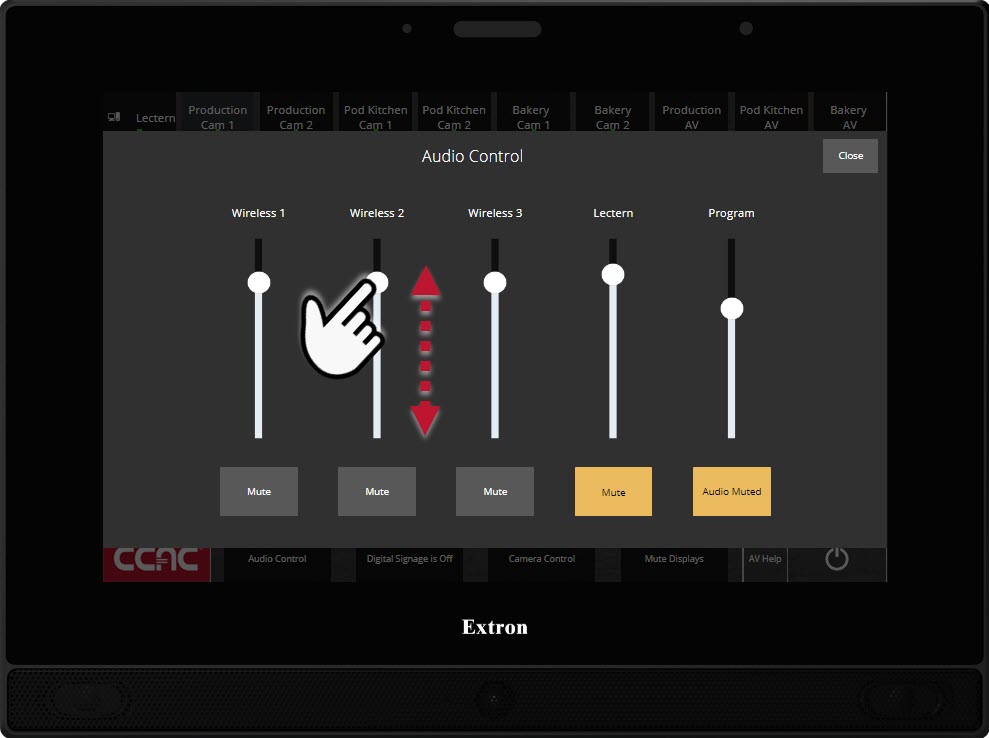
Volume Controls on the Touch Panel
- To adjust the system volume in the room, use the AV Level Slider

- To mute the room audio, press Mute Audio
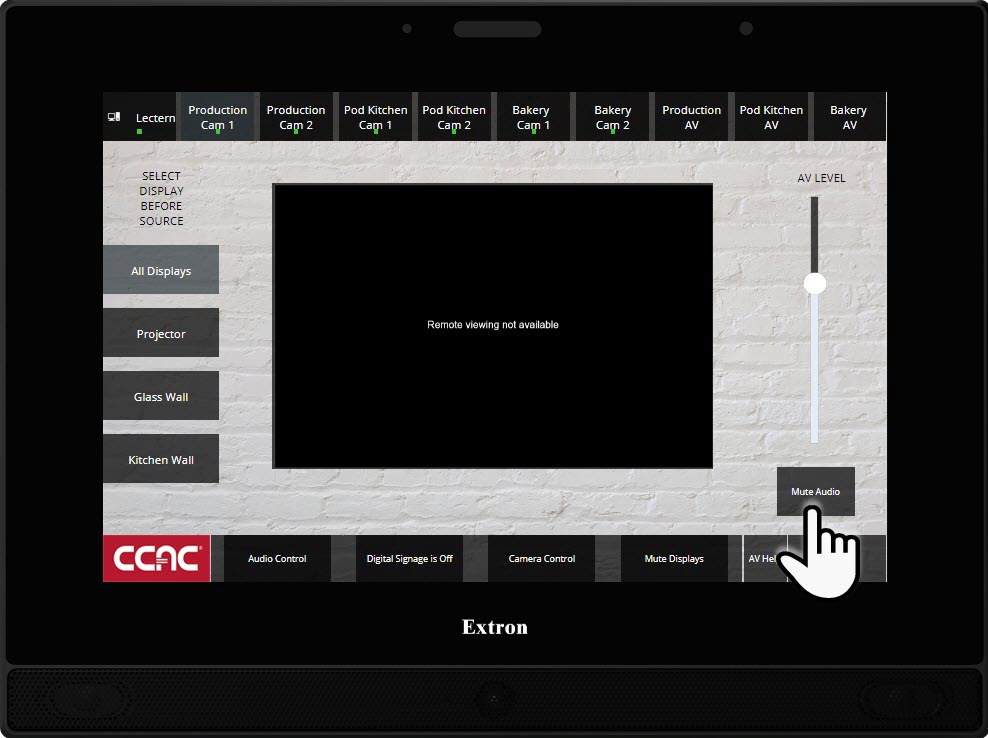
- To unmute the room audio, press Audio Muted
Classroom Phone
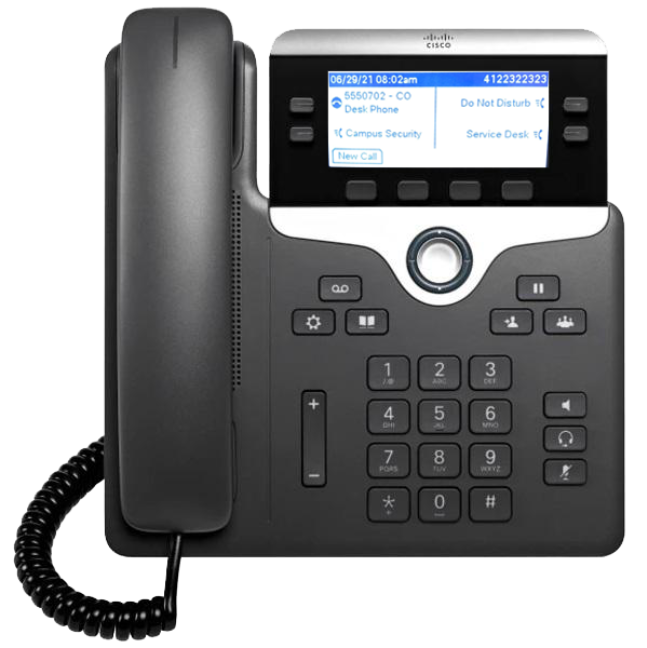
Internal Phone Calls Only
- Your Classroom Number and Extension
- Campus Security Button - Calls your Campus' Security
- ServiceDesk Button - Calls the ITS ServiceDesk
- Do Not Disturb Button - Mutes the phone ringer
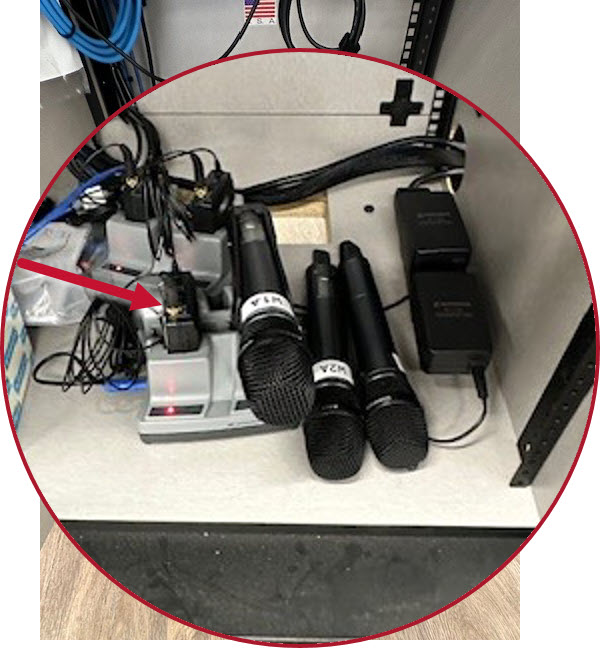
Wireless/Lectern Mics
Note
You will have two wireless mic options. You can find a lapel mic and a hand-held wireless mic located in the charging station. You can use up to three wireless mics at a time in any combination as long as they are not using the same channel.
The AV Level controls the room sound coming from the speakers.
Wireless Microphone
Note
This system will allow for the simultaneous use of three wireless mics. It can be any combination of one lapel and two handhelds, or three lapels or three handhelds. You will not, however, be able to use one wireless labeled lapel 1 and handheld 1. You would need to make sure you are not using two wireless mics on the same channel.
A successful example would be Lapel 1 and Handheld 2, or Lapel 1, Lapel 2, and Handheld 3.
Lapel 1 and Handheld 1 will not work together.
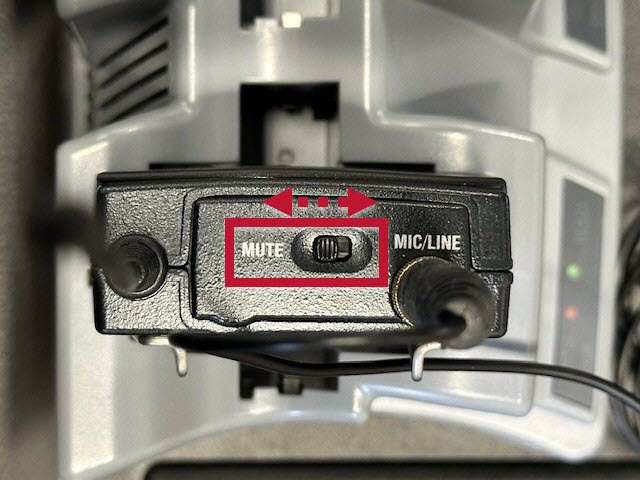
Lapel Microphones
Info
These instructions detail the process of using the touch panel to mute/unmute the microphone. The system mutes the microphones by default. It's important to note that there is also a mute button on the microphone itself.
You can toggle mute left for a quick pause. Toggle right to unmute.
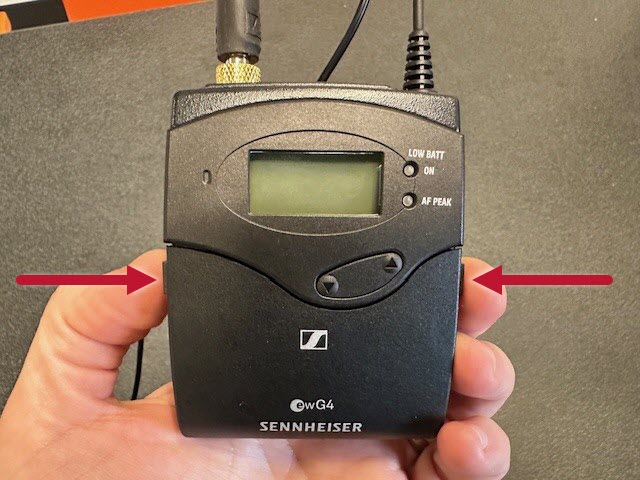
- Remove the lapel mic(s) from the charging base (located inside the lectern)
- Press the side tabs on the left and right of the pack to open the cover
- Press the power button
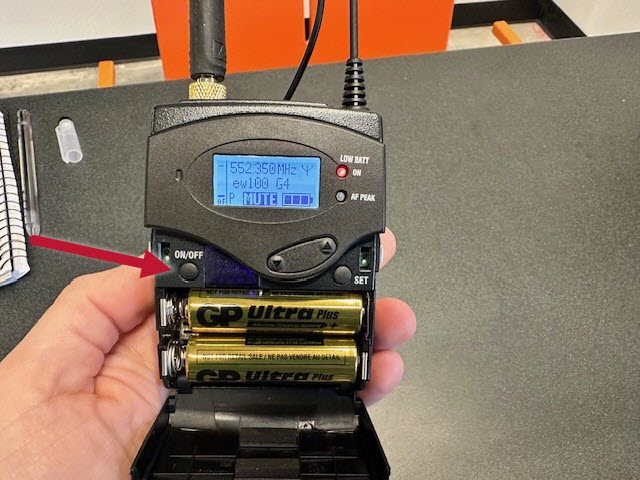
- Close the cover
- Attach the mic and pack to yourself securely
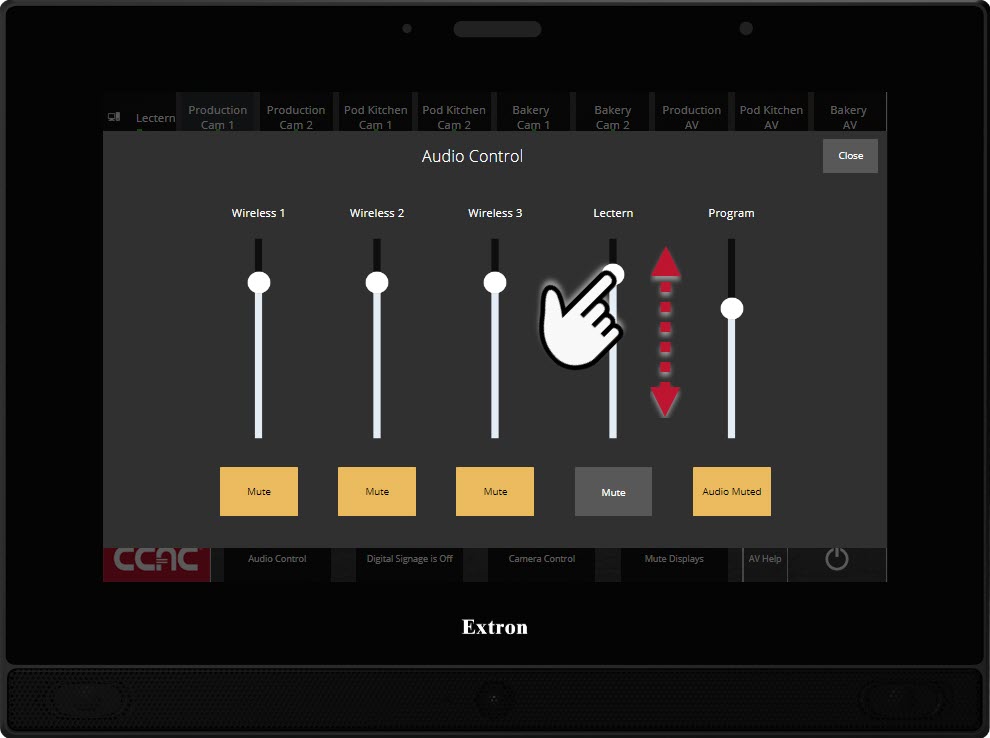
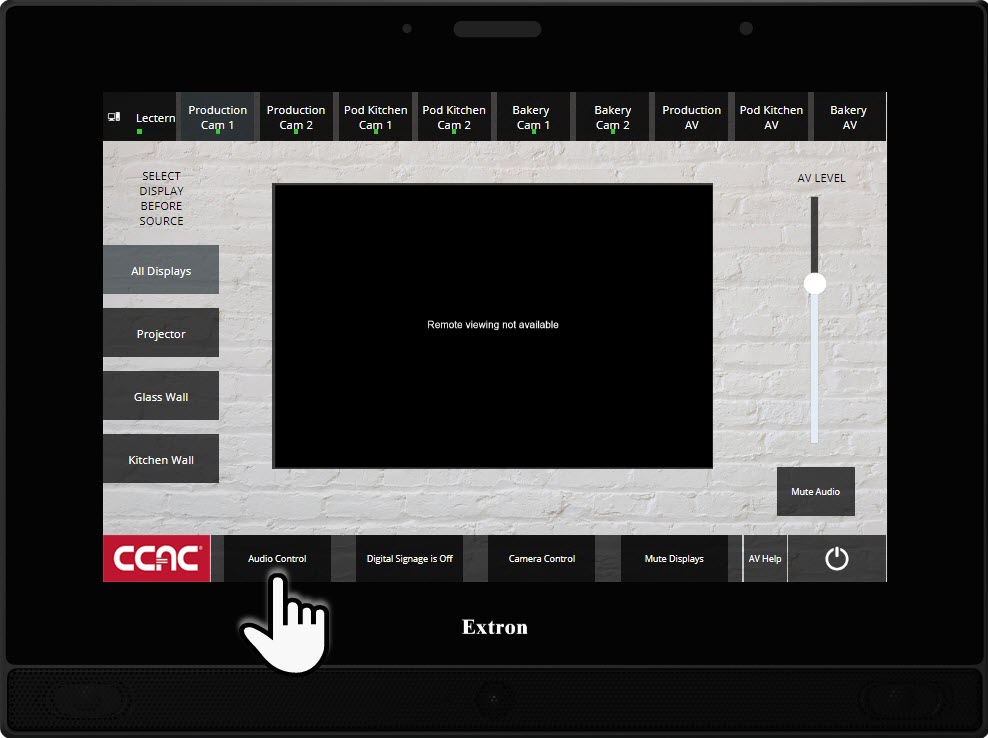
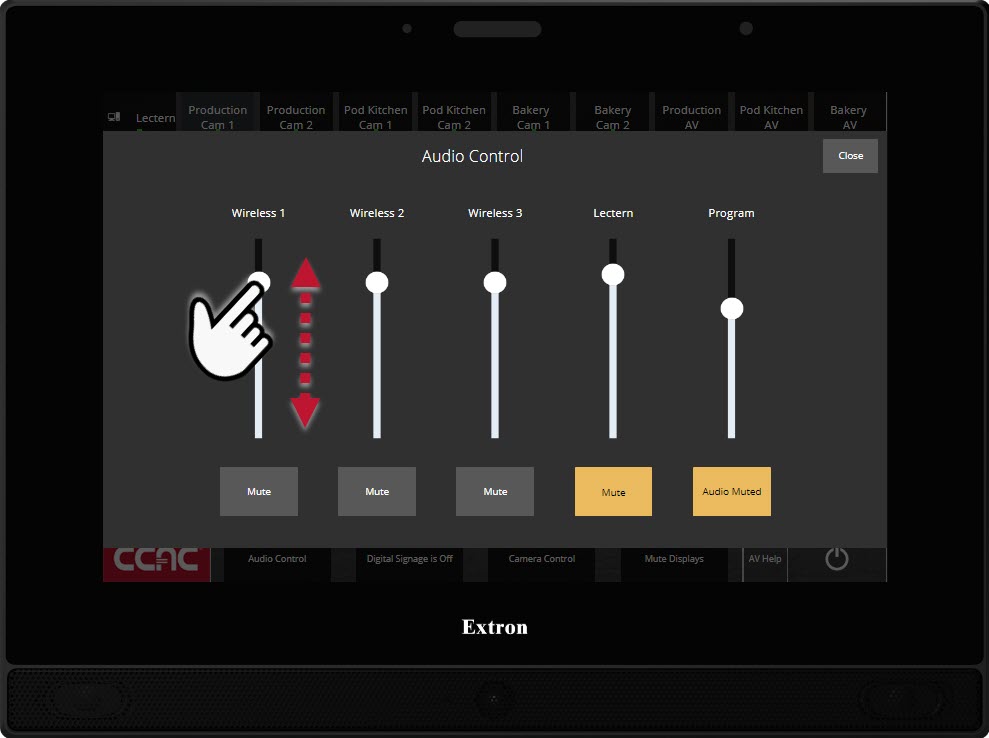
- On the touch panel, select Audio Control
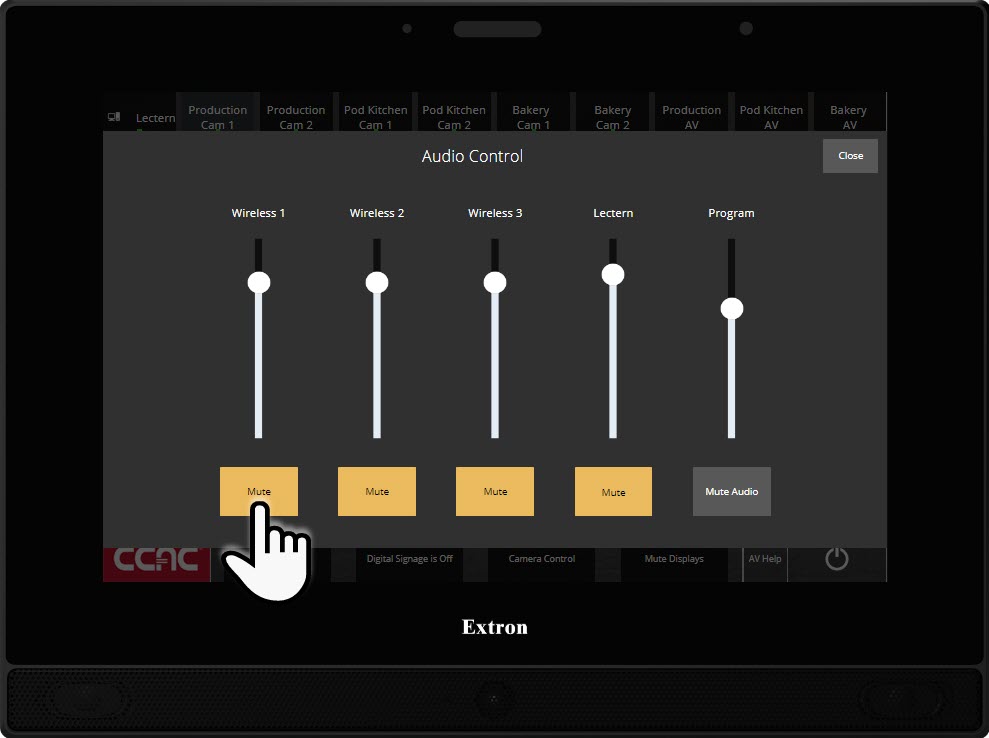
- The mic is muted by default; press Mute to Unmute (check your mic for the correct channel number)
- Adjust the volume using the slider as necessary
- When finished, return the mic to the charger

Hand-held Microphones
Info
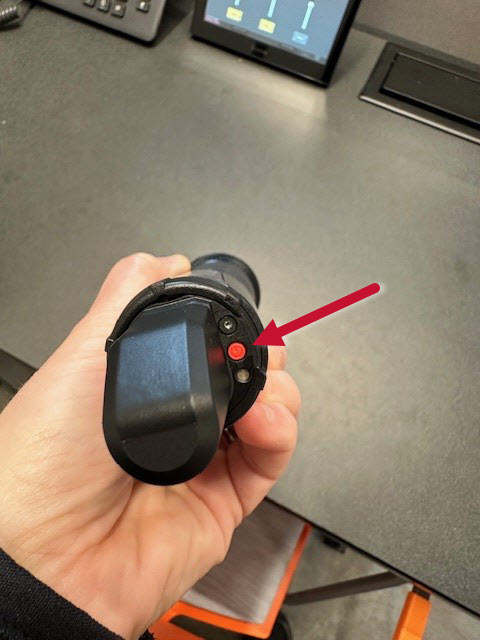
These instructions detail the process of using the touch panel to mute/unmute the microphone. The system mutes the microphones by default. It's important to note that there is also a mute button on the microphone itself.
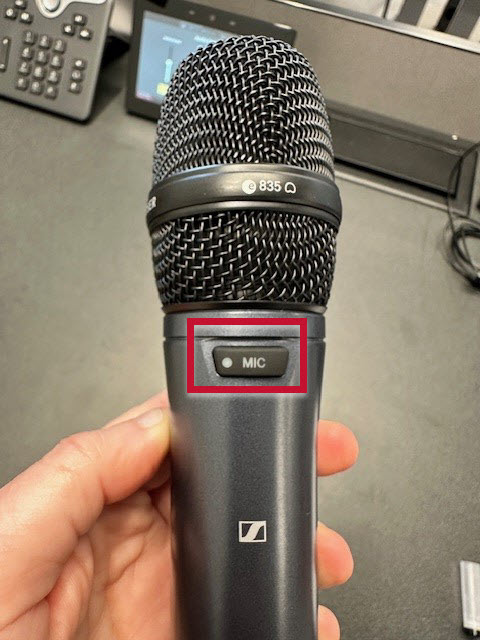
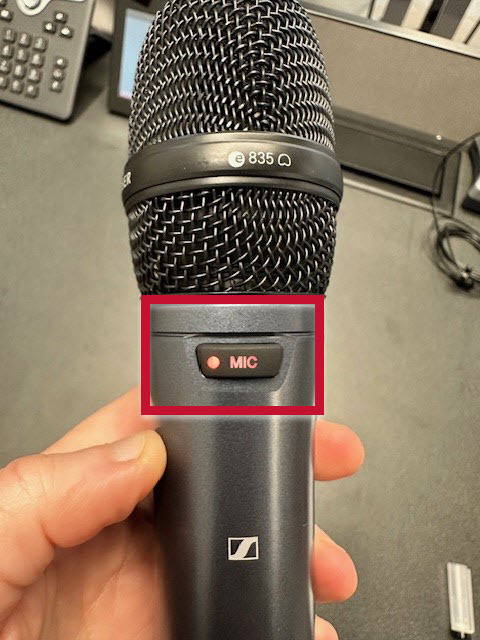
You can press MIC (no light) for a quick pause. Press again to unmute (turns red).
- Remove the handheld mic from the charging base located inside the lectern cabinet
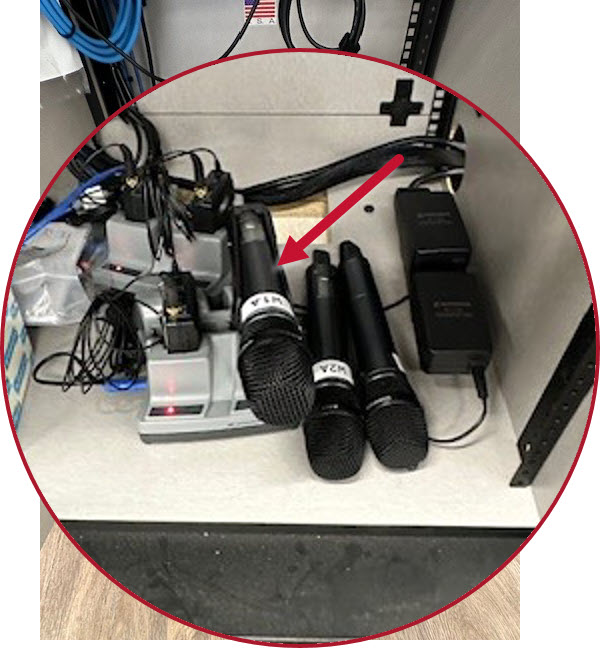
- On the bottom of the mic, press the power button
- On the touch panel, select Audio Control

- The mic is muted by default; press Mute to Unmute (check your mic for the correct channel number)
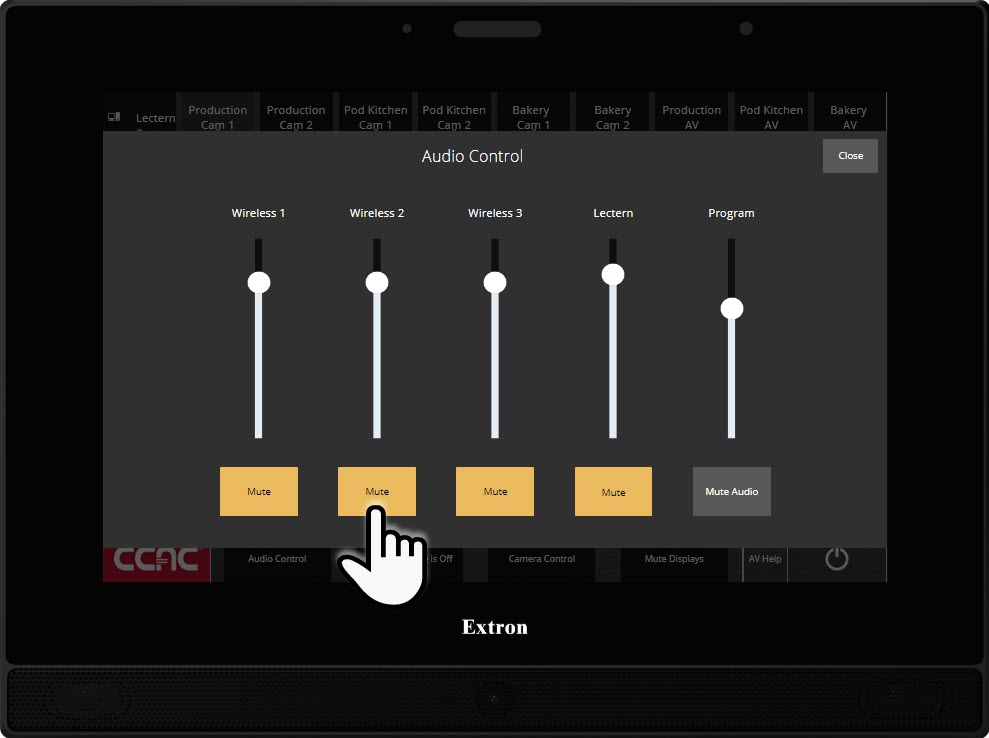
- Adjust the volume using the slider as necessary
- When finished, return the mic to the charger

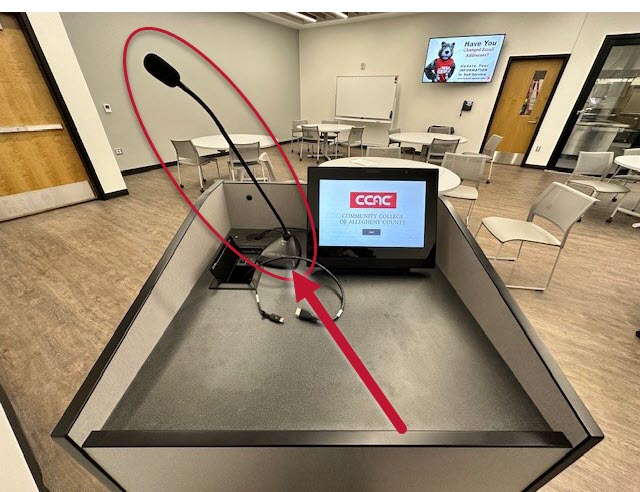
Lectern Microphone
Info
These instructions detail the process of using the touch panel to mute/unmute the microphone. The system mutes the microphones by default. It's important to note that there is also a mute button on the microphone itself.
You can push to mute for a quick pause.
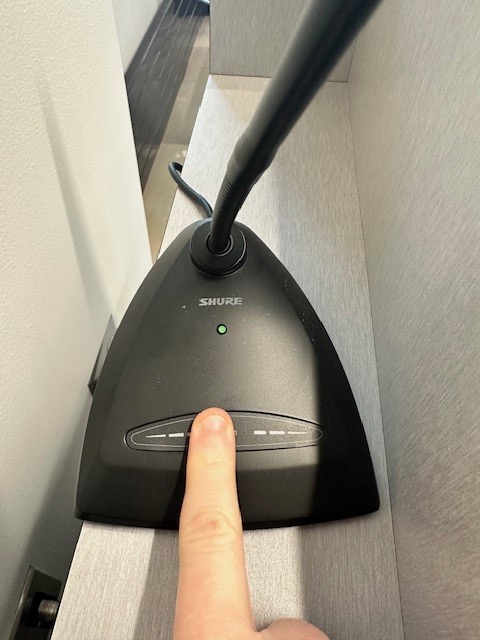
- Locate the Lectern mic
- On the touch panel, select Audio Control

- The mic is muted by default; press Mute to Unmute
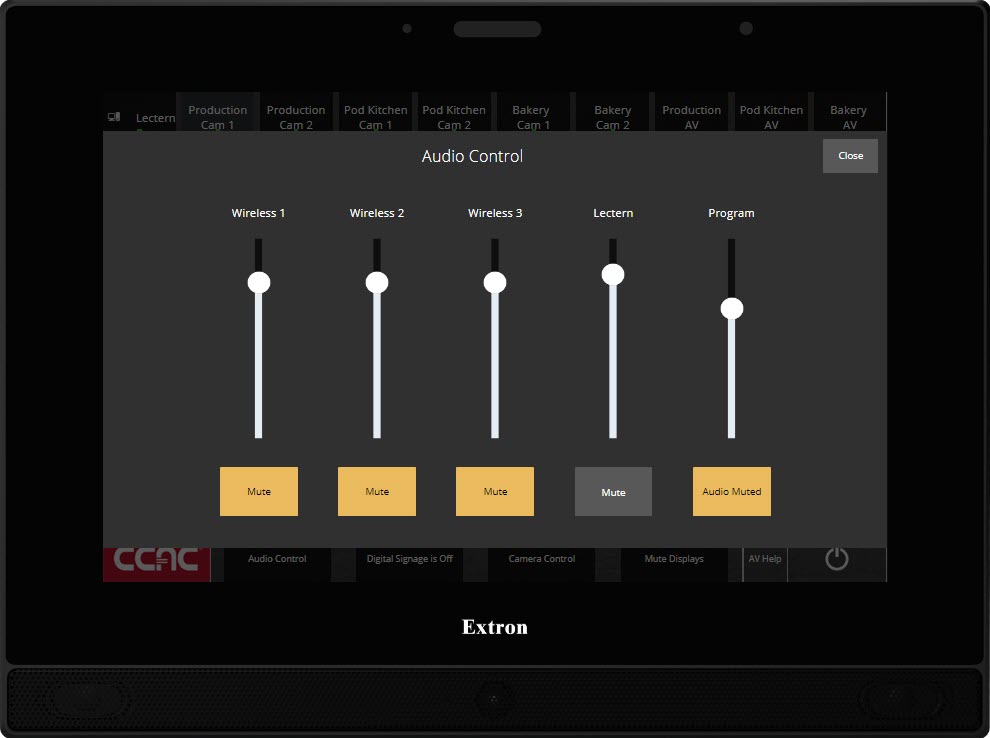
- Adjust the volume using the slider as necessary