Personal Device
Display a Personal Device (BYOD) in an ITech Classroom with Button Controls
- Locate the Cable Cubby on the instructors' desk
- Locate the HDMI and USB cables
- The USB allows for touch interaction between your device and the Interactive Touch Display

- The USB allows for touch interaction between your device and the Interactive Touch Display
- Plug both cables in the personal device

- Locate the Button Panel on the instructors' desk
- Press the LAPTOP button

- The HDMI connected device will appear on the Interactive Touch Display
Connecting a USB Drive in an ITech Classroom with Button Panel
- On the left side of the Computer monitor, there are 2 USB ports

Additional Port - Instructor PC
- On the front of the instructor's computer, there is 1 USB port

Additional Port - Interactive Touch Display - Front
- On the front of the display on the right side, there are 2 USB ports

Additional Port - Interactive Touch Display - Back Side
- On the right side, behind the screen of the interactive touch display, there are 3 USB ports

Instructional Software
EasiNote Guide - Endless Whiteboard - Getting Started
Table of Contents
Opening and Starting to use EasiNoteDrawing on the boardErasing the DrawingUsing the Discipline specific toolsAdjusting the Canvas sizeOpening and Starting to use EasiNote 
- Locate EasiNote in the Programs list
- It may be called "Note"
- Locate the icon on the desktop
Drawing on the board
- From within EasiNote
- Tap the Pencil Icon
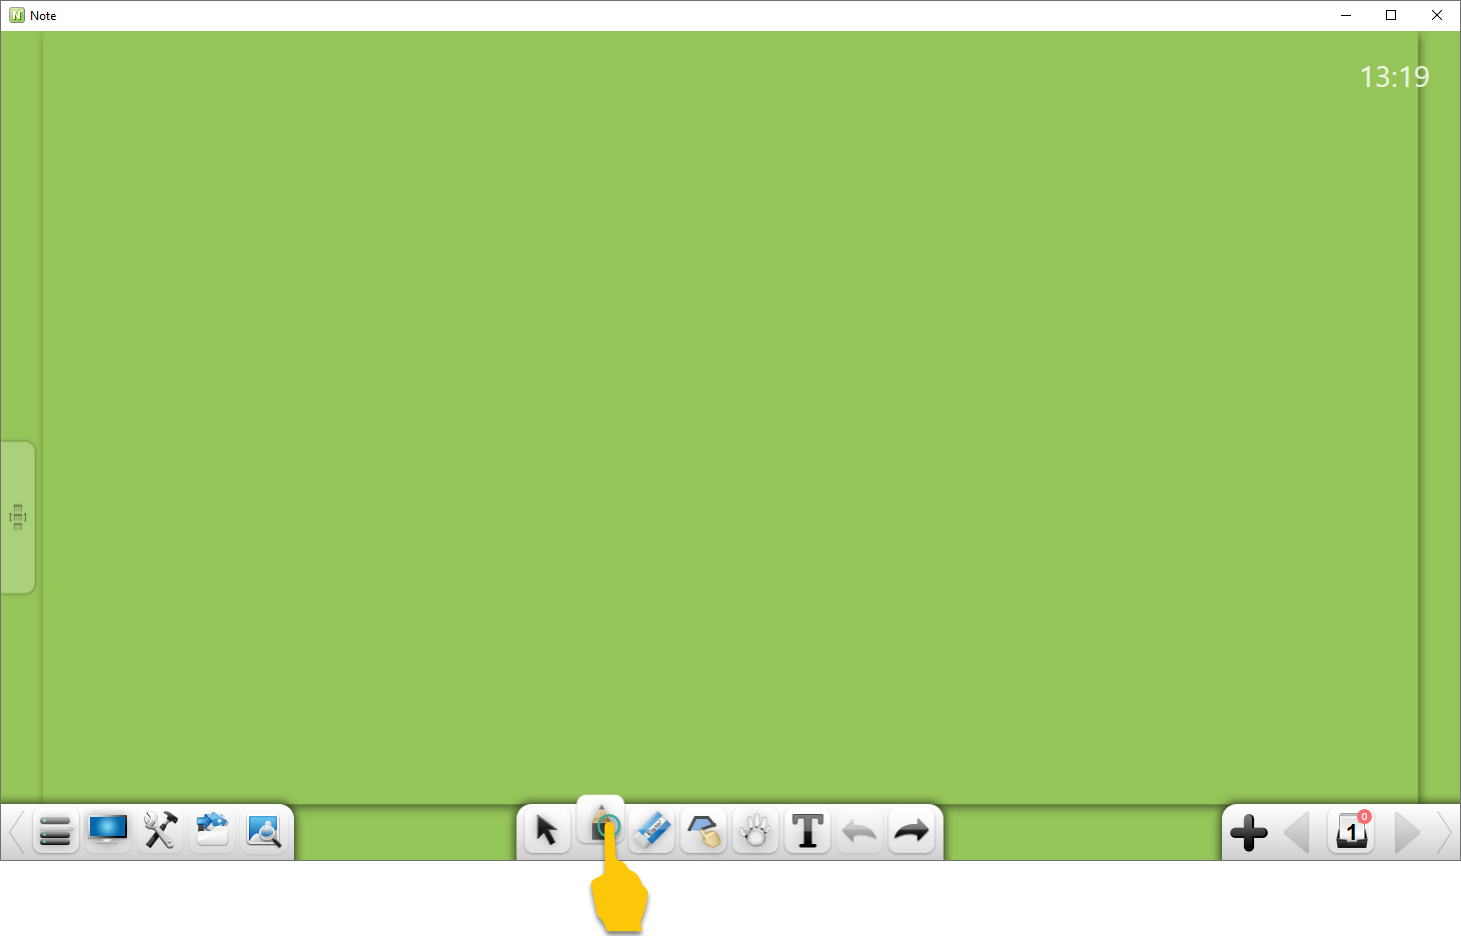
- Tap the Pencil Icon again to display settings
- Change the drawing type
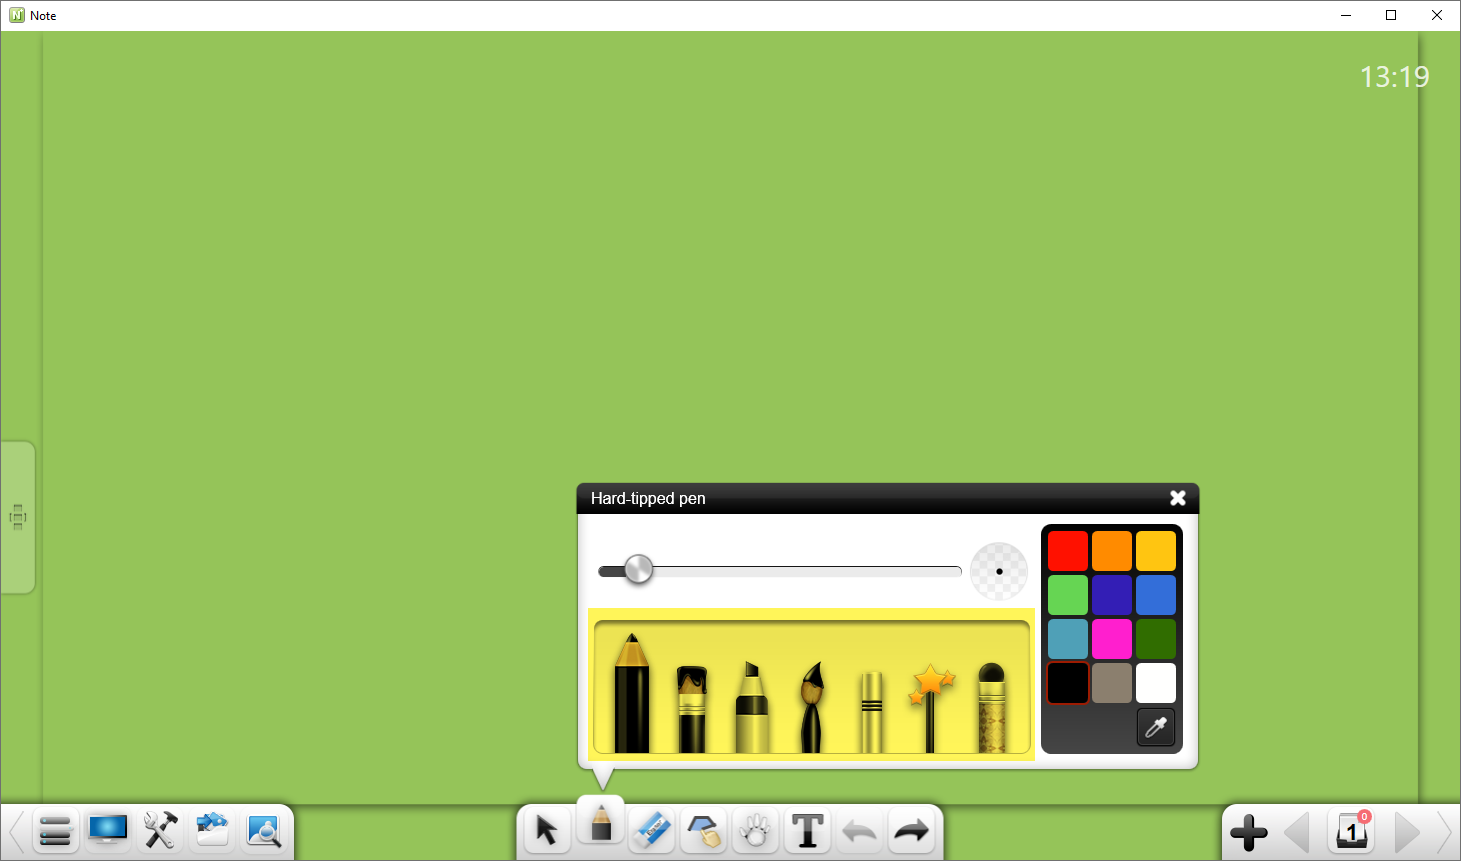
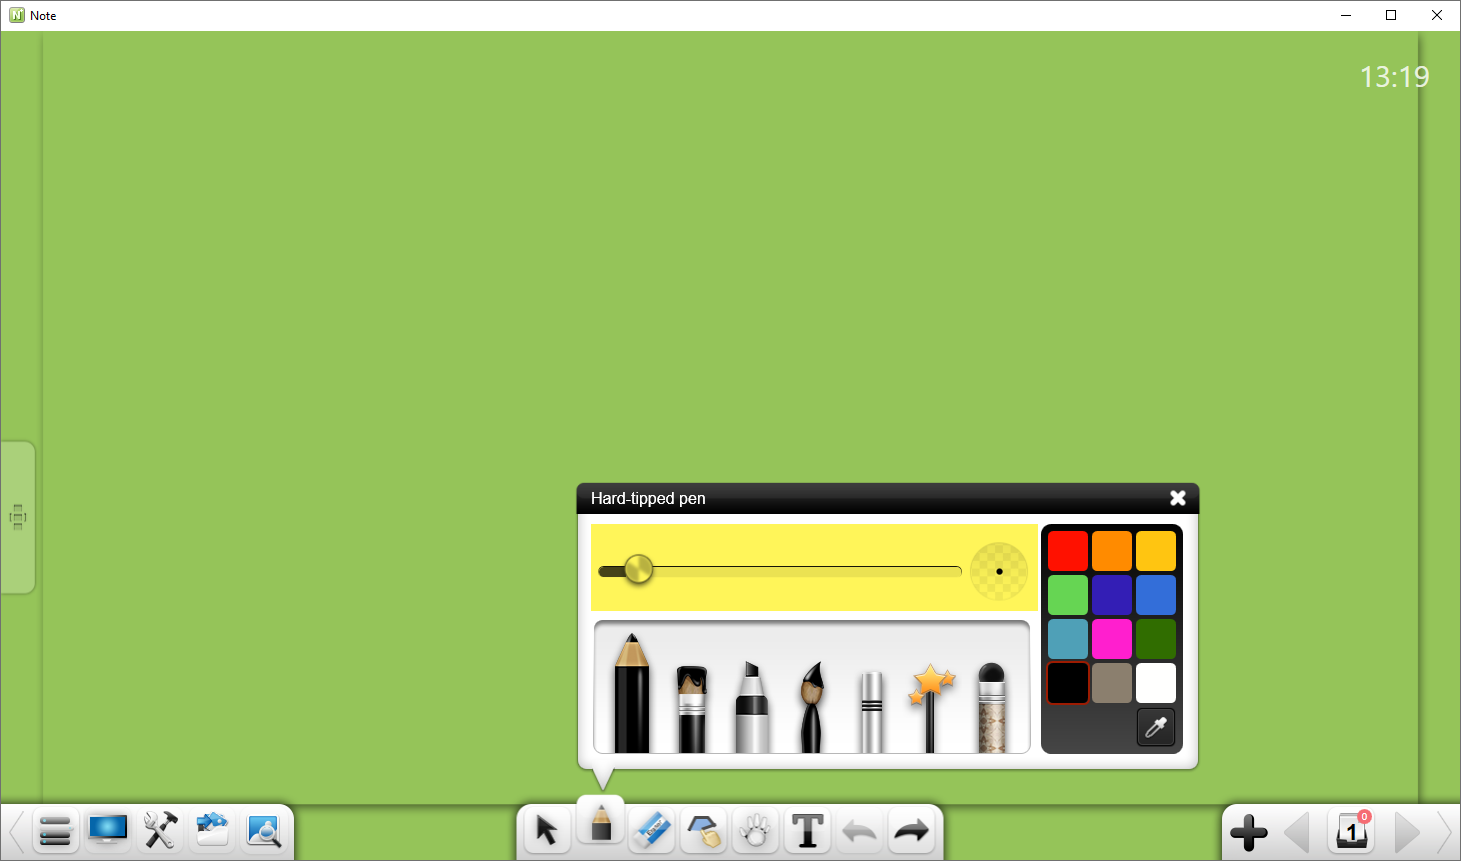
- Change the size
- Change the color
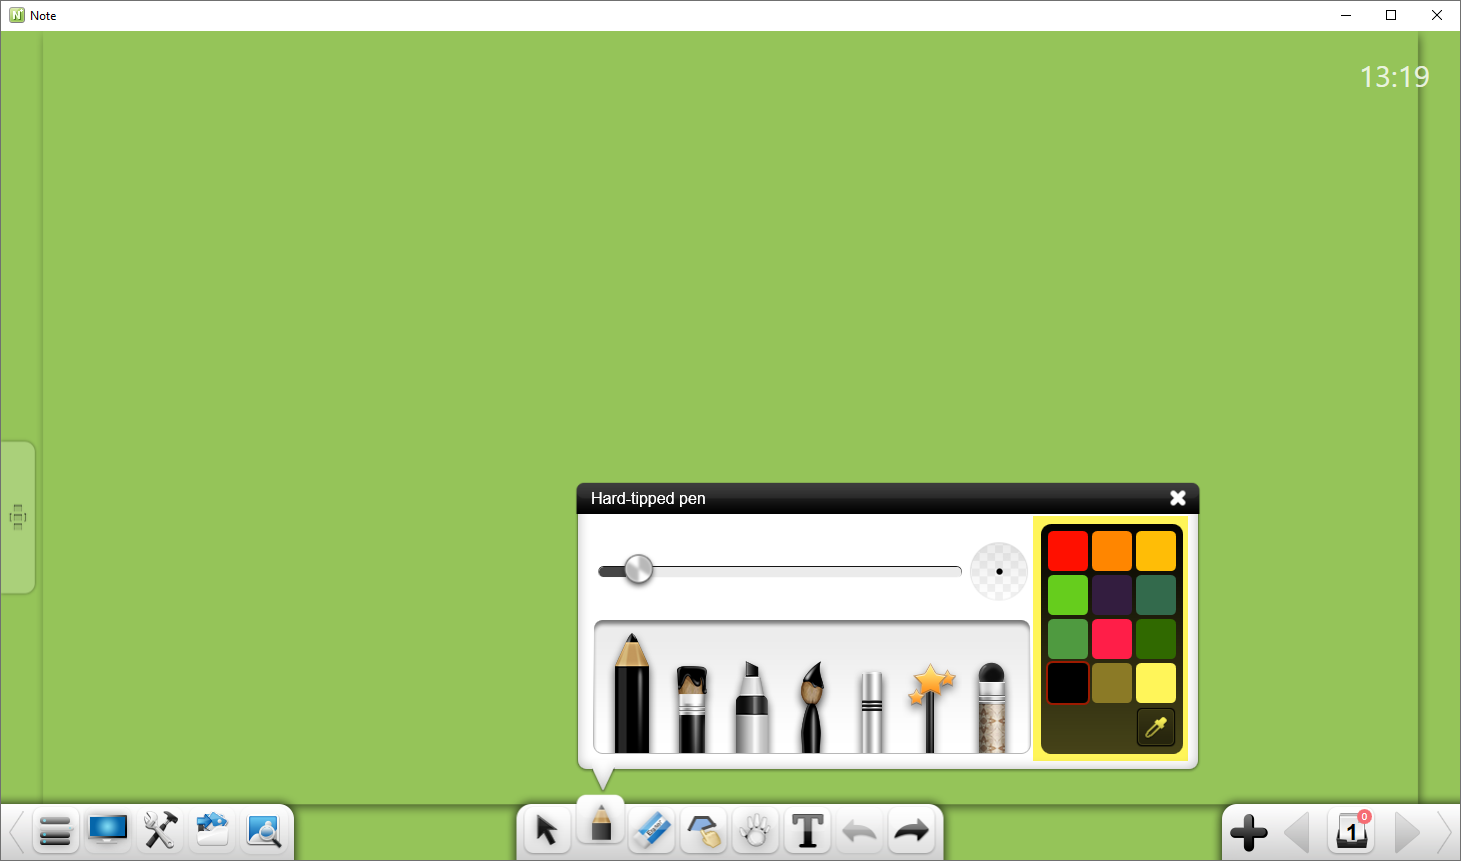
- Change the drawing type
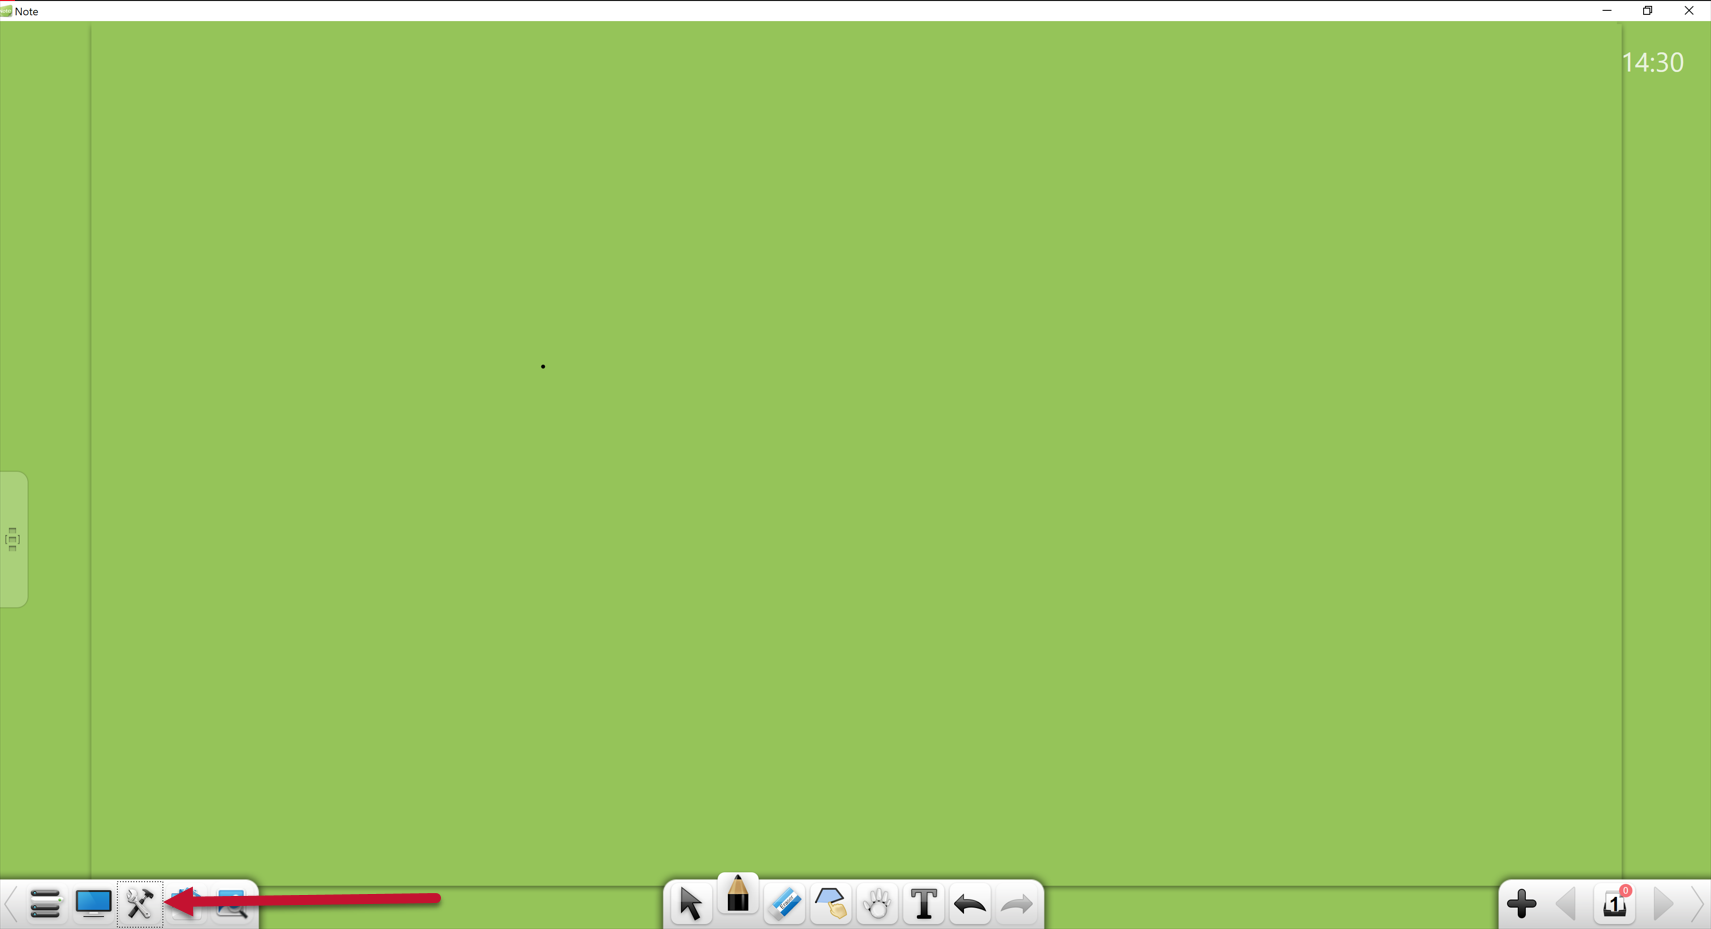
- Begin drawing on the screen
Erasing the Drawing
- From within EasiNote
- Tap the Eraser Icon

- Begin to erase where you need to erase

Using the Discipline specific tools
- From within EasiNote
- Tap the Treasure Box icon

- Choose the Subject or Disciple to see the options

Adjusting the Canvas size
- From within EasiNote
- Tap the Hand Icon

- Choose to Zoom or Move the canvas

- To Zoom:
- Pinch In to Zoom In

- Pinch Out to Zoom Out

- Pinch In to Zoom In
- To Move Around:
- Tap the screen and drag your hand to move the canvas

- Tap the screen and drag your hand to move the canvas
- To Zoom:
Collage Guide - Screen Sharing - Getting Started
 Clear Touch Collage is a software application that lets you device share. You can have up to 6 devices to your interactive display. It allows you or your students that have their own device share to the interactive display. There are permission controls give you the ability to manage who is able to connect, share and ability to remove.
How to Turning on Collage to allow for screen sharing
About Collage
Clear Touch Collage is a software application that lets you display up to 9 devices to your interactive display. It enables you to encourage interaction and involvement, where students have their own device. Helpful permission controls give you the ability to manage who is able to connect, ensuring you have the necessary control for keeping everything organized and running smoothly.
Students Will Need:
- Downloading and Installing Collage
- Joining Collage to Screen Share to the Interactive Touch Display
Faculty Will Need:
- The Collage code is on by default (typically, top left of screen)

- Allow the device to display on the screen from the popout menu
- Interacting with Multiple Screen Shares in Collage
- Removing someone's Screen Share capabilities from Collage
Tips and Tricks for Using Collage
How to Join to Collage from a device
iPhone /iPad
Screenshots were taken on iOS 14.3 and App Version 2
- Downloading and Install the Collage App
- Open the Collage App
- You may need to allow access to settings in your phone for Collage to work
- If it is not enabled, you will need to Enable Advanced Code Mode, found in the settings. tap the Gear icon

- Under Advanced code mode, tap the on toggle

- Return back to the main screen

- Enter the code that is on the Interactive Touch Display

- Follow the directions in the Collage app for how to screen share the device
Android
Screenshots were taken on Android OS Version 9, App Build 2.4.0.2894
- Downloading and Install the Collage App
- Open the Collage App
- You may need to allow access to settings in your phone for Collage to work
- If it is not enabled, you will need to Enable Advanced Code Mode, found in the settings. tap the Gear icon

- Tap the toggle for Advance code mode

- Tap the back arrow

- Enter the code that is on the Interactive Touch Display

- Tap the Start button to begin screen sharing

- You may need to name your device, this will appear on the Interactive Touch Display, tap Save

-
Allow the screen capture, click Start Now

Windows Computer
Screenshots were taken on Windows Version 1809, App Build 2.4.0.2163
- Downloading and Install the Collage Application
-
Open the Collage App from the programs list or desktop

- Click the Menu

- Click Settings

- Under Advanced code mode, toggle to ON

- Click the Back option

- Enter the code that is on the Interactive Touch Display

- Click the Start mirroring button

- Adjust the settings if needed

Mac Computer
**Directions Coming Soon**
How to Use Collage with multiple devices connected
While multiple people are screen sharing, you may want to focus on one screen or bring that one screen to attention.
Making 1 Screen Share Full Screen
- From the multiple screen share view, click on the Expand Arrows
 icon for the screen you want to be full screen
- The screen you selected will be full screen
You will also see the Expanded Arrows now has a number indicator

Returning to Multiple Screen View from 1 Screen Share
From the single screen view, you will see the Expand Arrows icon will have a number. This will let you know how many screens are connected
- From the single screen view, click on the Expand Arrows icon

- You will return to the multiple screen view

How to Remove someone and stop screen sharing
- While others are screen sharing, you can click the X in the bottom left of their window to stop their screen sharing.

Alternate way to remove someone's screen
- From the interactive touch display, tap the Collage button.

- This button is floating, it can be moved around the screen
- Tap View the Device List >

- A window will appear with the list of connected devices

- Tap the power button by the device you want to remove

Document Camera
Connecting a Document Camera to an ITech Classroom with Button Panel
- Locate the Cable Cubby on the instructors' desk
- Locate the document camera's cable

- Plug in the cable into the document camera

- The computer will make a device connected noise
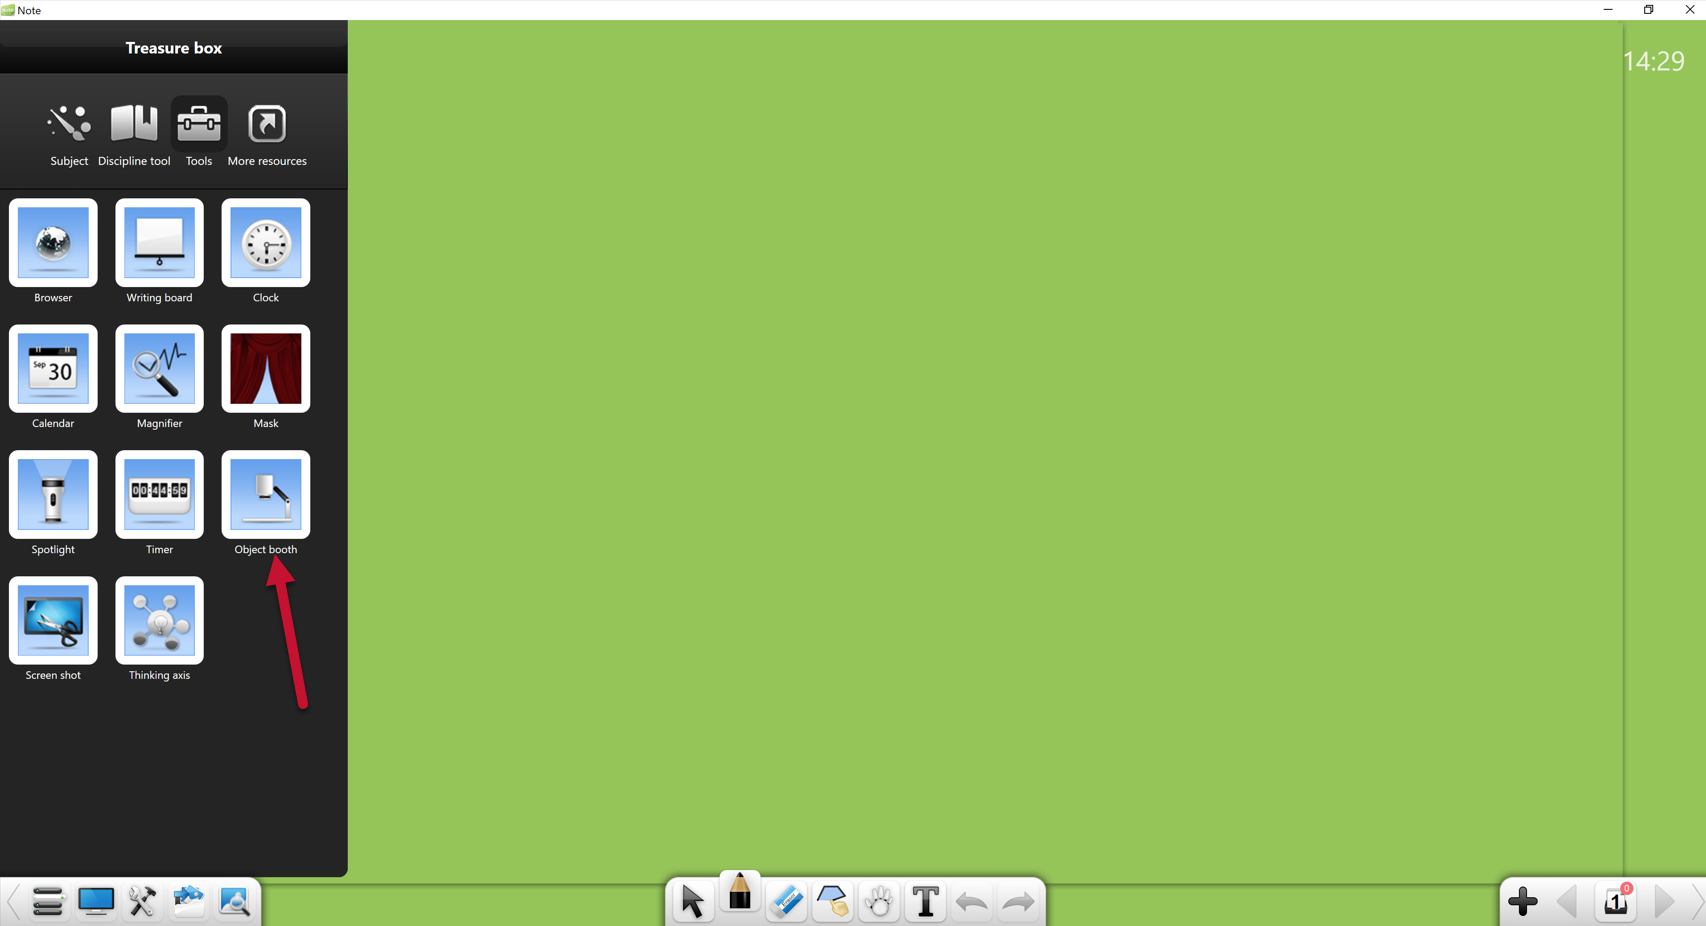
- Open Note program

- Click on the tools icon
- Click Object Booth