Printing from CCAC Computer
Printing From A CCAC Computer
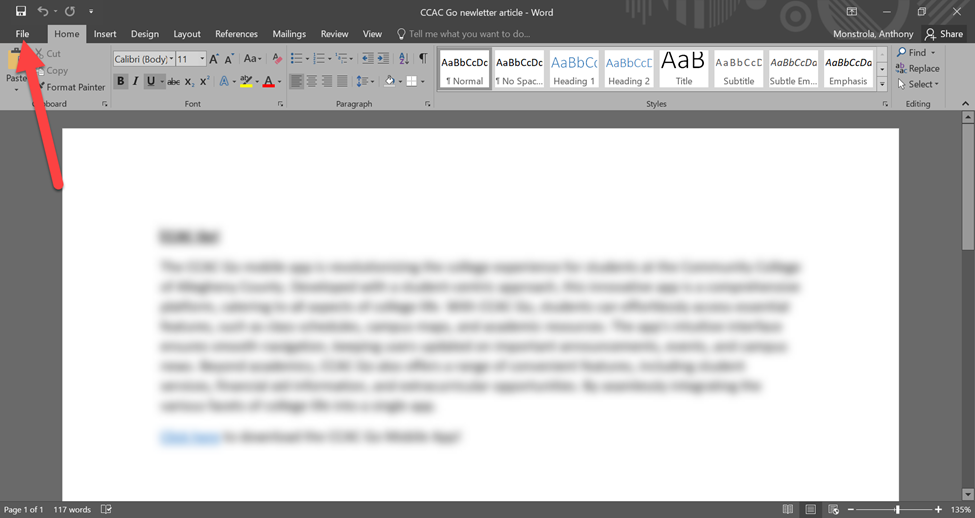
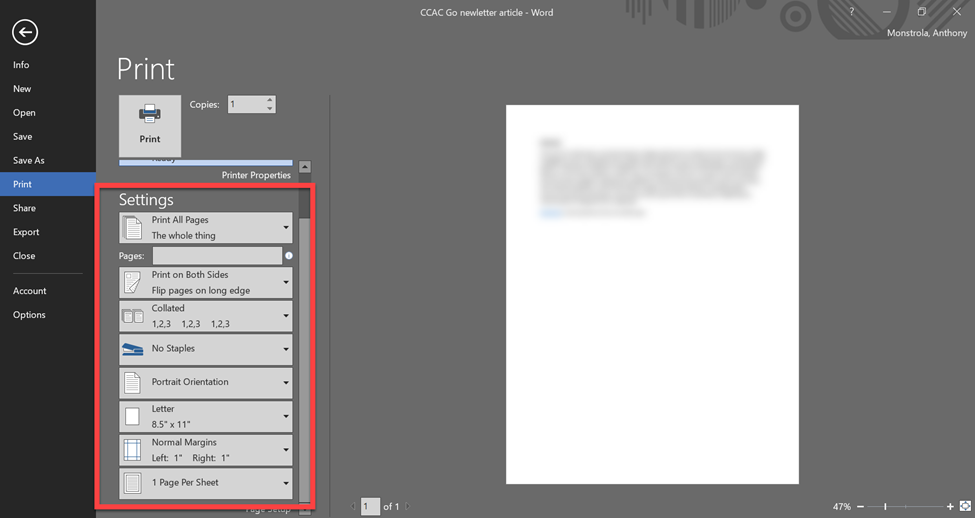
Windows
- Click File

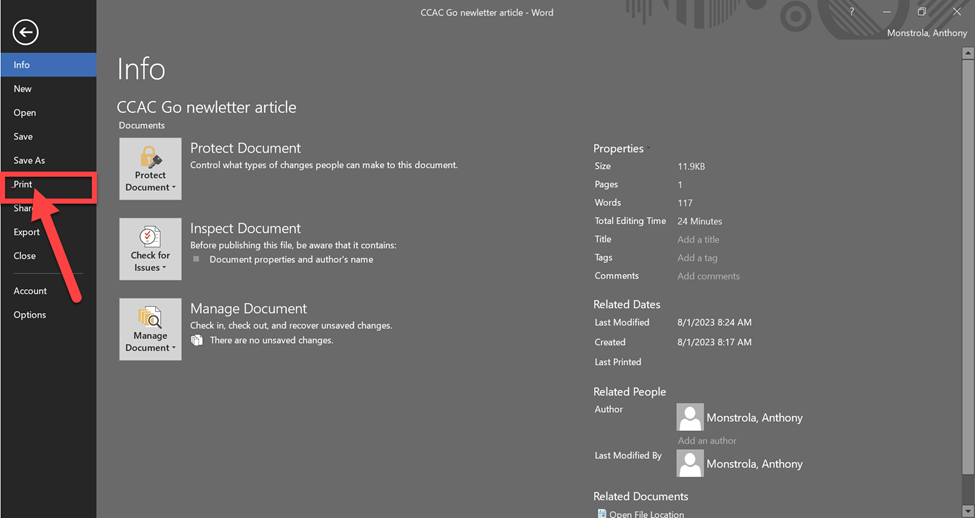
- Click Print

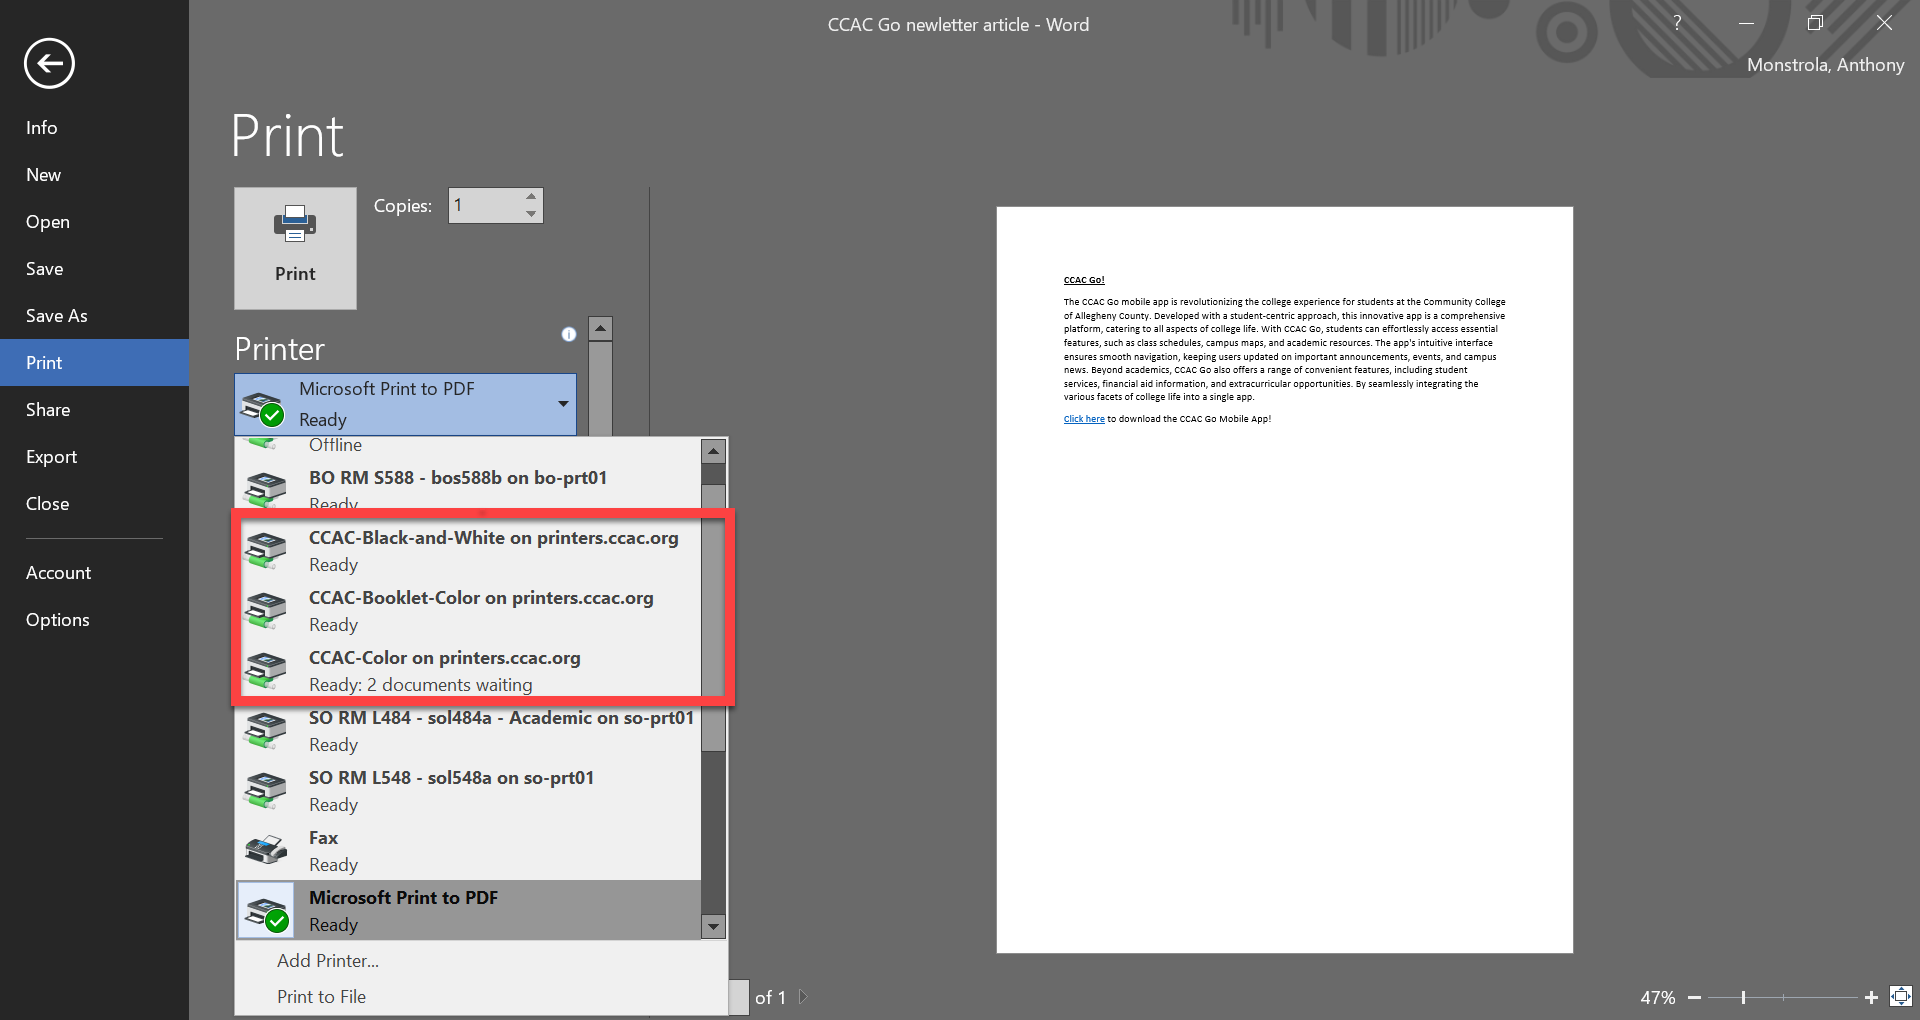
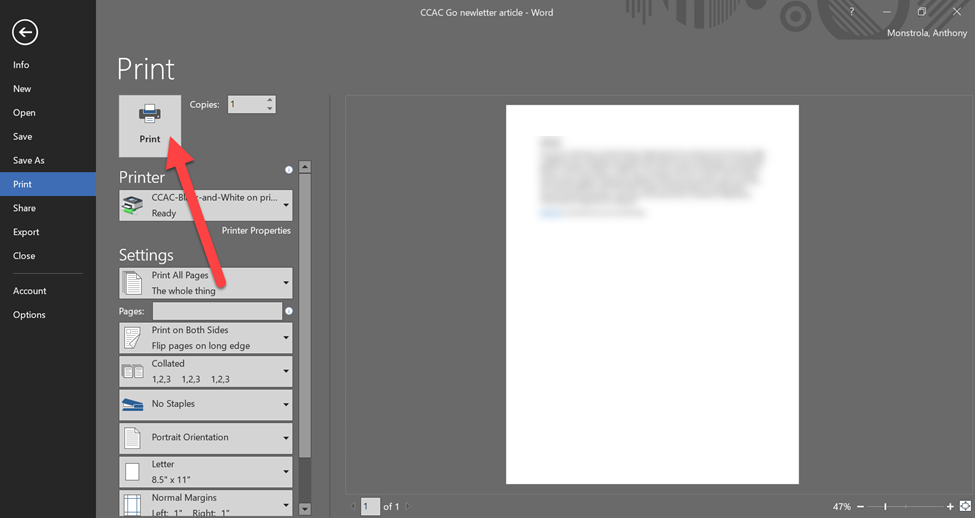
- Select Printer in the drop-down
- CCAC-Black-and-White on printers.ccac.org
- CCAC-Color on printers.ccac.org
- CCAC-Booklet-Color on printers.ccac.org (only certain users will see this option)
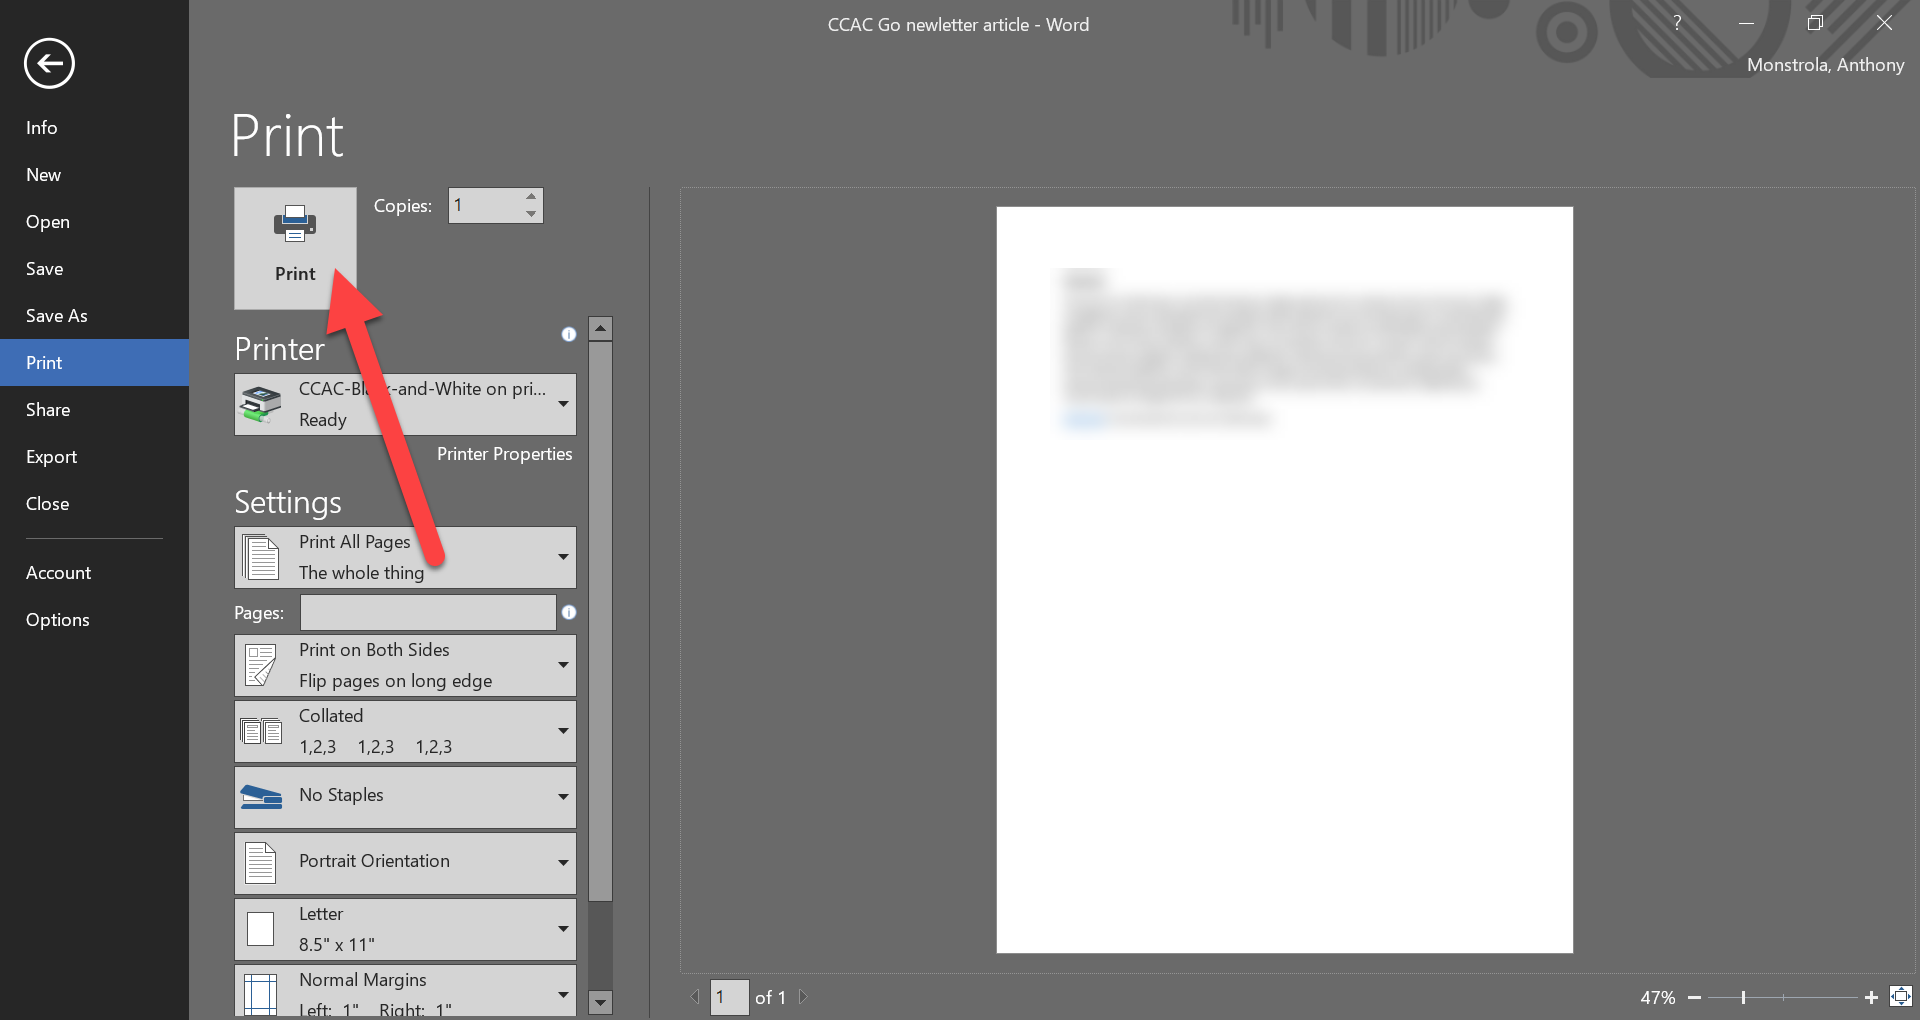
- Adjust other printer settings to your needs

- Click Print
- After clicking print, your print job will be in a queue
- You will have to physically walk to the printer to release the job
MAC
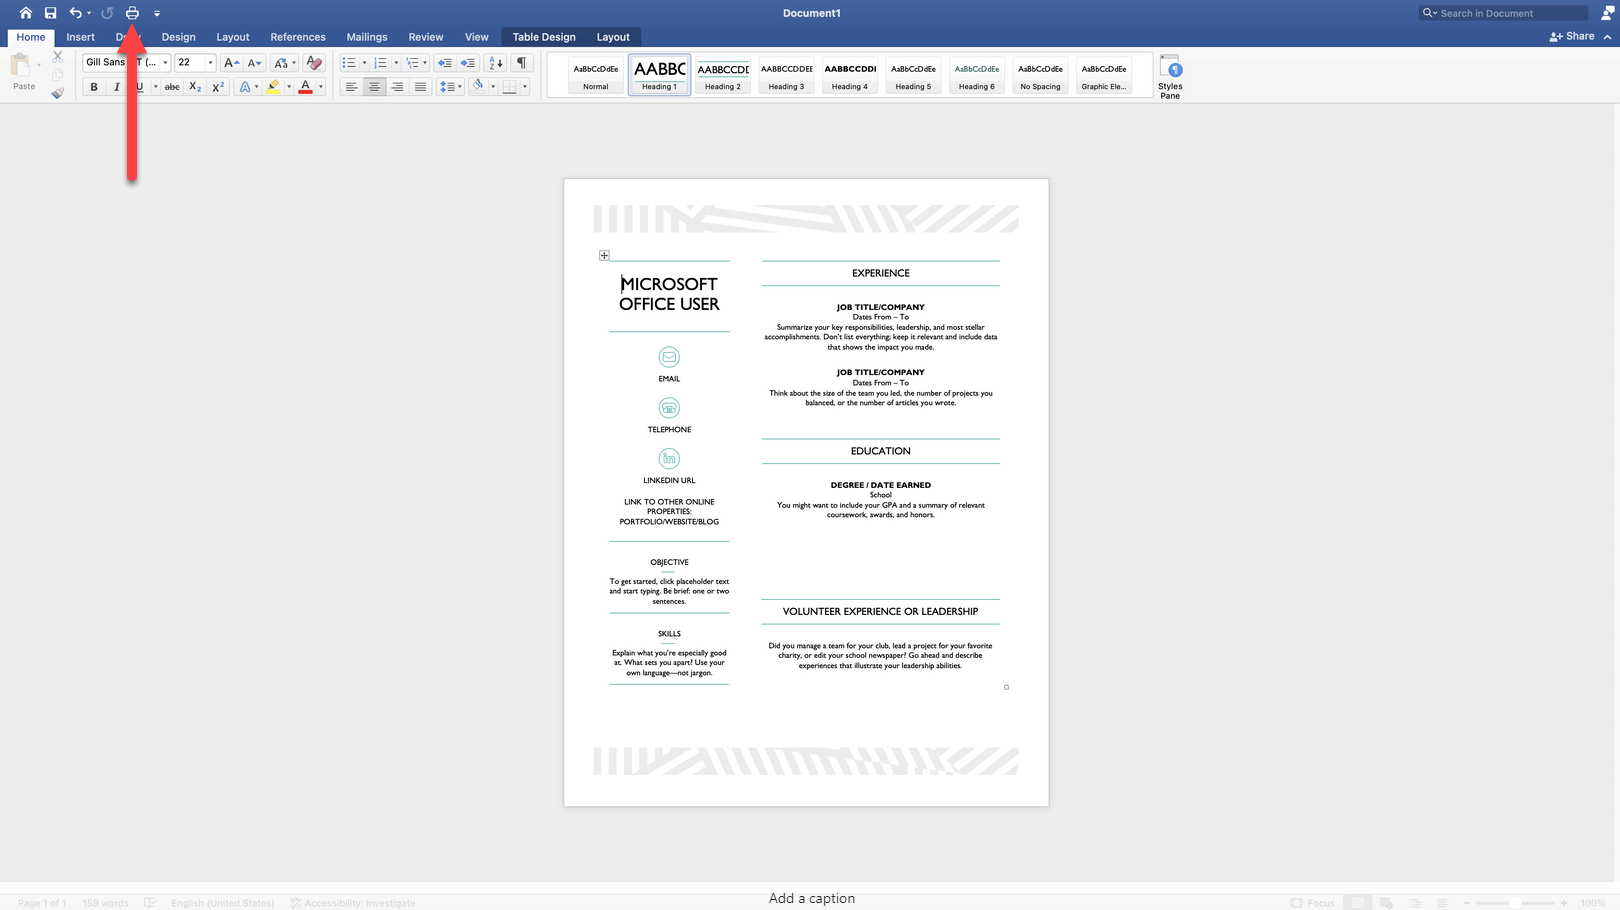
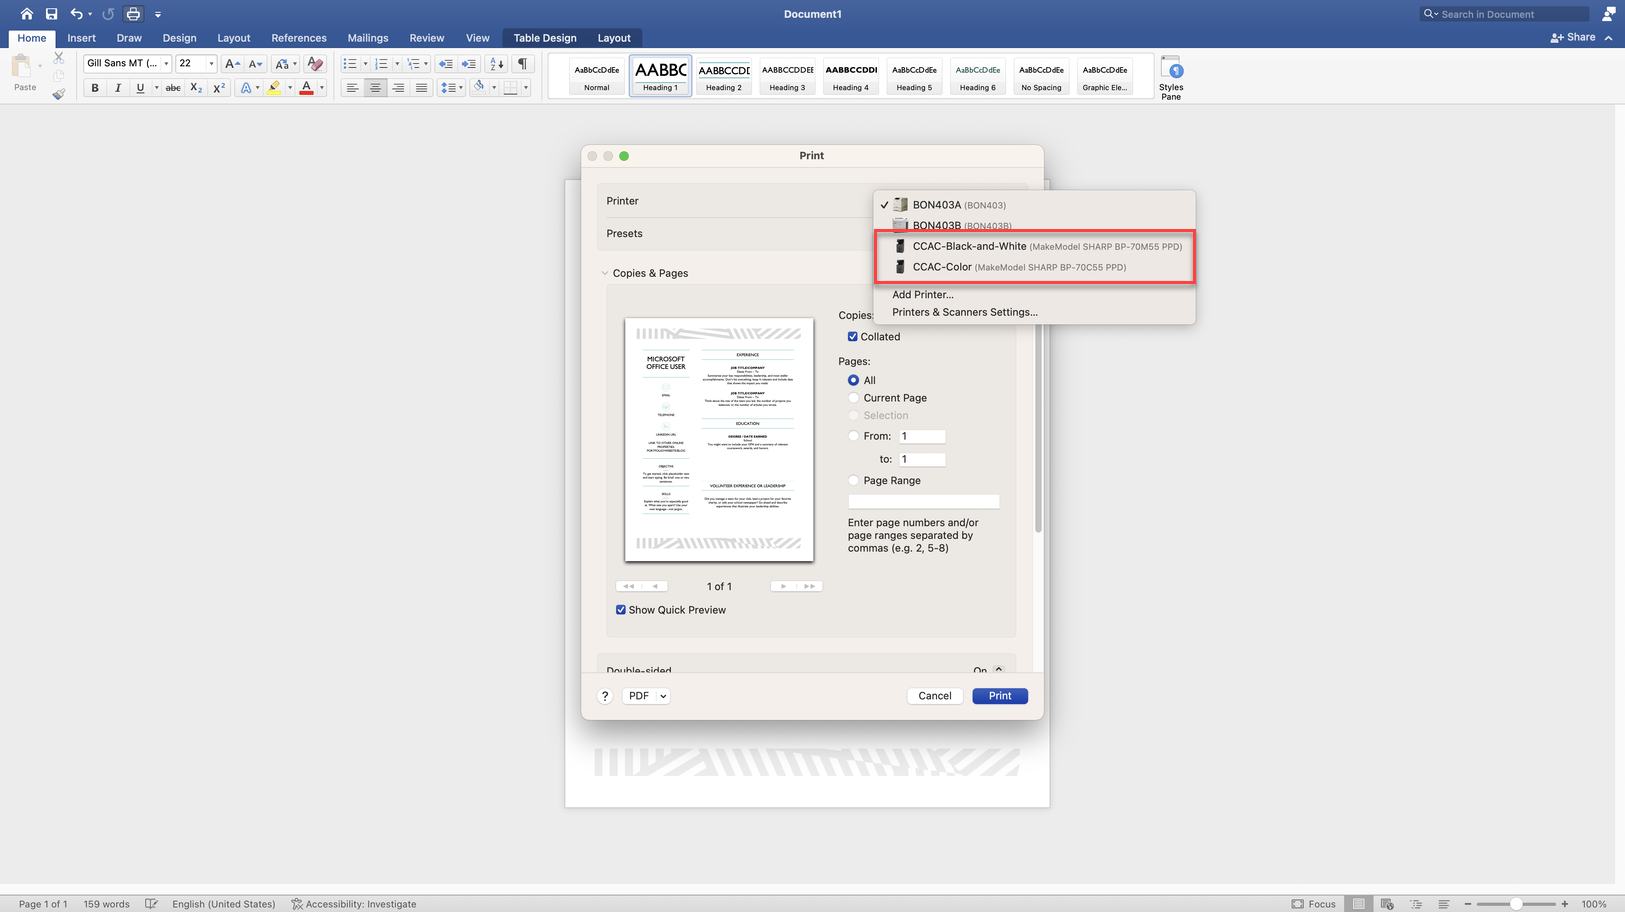
- Click on the printer icon
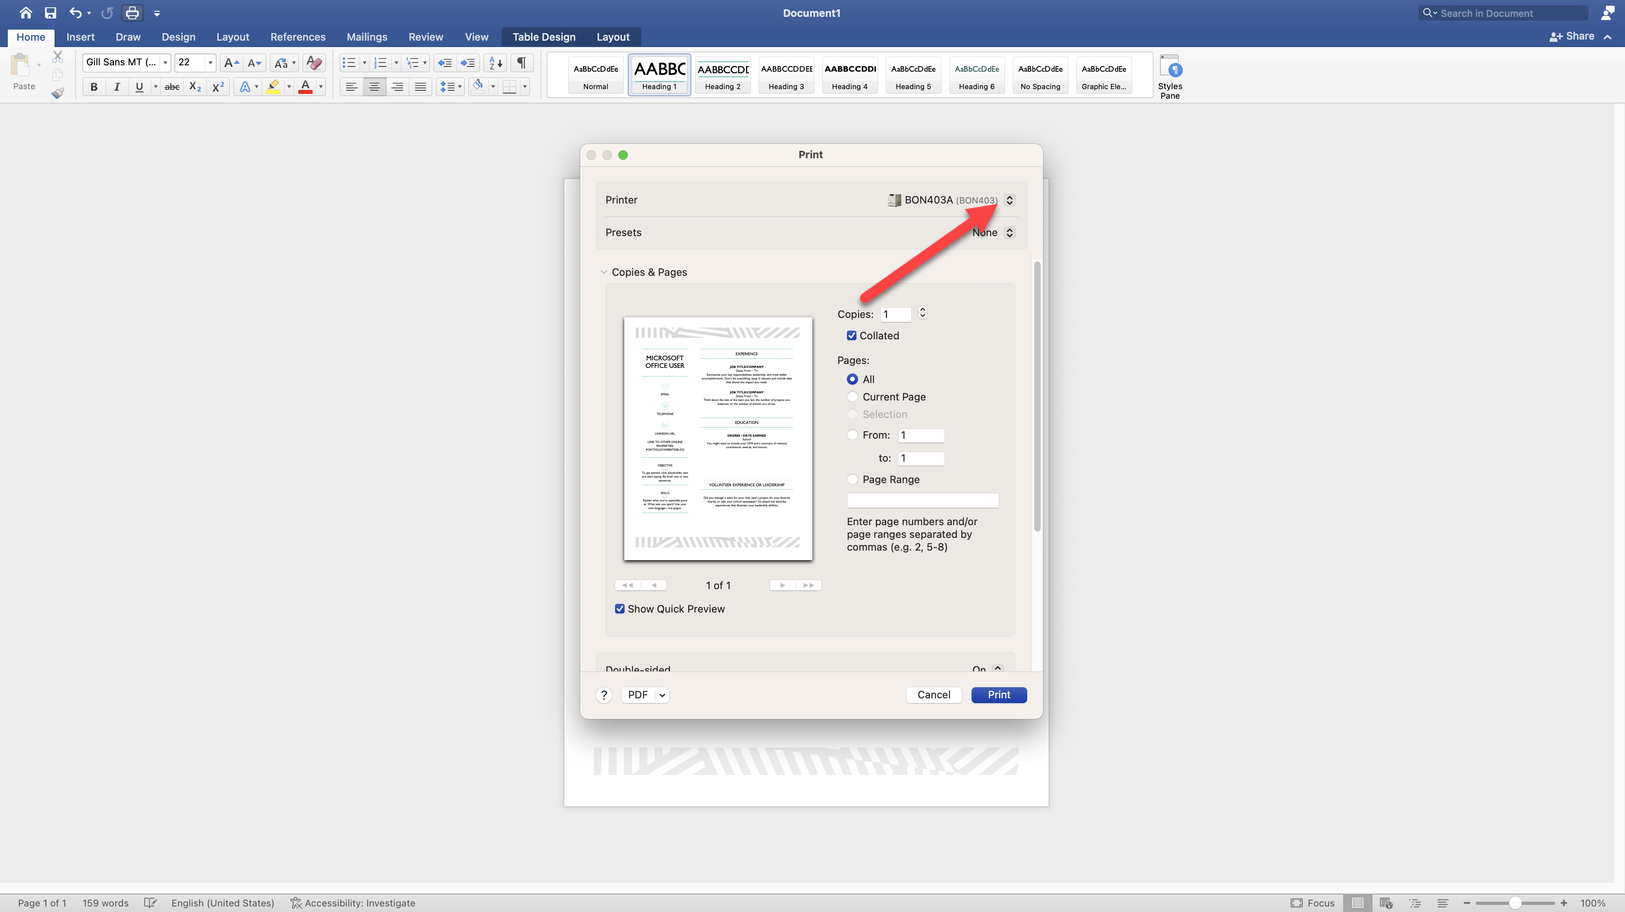
- Select Printer in the drop-down
- CCAC-Black-and-White on printers.ccac.org
- CCAC-Color on printers.ccac.org
- CCAC-Booklet-Color on printers.ccac.org (only certain users will see this option)
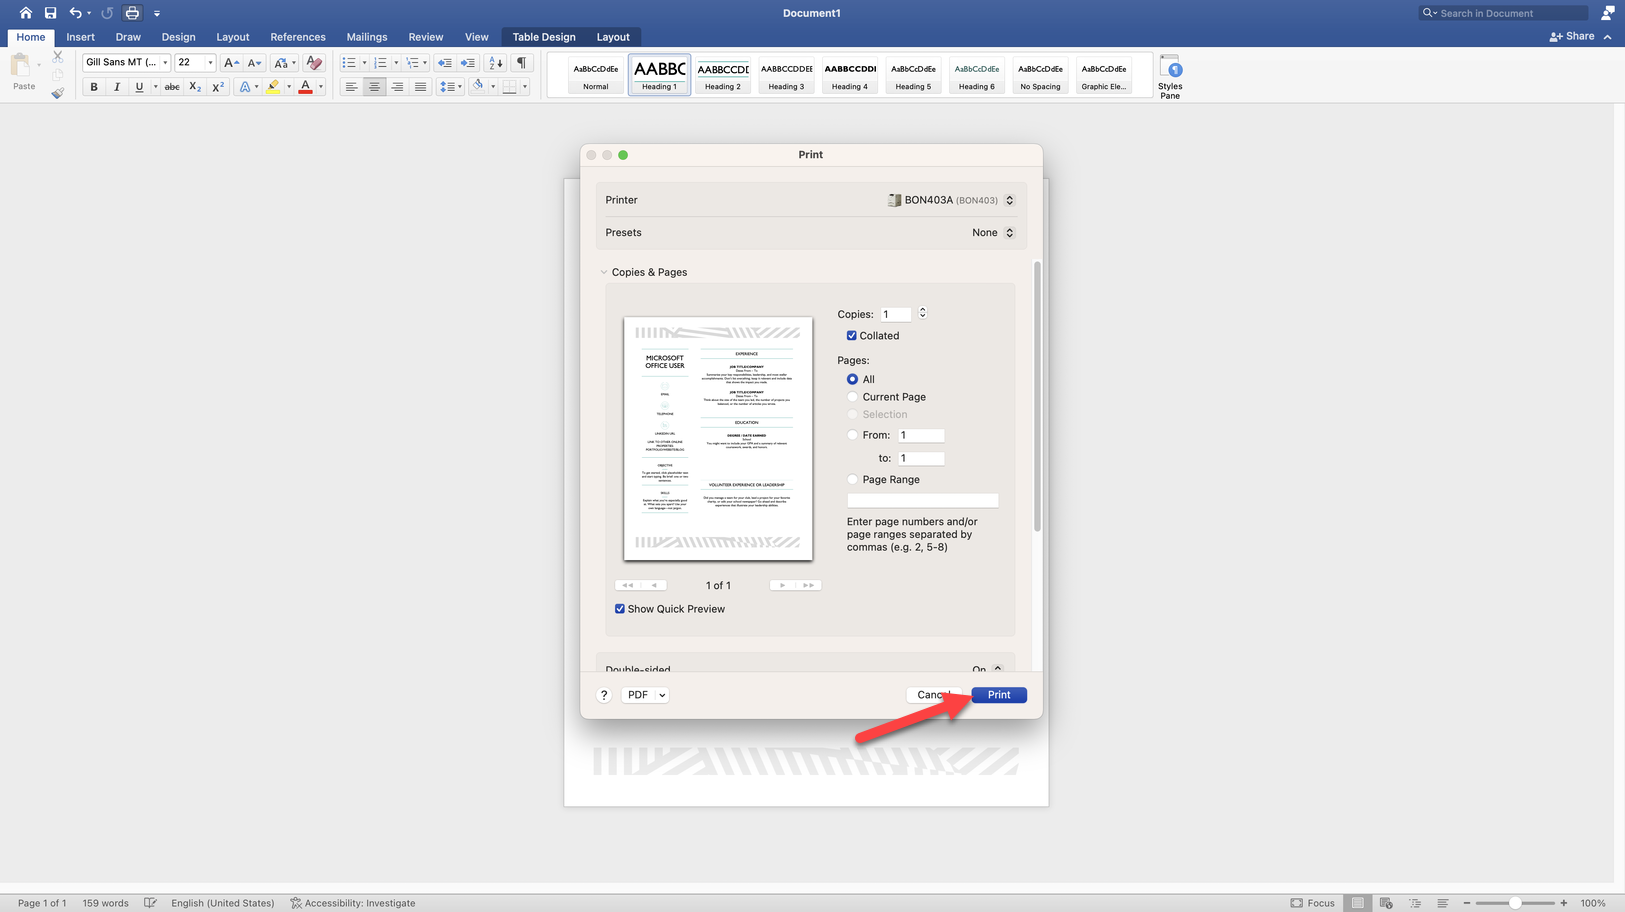
- Adjust other printer settings to your needs

- Click Print
- After clicking print, your print job will be in a queue
- You will have to physically walk to the printer to release the job
Printing Using Your Own Personal Device
Please Note:
We cannot guarantee that the printer will install or function correctly on all models and operating system versions, especially legacy systems. If printing isn't working on your personal device, it is recommended that you log in to a CCAC computer to print.
Printing Using Your Own Personal Device
iOS Mobile Device
Installing Mobility Print Client
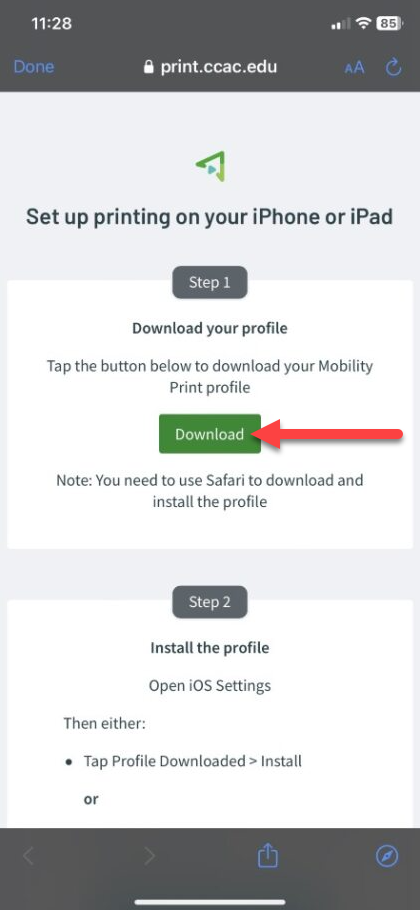
- Open up browser Navigate to https://print.ccac.edu:9164/client-setup/known-host/ios.html
- Click Download
- Dialogue box will display, click Download
- Tap Allow
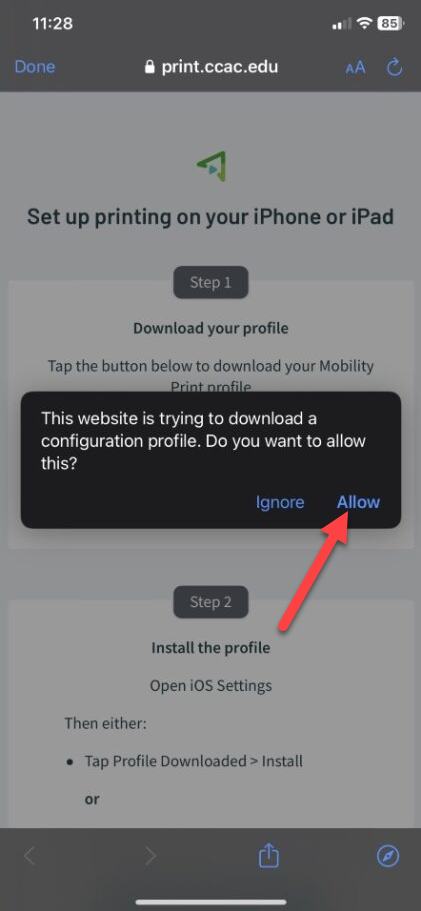
- Tap Close
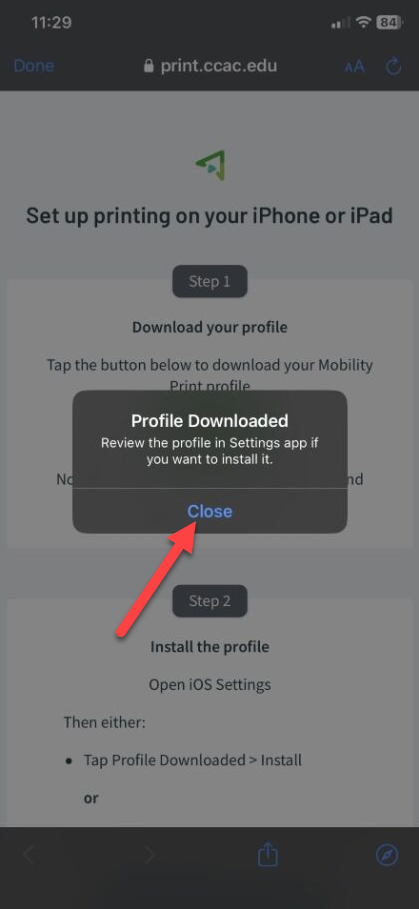
- Go to you iOS mobile device settings
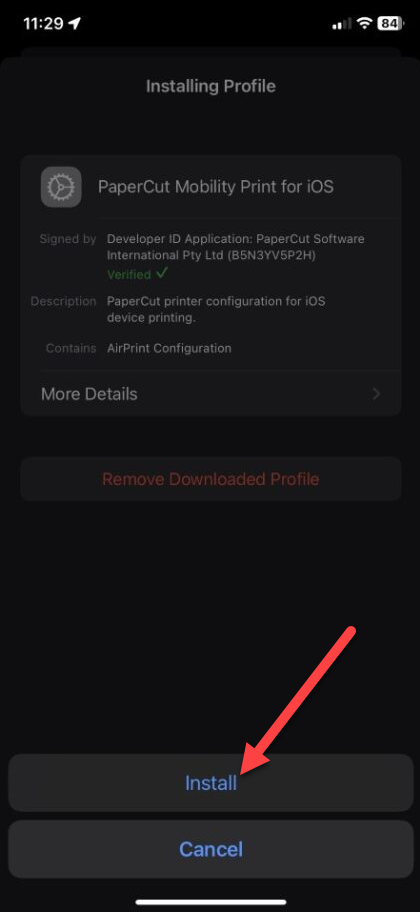
- Tap Profile Downloaded
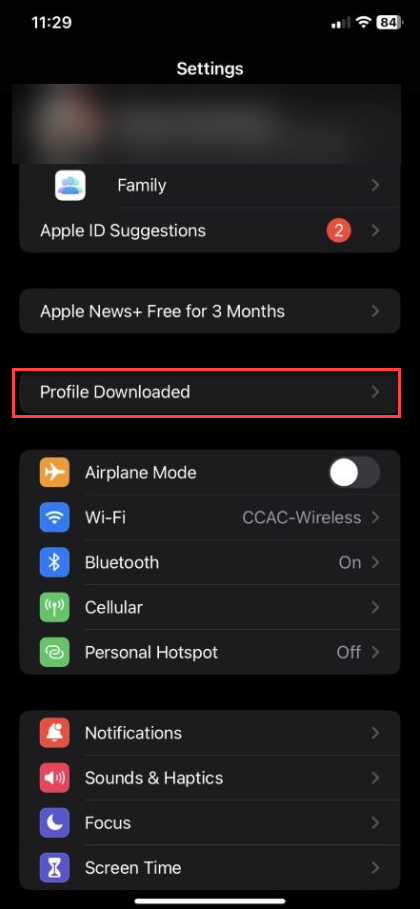
- Tap Install
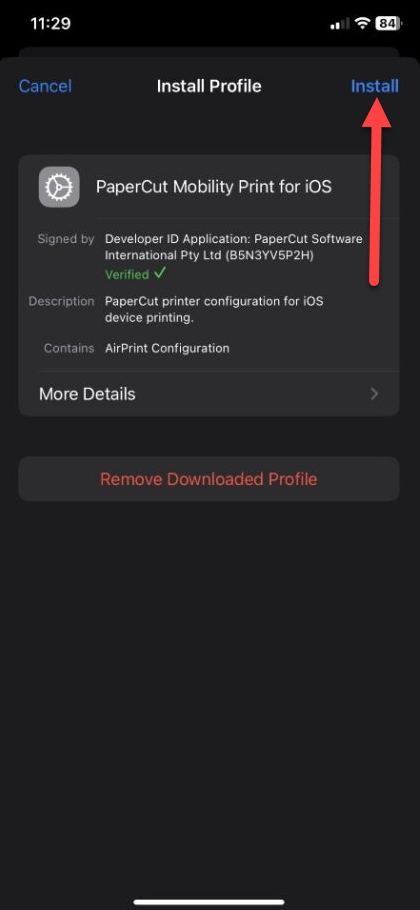
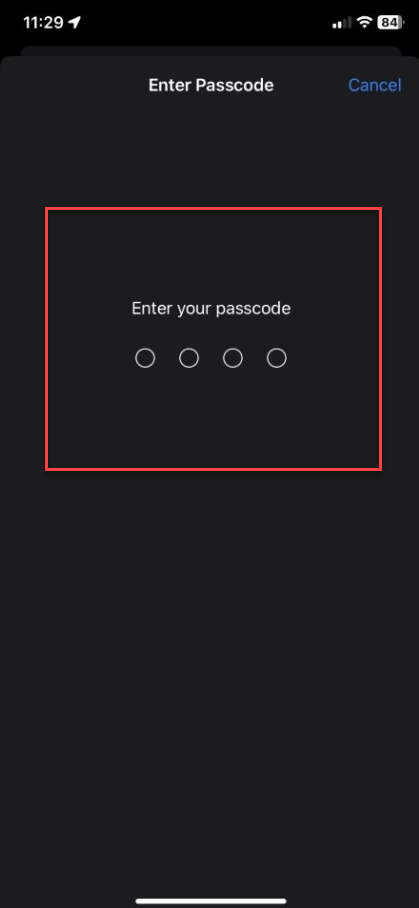
- Enter your passcode
- Tap Install
- Tap Done

- You are now setup to print from your mobile device
Printing from Personal iOS Mobile Device
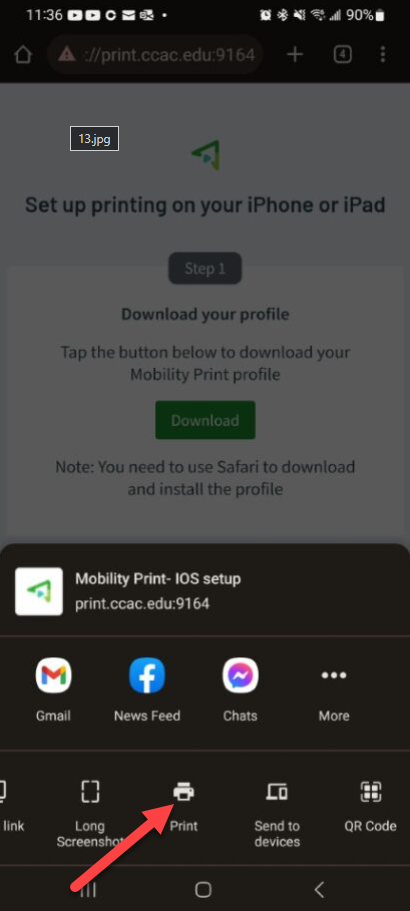
- Navigate to the document(s) you want to print
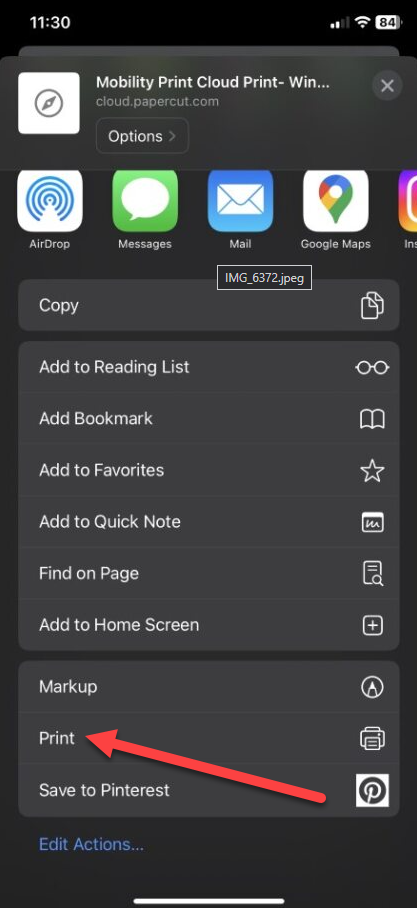
- Tap box the share icon

- Scroll down tap Print
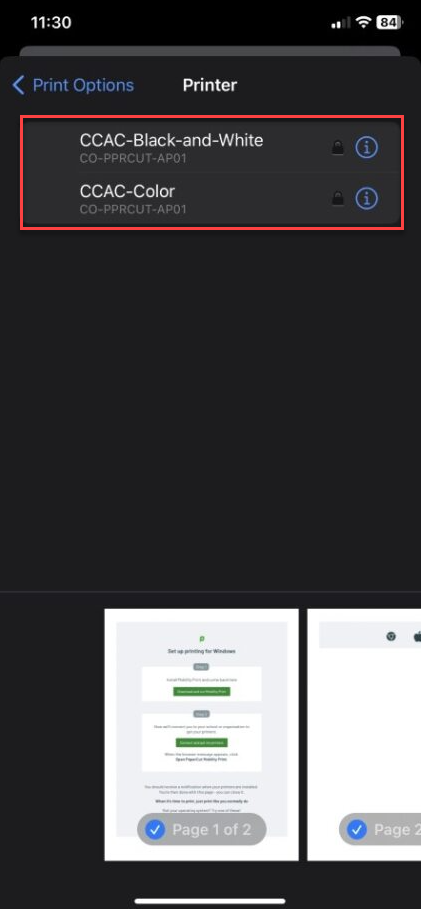
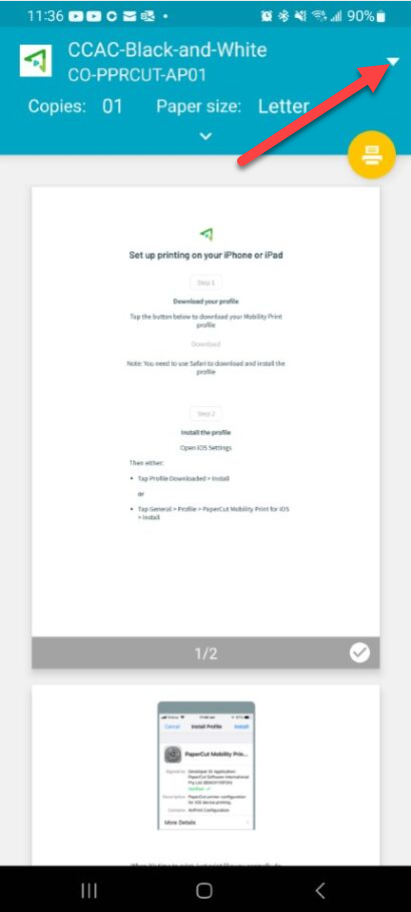
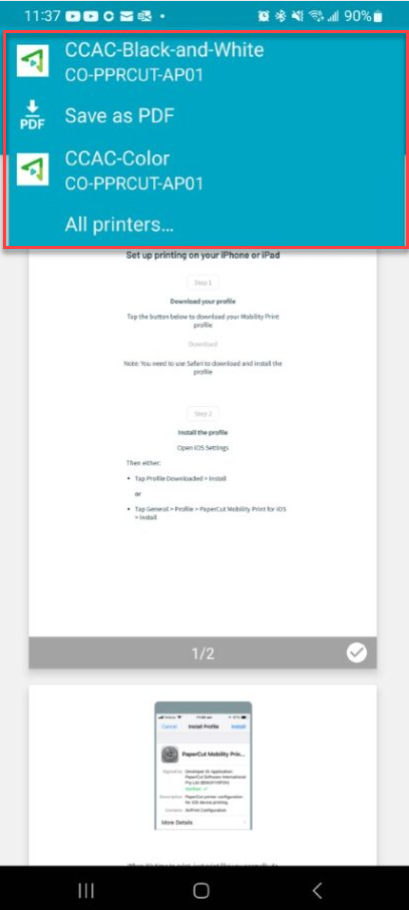
- Tap Printer dropdown
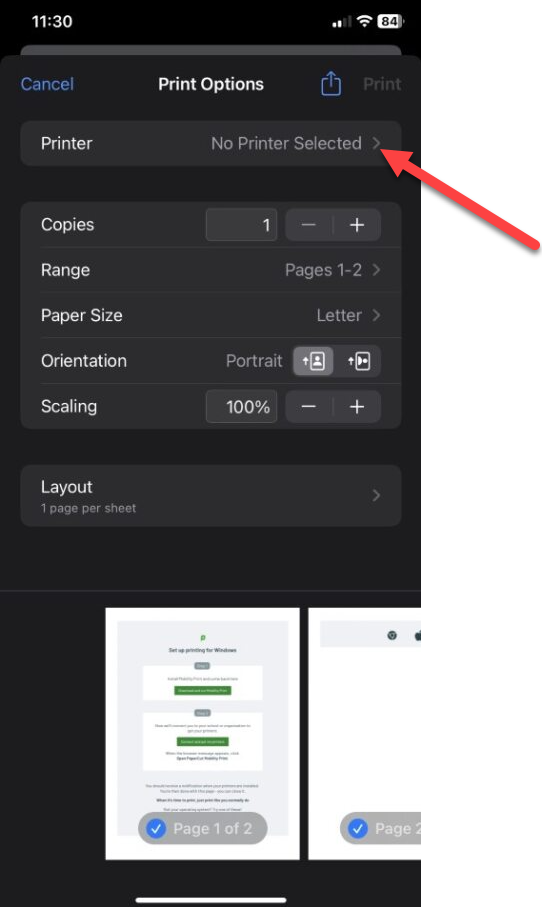
- Select the appropriate printer
- CCAC-Black-and-White
- CCAC-Color
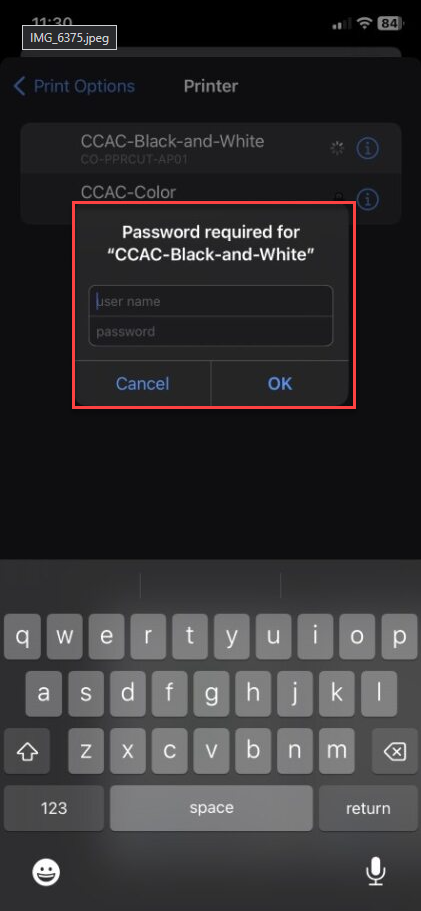
- Enter your CCAC Netid and Password
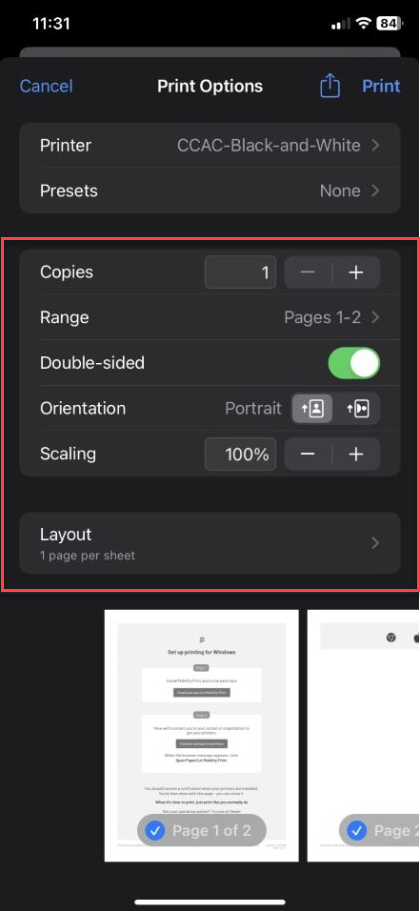
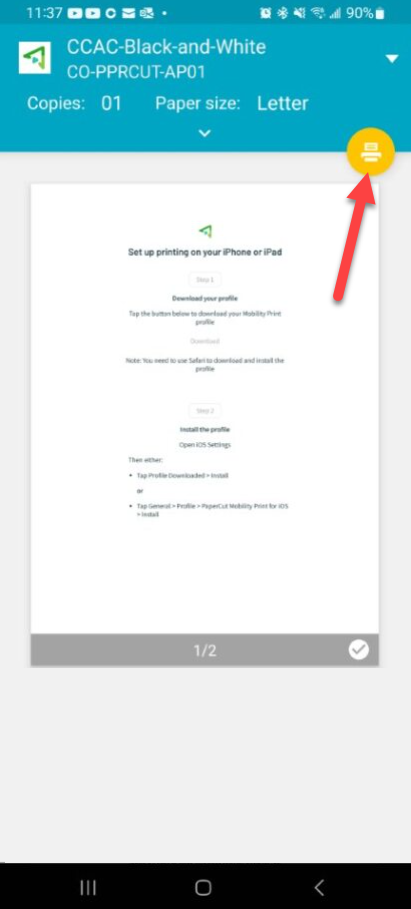
- Adjust other printer settings to your needs
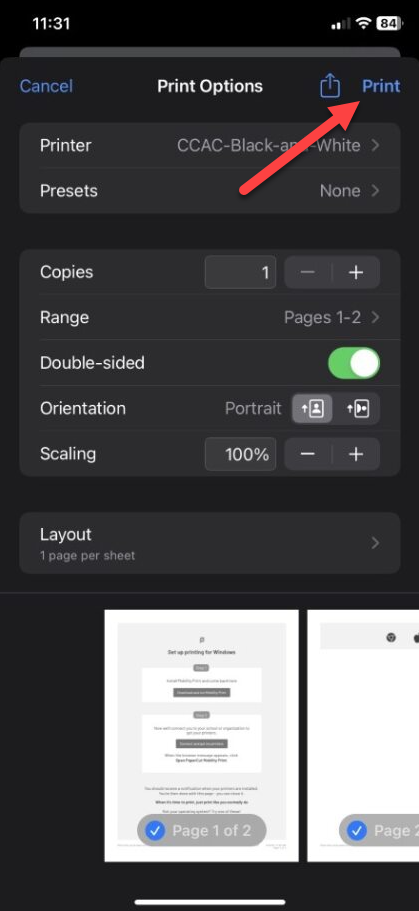
- Tap Print
- After clicking print, your print job will be in a queue
- You will have to physically walk to the printer to release the job
Android Mobile Device
Installing Mobility Print Client
- Open a Web Browser, Navigate to https://print.ccac.edu:9164/client-setup/known-host/android.html
- Click Advanced
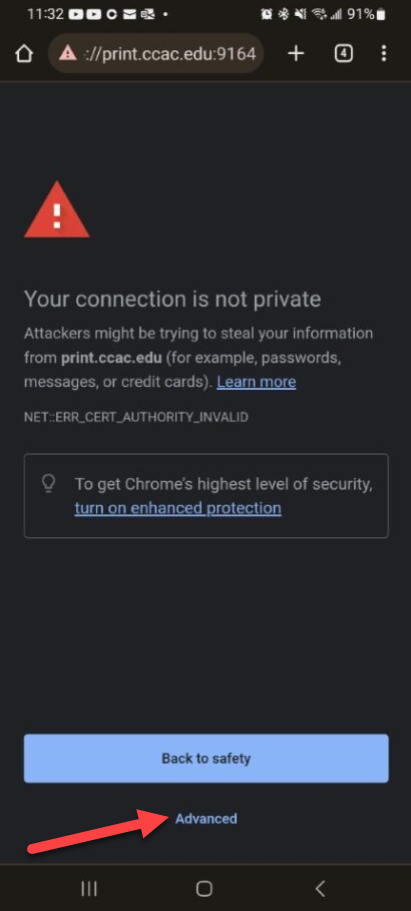
- Tap Proceed to Print.ccac.edu(unsafe)

- Tap Install or update
- Will take you to google play store
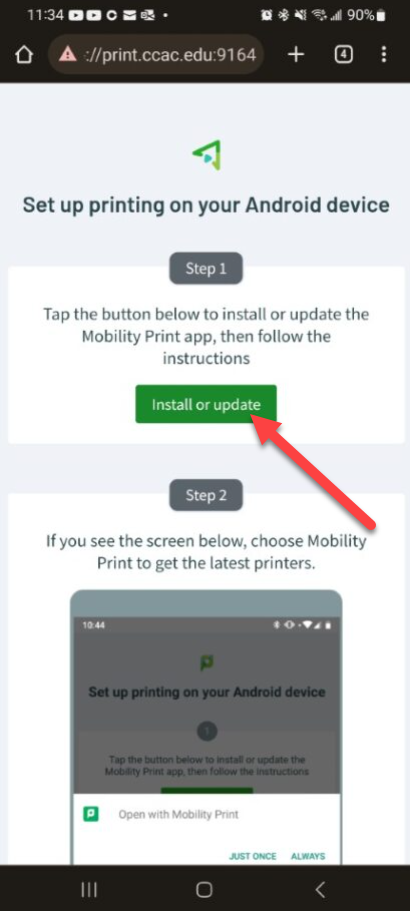
- Will take you to google play store
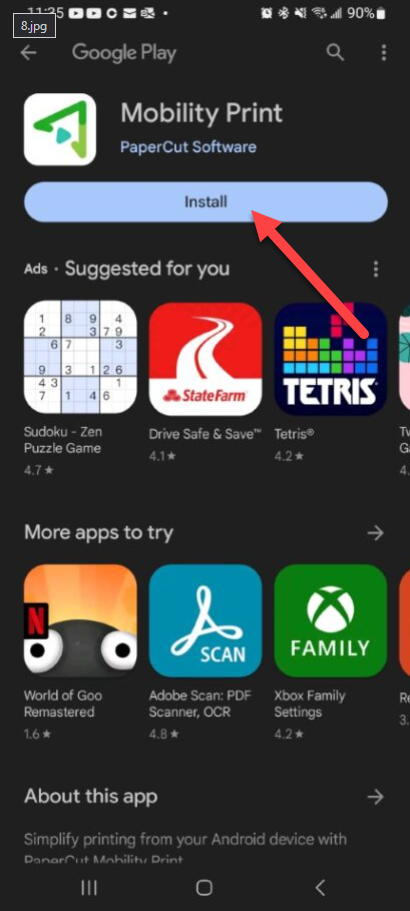
- Tap Install
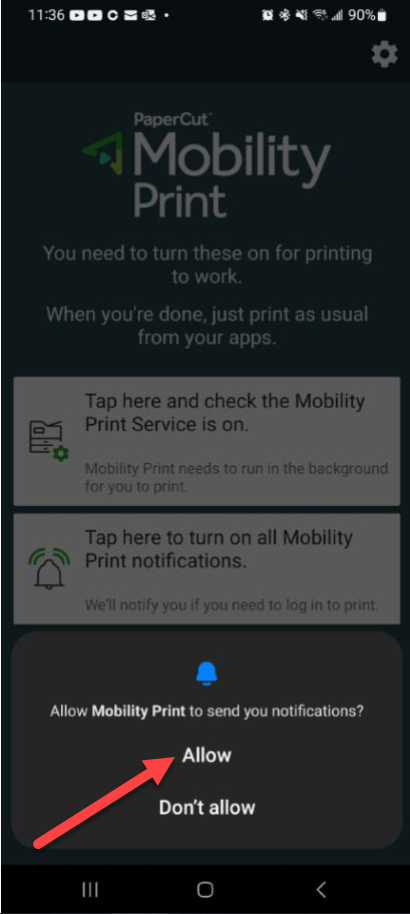
- Tap Open
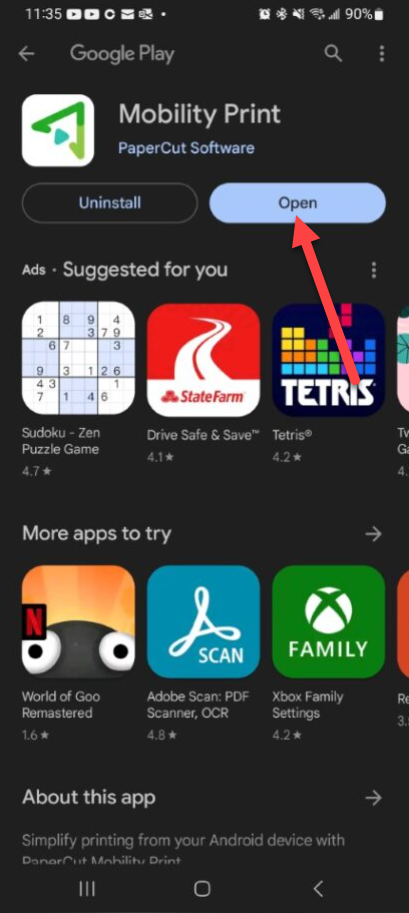
- Tap Allow
- Will show print services automatically
- Confirm both options are enabled
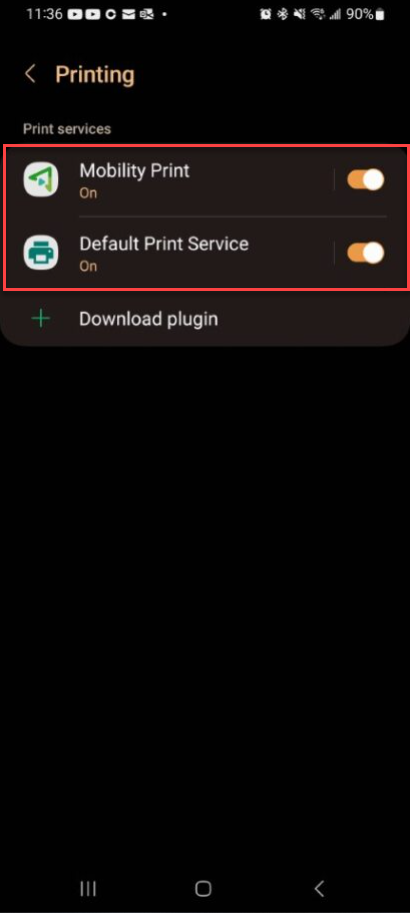
- You are now setup to print from your mobile device
Printing from Personal Android Mobile Device
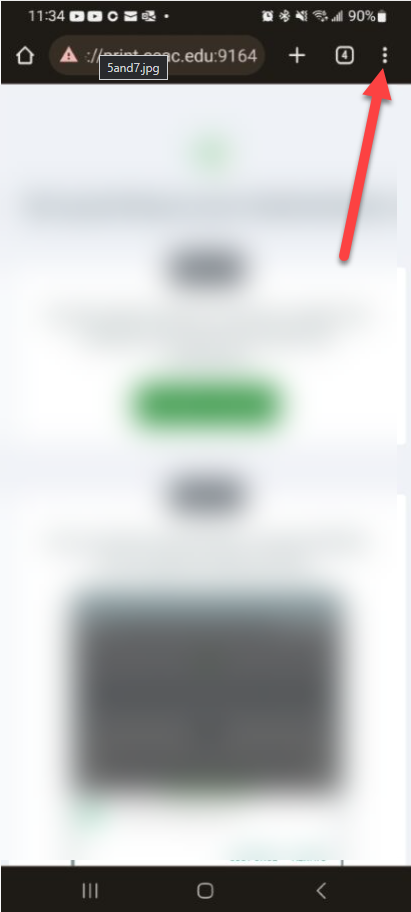
- Navigate to the document(s) you want to print
- Click the 3 dots in the upper right hand corner
- Tap Share
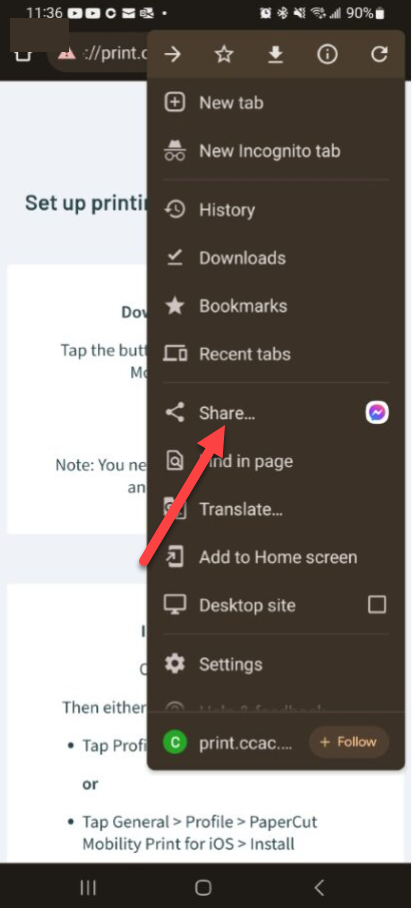
- Tap Print
- Tap printer dropdown
- Select the appropriate printer
- CCAC-Black-and-White
- CCAC-Color
- Tap yellow printer button
- After clicking print, your print job will be in a queue
- You will have to physically walk to the printer to release the job
Windows
Installing Mobility Print Client
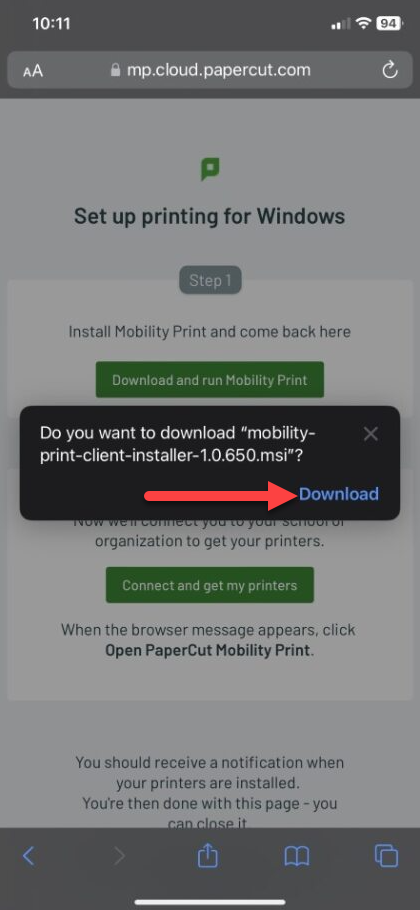
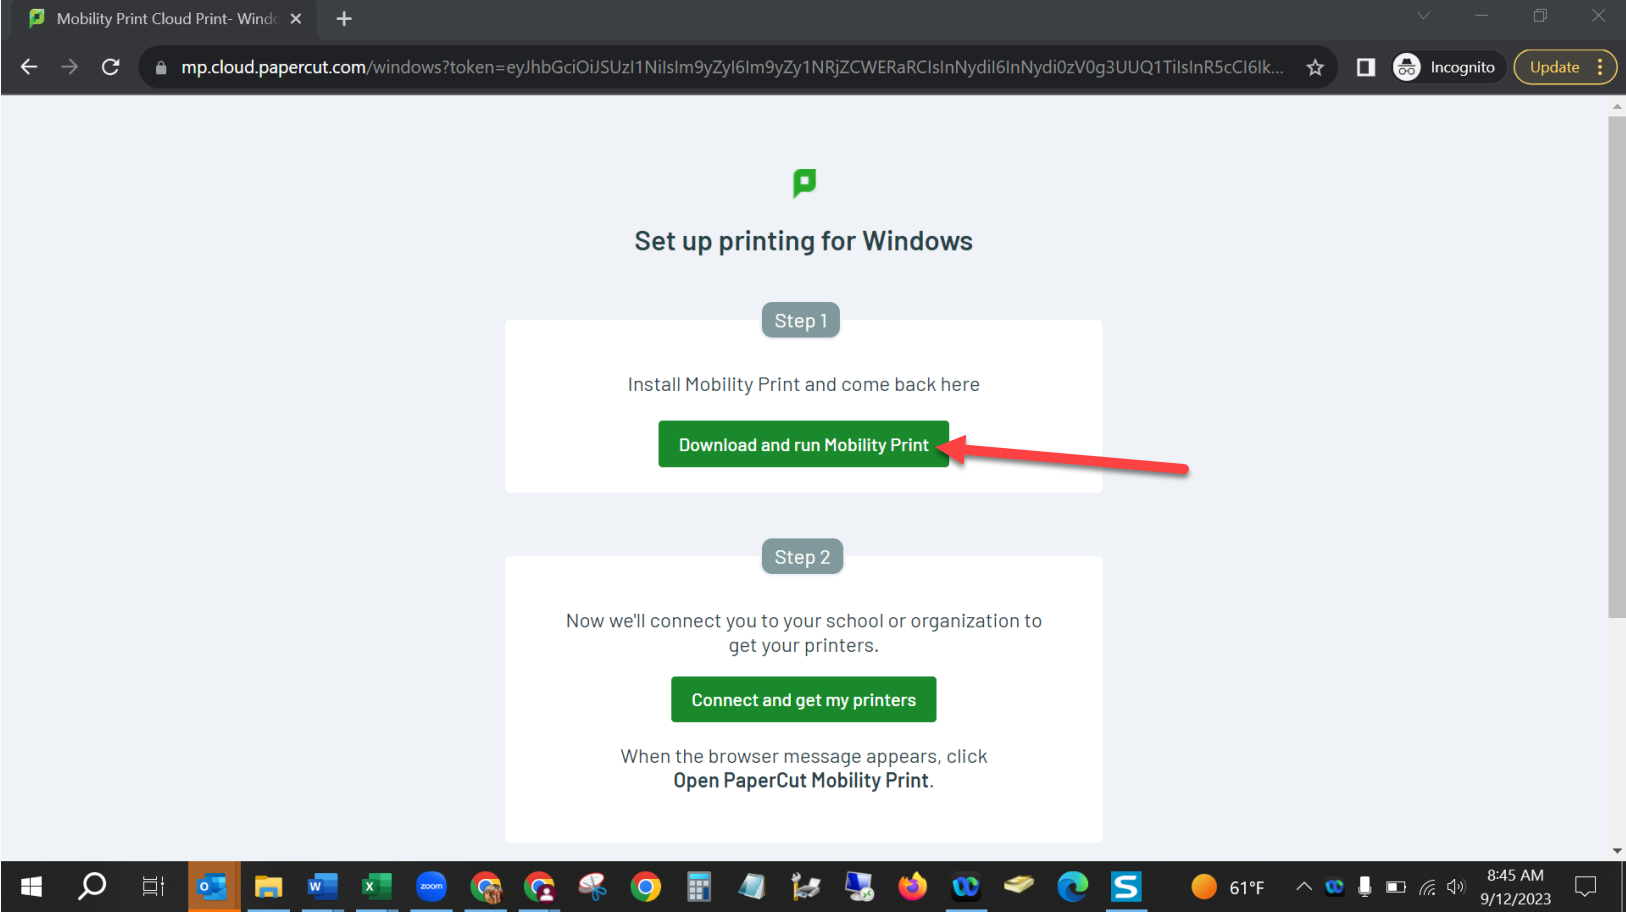
- Open any browser, and navigate to https://print.ccac.edu:9164/setup
- Click Download and run Mobility Print
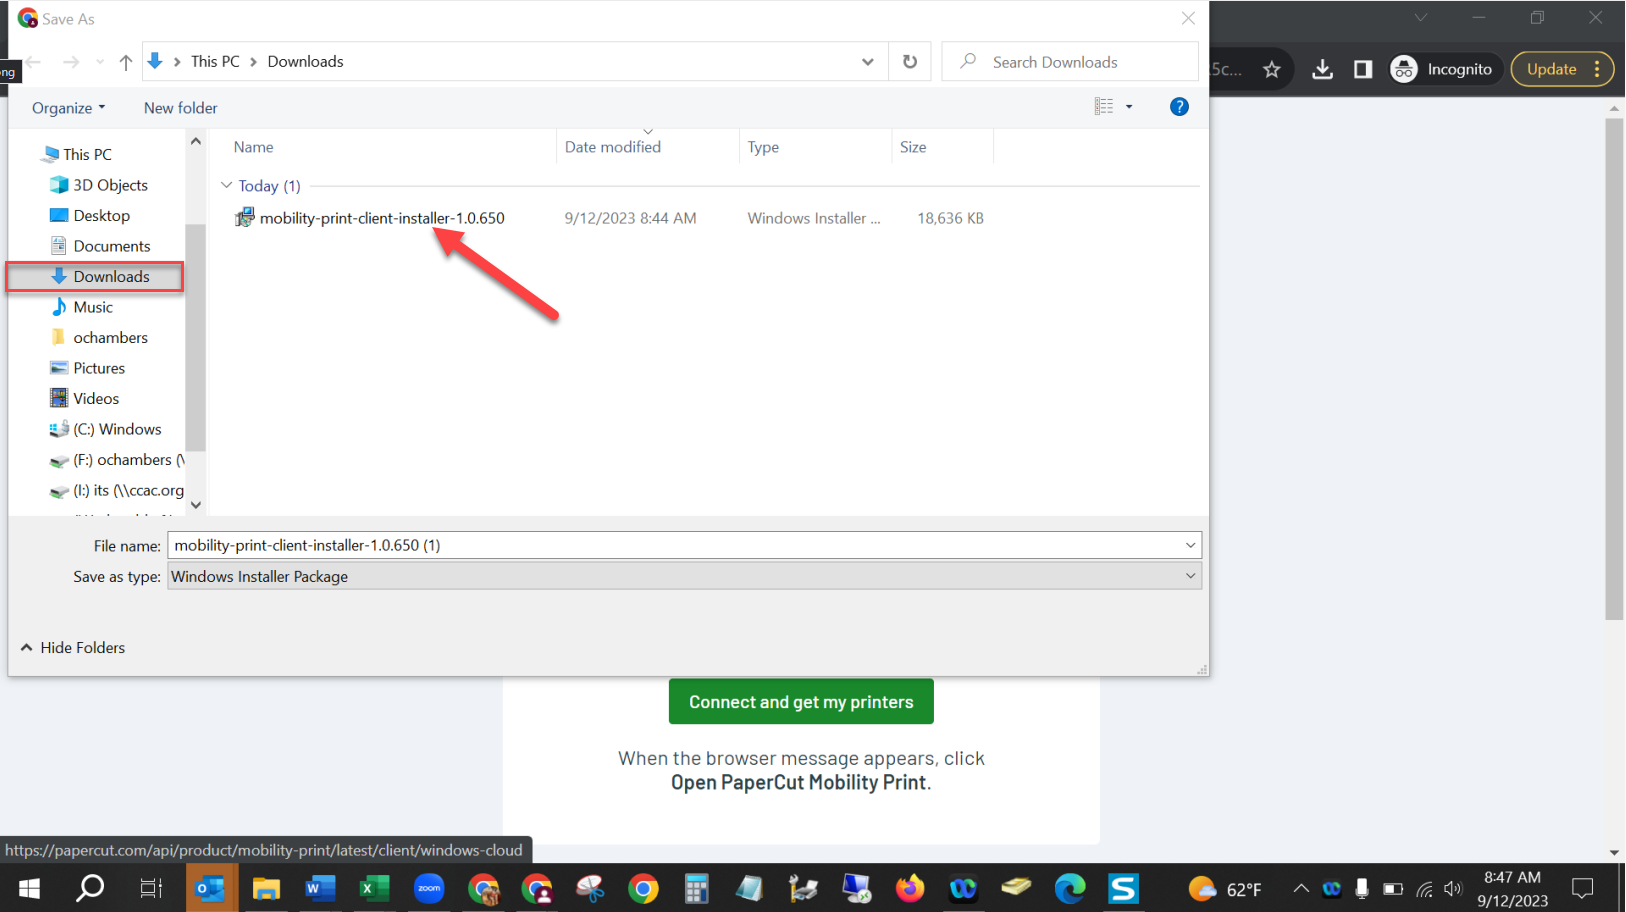
- If download doesn't automatically run, open the download
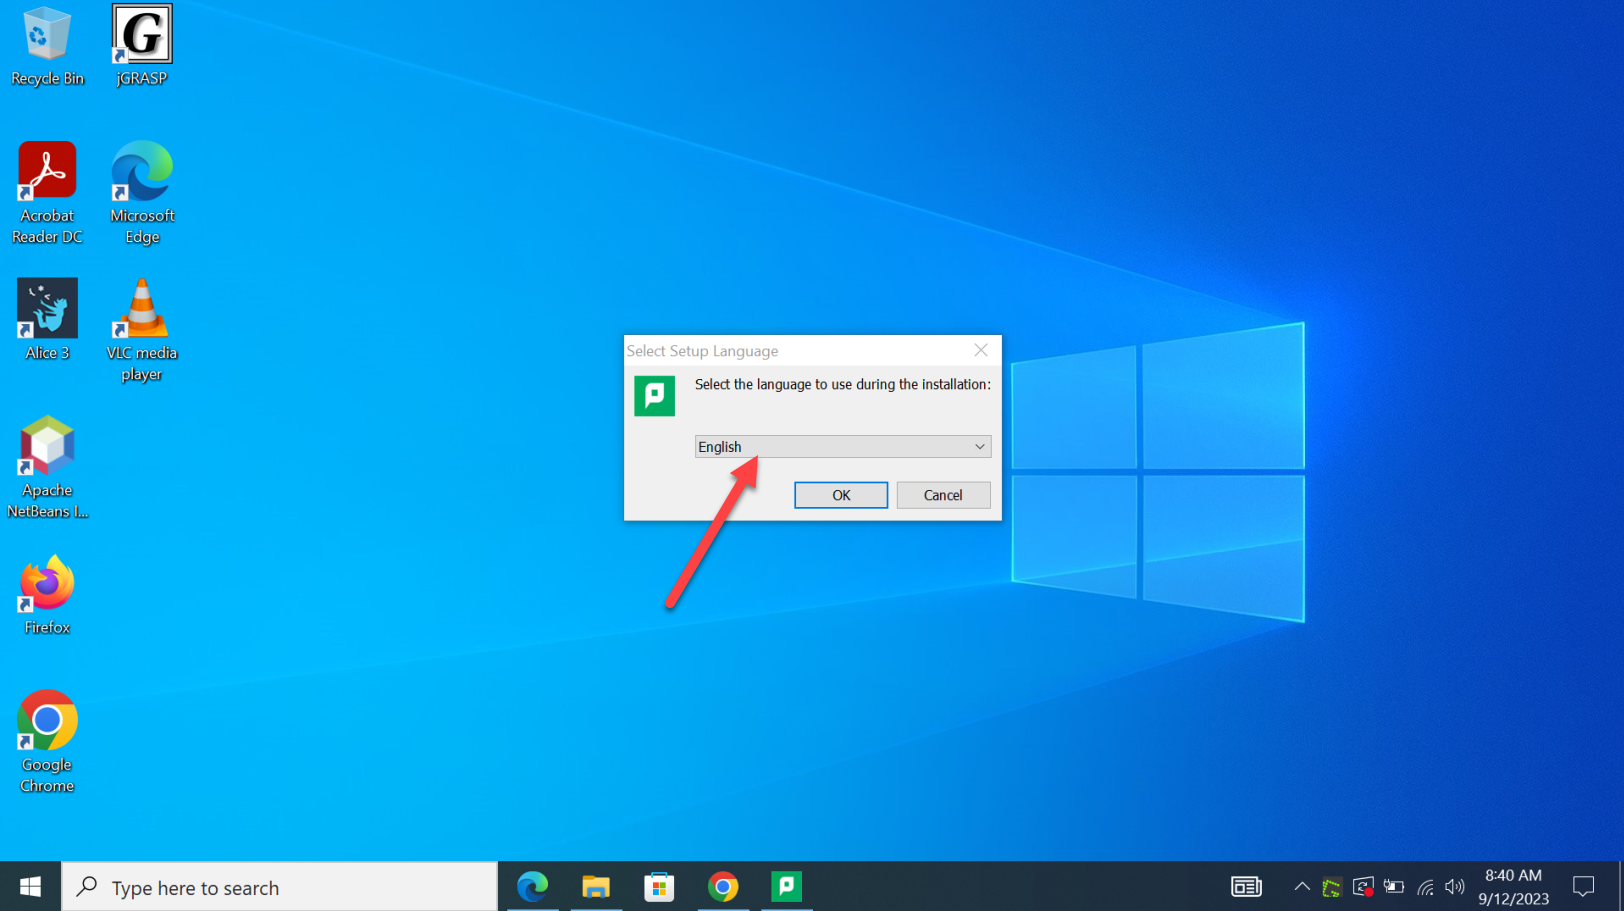
- Select the language, and click OK
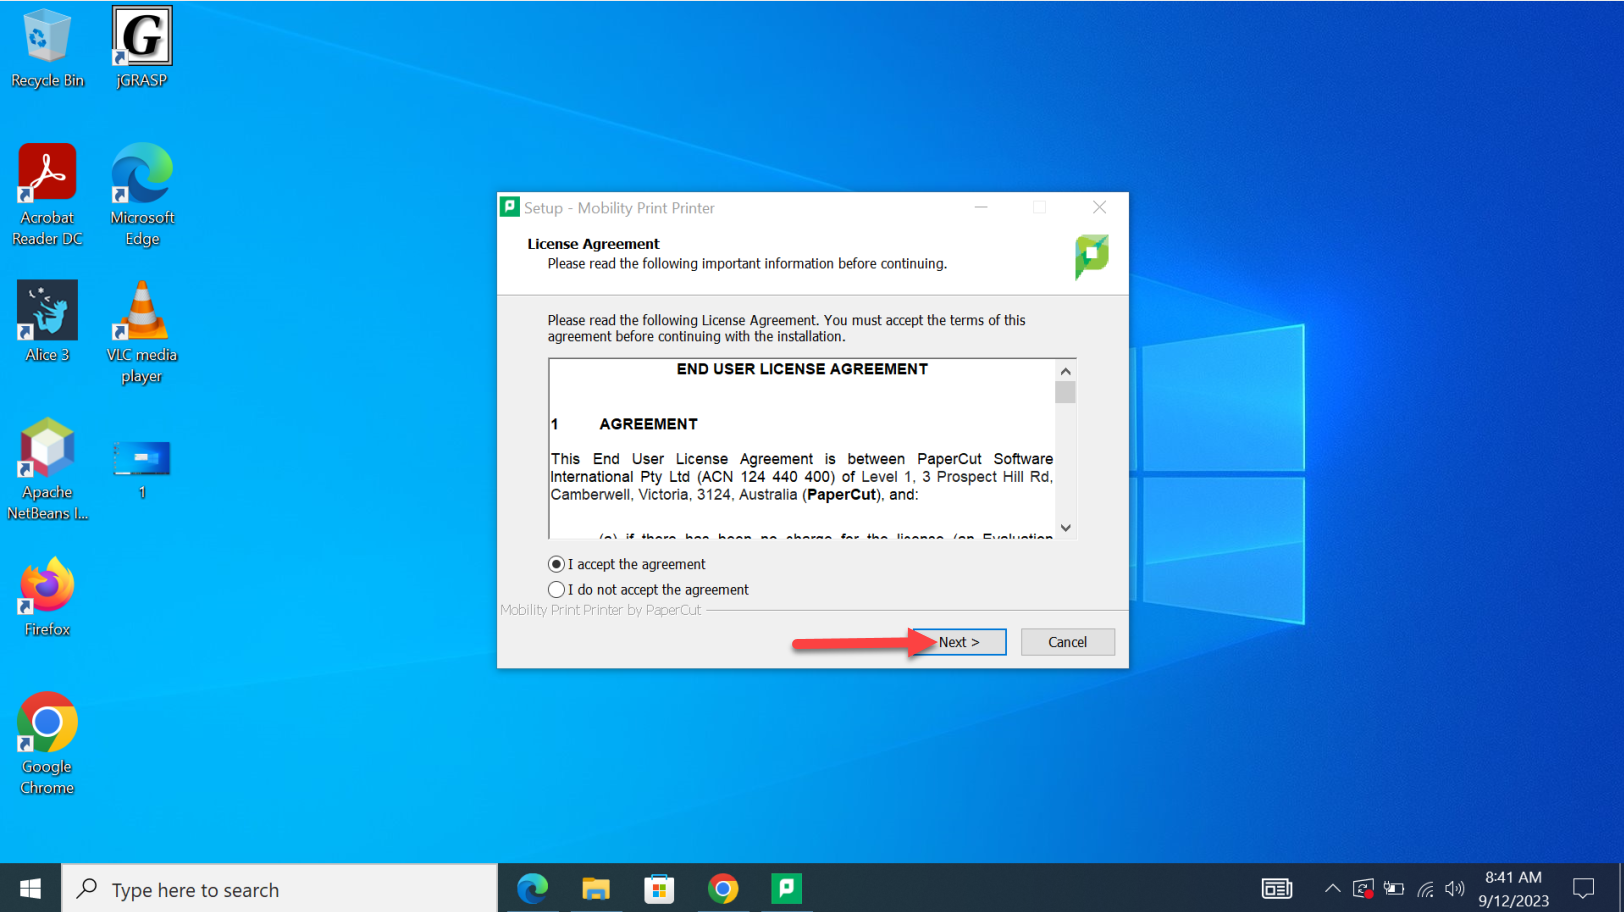
- Accept the End User License Agreement
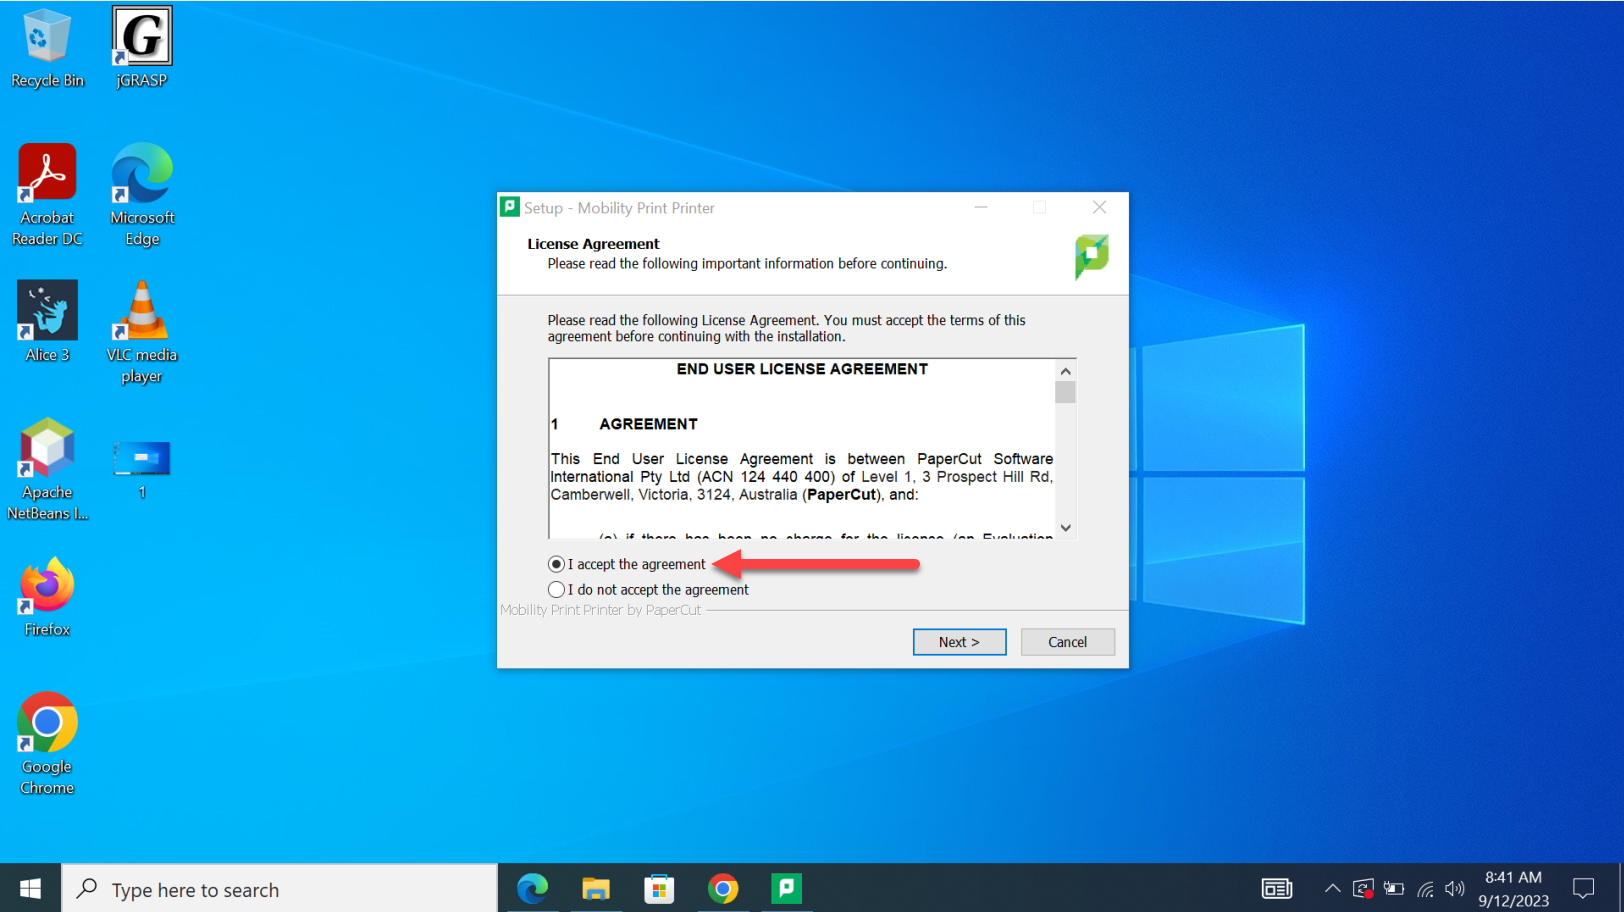
- Click Next
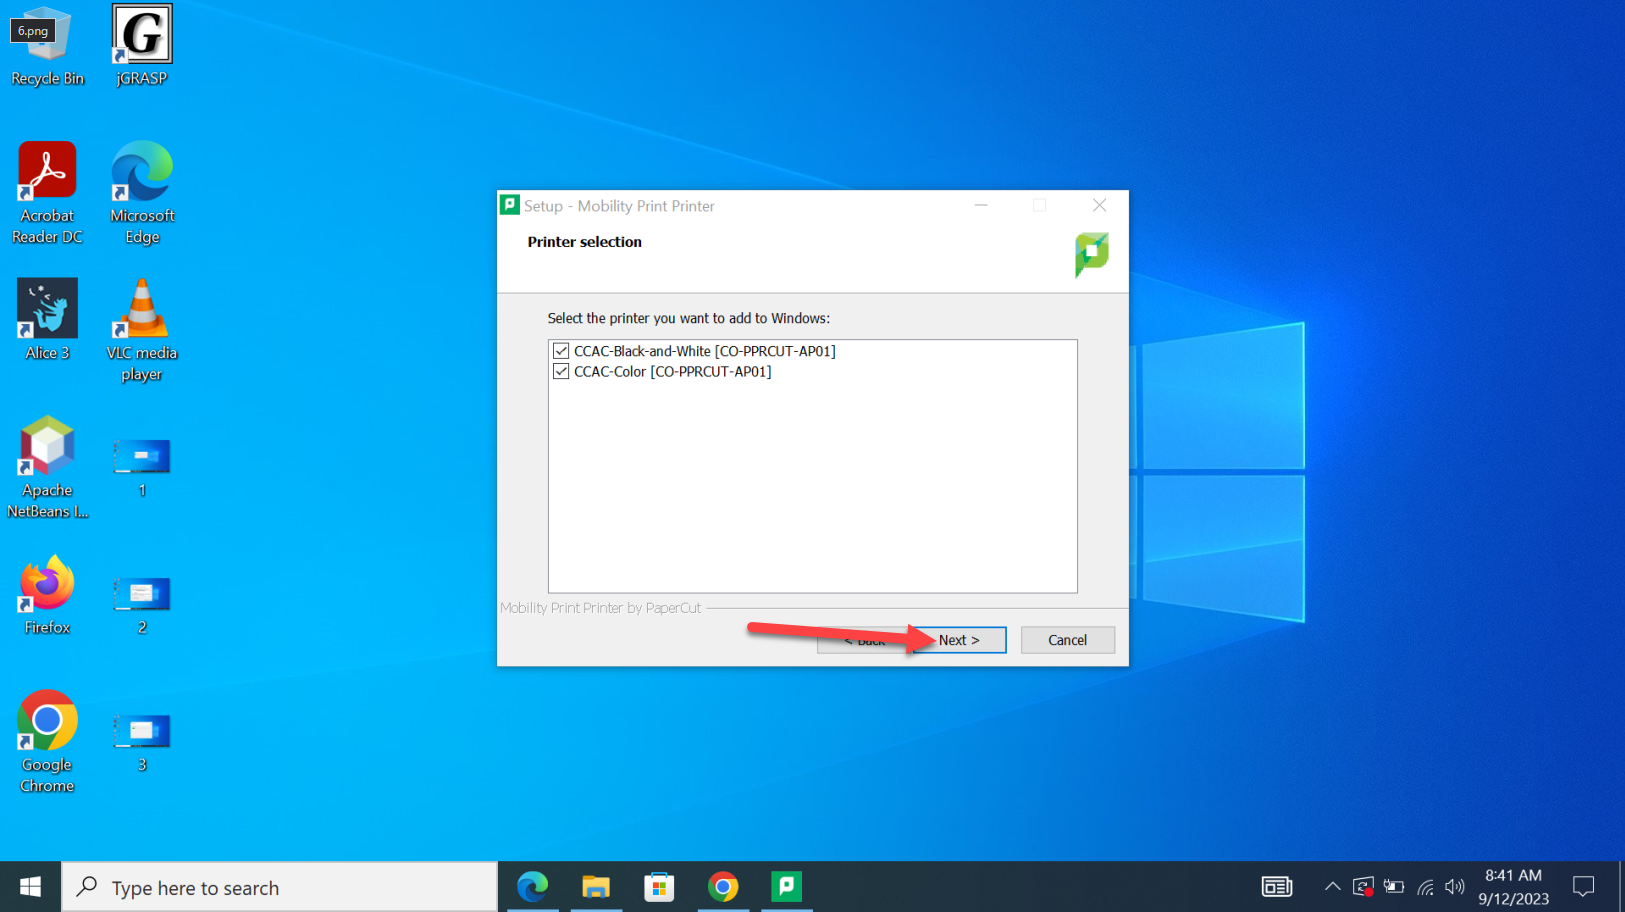
- Confirm the printer(s)
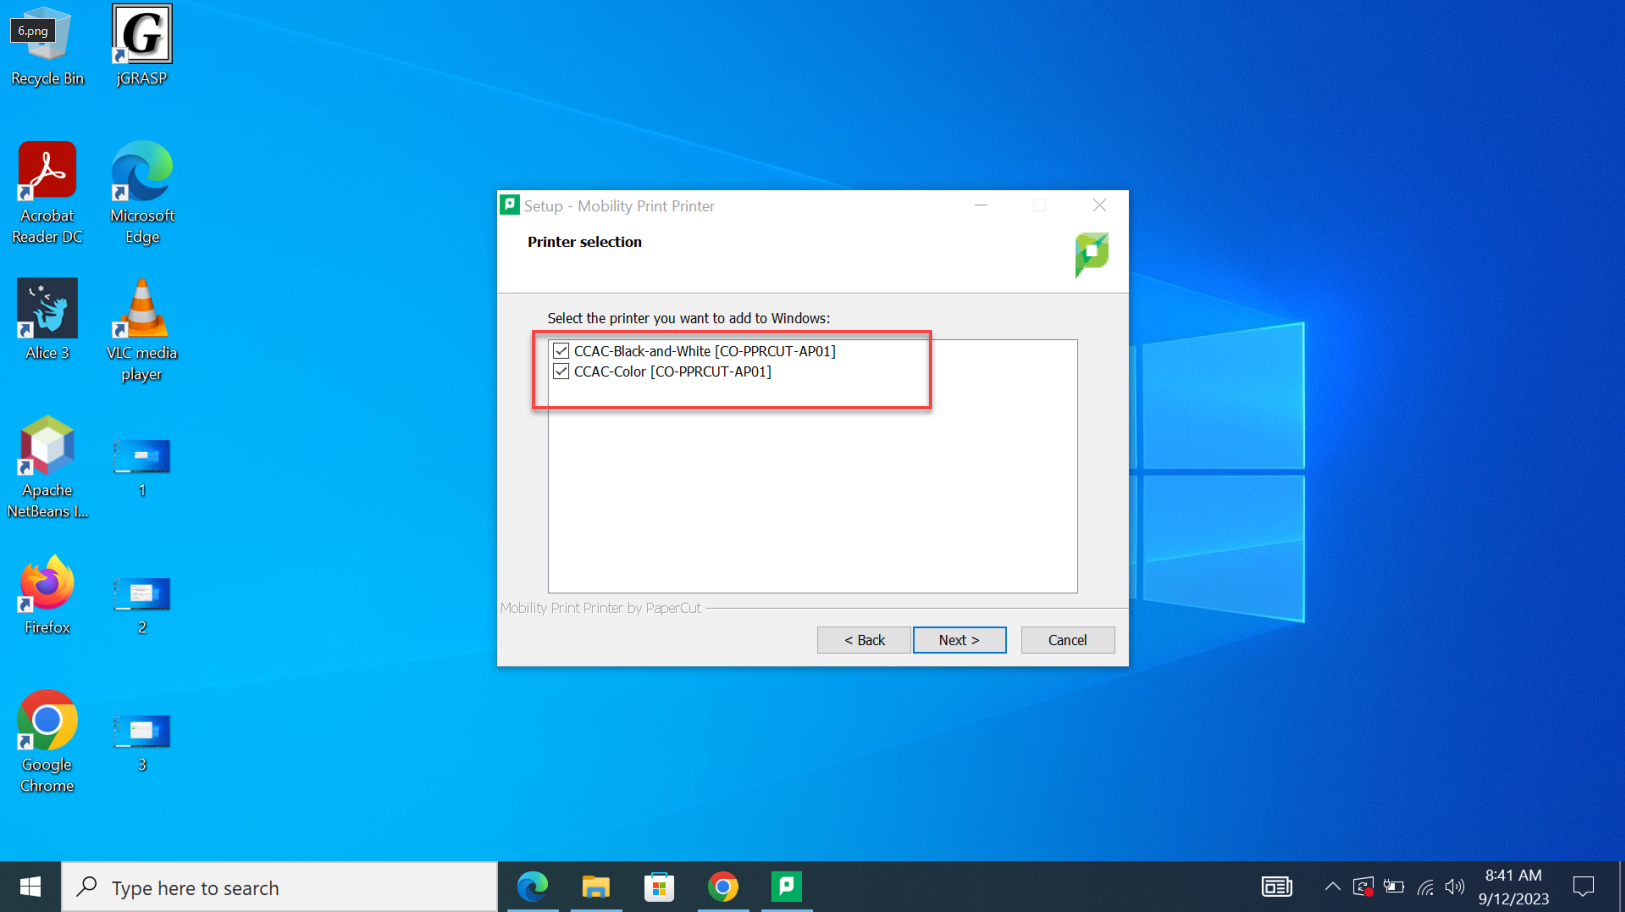
- Click Next
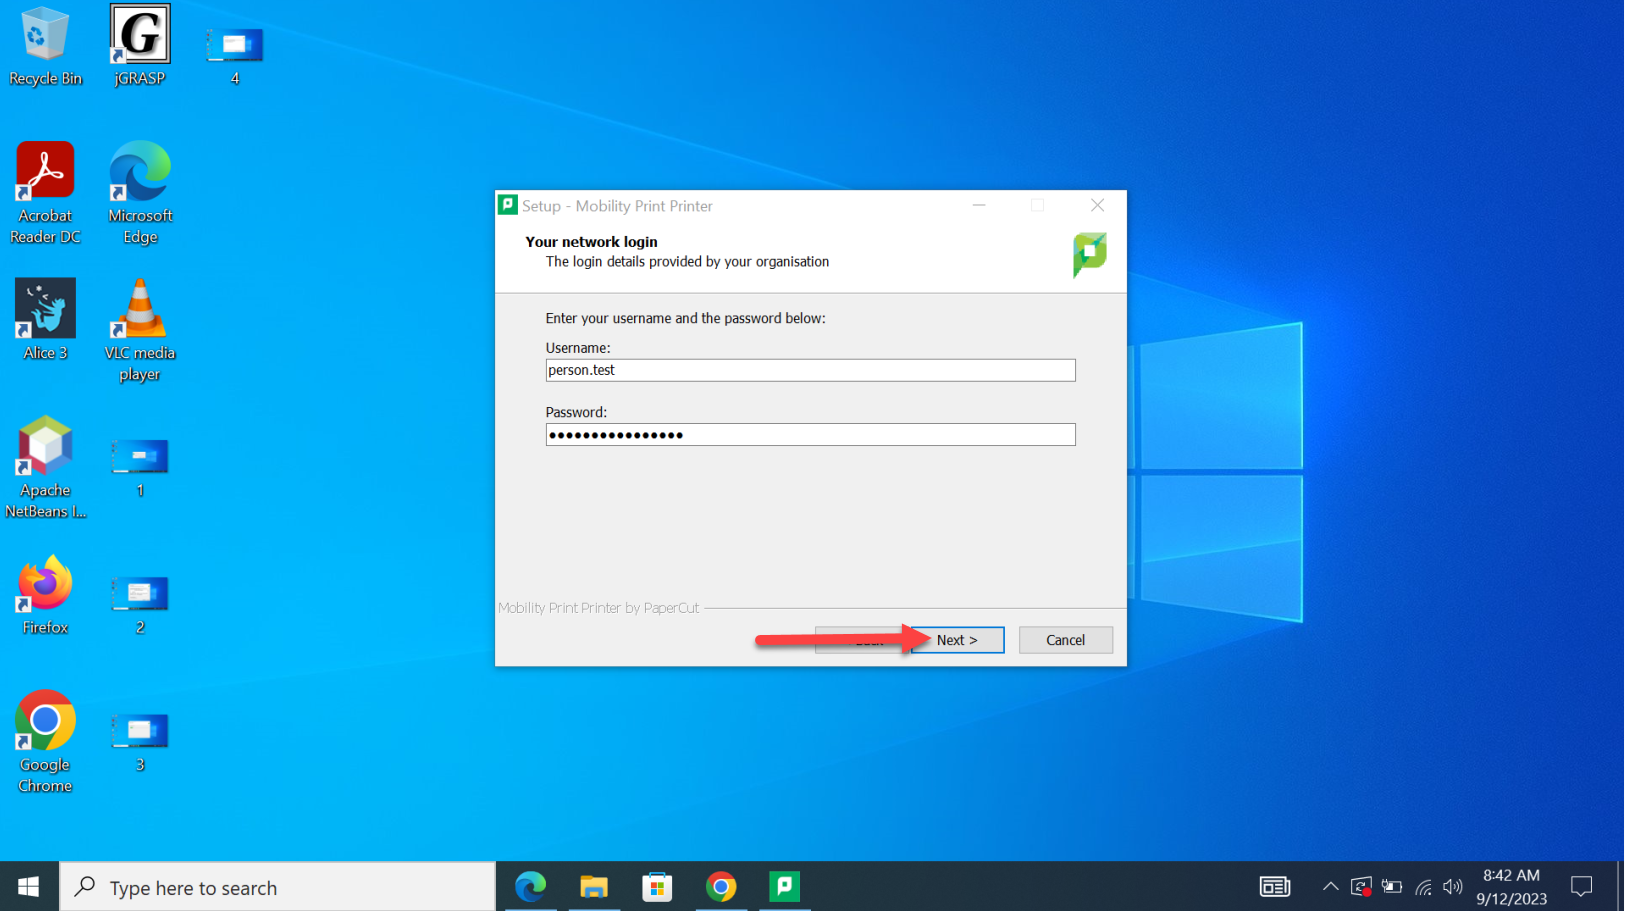
- Enter your CCAC Netid and Password
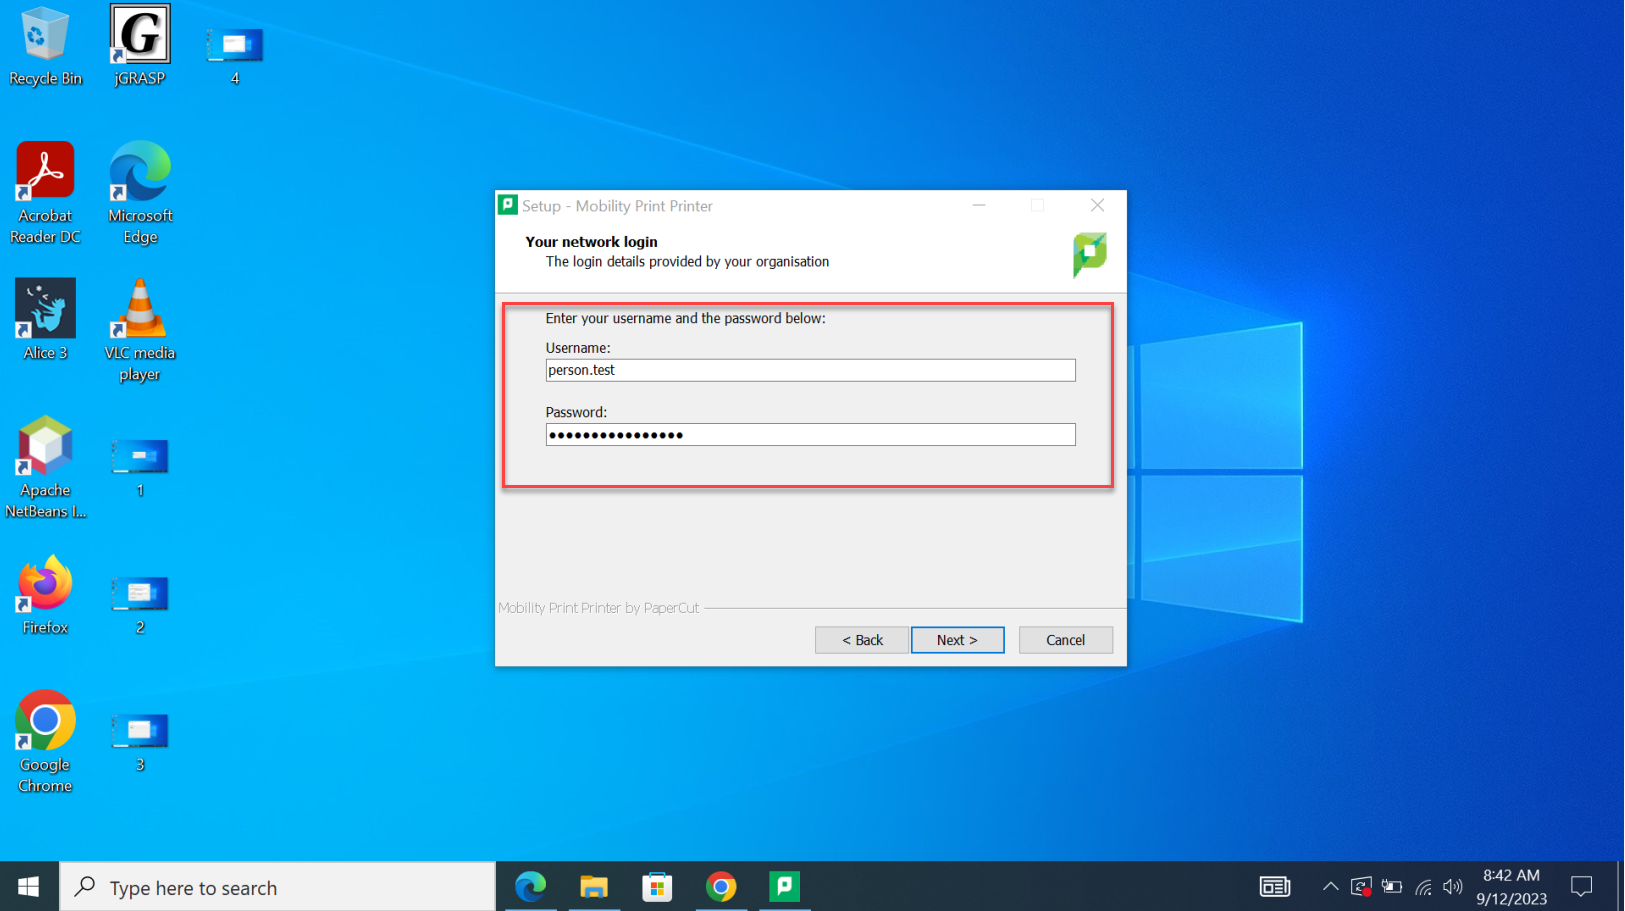
- Click Next
- Click Finish
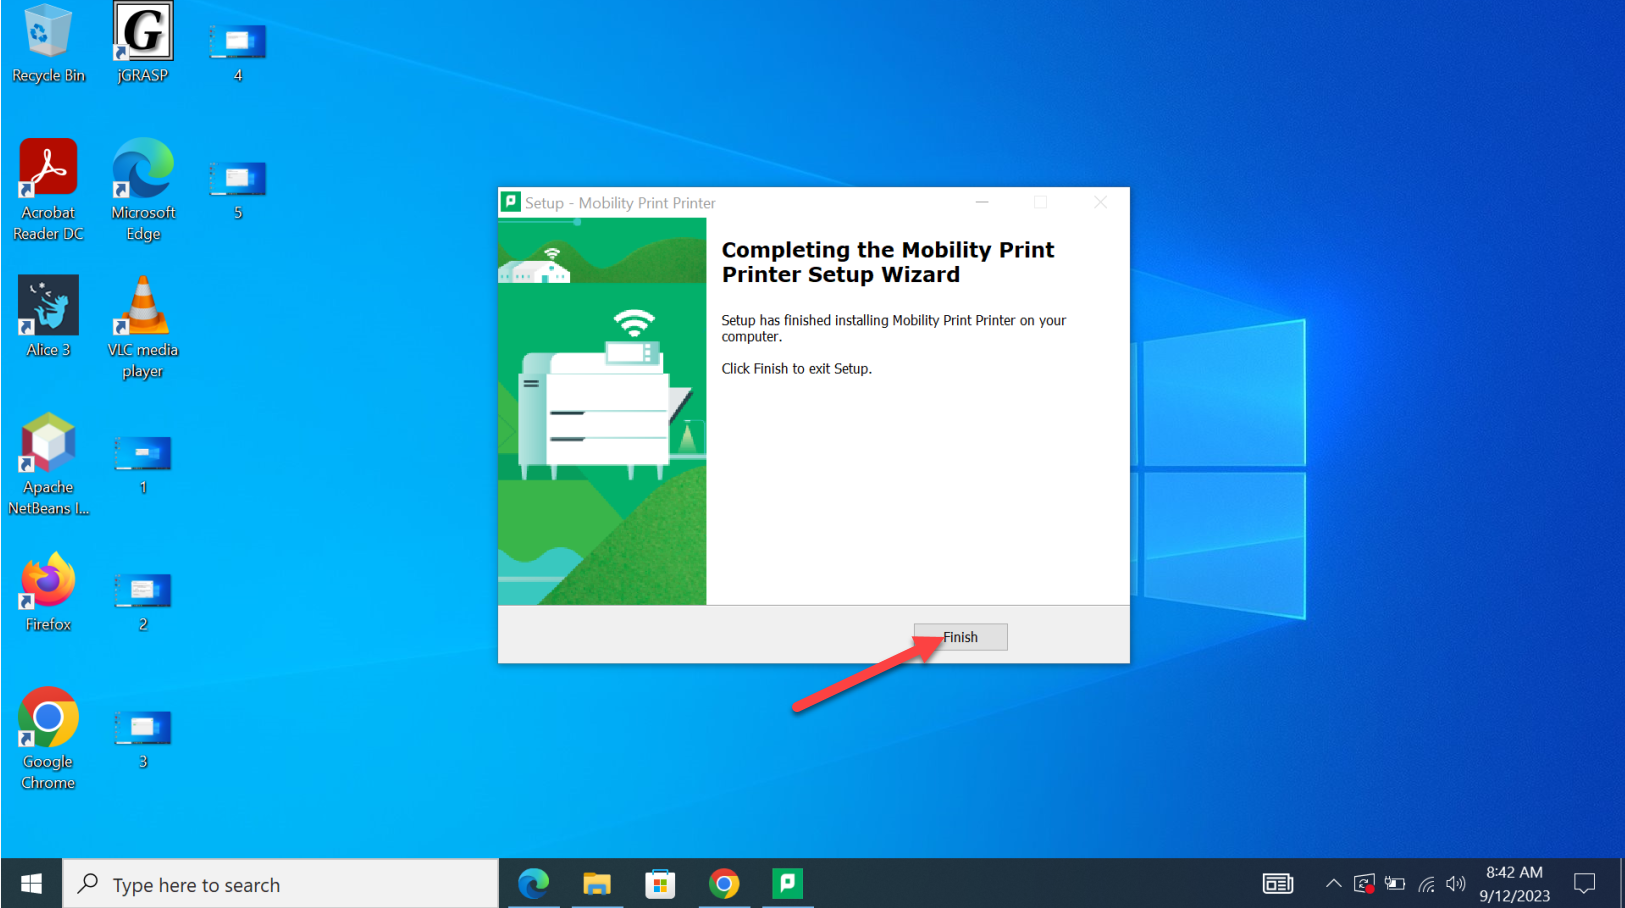
- You are now setup to print from your device
Printing from Personal Windows Device
- Click File
- Click Print
- Select Printer in the drop-down
- CCAC-Black-and-White [CO-PPRCUT-AP-01](Mobility)
- CCAC-Color [CO-PPRCUT-AP-01](Mobility)
- Adjust other printer settings to your needs
- Click Print
- After clicking print, your print job will be in a queue
- You will have to physically walk to the printer to release the job
MAC
Installing Mobility Print Client
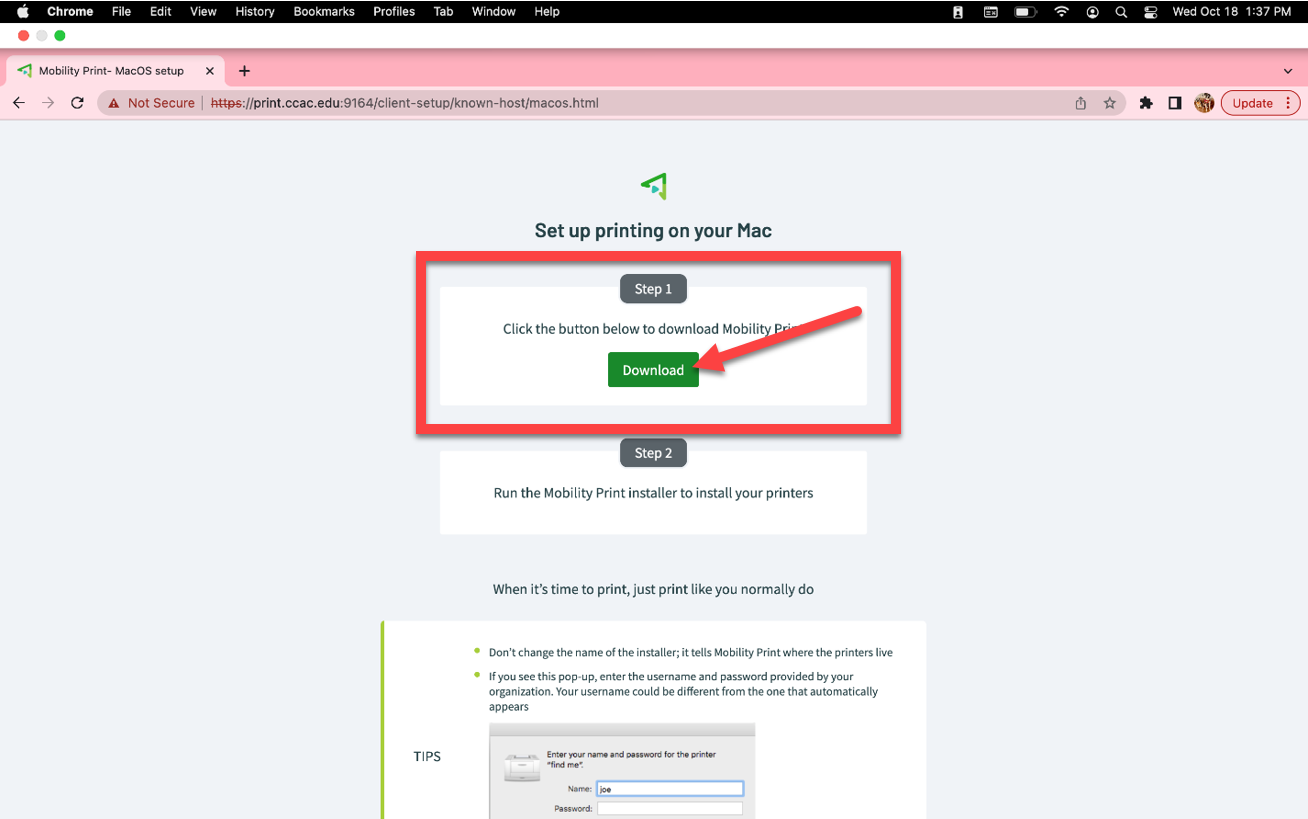
- Open any browser, and navigate to https://print.ccac.edu:9164/client-setup/known-host/macos.html
- Click Download and run Mobility Print
- If download doesn't automatically run, open the download
- Click the Downloads icon in the upper right to display recent downloads

- Click the Downloads icon in the upper right to display recent downloads
- Run the installer

- Press Continue to begin installation

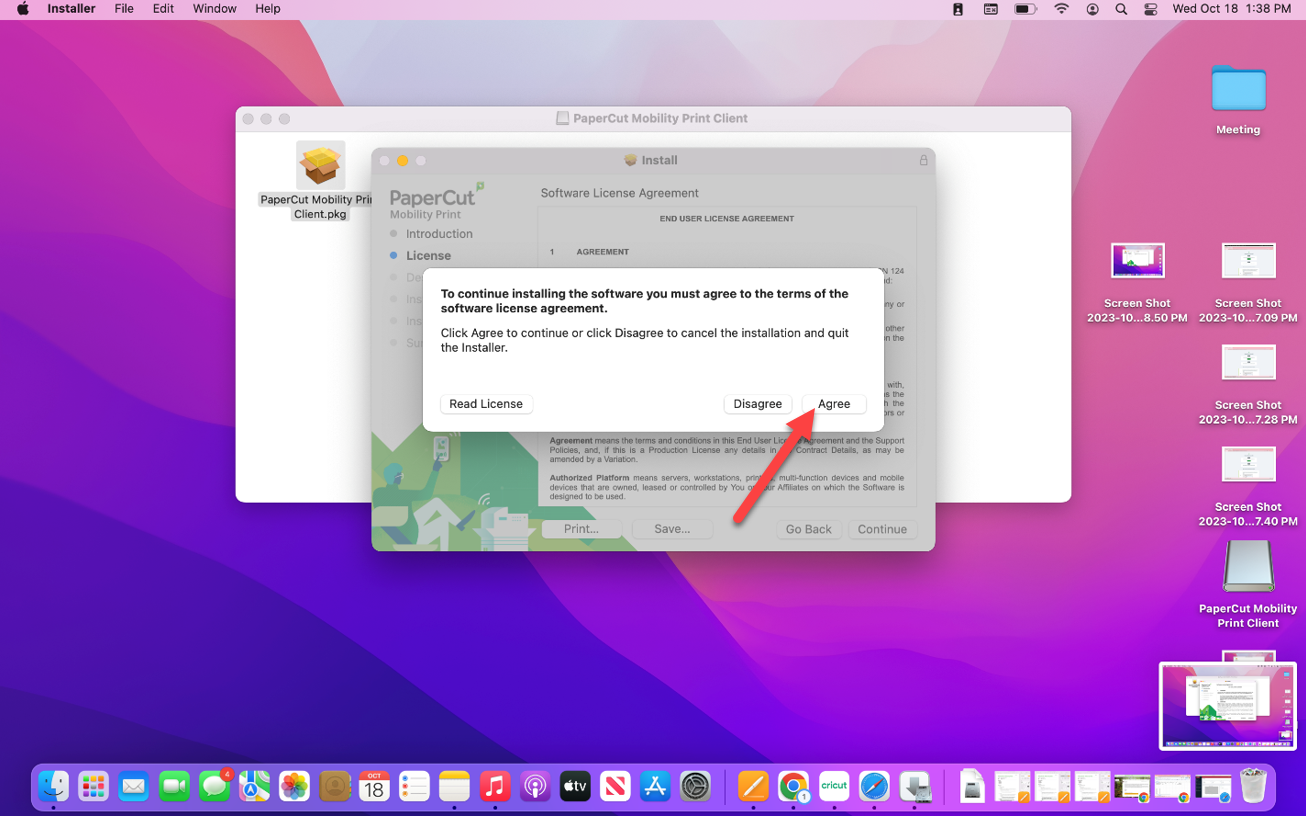
- Read the End User License Agreement, and then click Continue
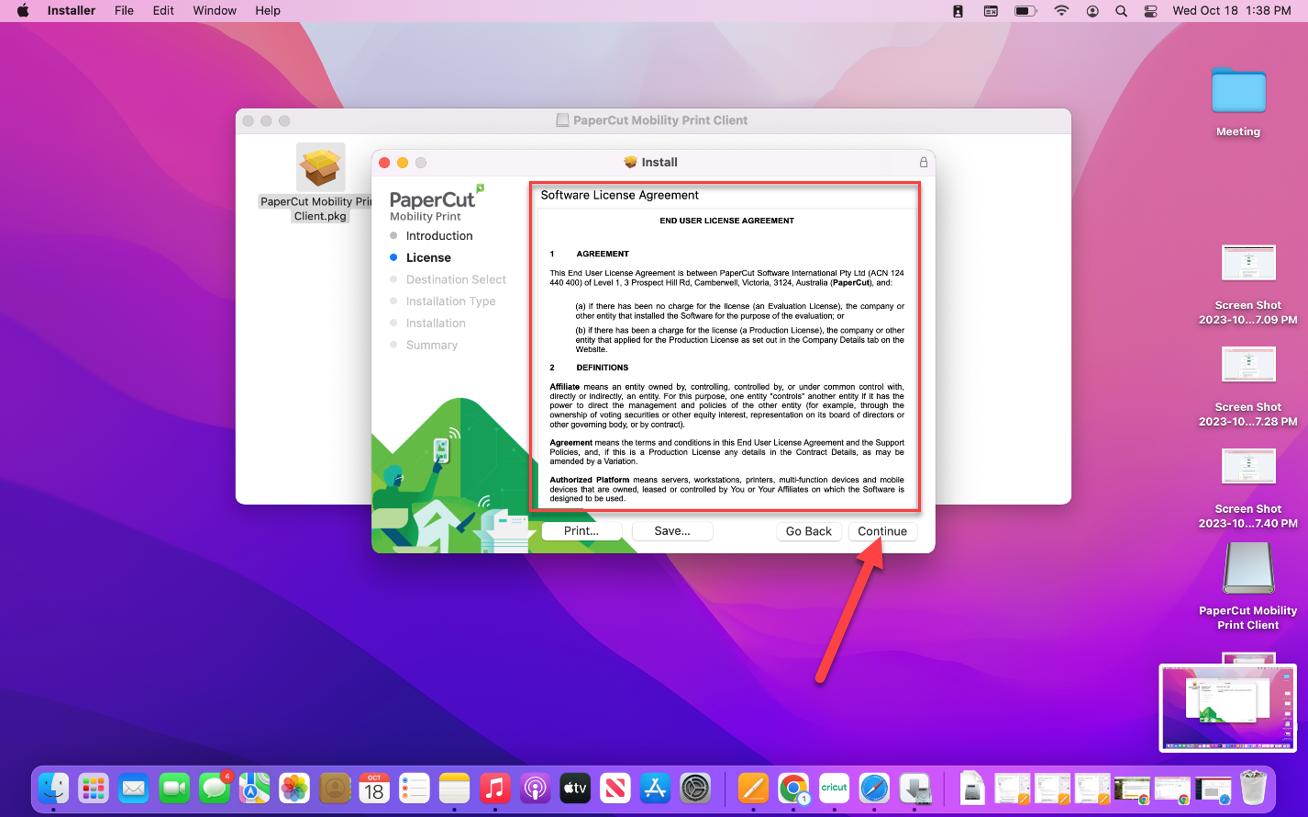
- Click Agree to accept the terms of the End User Agreement
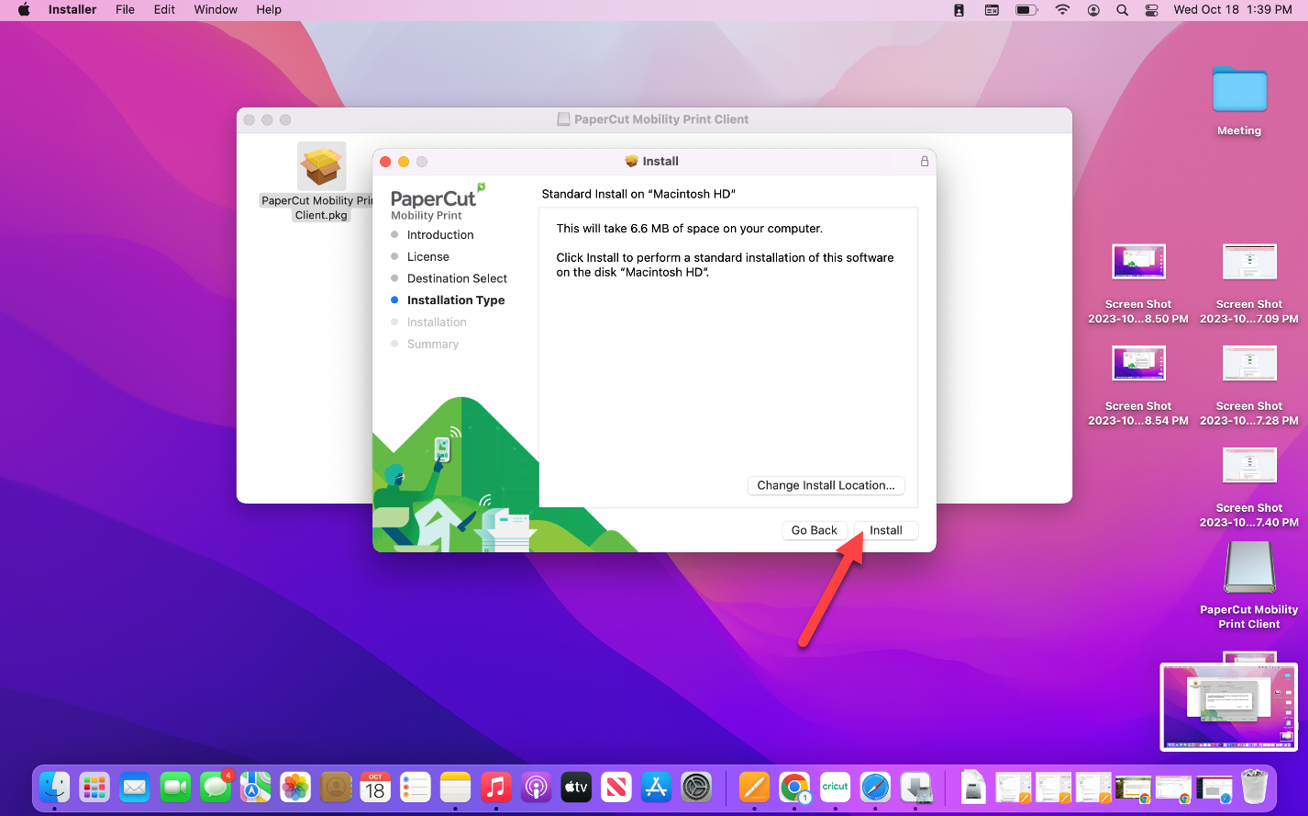
- Click on install to start installation
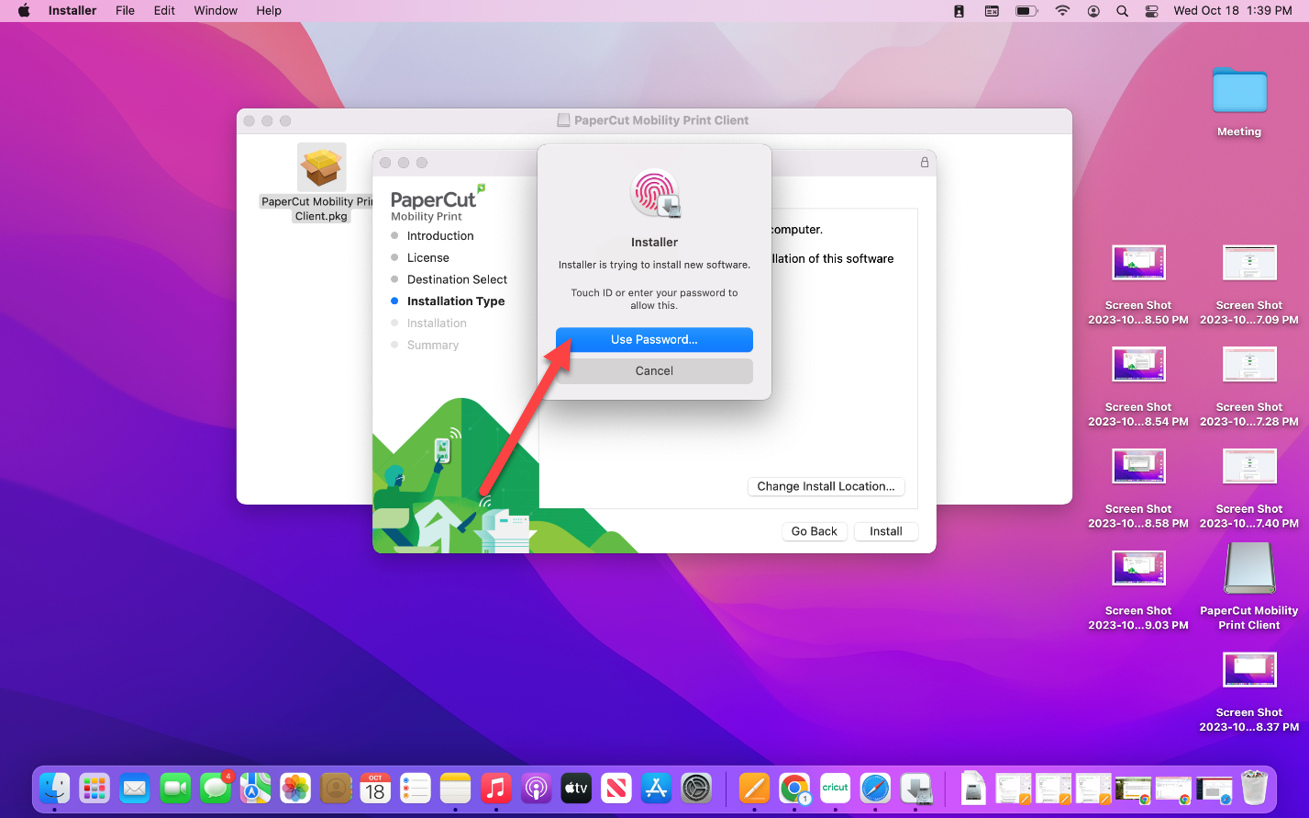
- Enter Mac password to allow
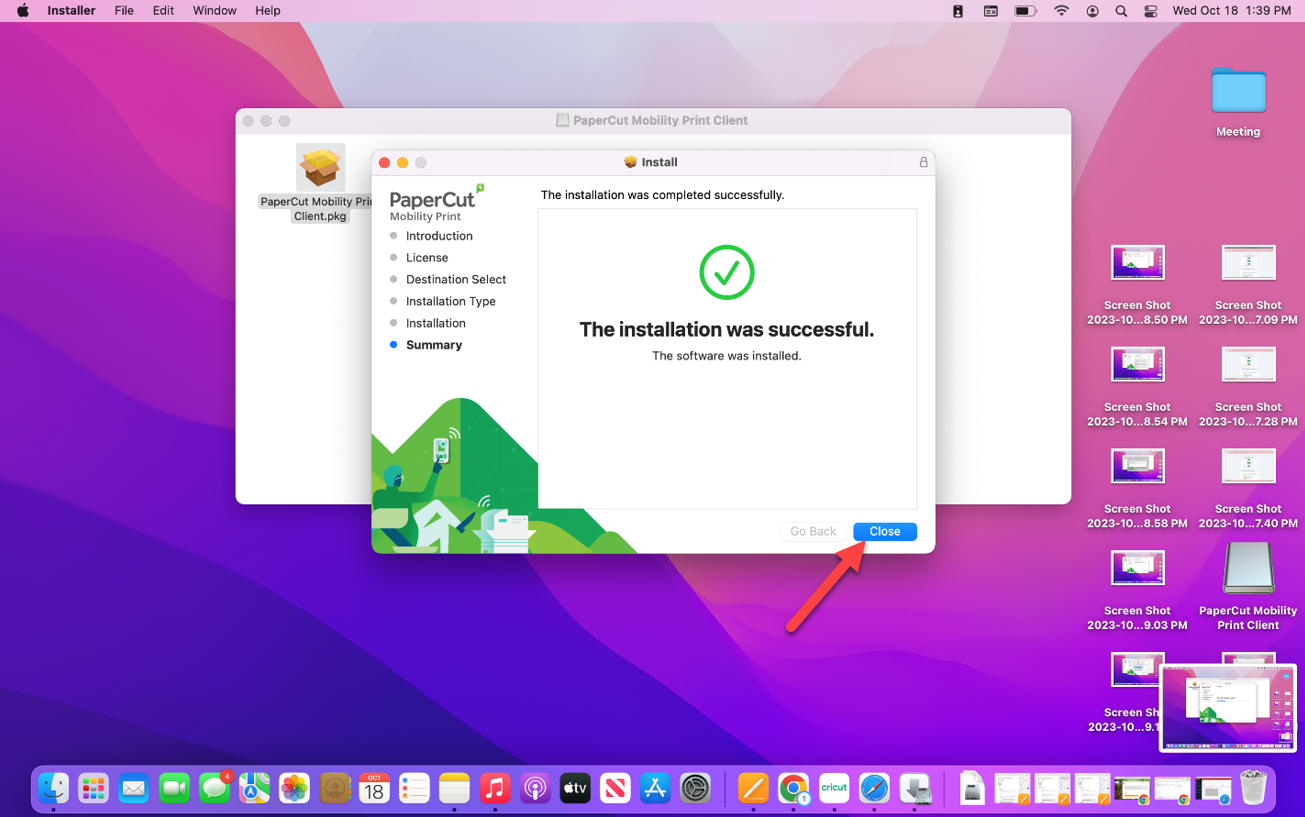
- Installation will proceed through various steps
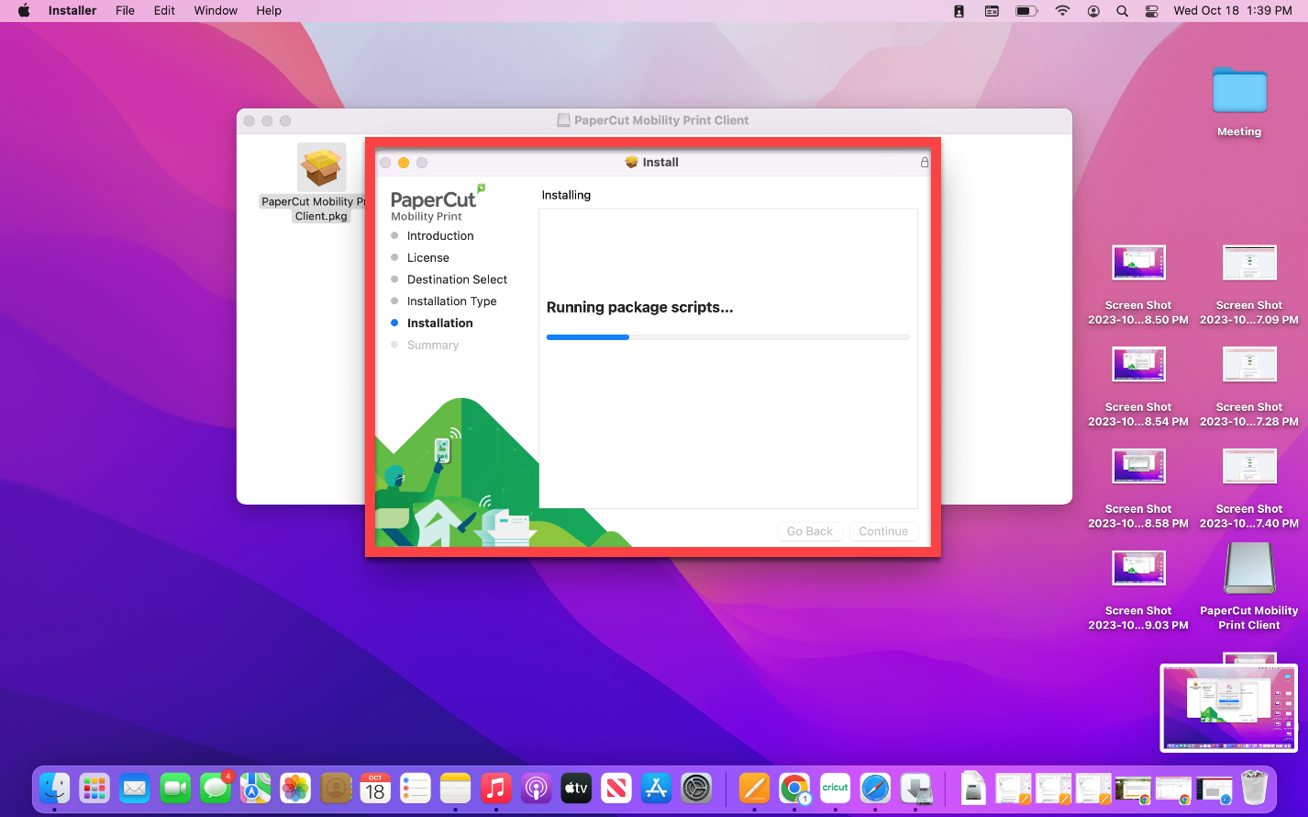
- Click Close
Printing from Personal MAC Device
- Click on the printer icon
- Select Printer in the drop-down
- CCAC-Black-and-White on printers.ccac.org
- CCAC-Color on printers.ccac.org
- Adjust other printer settings to your needs
- Click Print

- Enter your CCAC NetID username and password

- Click OK

- After clicking OK, your print job will be in a queue
- You will have to physically walk to the printer to release the job
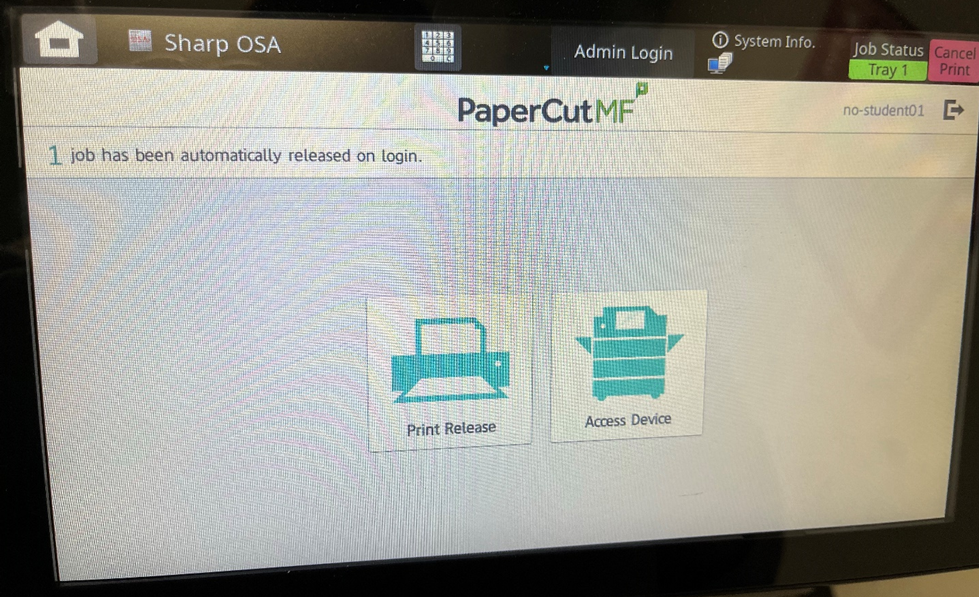
How to Release a Printing Job from Printer
How to Release a Printing Job from Printer
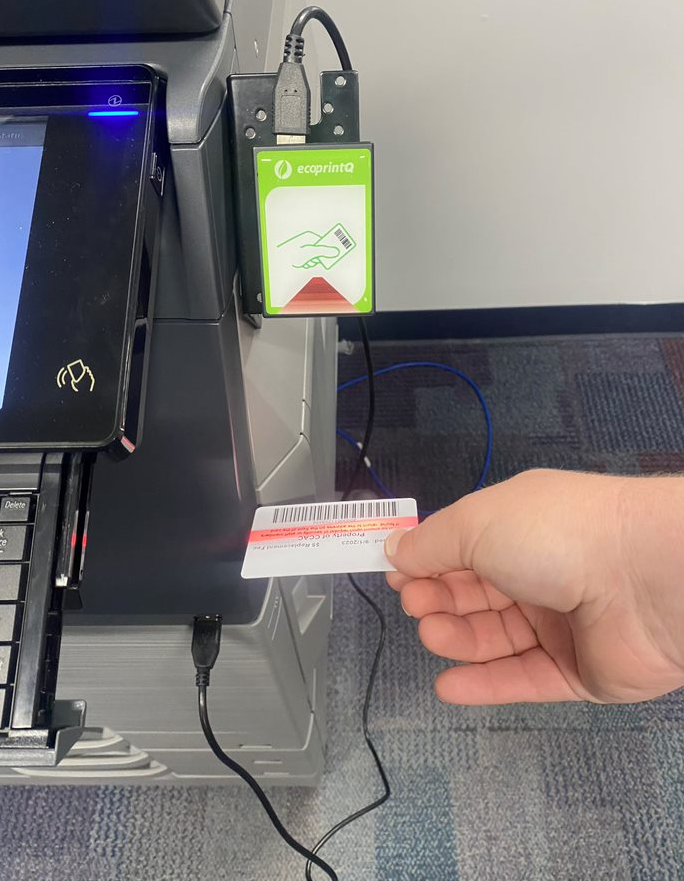
Release Using ID Card
- Walk to a Printer

- Use the ID Badge Scanner to scan the barcode on the back of your CCAC ID Card
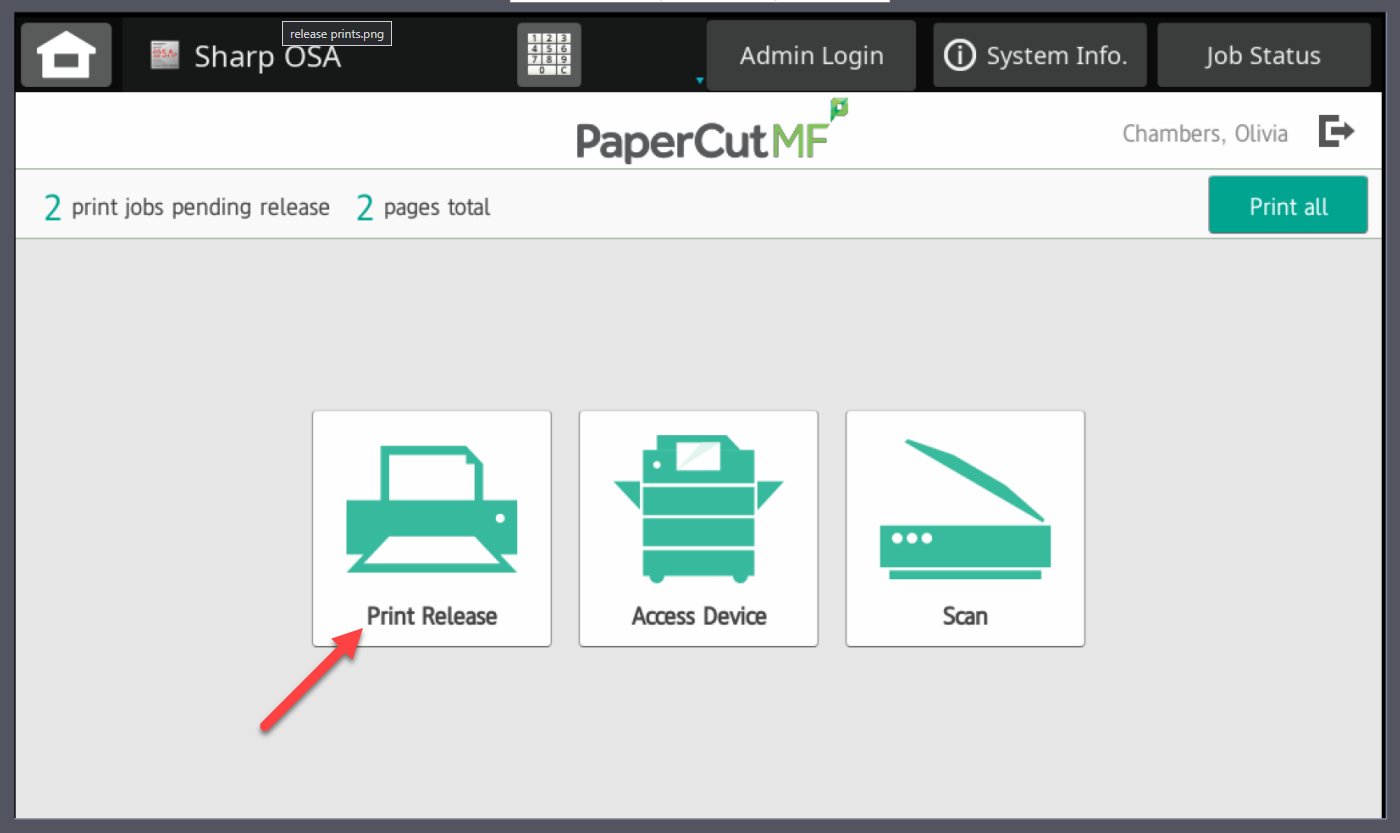
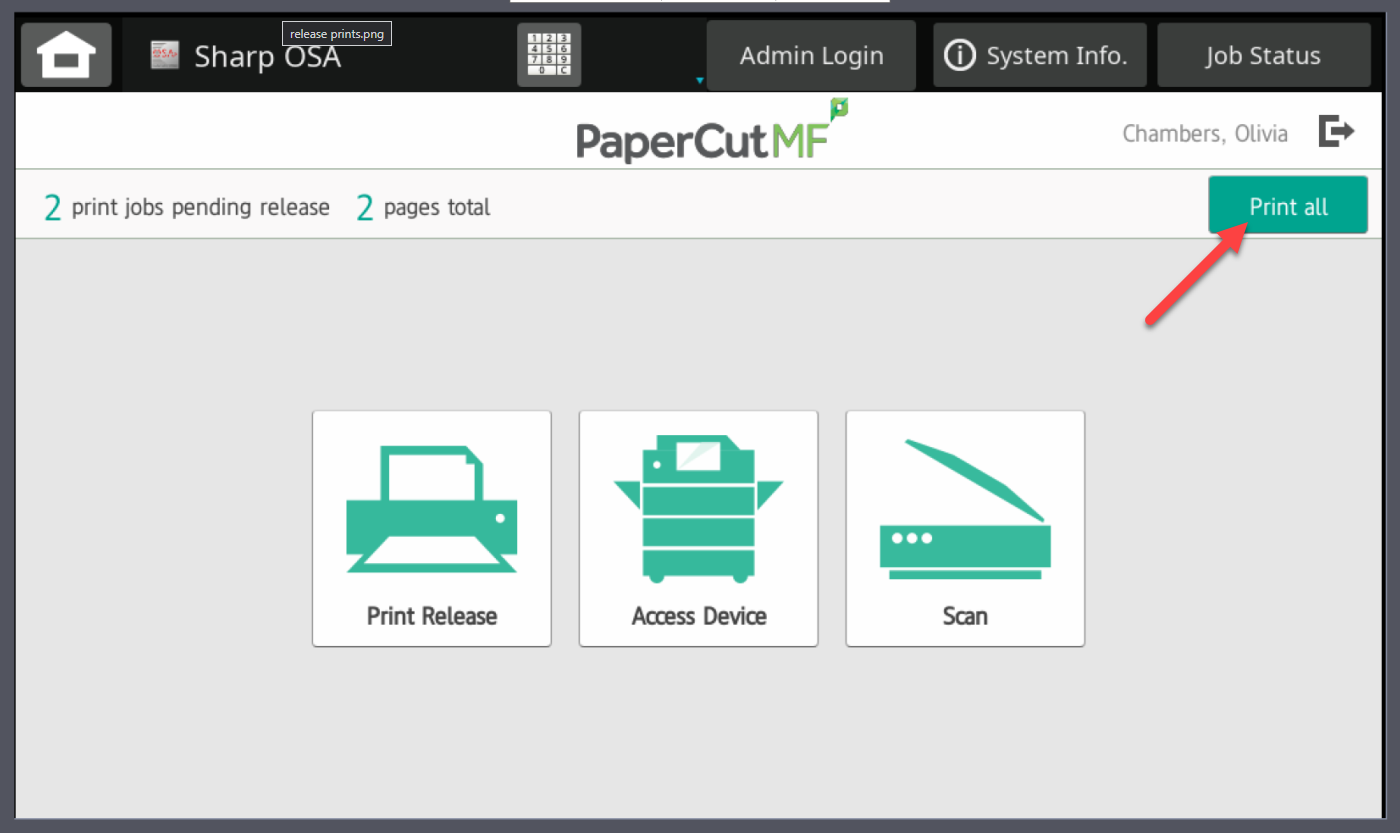
- To print all jobs associate with you click Print all

- To print specific jobs associated with you click Print Release
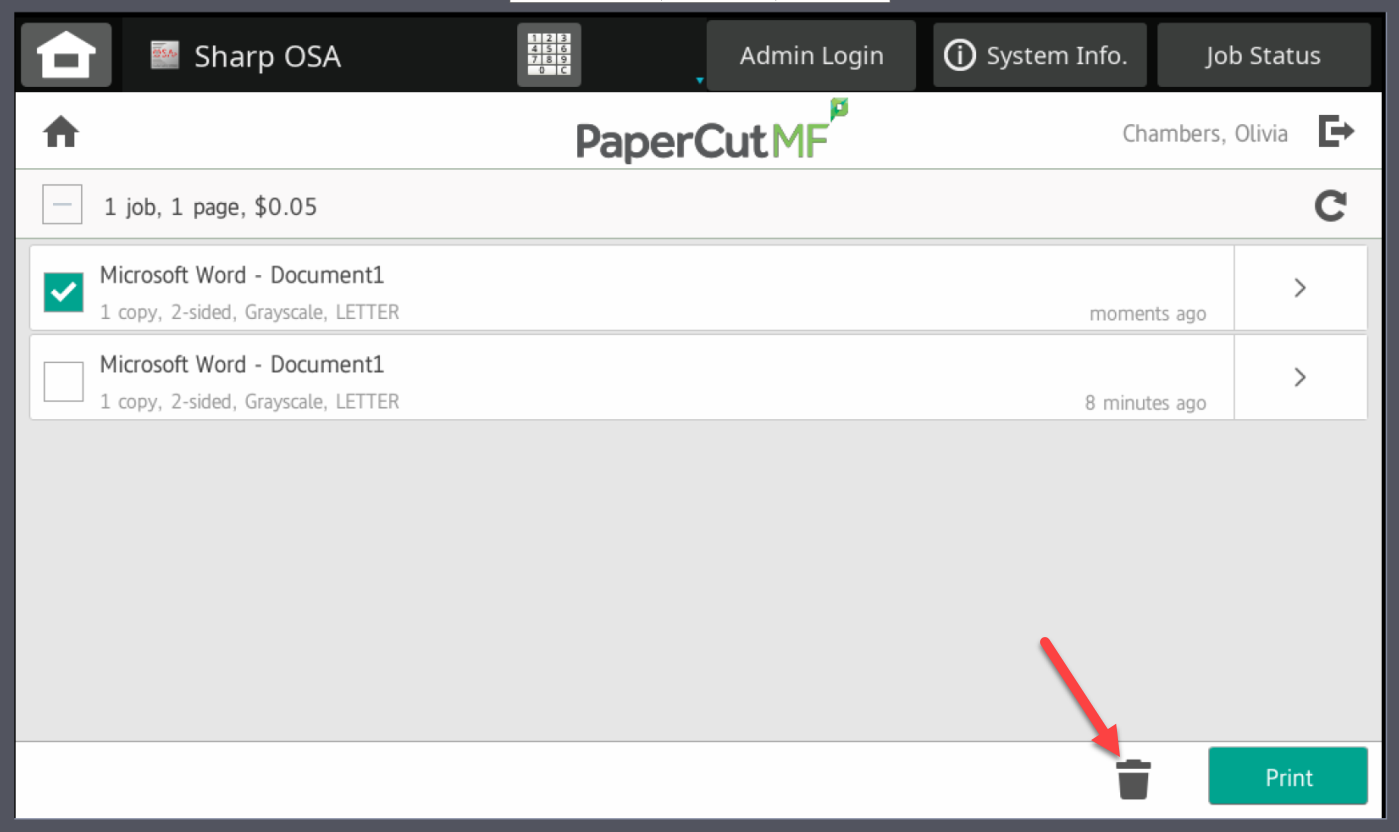
- Select the jobs that you want to print

- Click Print

- You can delete unwanted print jobs, by clicking on the trash can

- Print job will be released at the printer
Release Using Your CCAC NetID
- Walk to a Printer

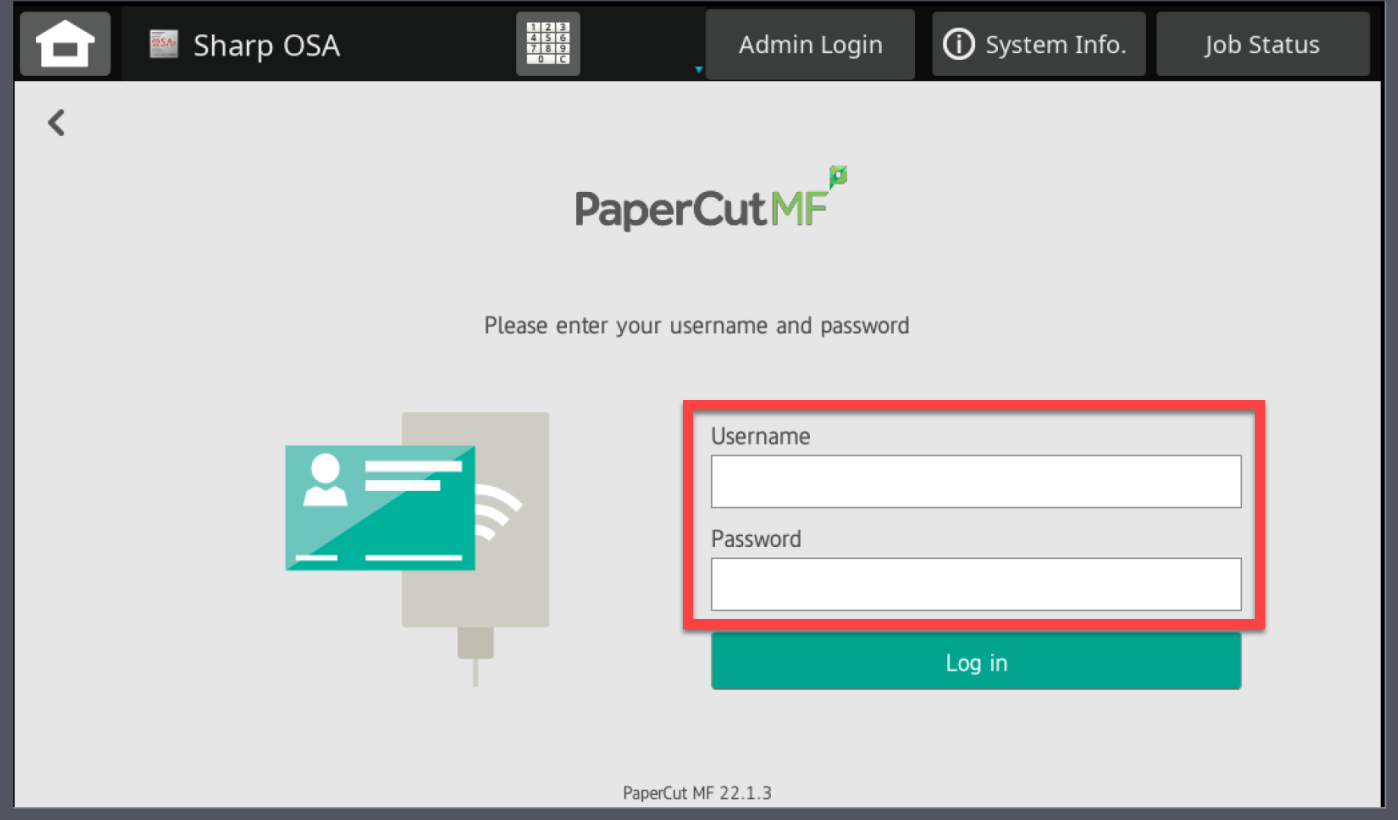
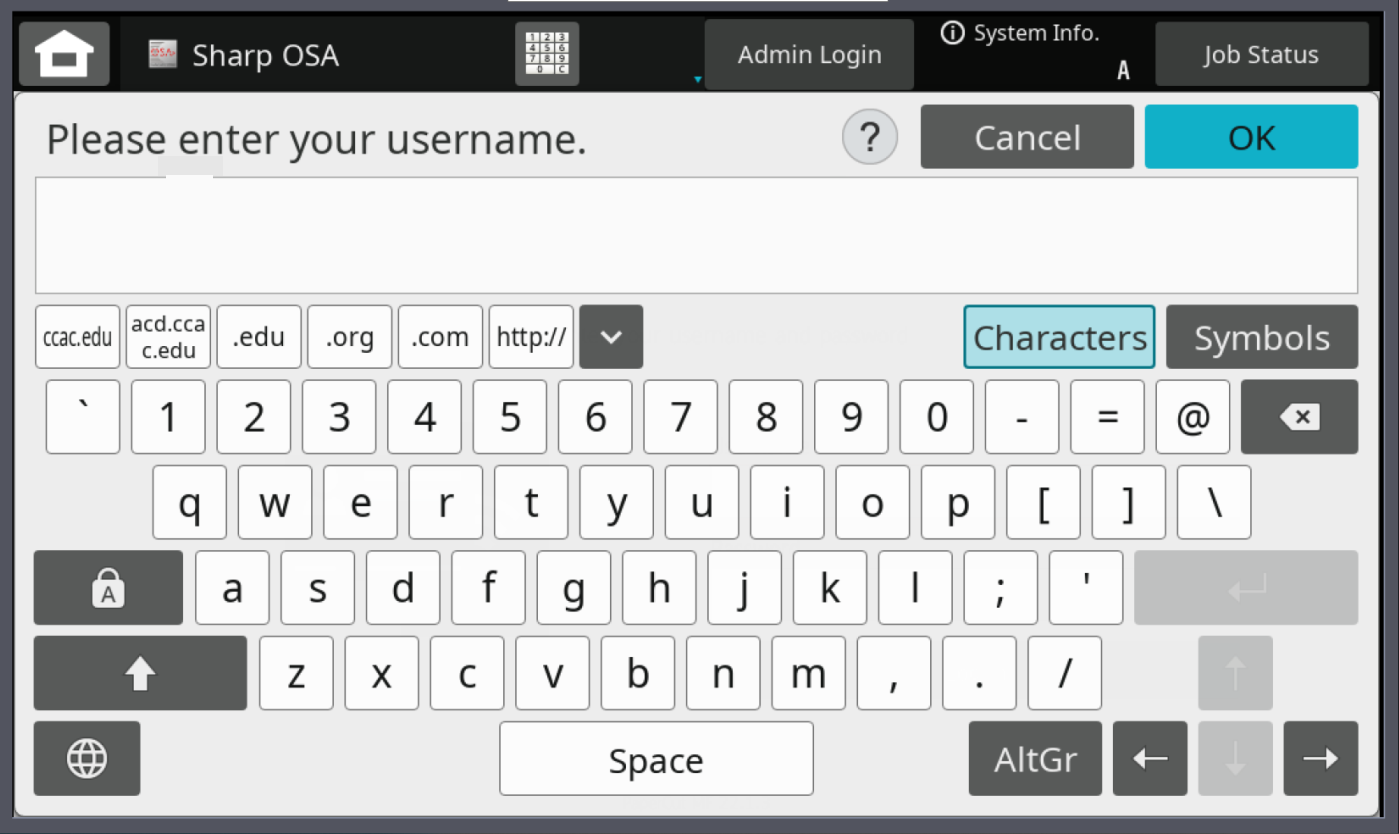
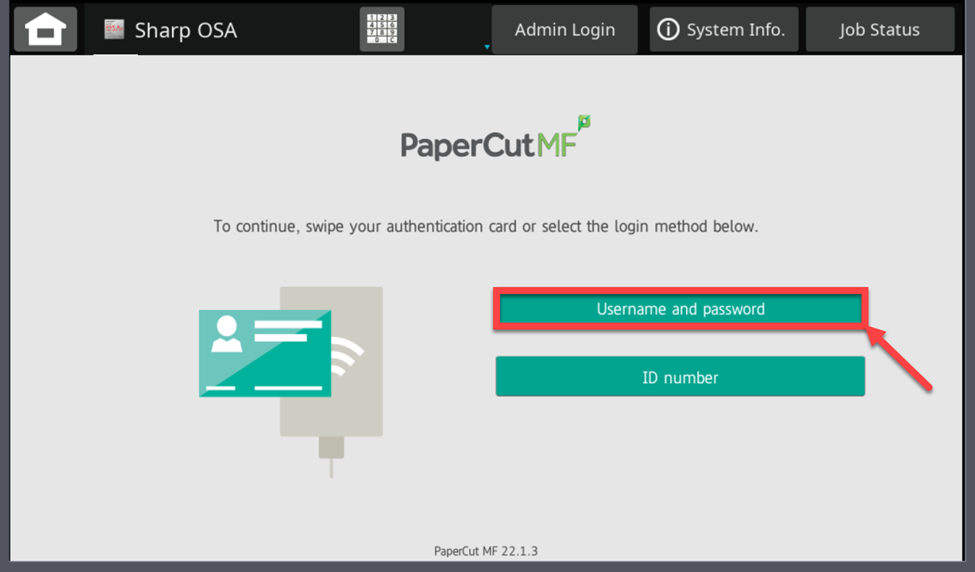
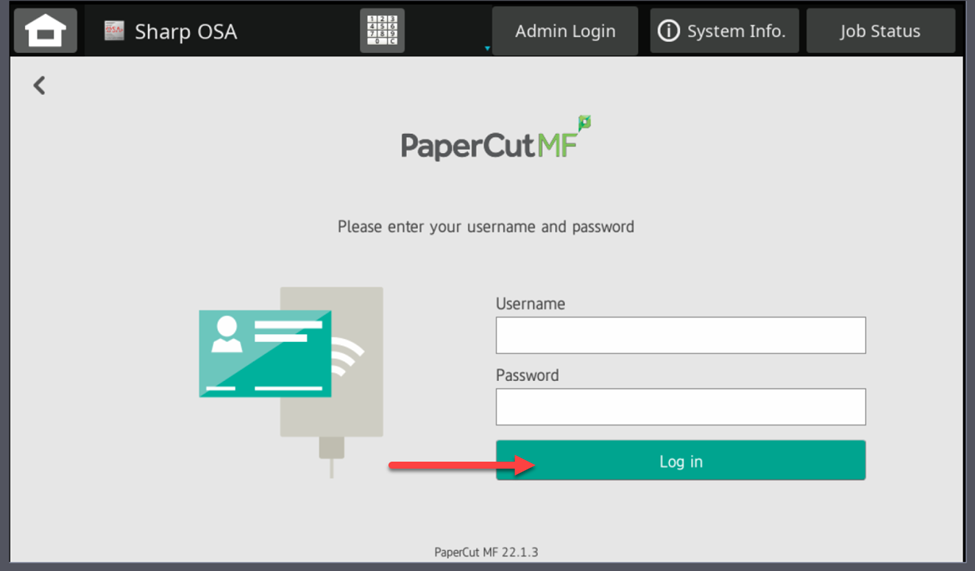
- On the touch pad, tap Username and password

- Enter CCAC NetID and Password
- Using Onscreen Keyboard
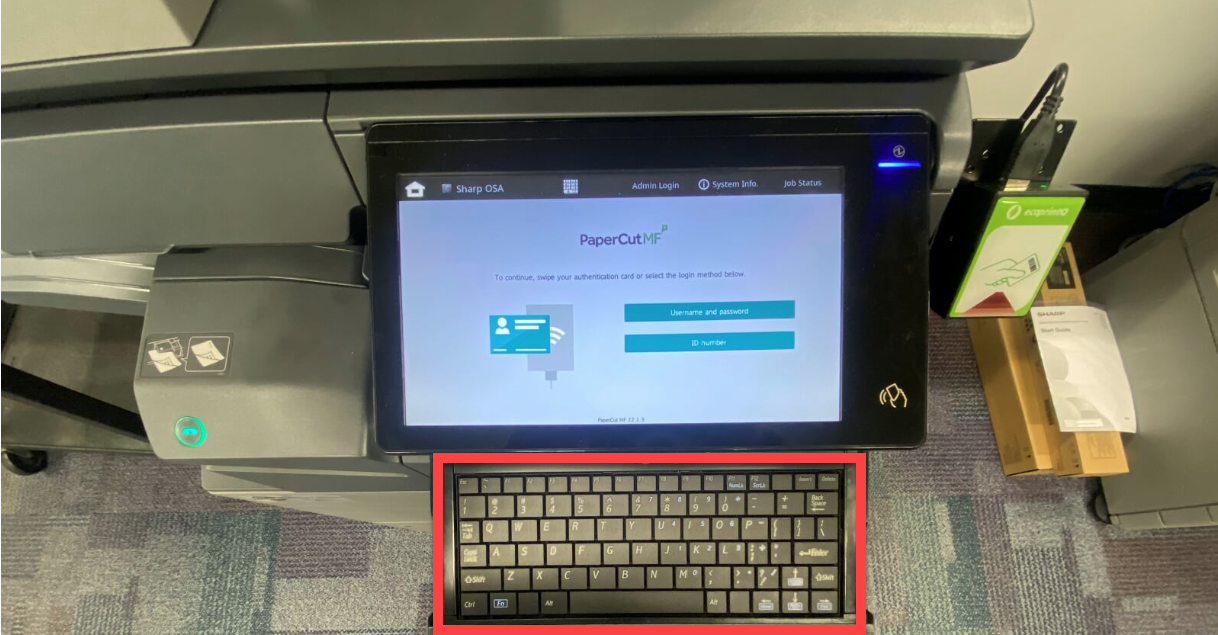
- Using Pull out Keyboard at printer
- Using Onscreen Keyboard
- Click Log in

- To print all jobs associate with you click Print all

- To print specific jobs associated with you click Print Release

- Select the jobs that you want to print

- Click Print
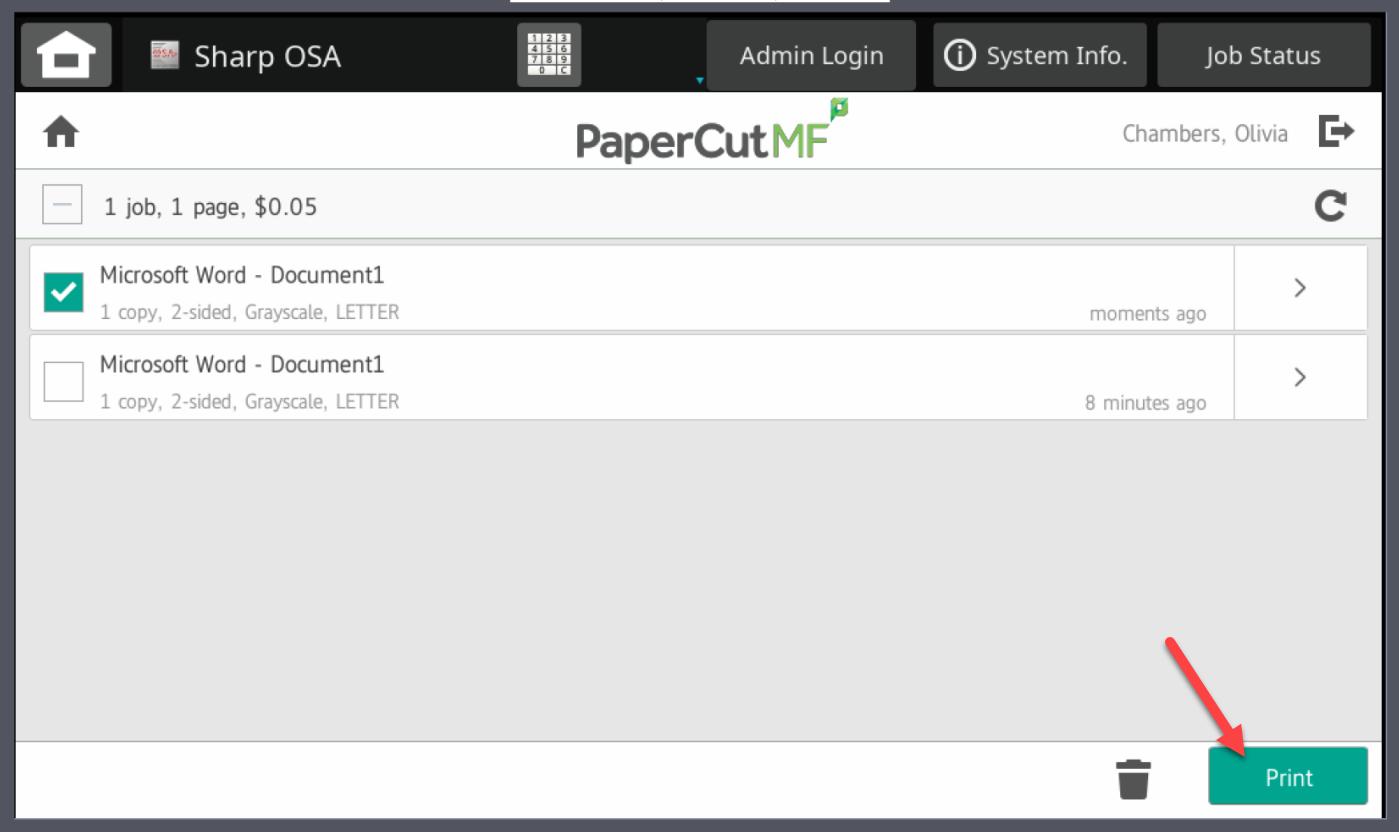
- You can delete unwanted print jobs, by clicking on the trash can

- Print job will be released at the printer
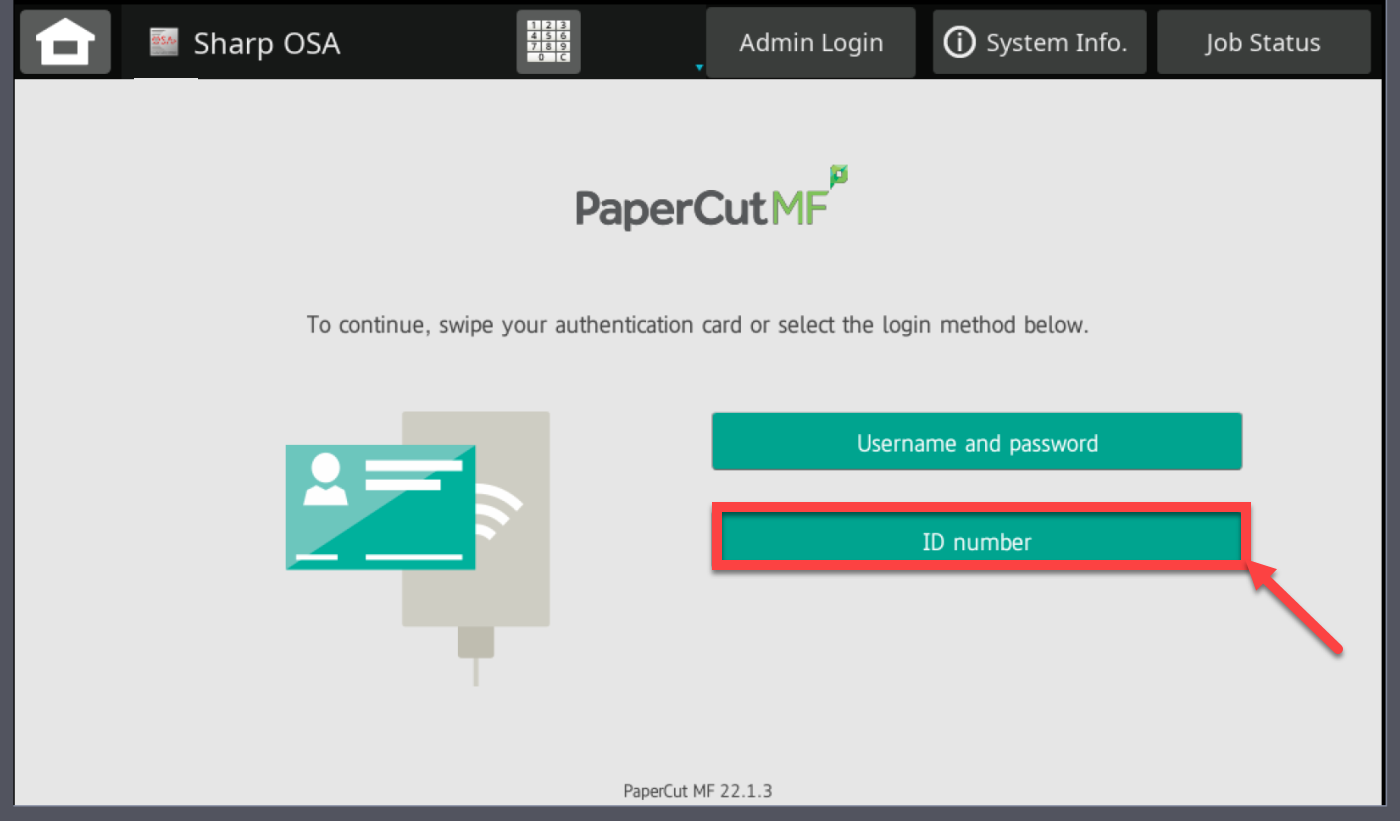
Release Using Your 7-Digit ID Number
- Walk to a Printer
- On the touch pad, tap ID number
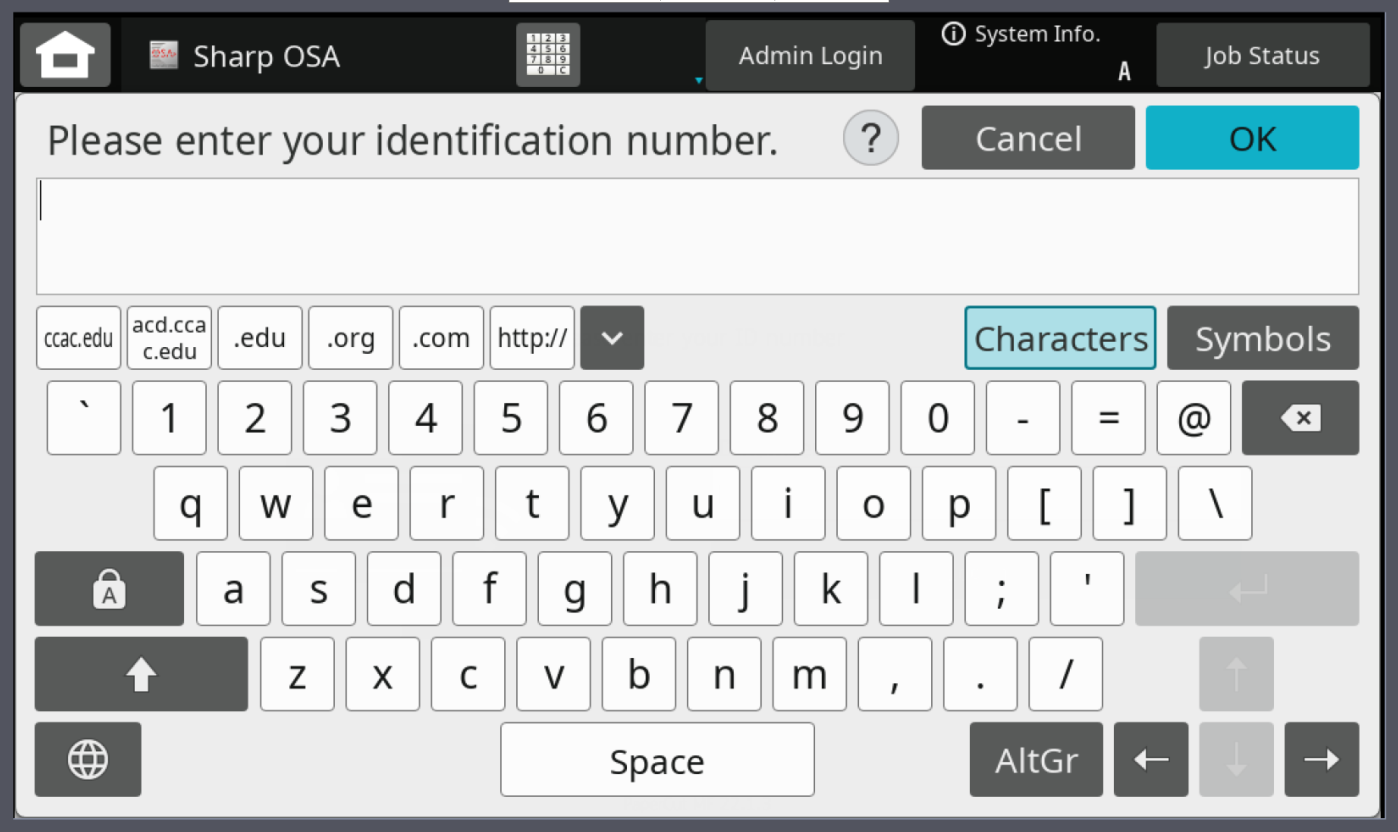
- Enter your 7-Digit ID Number
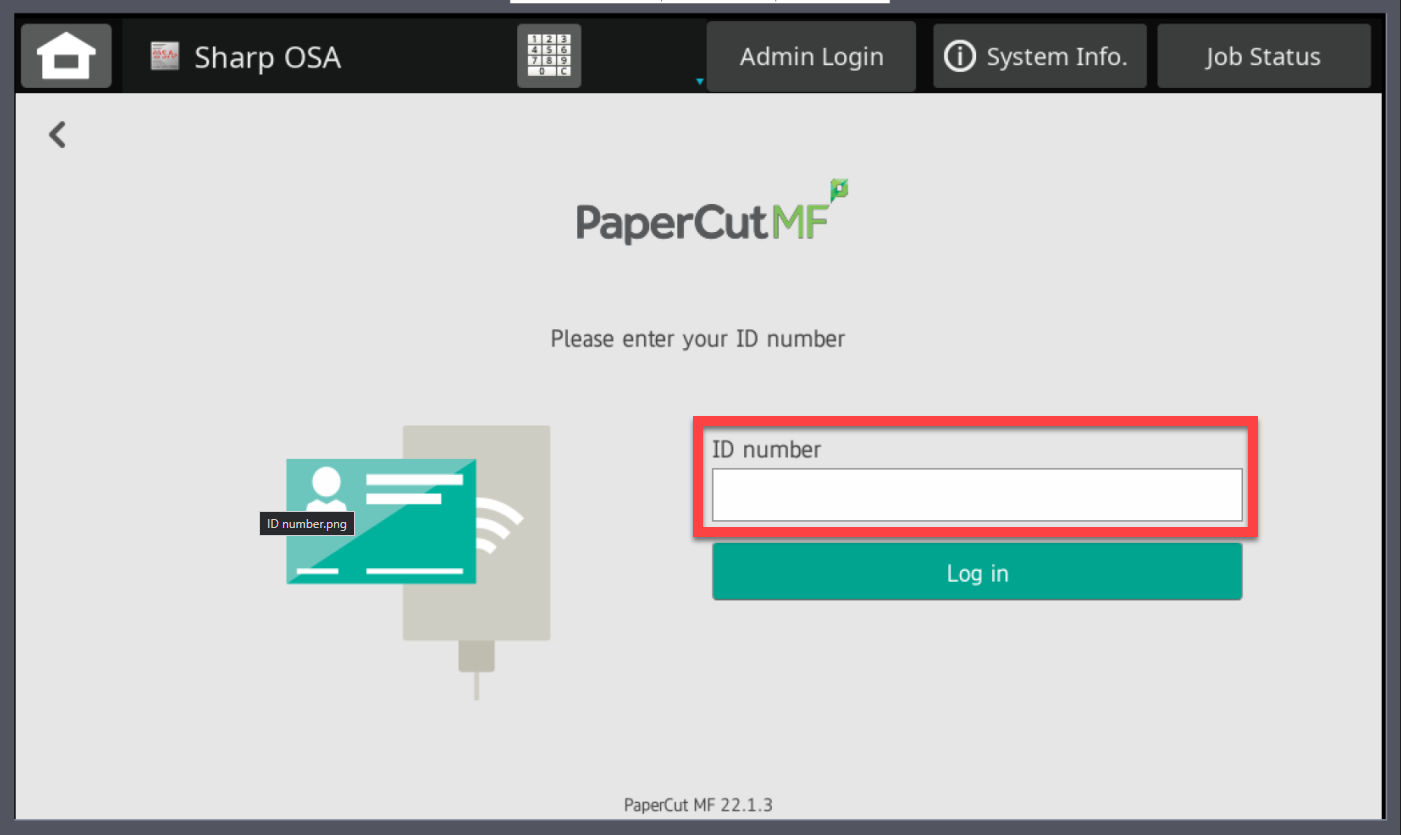
- Using Onscreen Keyboard
- Using Pull out Keyboard at printer

- Using Onscreen Keyboard
- Click Log in
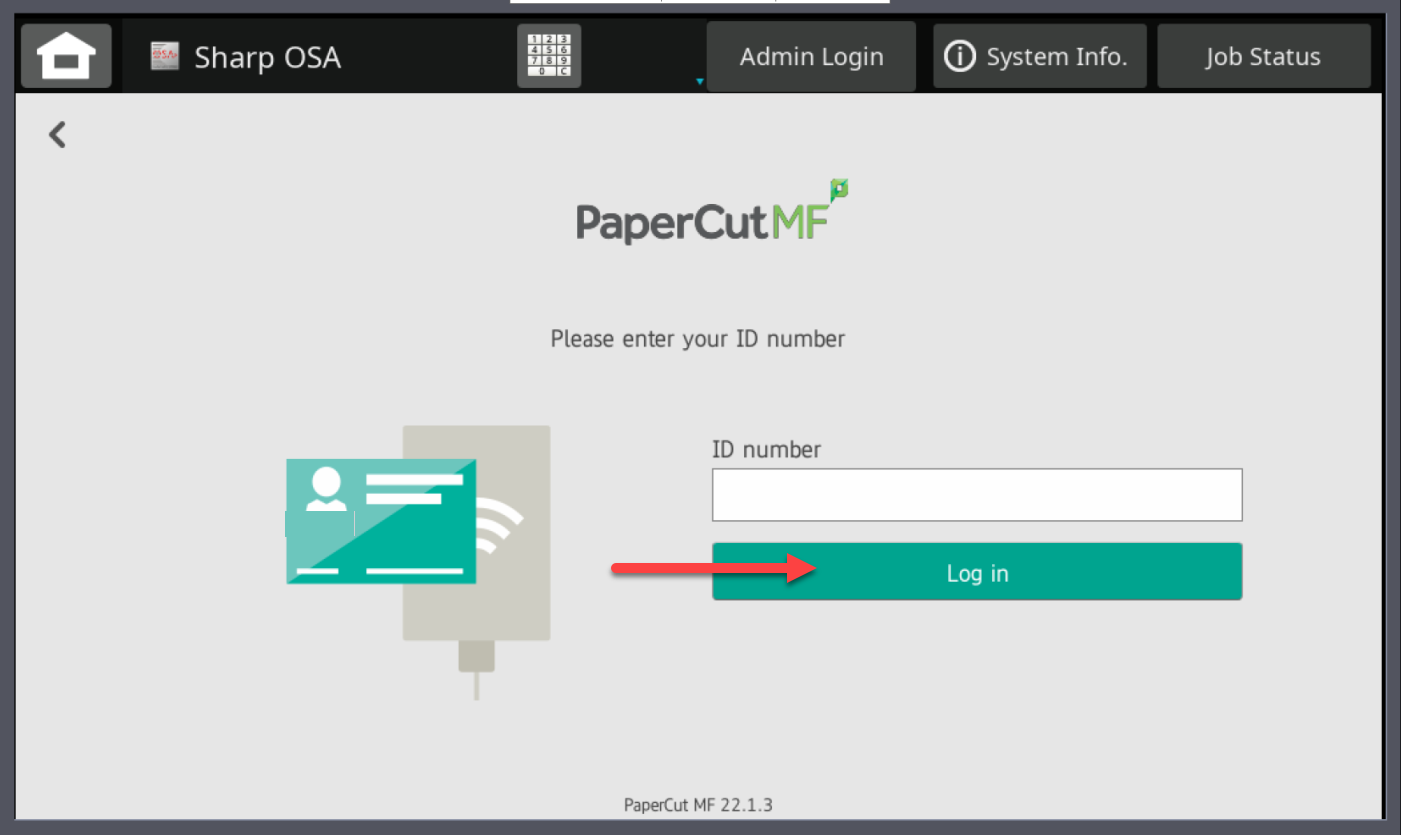
- To print all jobs associate with you click Print all
- To print specific jobs associated with you click Print Release

- Select the jobs that you want to print

- Click Print

- You can delete unwanted print jobs, by clicking on the trash can
- Print job will be released at the printer
Copying Using the Sharp Multi-Functioning Printers
Copying Using the Sharp Multi-Functioning Printers
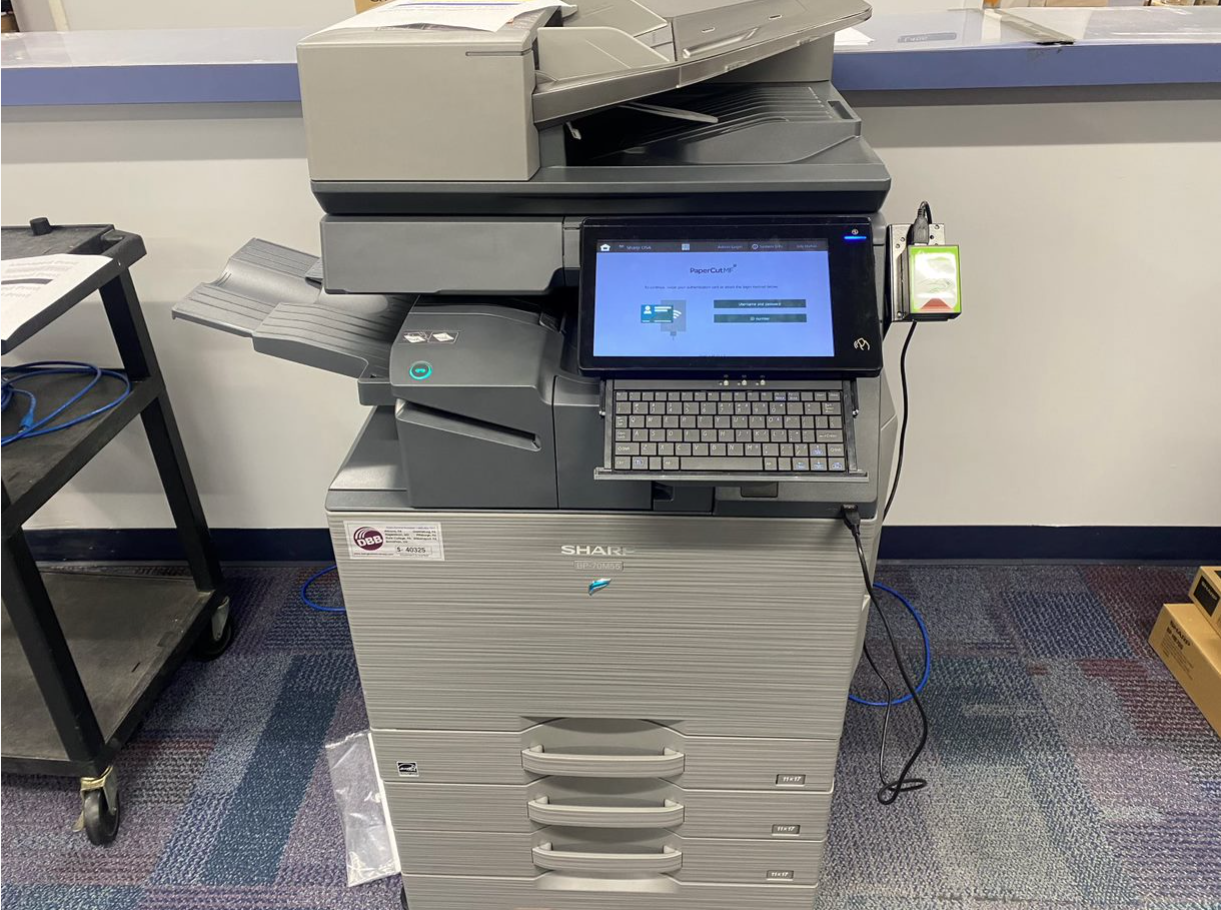
- Walk up to a printer

- Load the paper
- Paper Tray (need image)
- Scanner (need image)
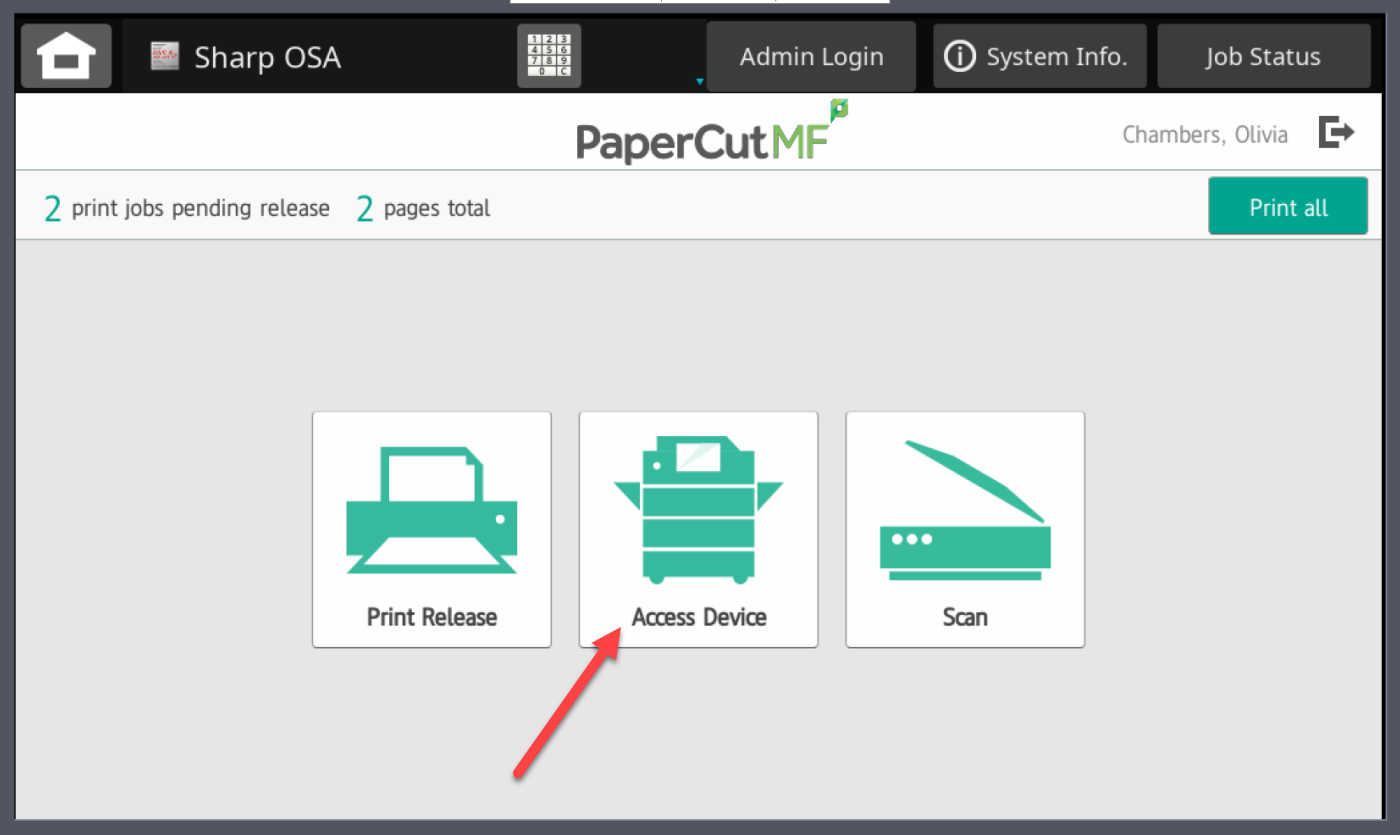
- On touch pad, tap Access Device
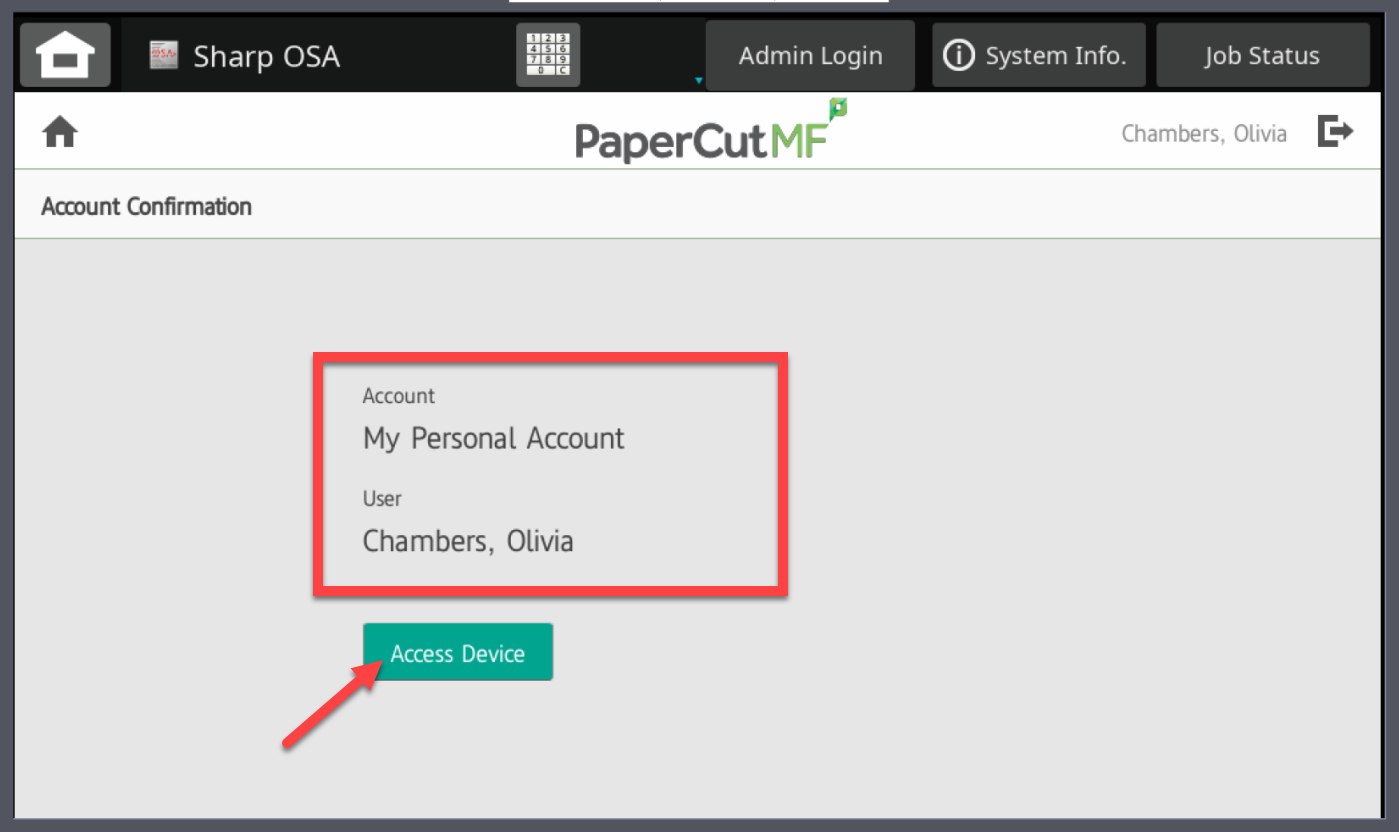
- Confirm information, and tap Access Device
- Tap Copy
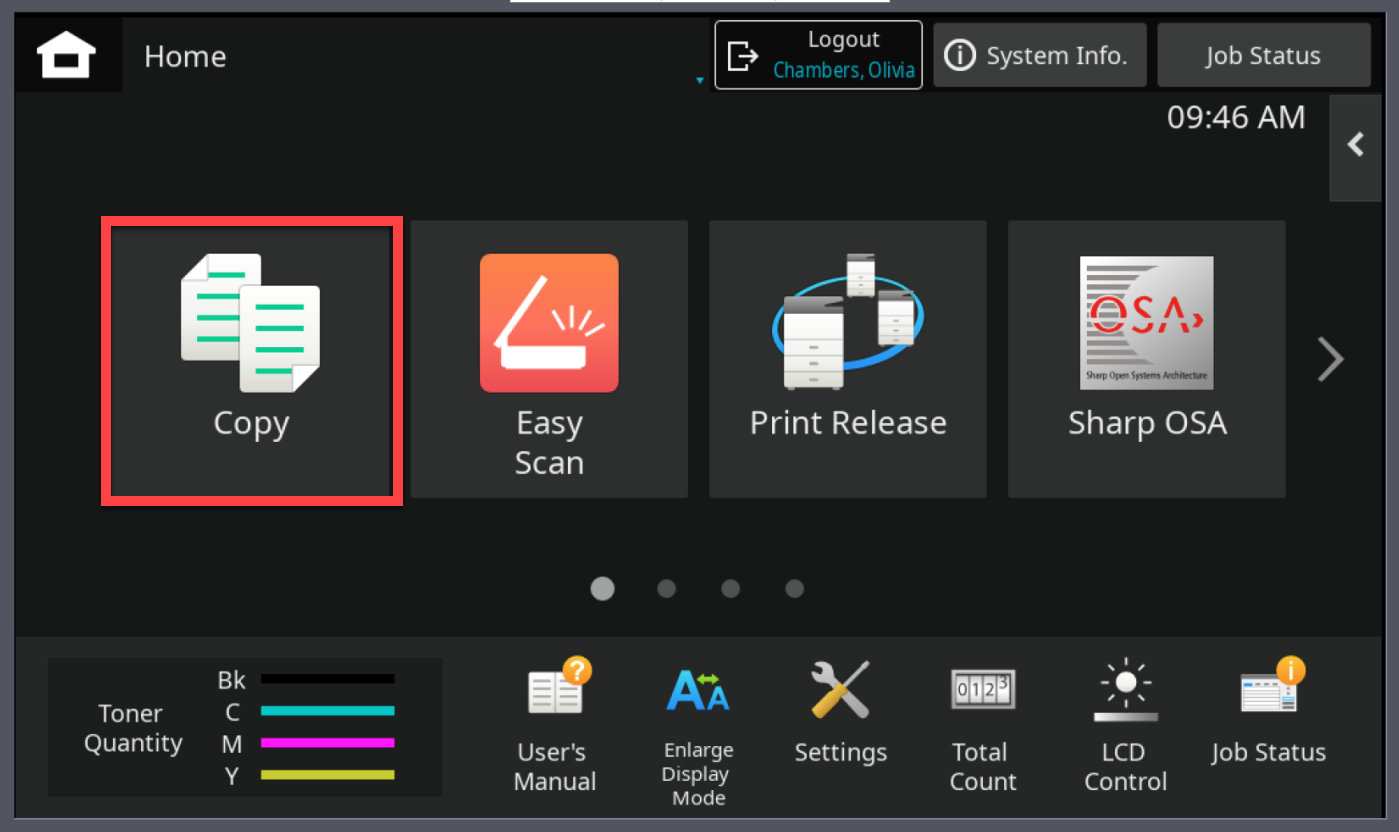
- Set/Confirm your settings
- Click here for documentation on advanced copy settings
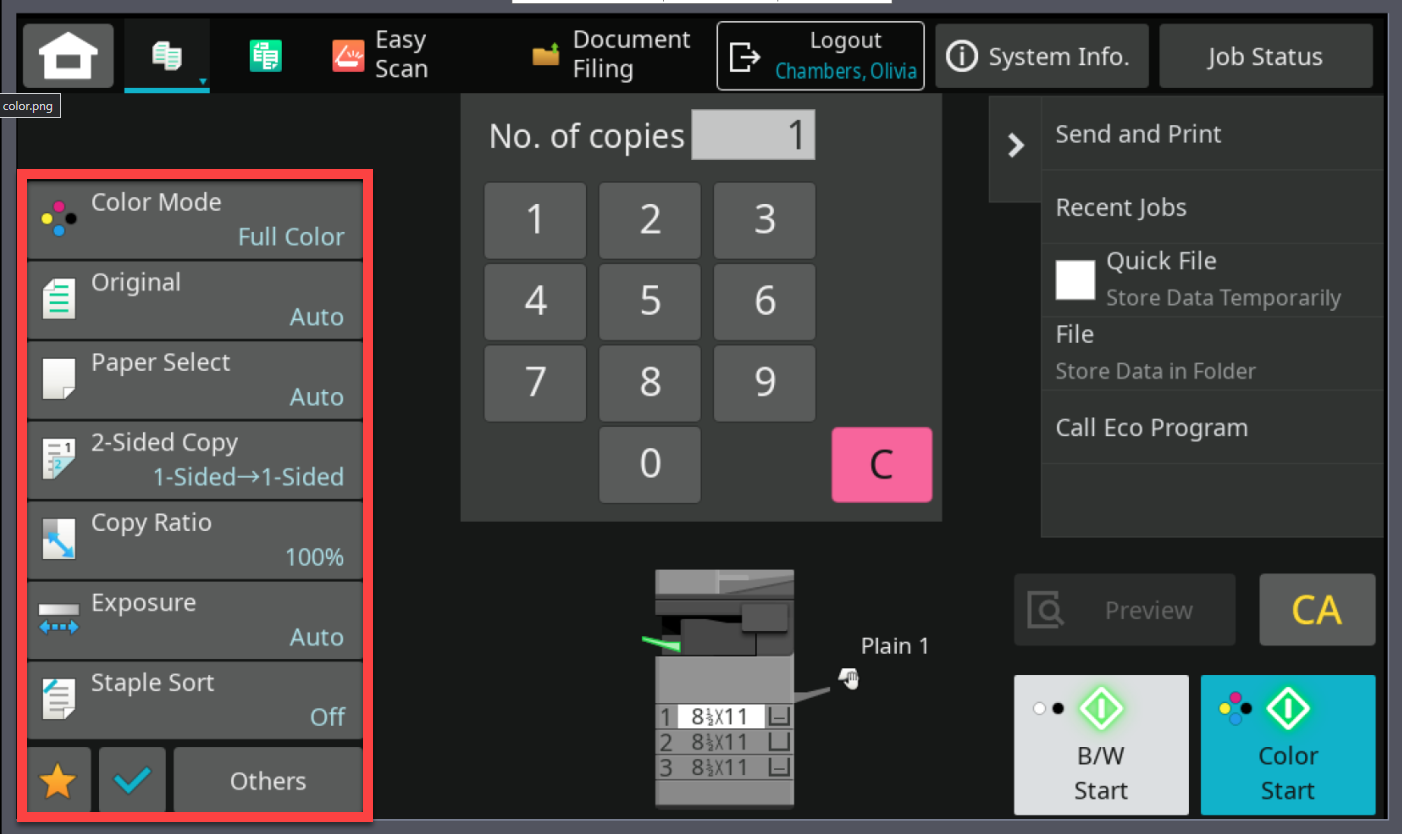
- Click here for documentation on advanced copy settings
- Enter in number of copies needed
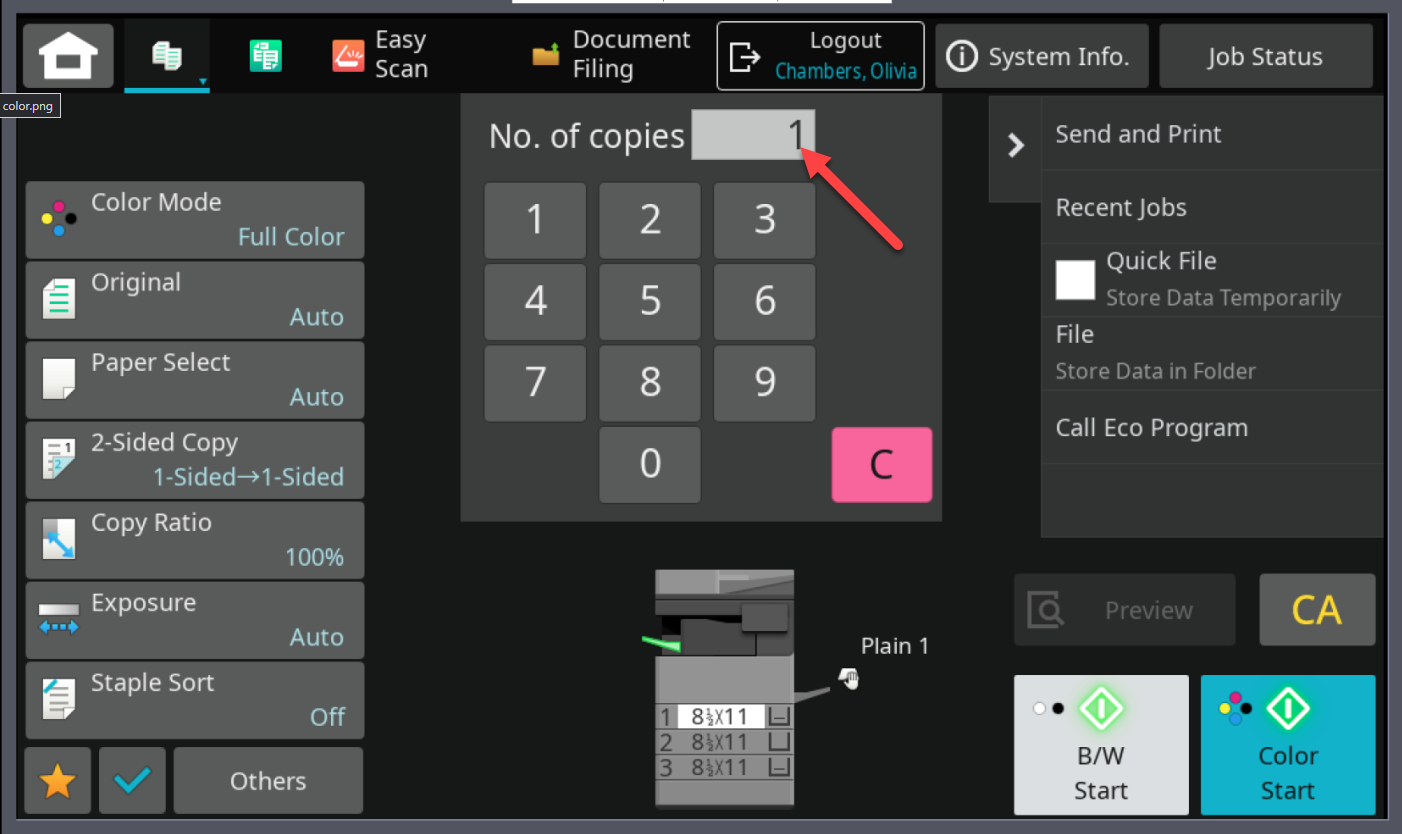
- Select Start button
- If using a color printer, you will see a B/W Start button (Black and White) and a Color Start (Color Copy)

- If using a color printer, you will see a B/W Start button (Black and White) and a Color Start (Color Copy)
Scanning Using the Sharp Multi-Purpose Printers
Scanning Using the Sharp Multi-Purpose Printers
- Walk up to a printer

-
Load the paper
- Paper Tray
- Scanner
- Tap Scan

- Tap a location where you want the scan to save
- One Drive

- Confirm the information provided
- Email

- One-Drive

- Email
- Tap Start
- Scan will begin to process

- Scan will begin to process
- Tap Scan Next page to add to the scan or Tap Scan new document to start a new scan

- Tap Finish

CCAC Staff, Faculty, and Administrator Printer Locations
CCAC Staff, Faculty, and Administrator Printer Locations
As you may be aware, the college is looking to move forward with the implementation of a managed print & scanning solution. The goal of this initiative is to provide formal industry standard processes around printing and print management, optimize printing operations, upgrade our printers to current equipment, and improve upon the available features. Additionally, the goal is to expand access to network-based scanners (will not include document imaging for perceptive content). Below are the tentative locations of the new print, scan, and copy multifunctional devices.
Allegheny Campus
Byers Hall
1st Floor

2nd Floor

3rd Floor

Center for Education, Innovation & Training (CEIT)
1st floor

3rd Floor

Center for Teaching and Learning (CTL)
2nd floor

3rd floor

Field House
1st floor

Jones Hall
1st floor

2nd Floor

3rd Floor

KLI
1st Floor

2nd Floor

3rd Floor

4th Floor


Library Building
1st Floor

2nd Floor

3rd Floor

4th Floor

5th Floor

Milton Hall
2nd Floor

3rd Floor

4th Floor

5th Floor

6th Floor

7th Floor

Phys Ed Building
4th Floor

SSC
1st Floor

2nd Floor

3rd Floor

West Hall
Basement

1st Floor

2nd Floor

3rd Floor

4th Floor

Boyce Campus
North Wing
1st Floor
2nd Floor

3rd Floor

4th Floor
4th Floor

4th Floor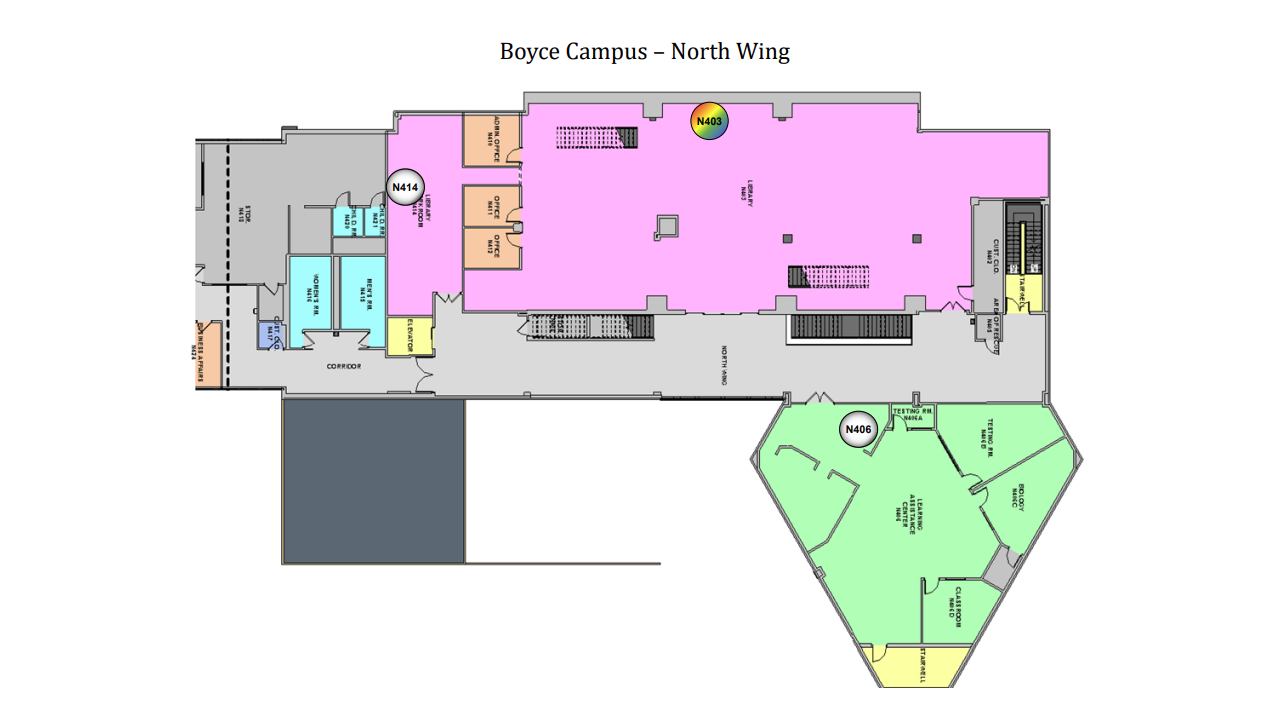
5th Floor
5th Floor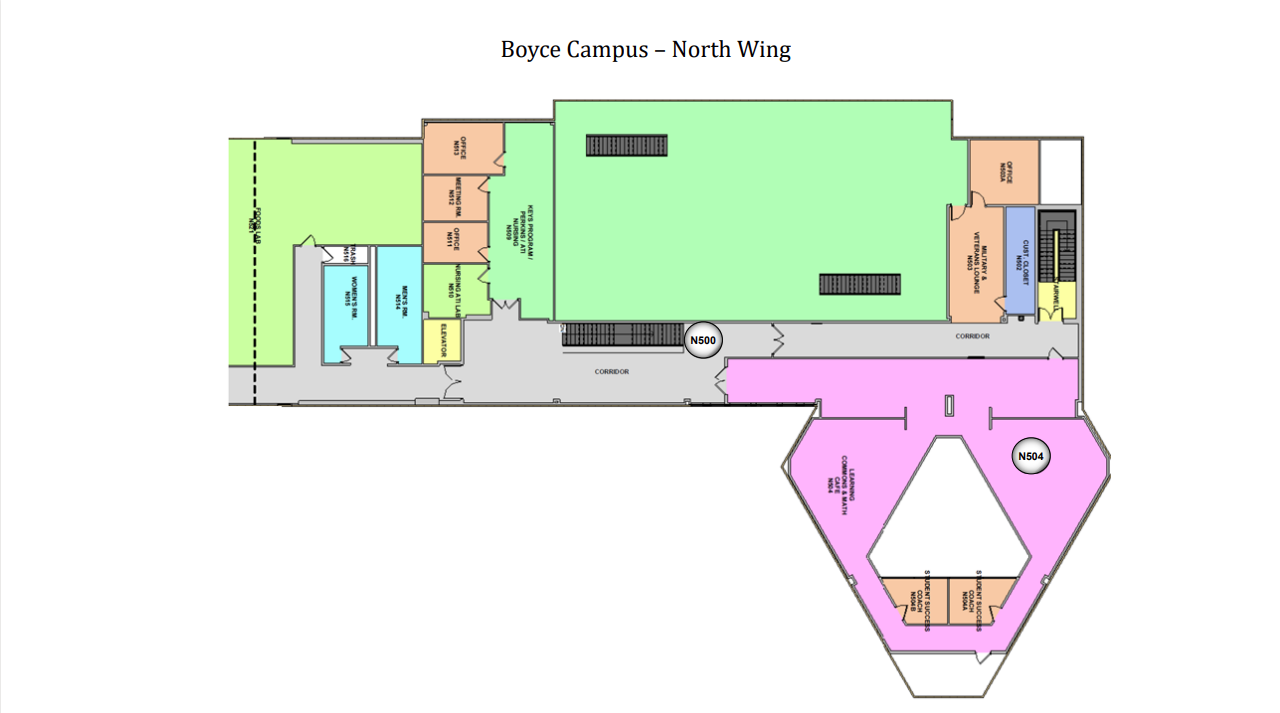
South Wing
4th Floor
4th Floor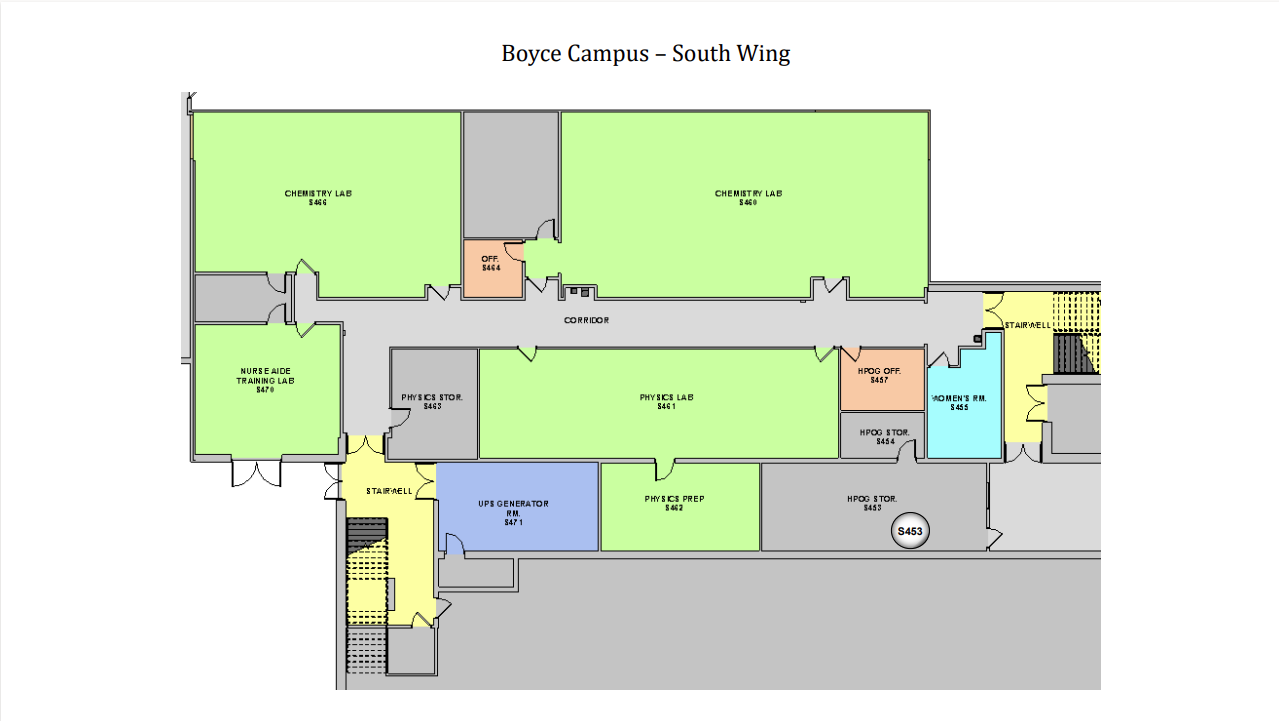
5th Floor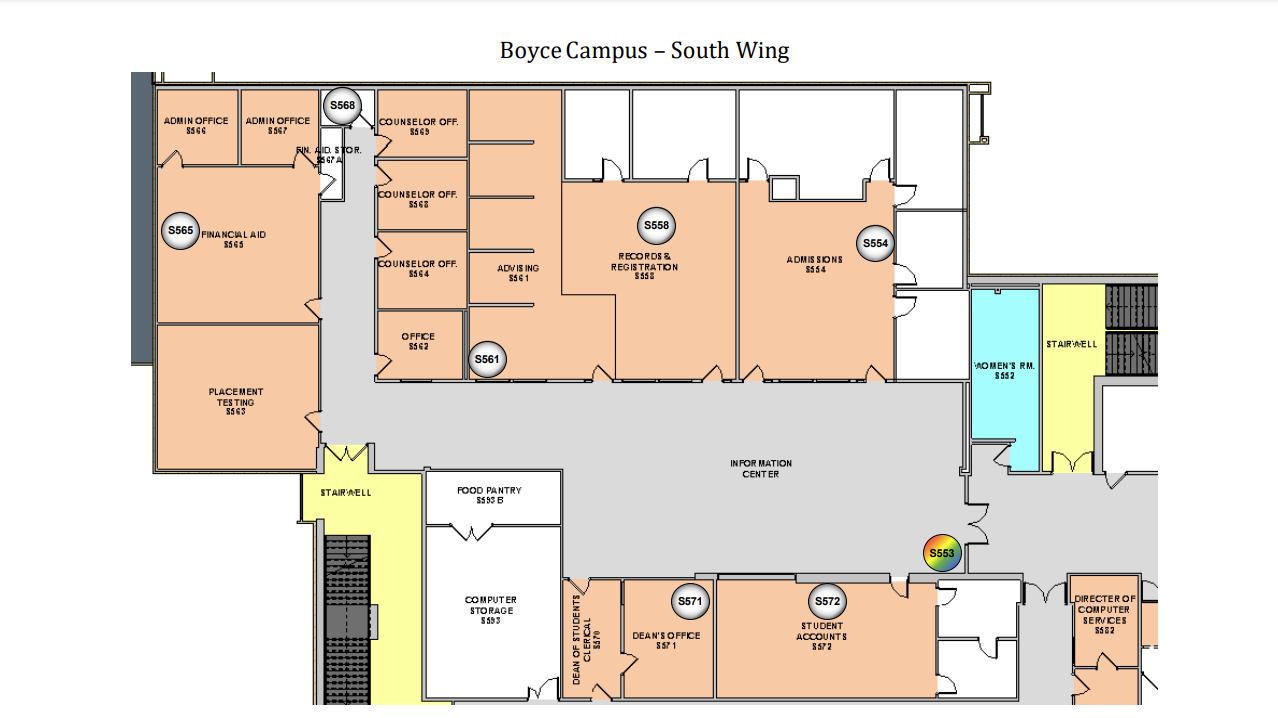
5th Floor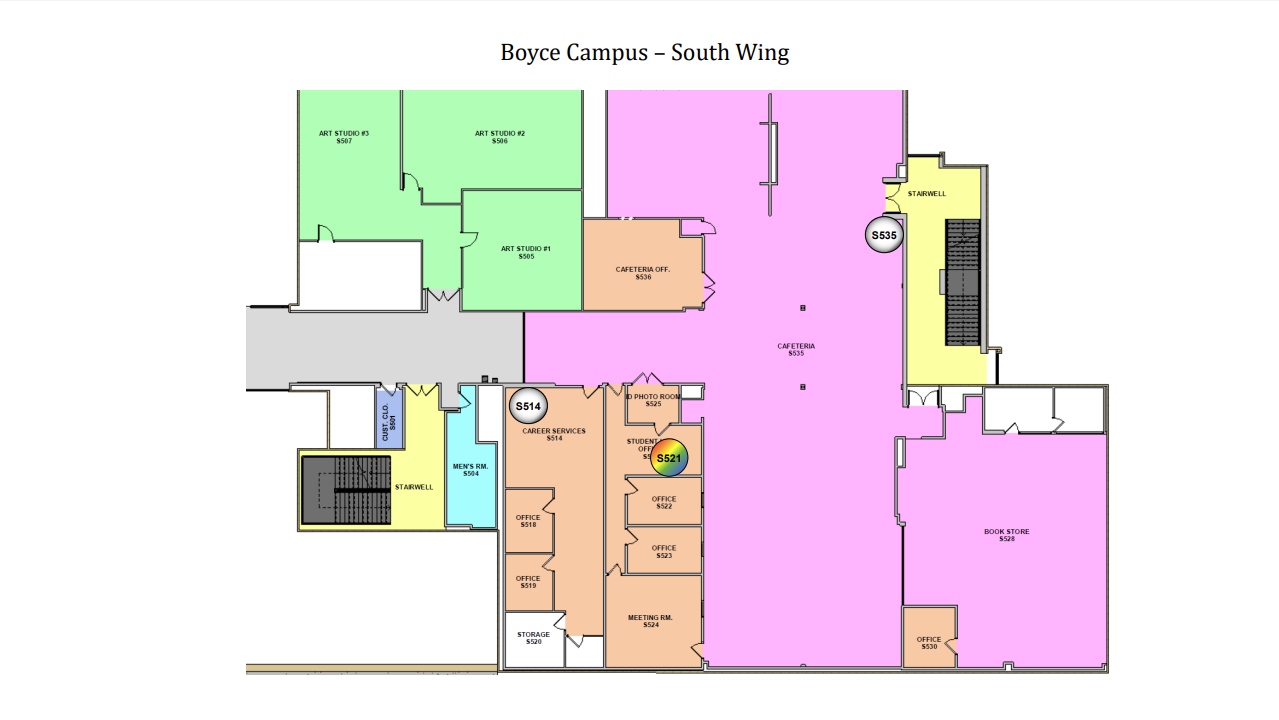
6th Floor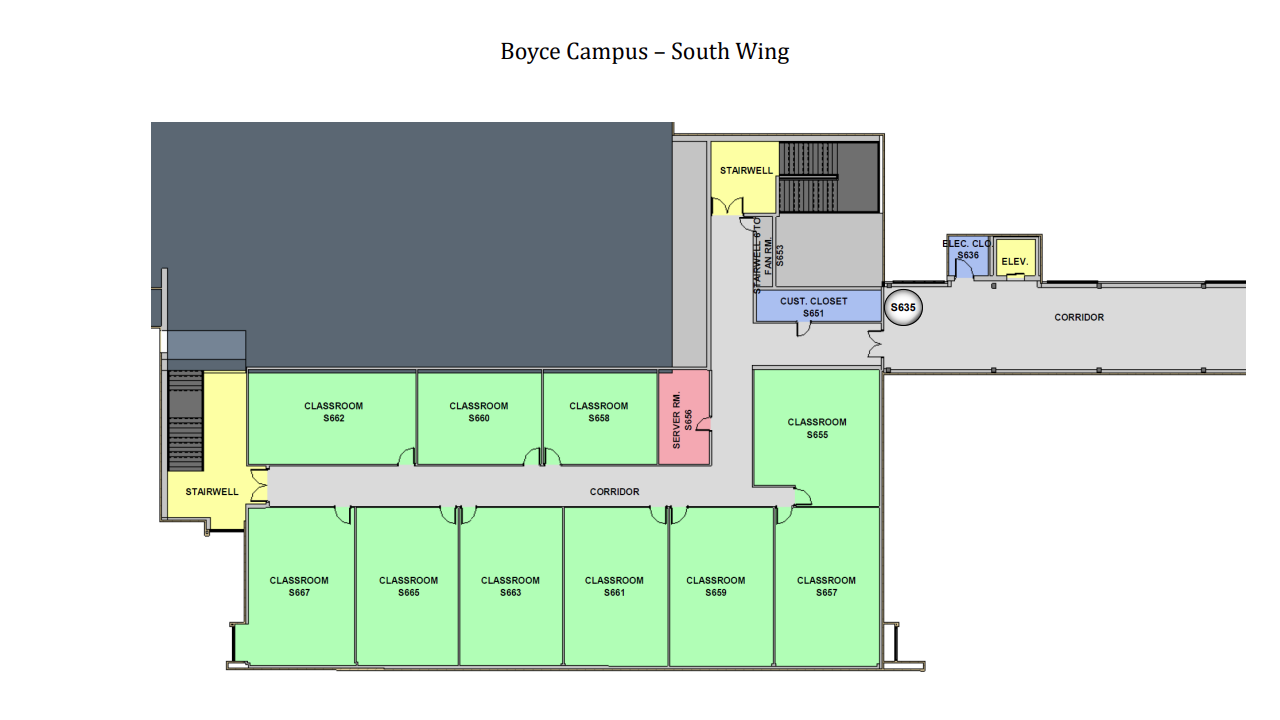
West Wing
4th Floor

South Campus
A Building
3rd Floor
4th Floor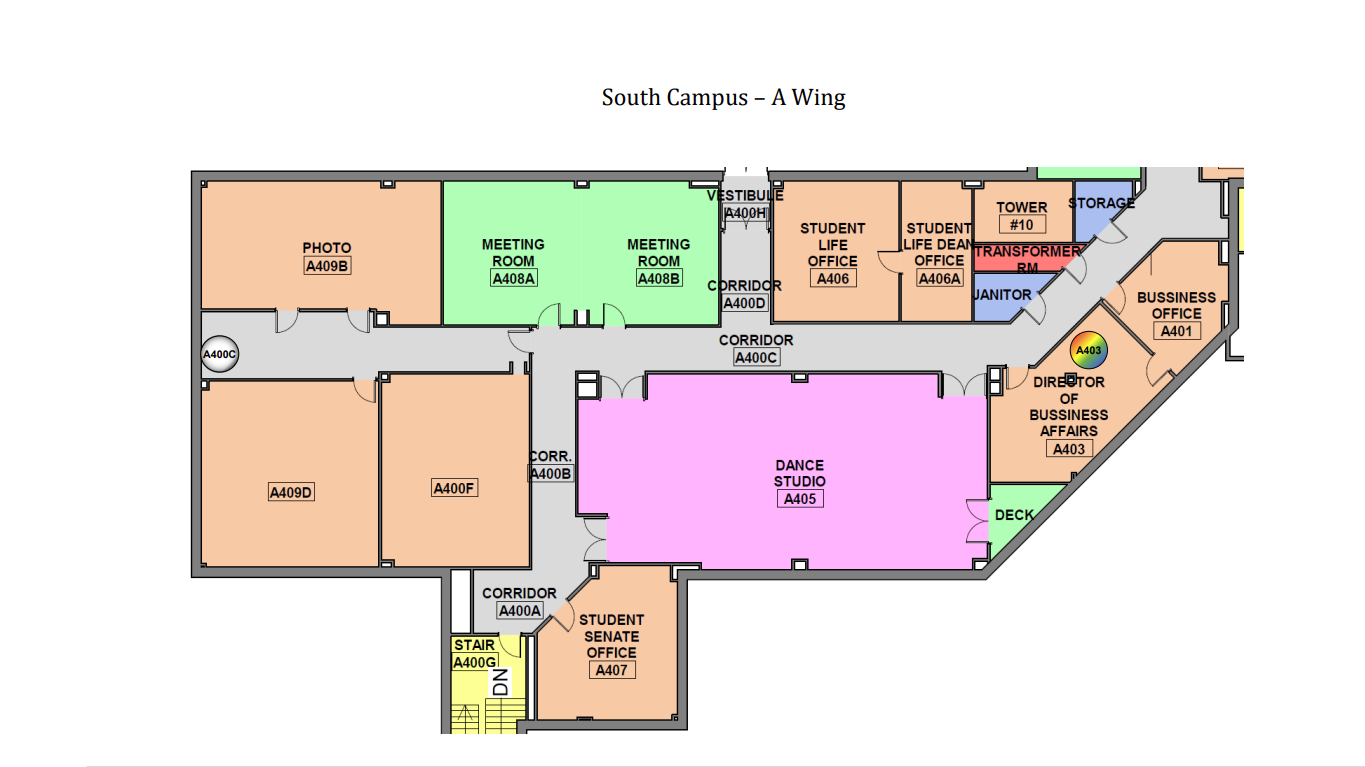
B Building
3rd Floor
4th Floor 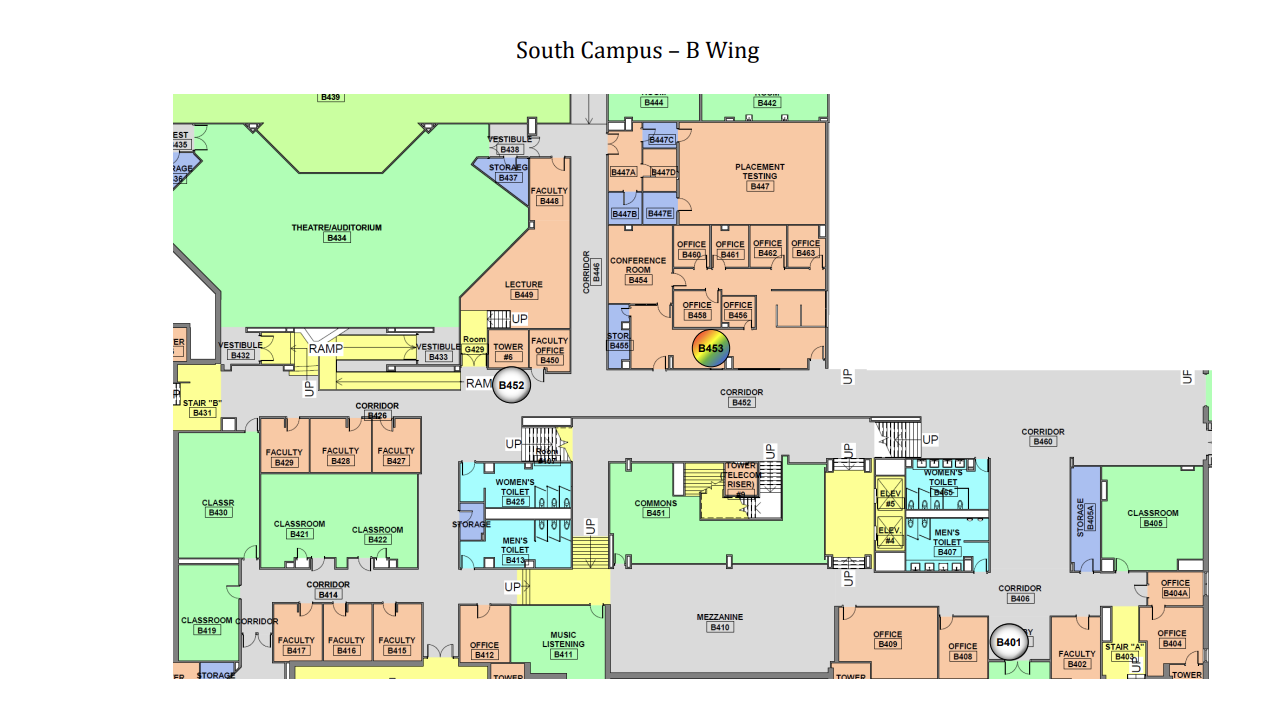
5th Floor
6th Floor
D Building
1st Floor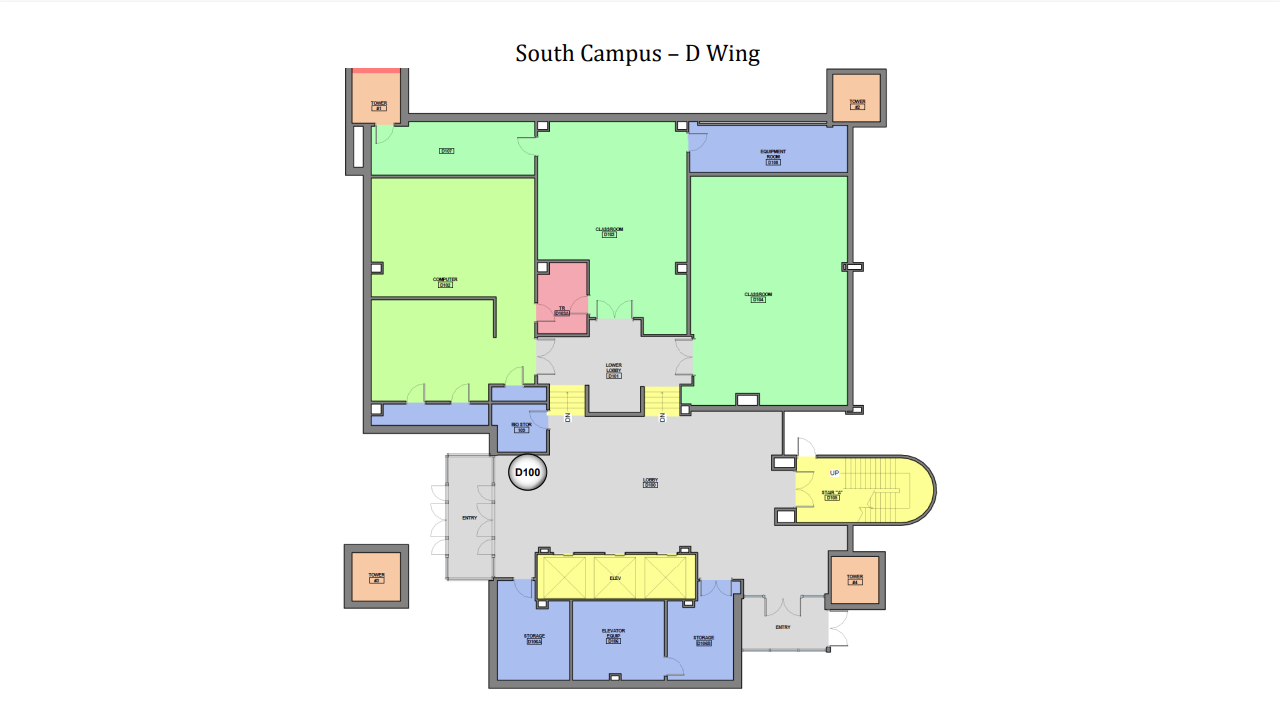
2nd Floor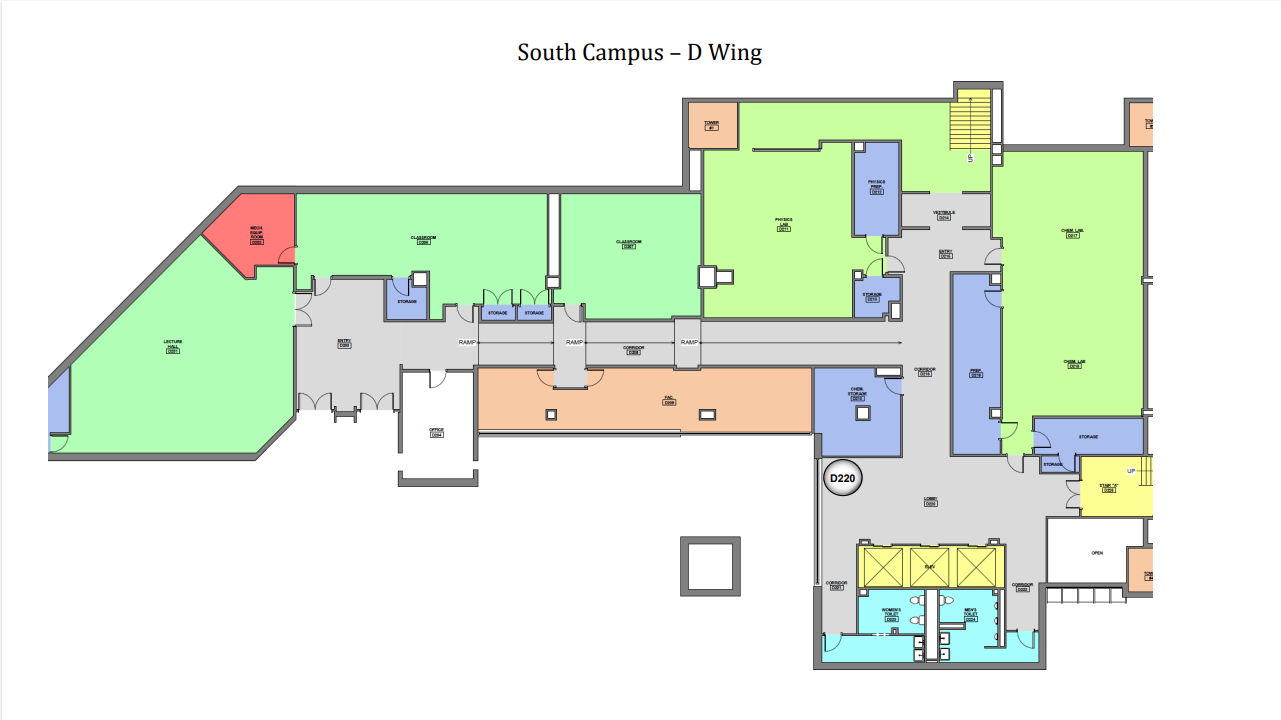
3rd Floor
4th Floor
5th Floor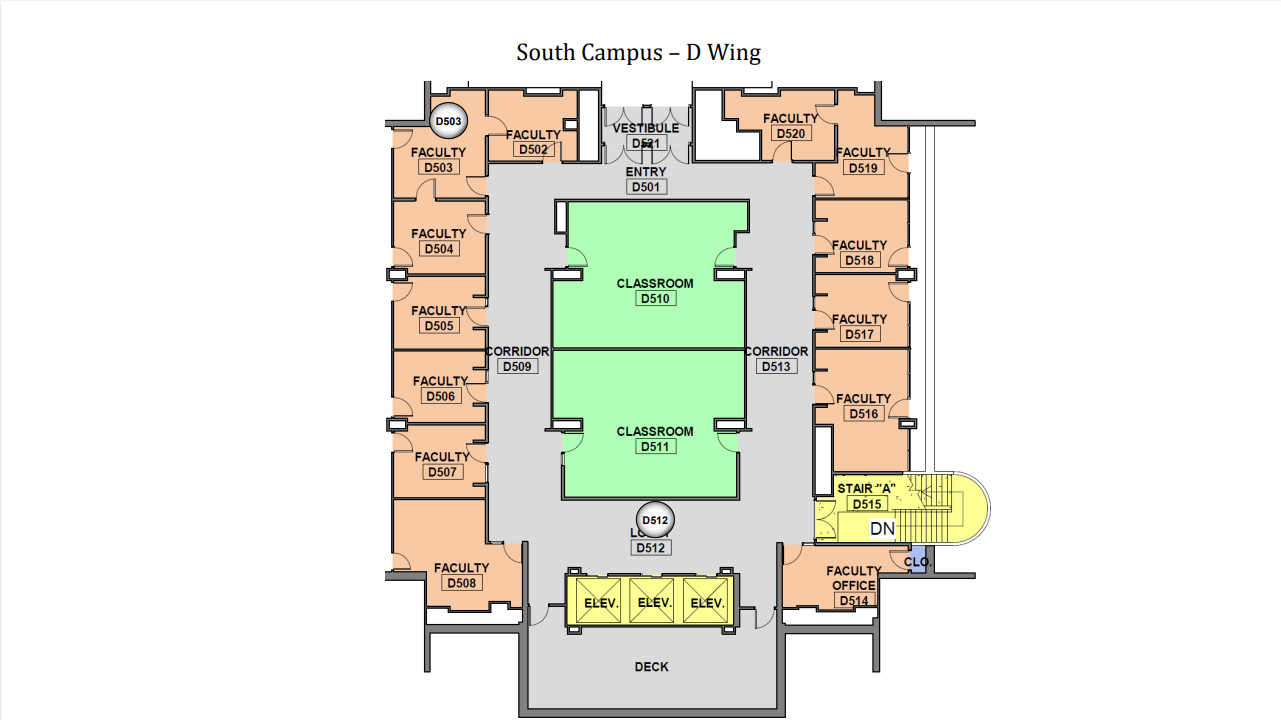
G Building
3rd Floor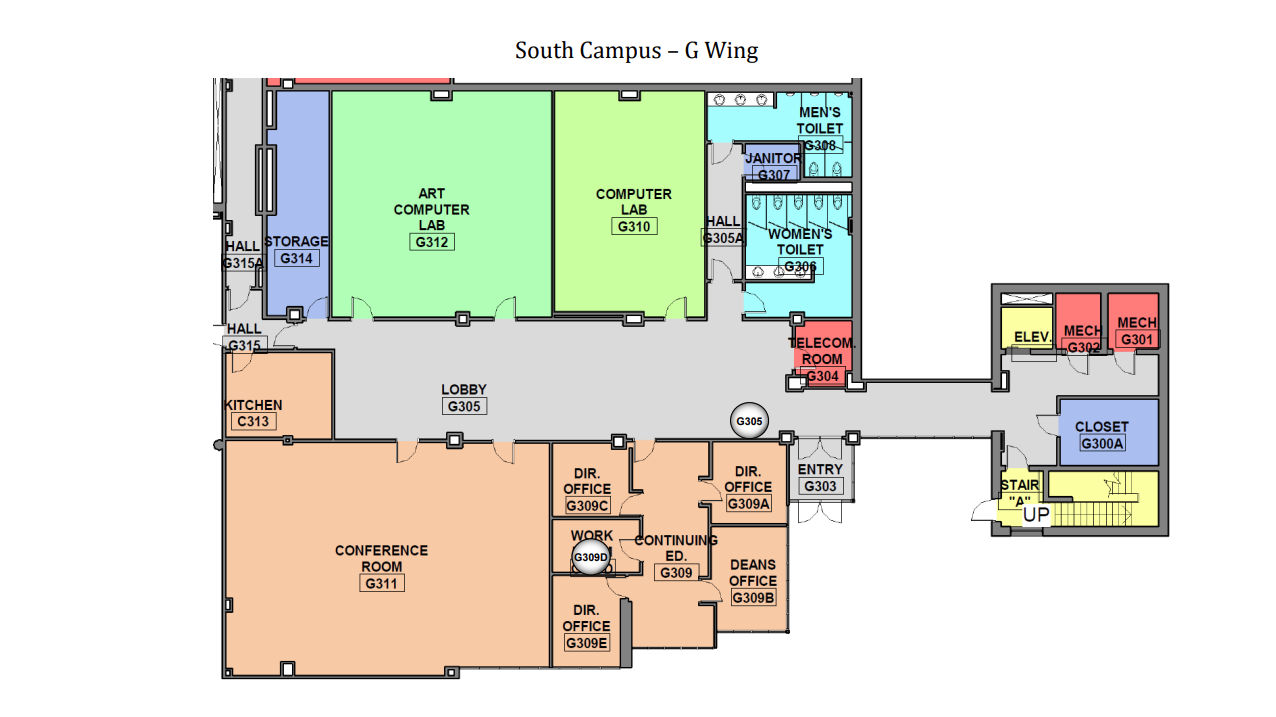
4th Floor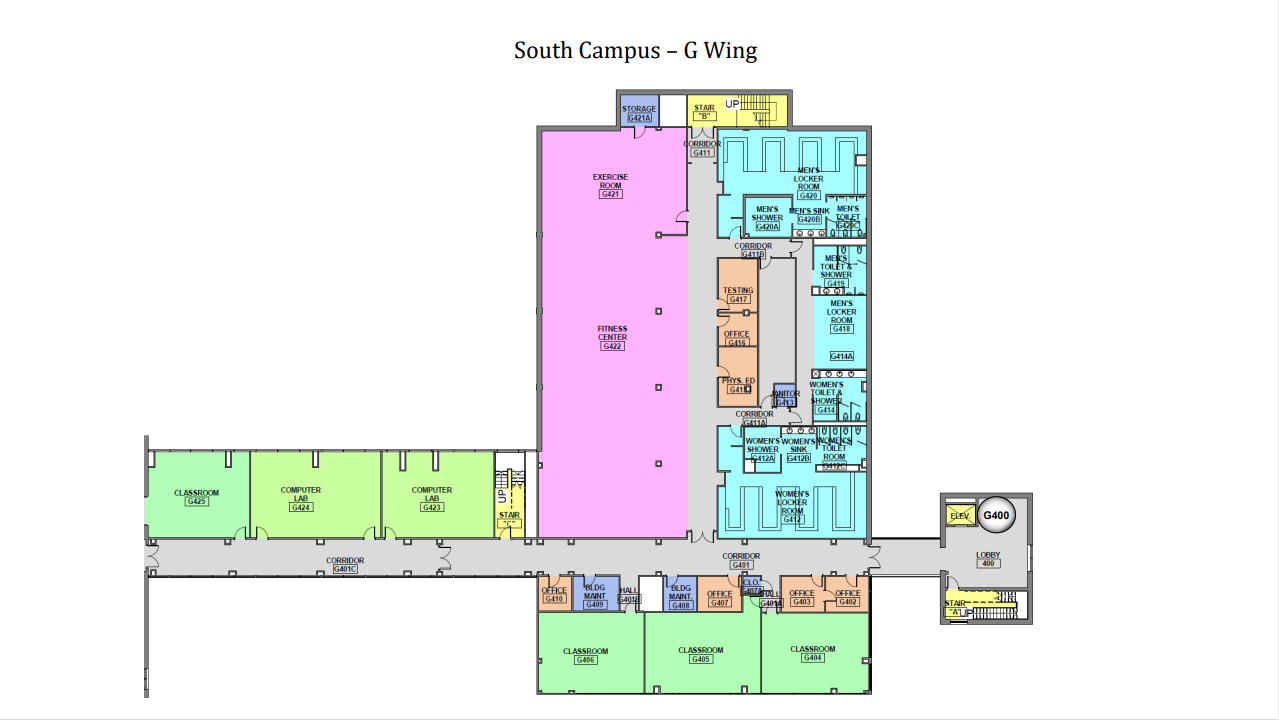
5th Floor
L Building
4th Floor
5th Floor
North Campus
1st Floor
2nd Floor
3rd Floor
OCS
1st Floor

2nd Floor

3rd Floor

4th Floor

5th Floor

West Hills Center
North Wing
1st Floor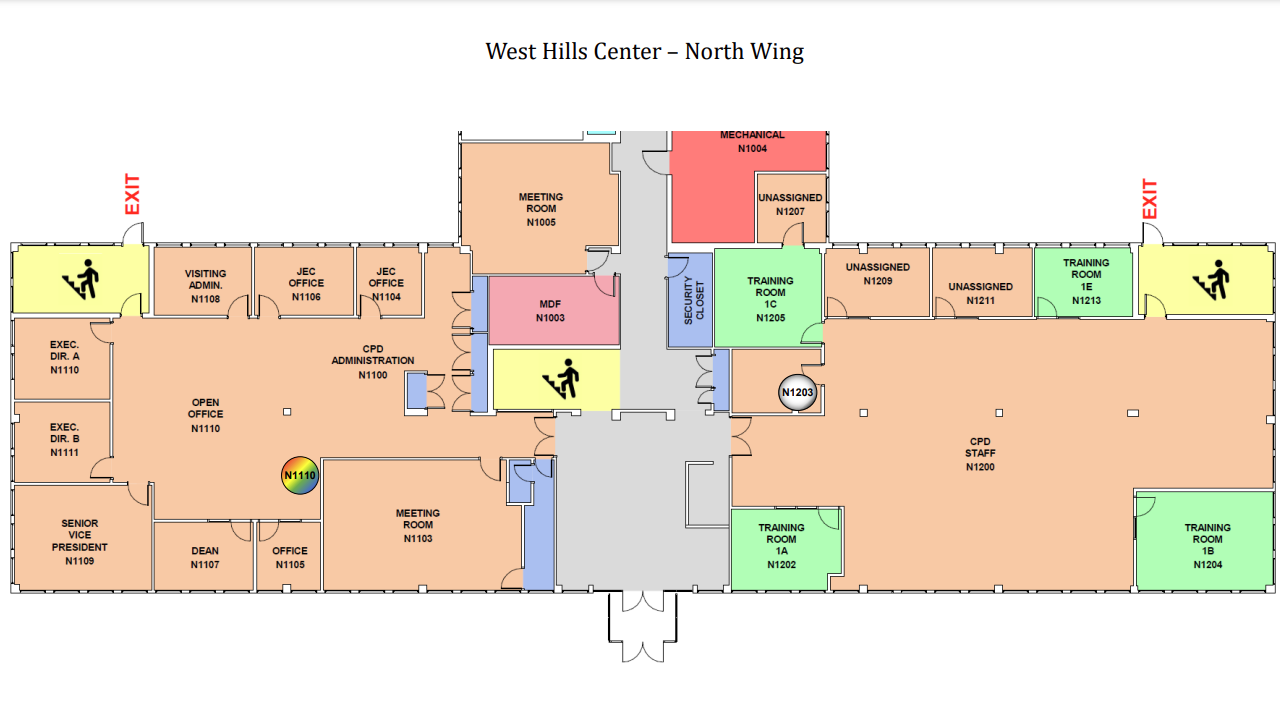
South Wing
1st Floor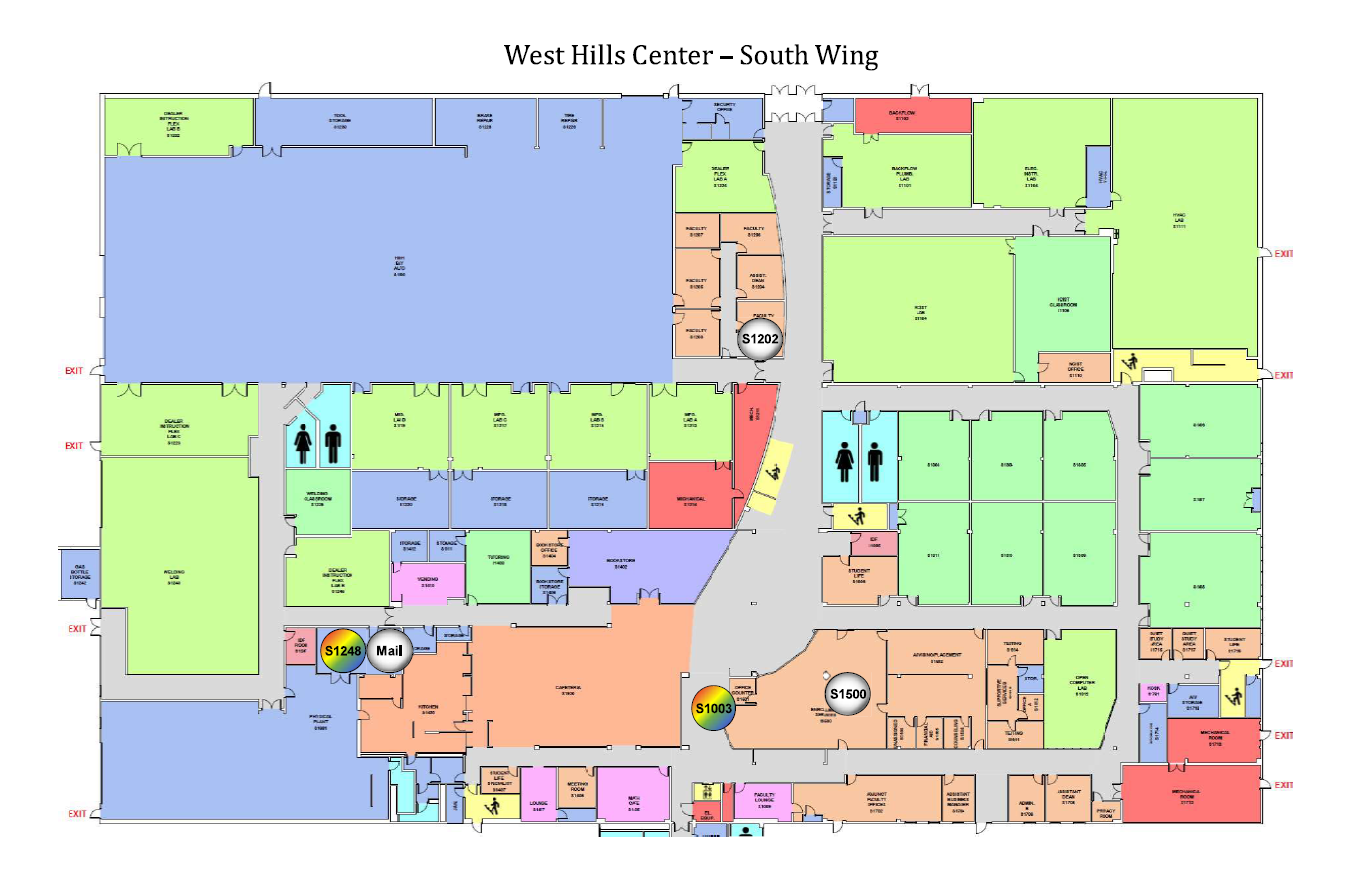
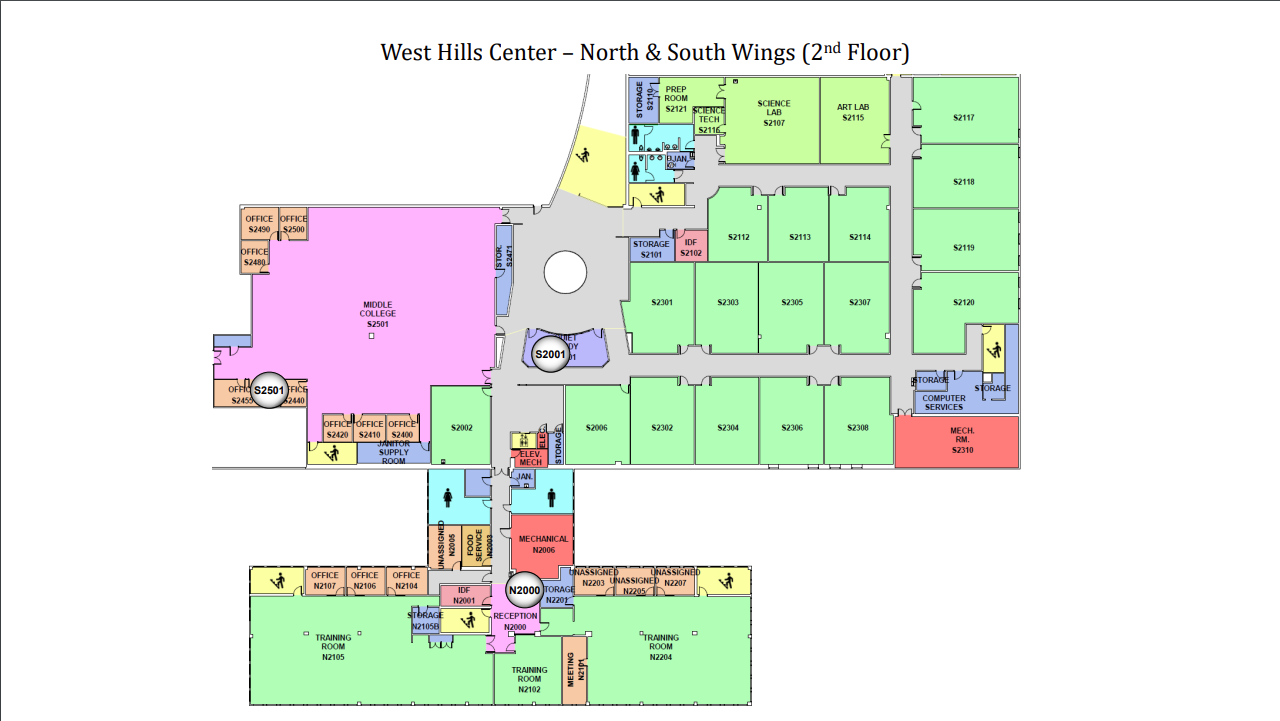
2nd Floor
Homewood Brushton
1st Floor

2nd Floor

Braddock Hills
1st Floor

CCAC Student Printer Locations
CCAC Student Printer Locations
The college has implemented managed print and scanning solutions college wide. The goal of this initiative is to provide formal industry standard processes around printing and print management, optimize printing operations, upgrade our printers to current equipment, and improve upon the available features. Additionally, the goal is to expand access to network-based scanners (will not include document imaging for perceptive content). Below are the tentative locations of the new print, scan, and copy multifunctional devices.
Allegheny Campus
CEIT Building
3rd Floor
Jones Hall
1st floor
KLI
1st Floor
2nd Floor
4th Floor

Library Building
1st Floor
2nd Floor
3rd Floor
4th Floor
5th Floor
Milton Hall
2nd Floor
3rd Floor
4th Floor
5th Floor
6th Floor
7th Floor
Phys Ed Building
4th Floor
SSC
1st Floor
2nd Floor
West Hall
Subbasement
1st Floor
2nd Floor 
3rd Floor
4th Floor
Boyce Campus
North Wing
1st Floor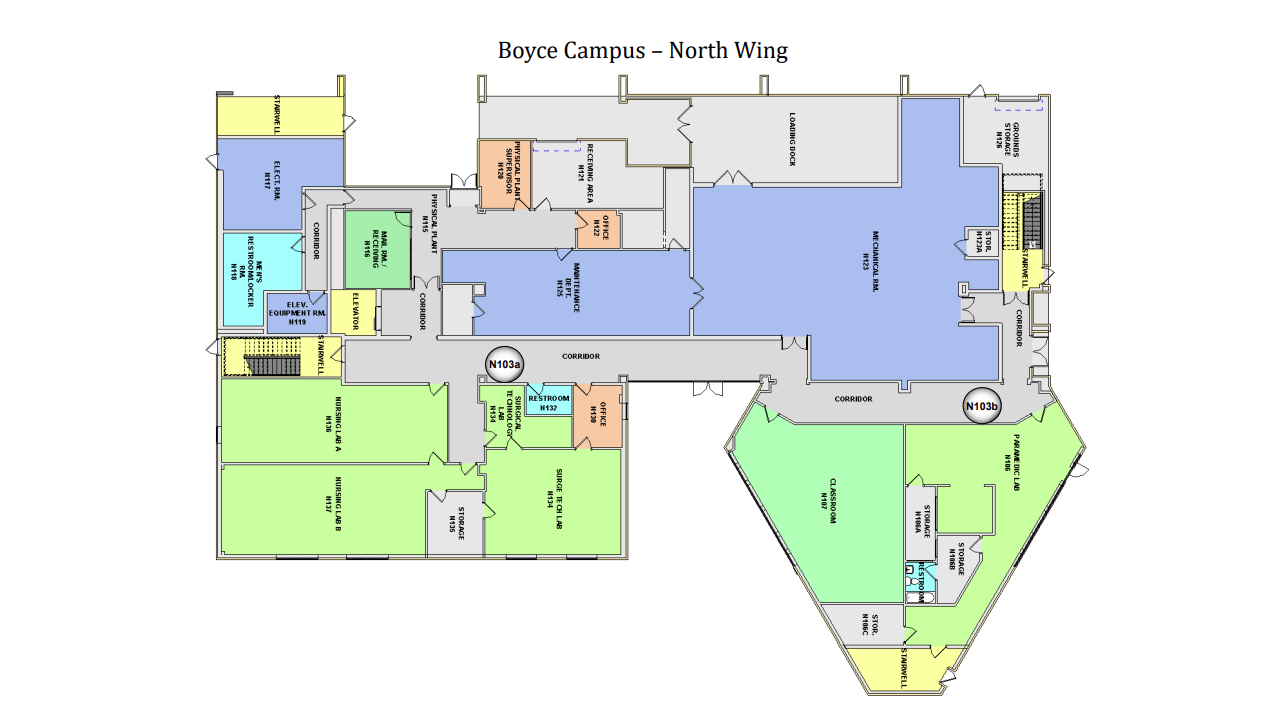
2nd Floor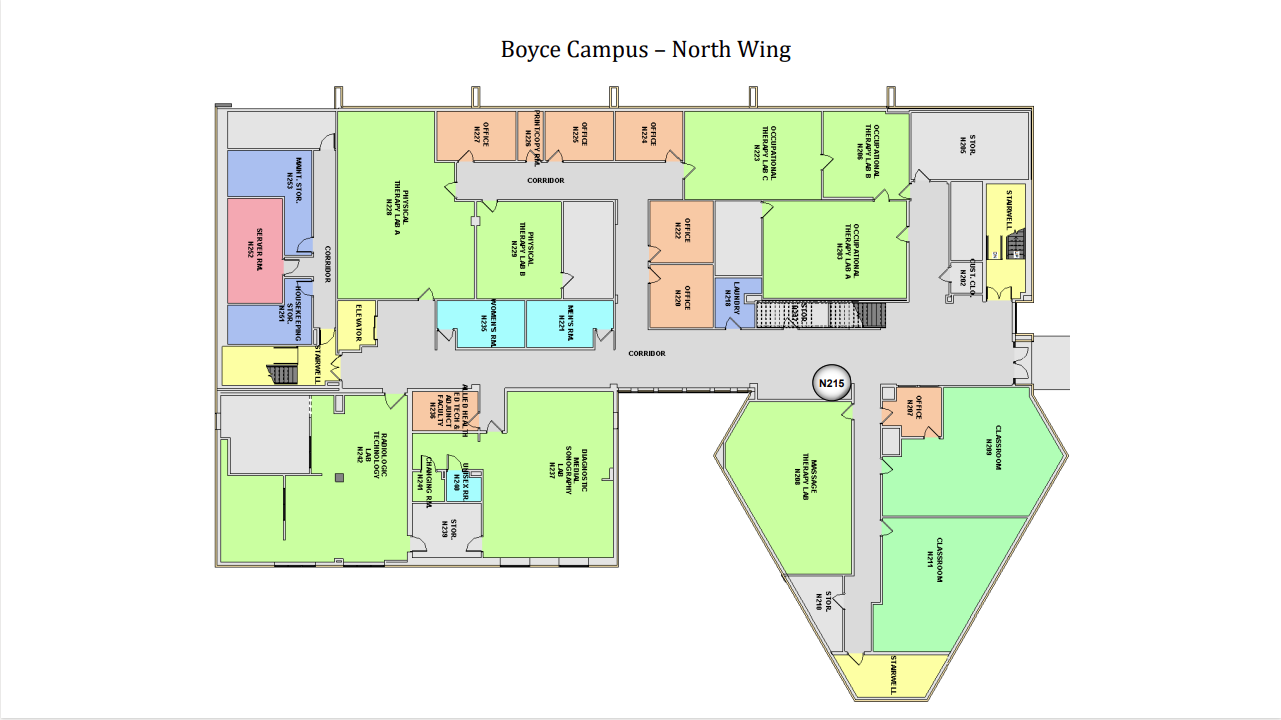
3rd Floor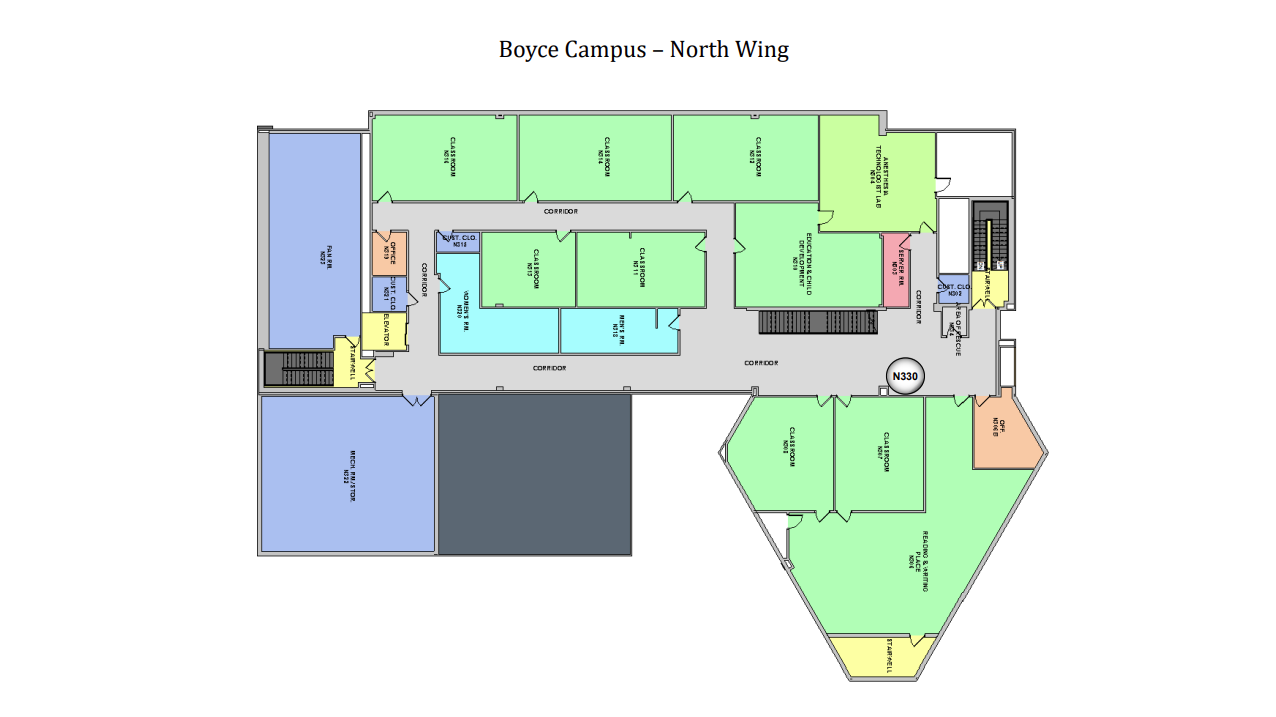
4th Floor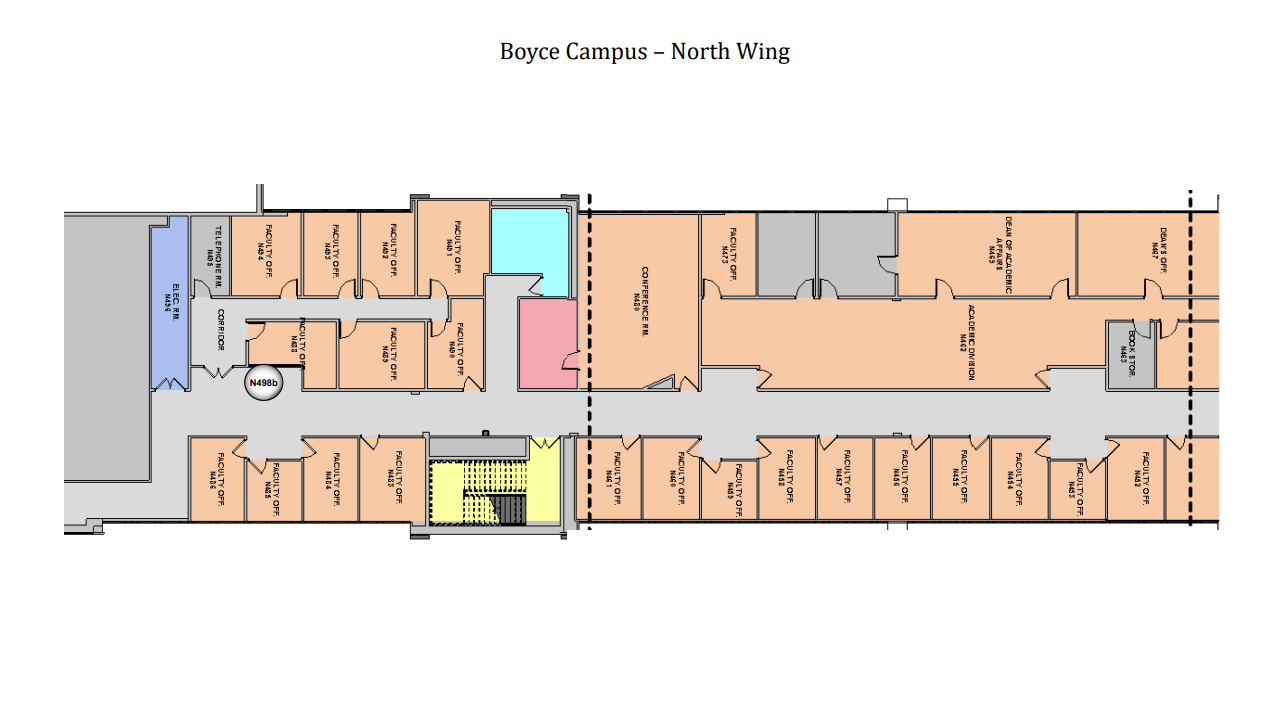
4th Floor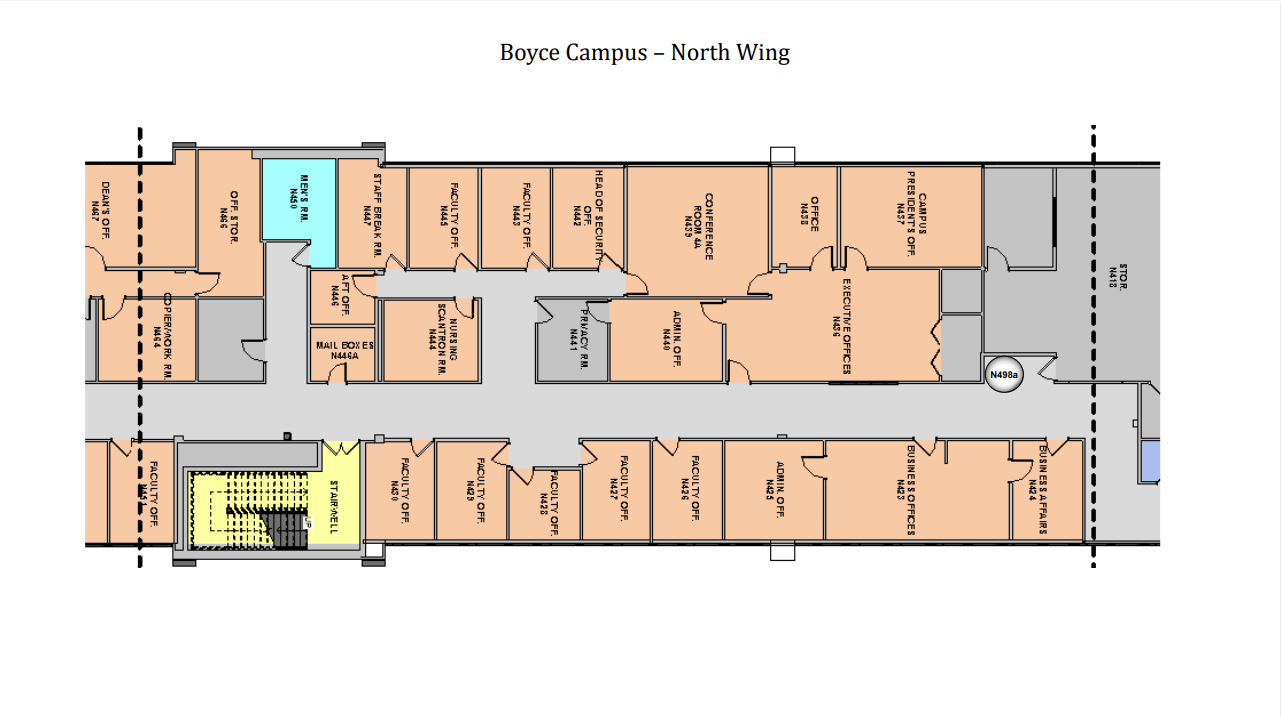
4th Floor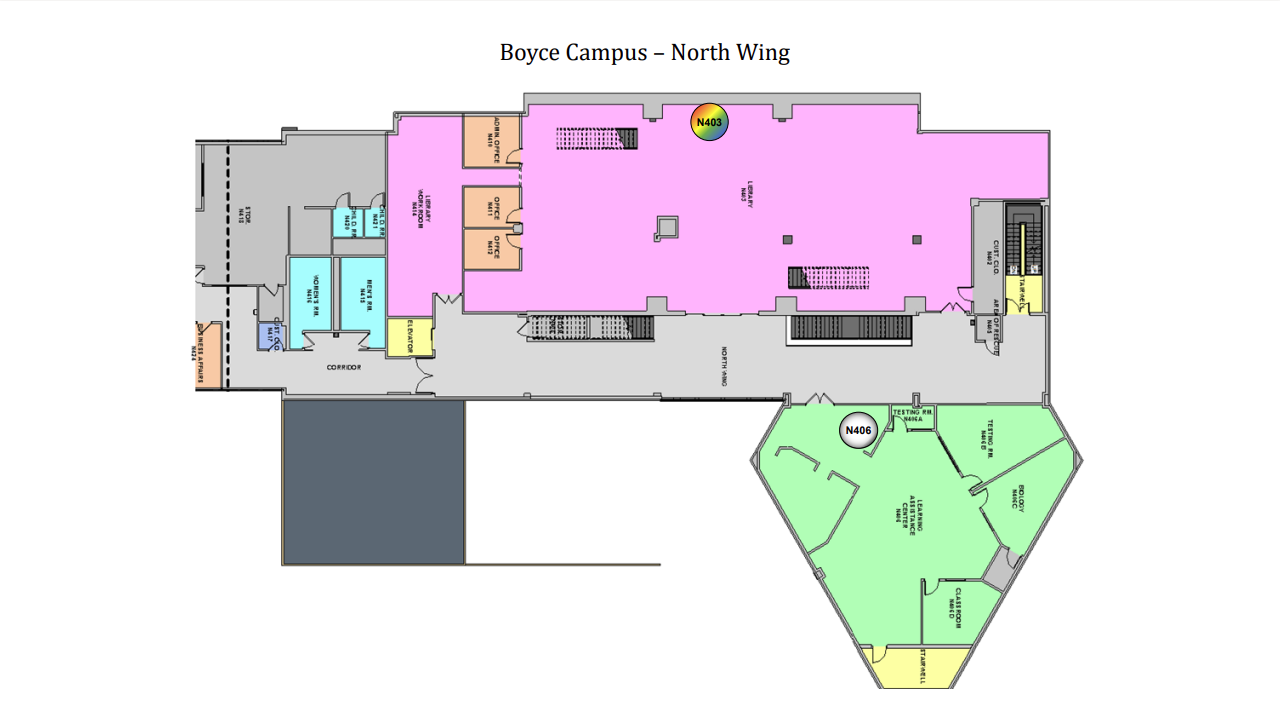
5th Floor
5th Floor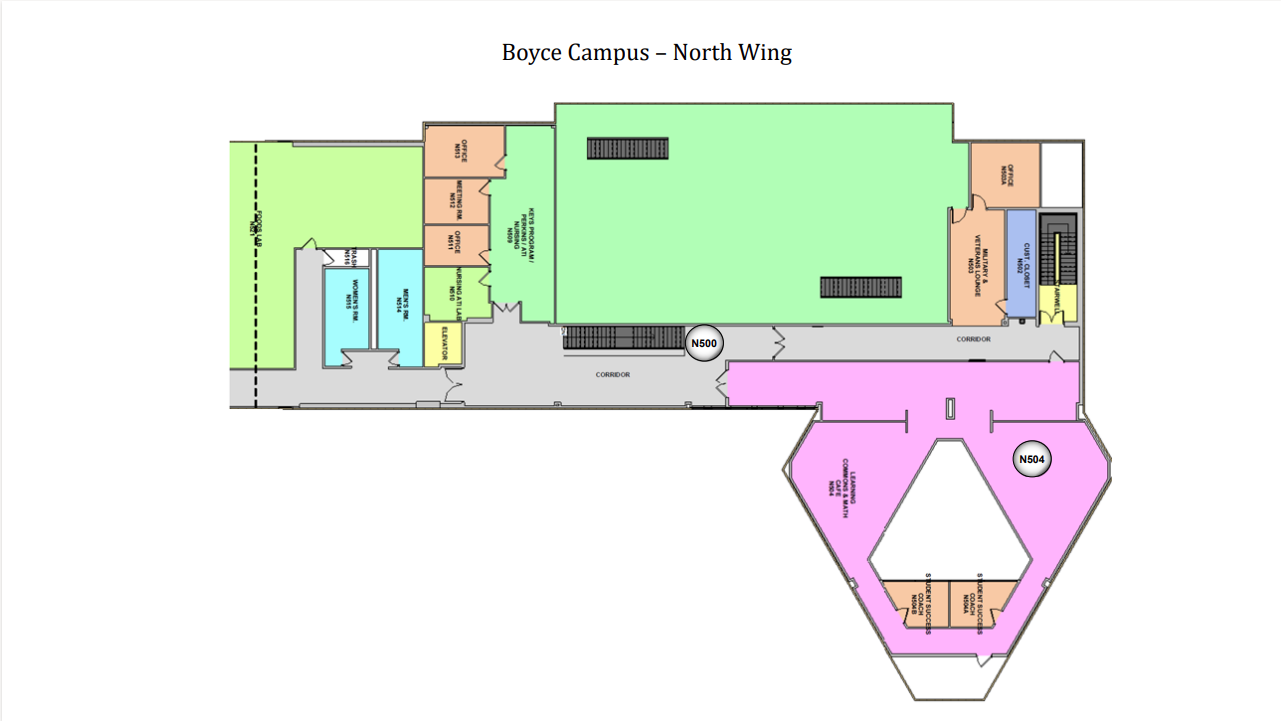
South Wing
4th Floor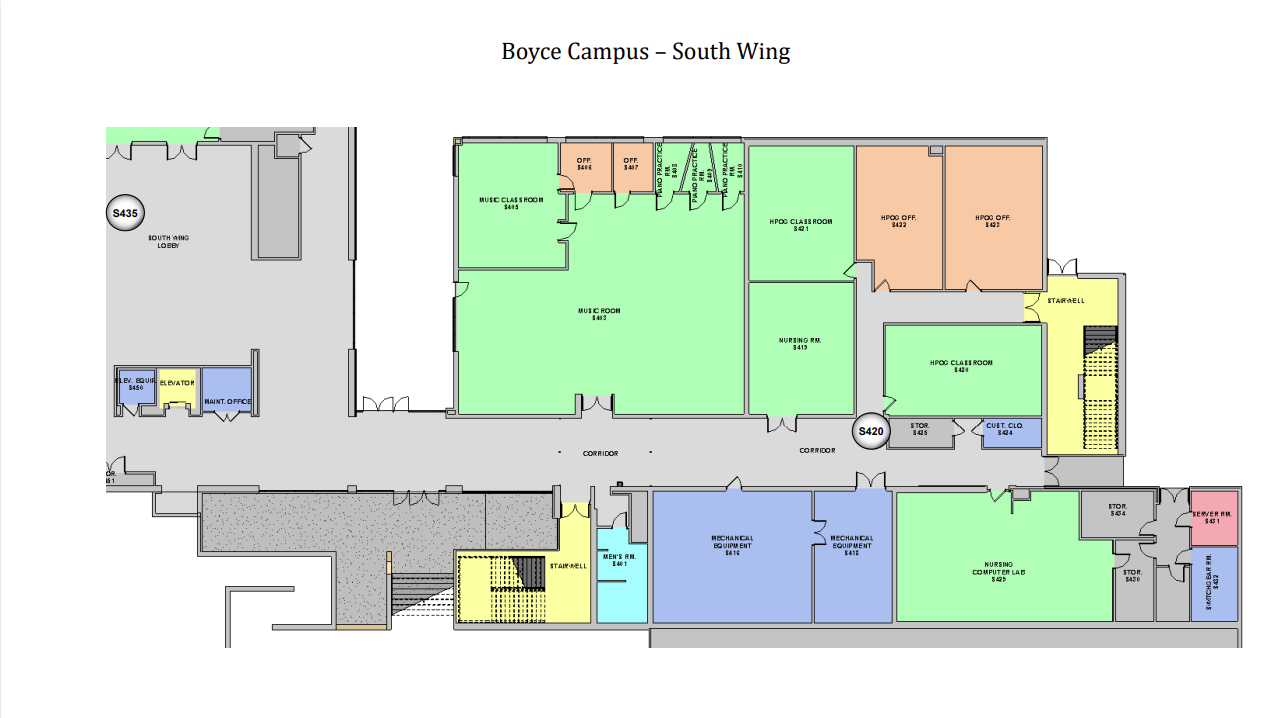
5th Floor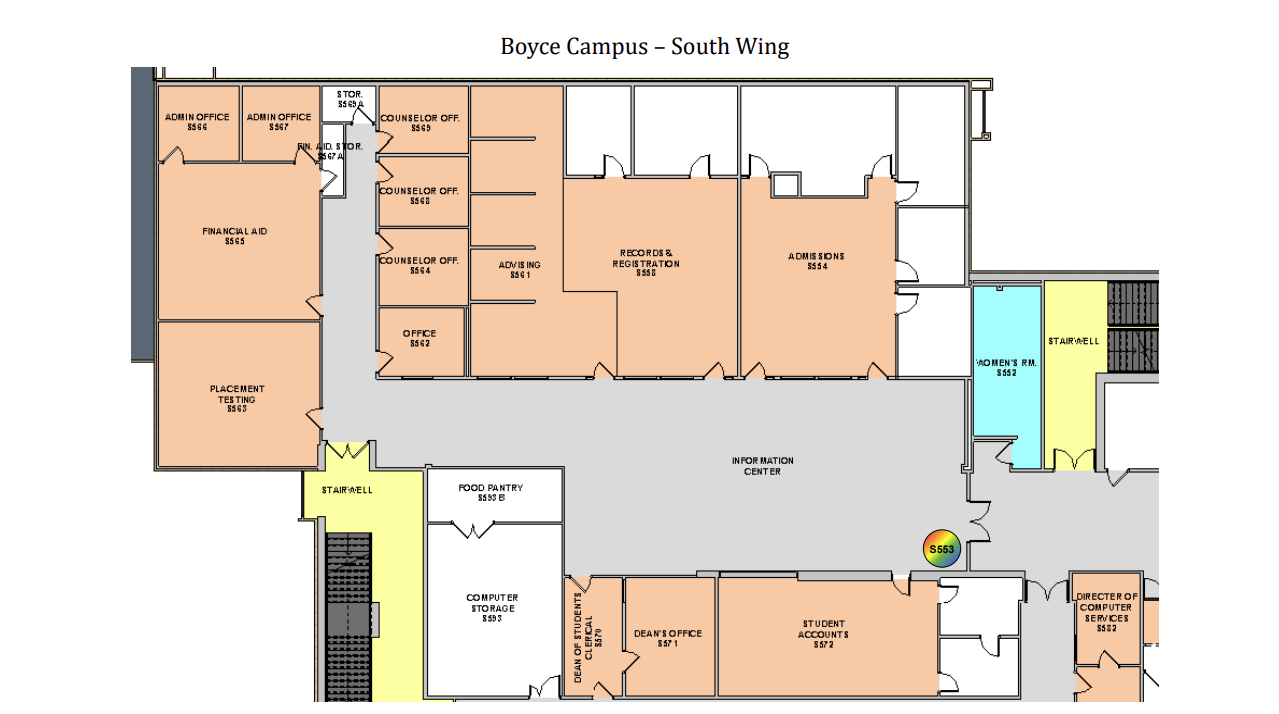
5th Floor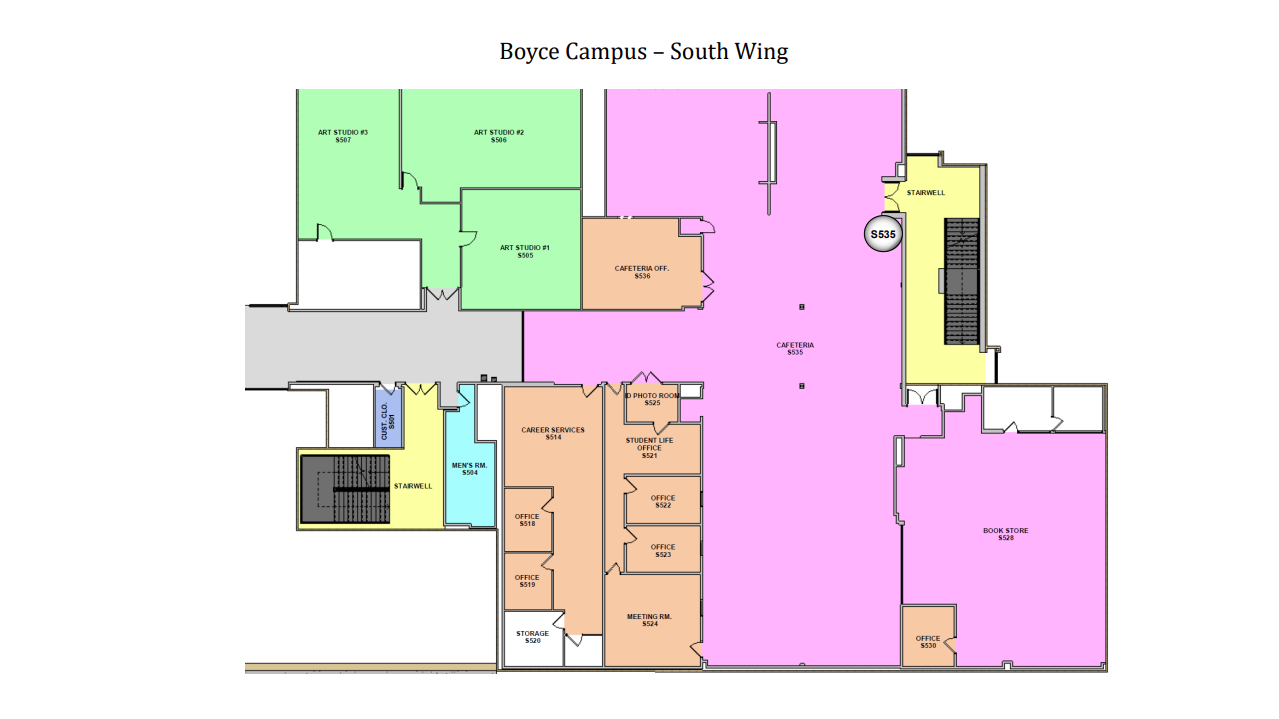
6th Floor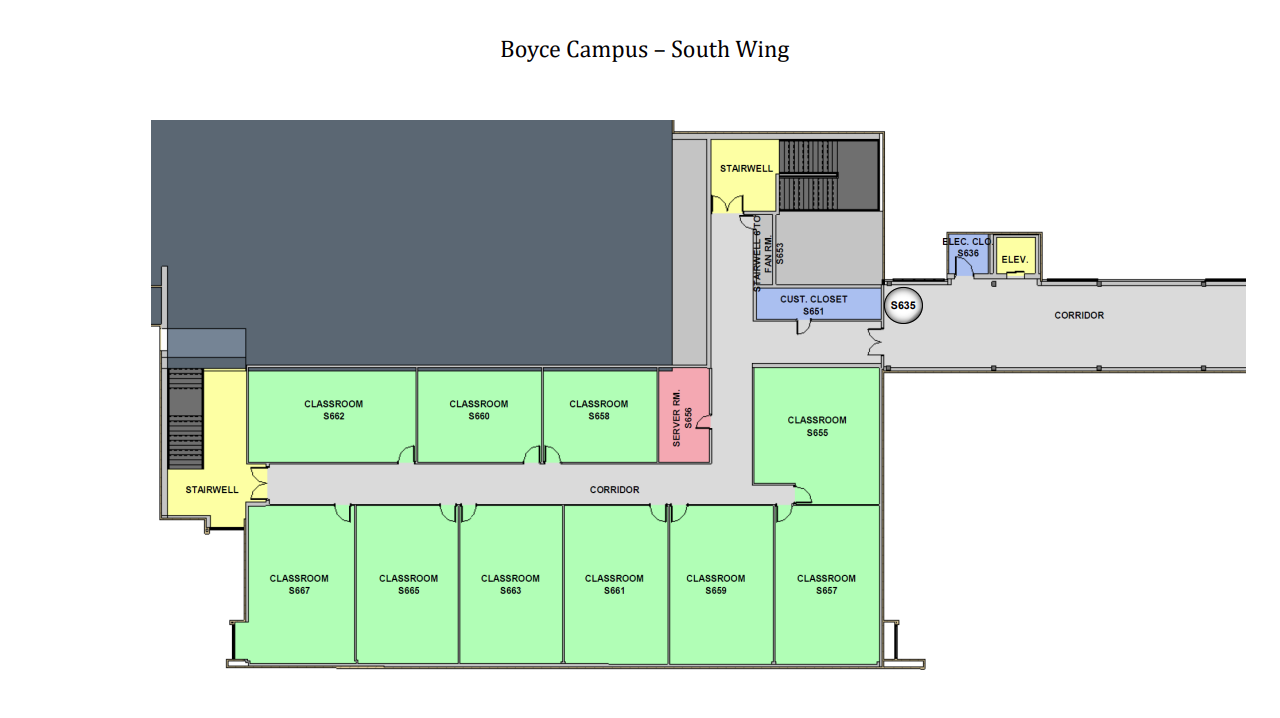
West Wing
4th Floor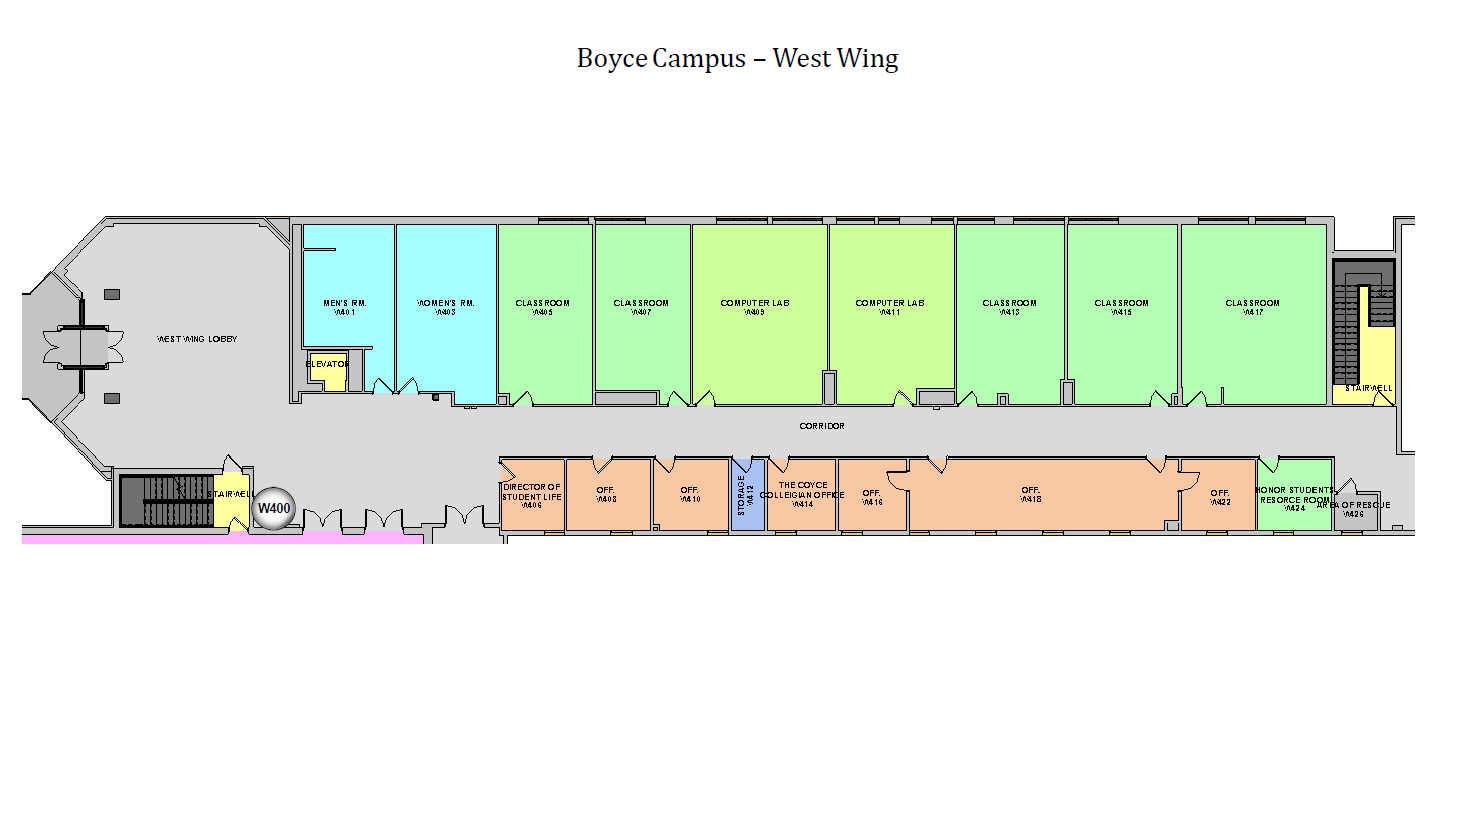
South Campus
A Building
3rd Floor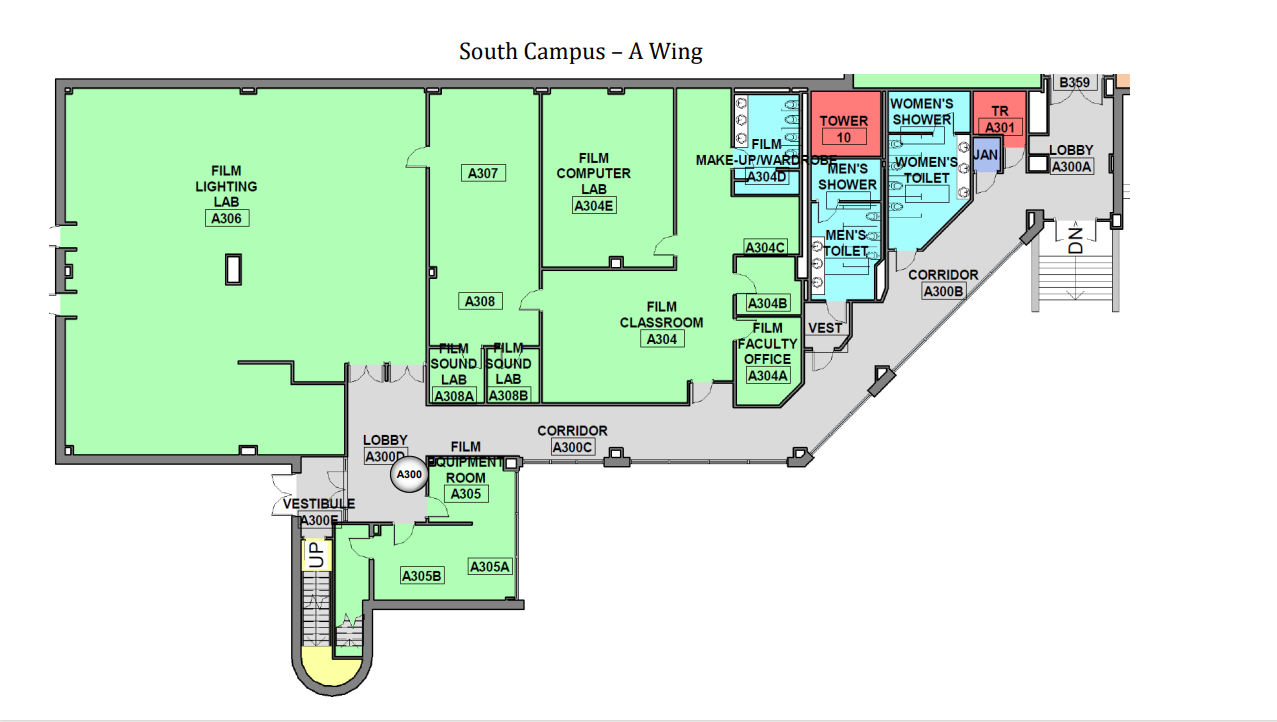
4th Floor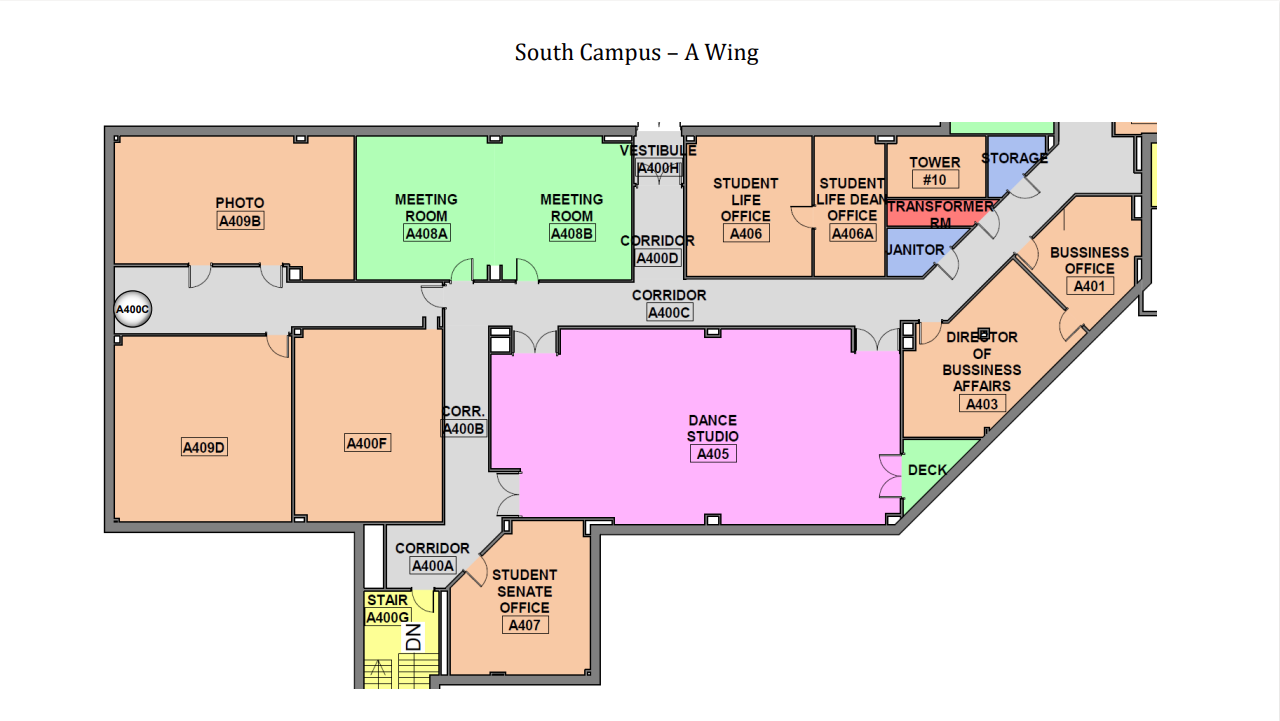
B Building
3rd Floor
4th Floor 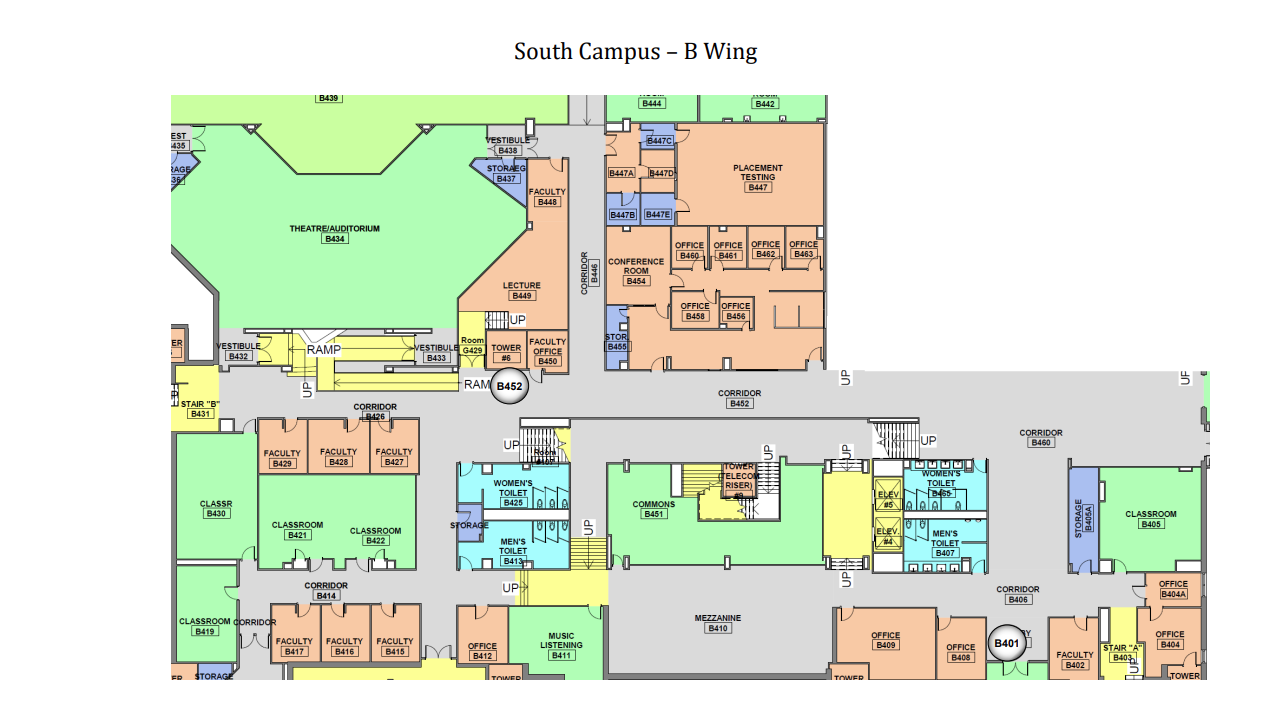
5th Floor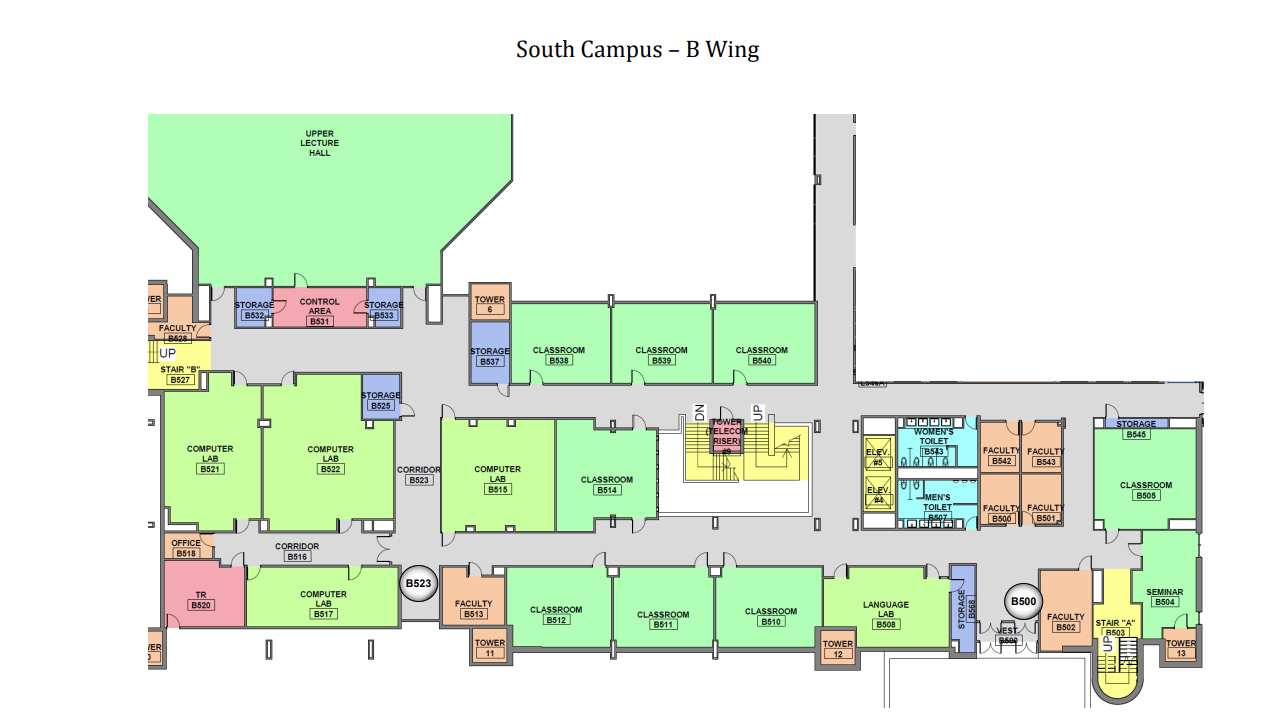
6th Floor
D Building
1st Floor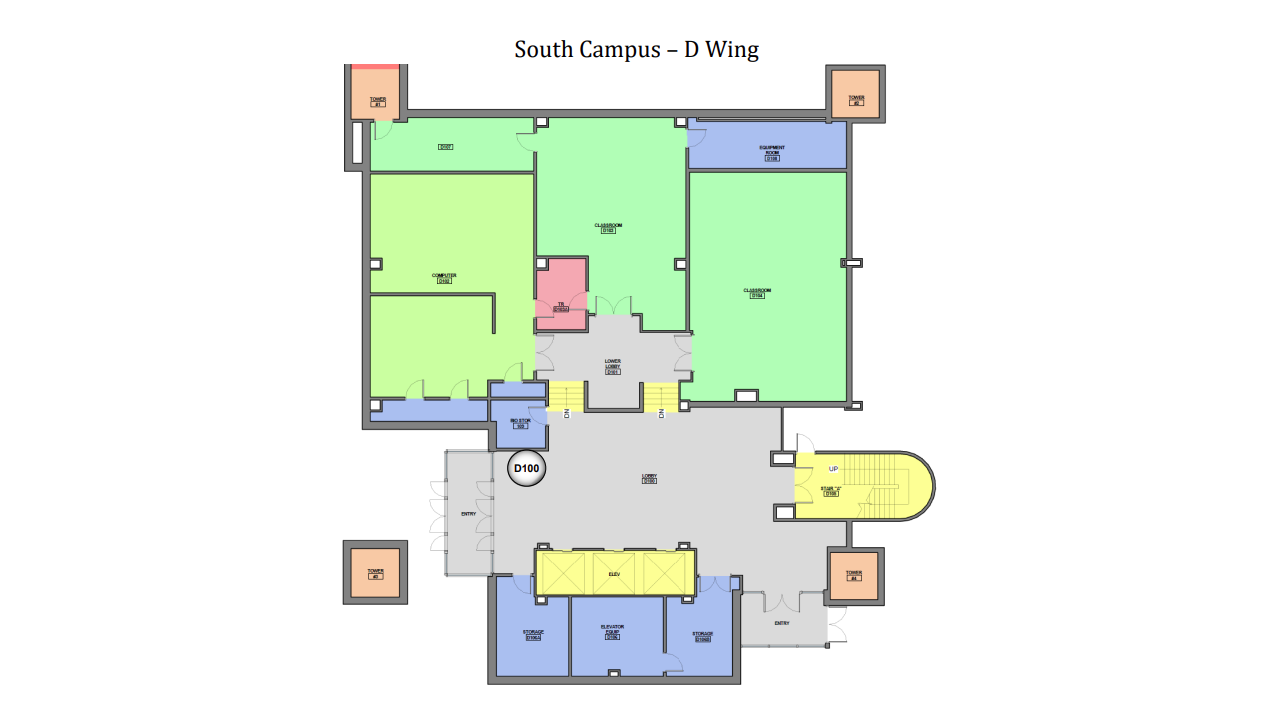
2nd Floor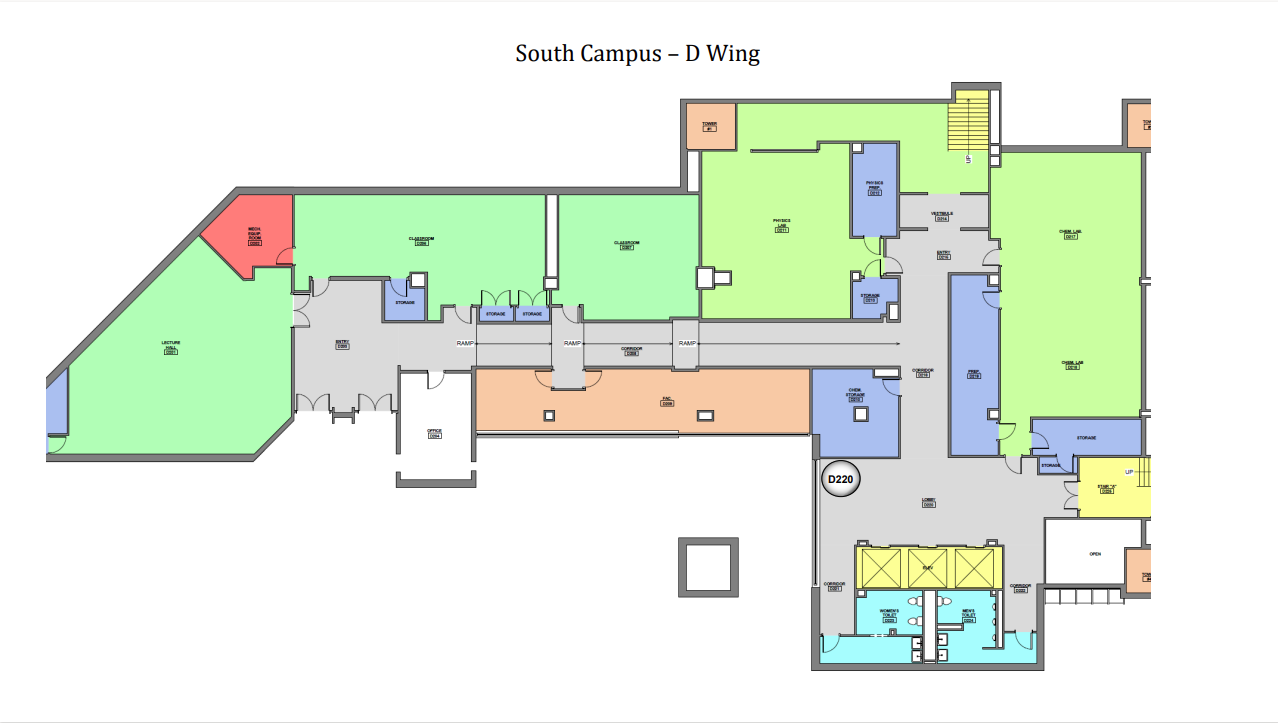
3rd Floor
4th Floor
5th Floor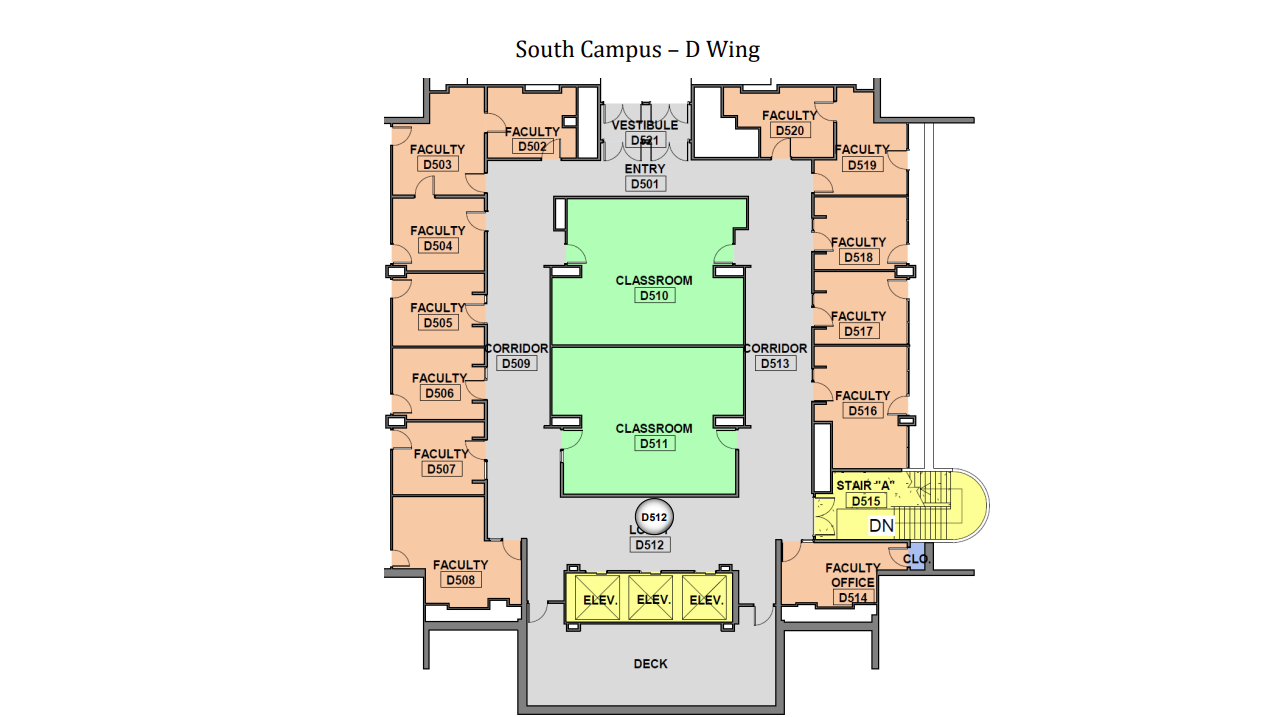
G Building
3rd Floor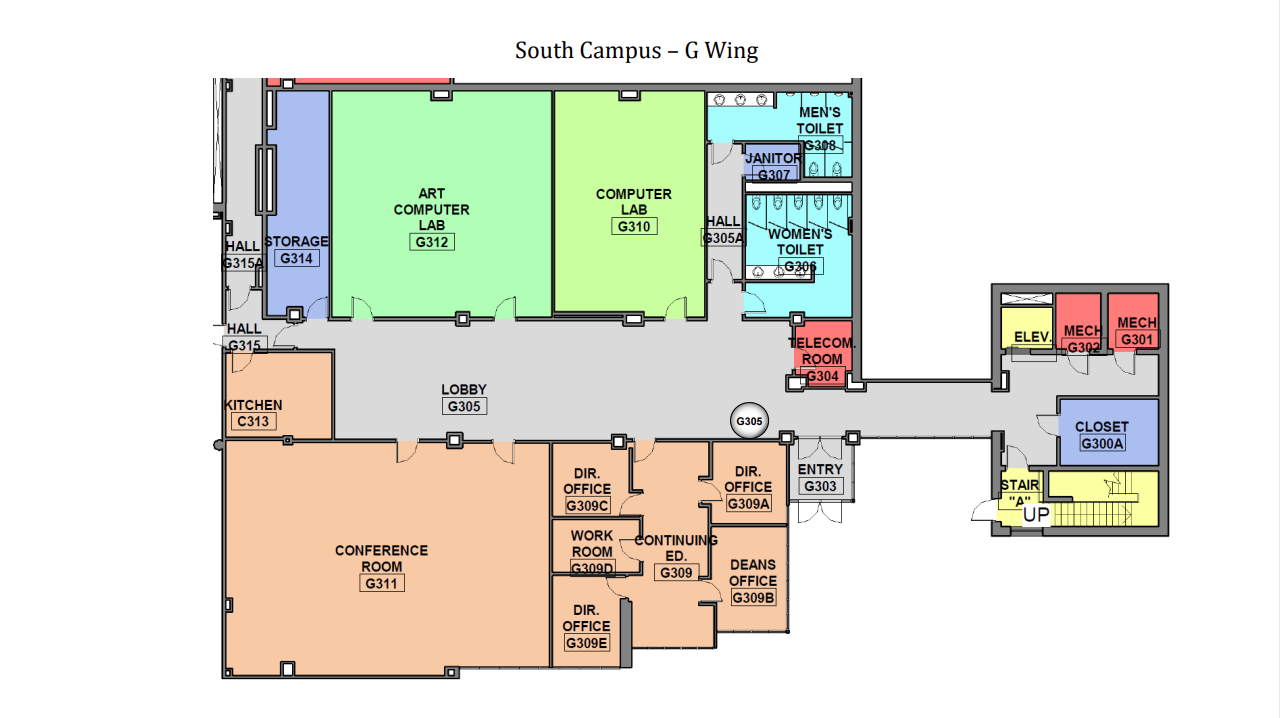
4th Floor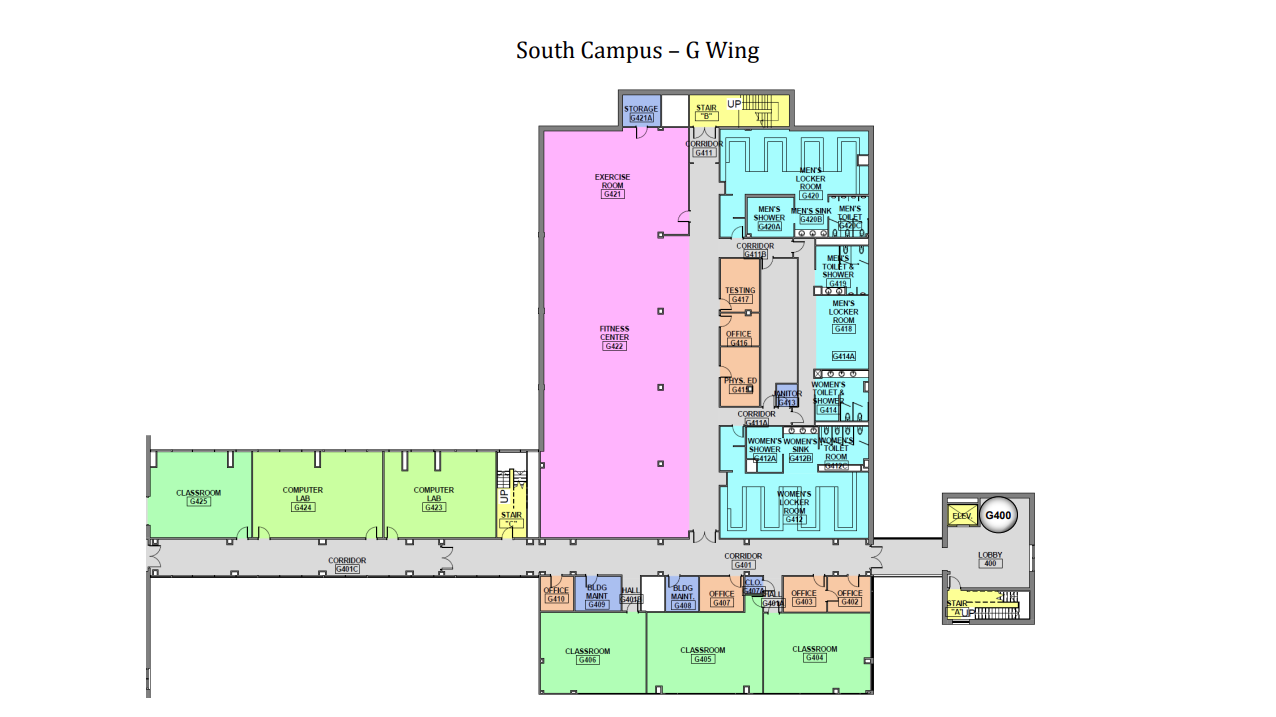
5th Floor
L Building
5th Floor
North Campus
1st Floor
2nd Floor
3rd Floor
West Hills Center
South Wing
1st Floor
2nd Floor

Homewood Brushton
1st Floor
2nd Floor
Braddock Hills
1st Floor

Adding Funds to Your CCAC ID Card for Print Management
Adding Funds to Your CCAC ID Card for Print Management
- Go to print.ccac.edu and click on the CCAC ID Card Services tab
- A new window will open with account information
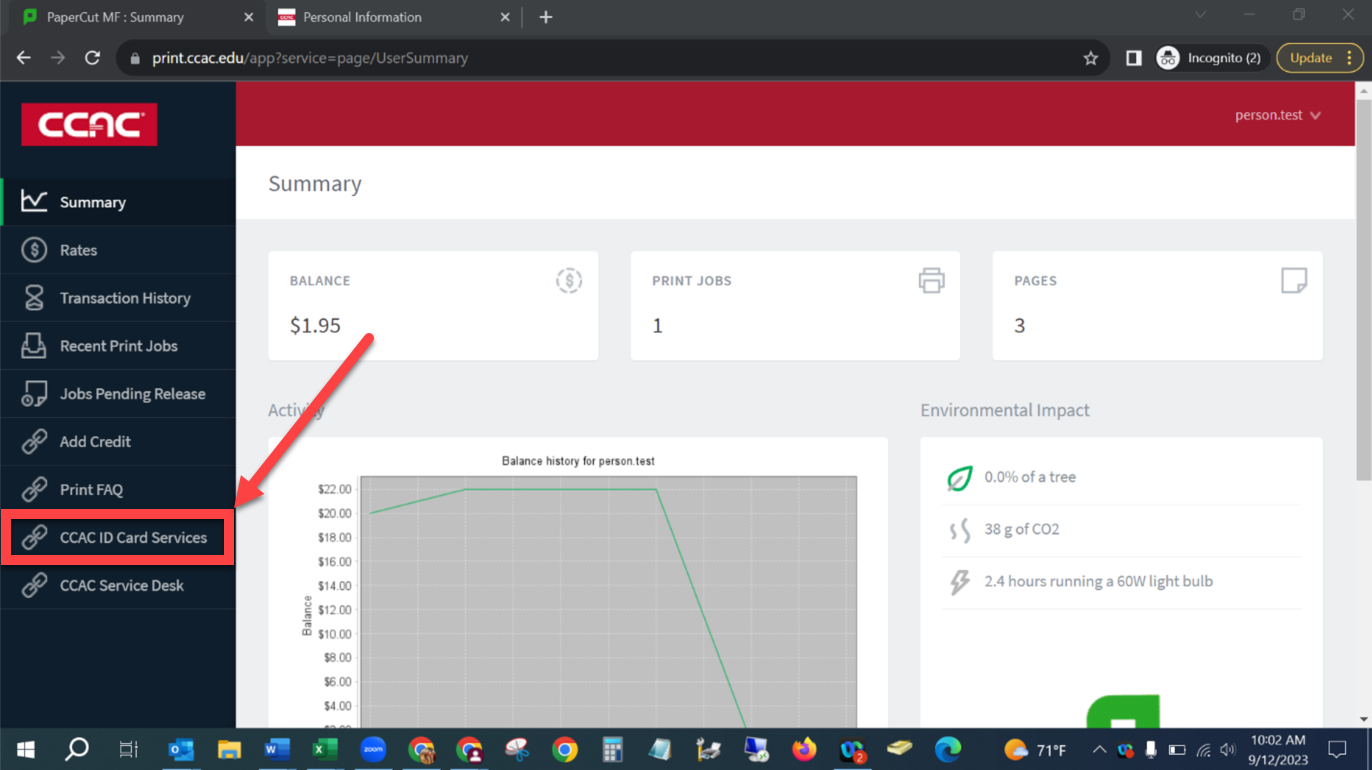
- A new window will open with account information
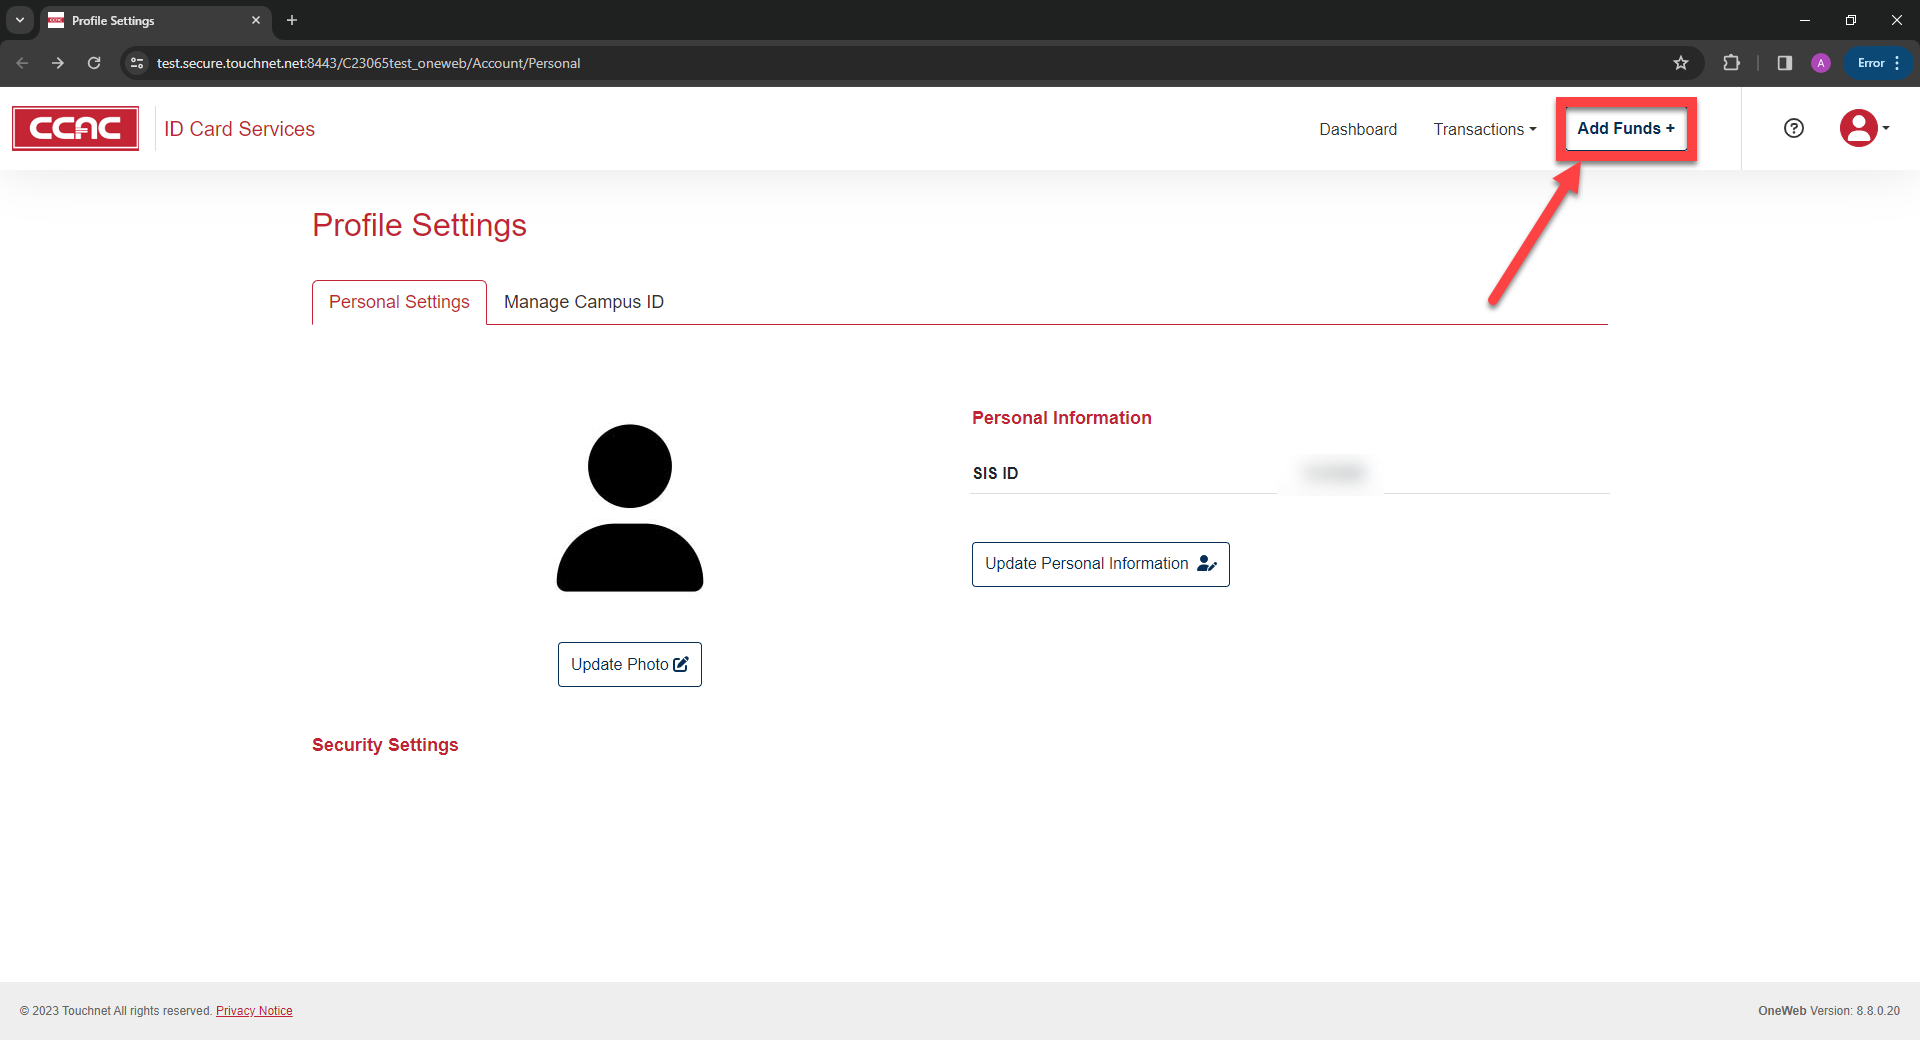
- Click on the Add Funds tab
- Click Add Funds
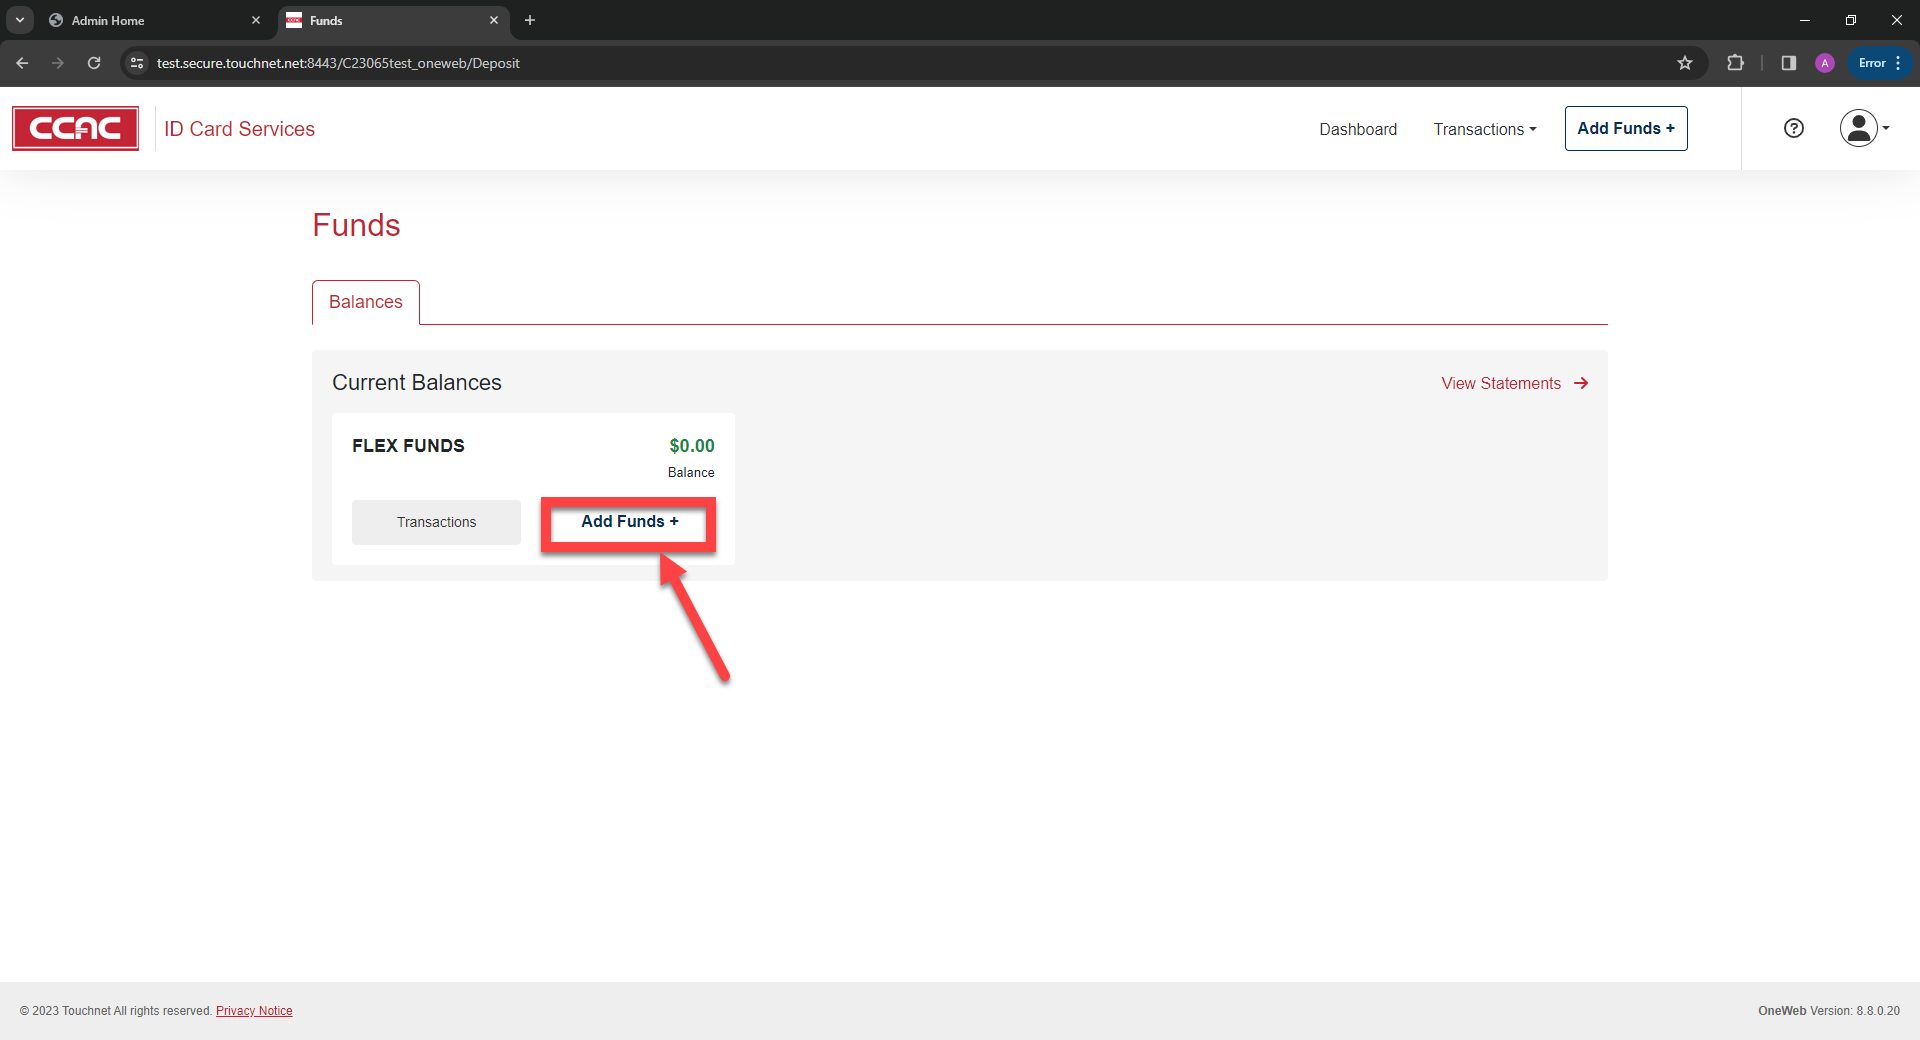
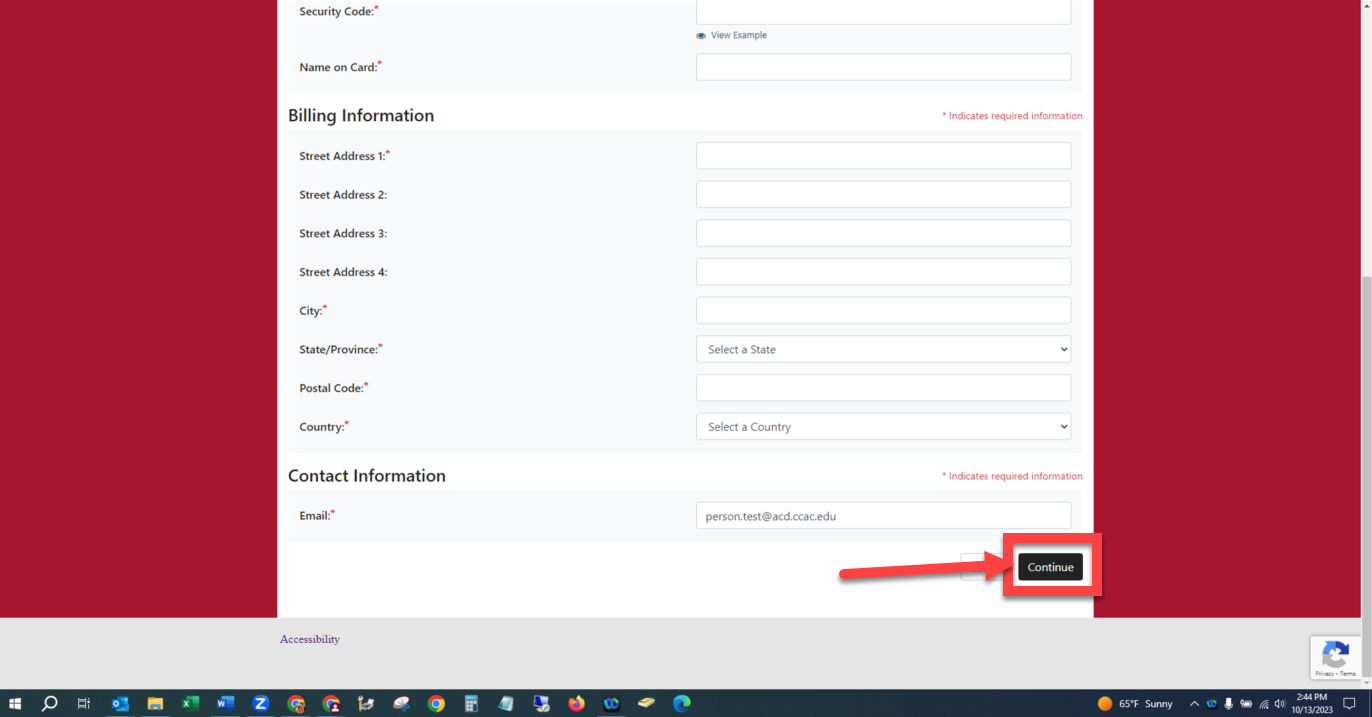
- Enter your Online Deposit Amount, Email, and Deposit Note if desired
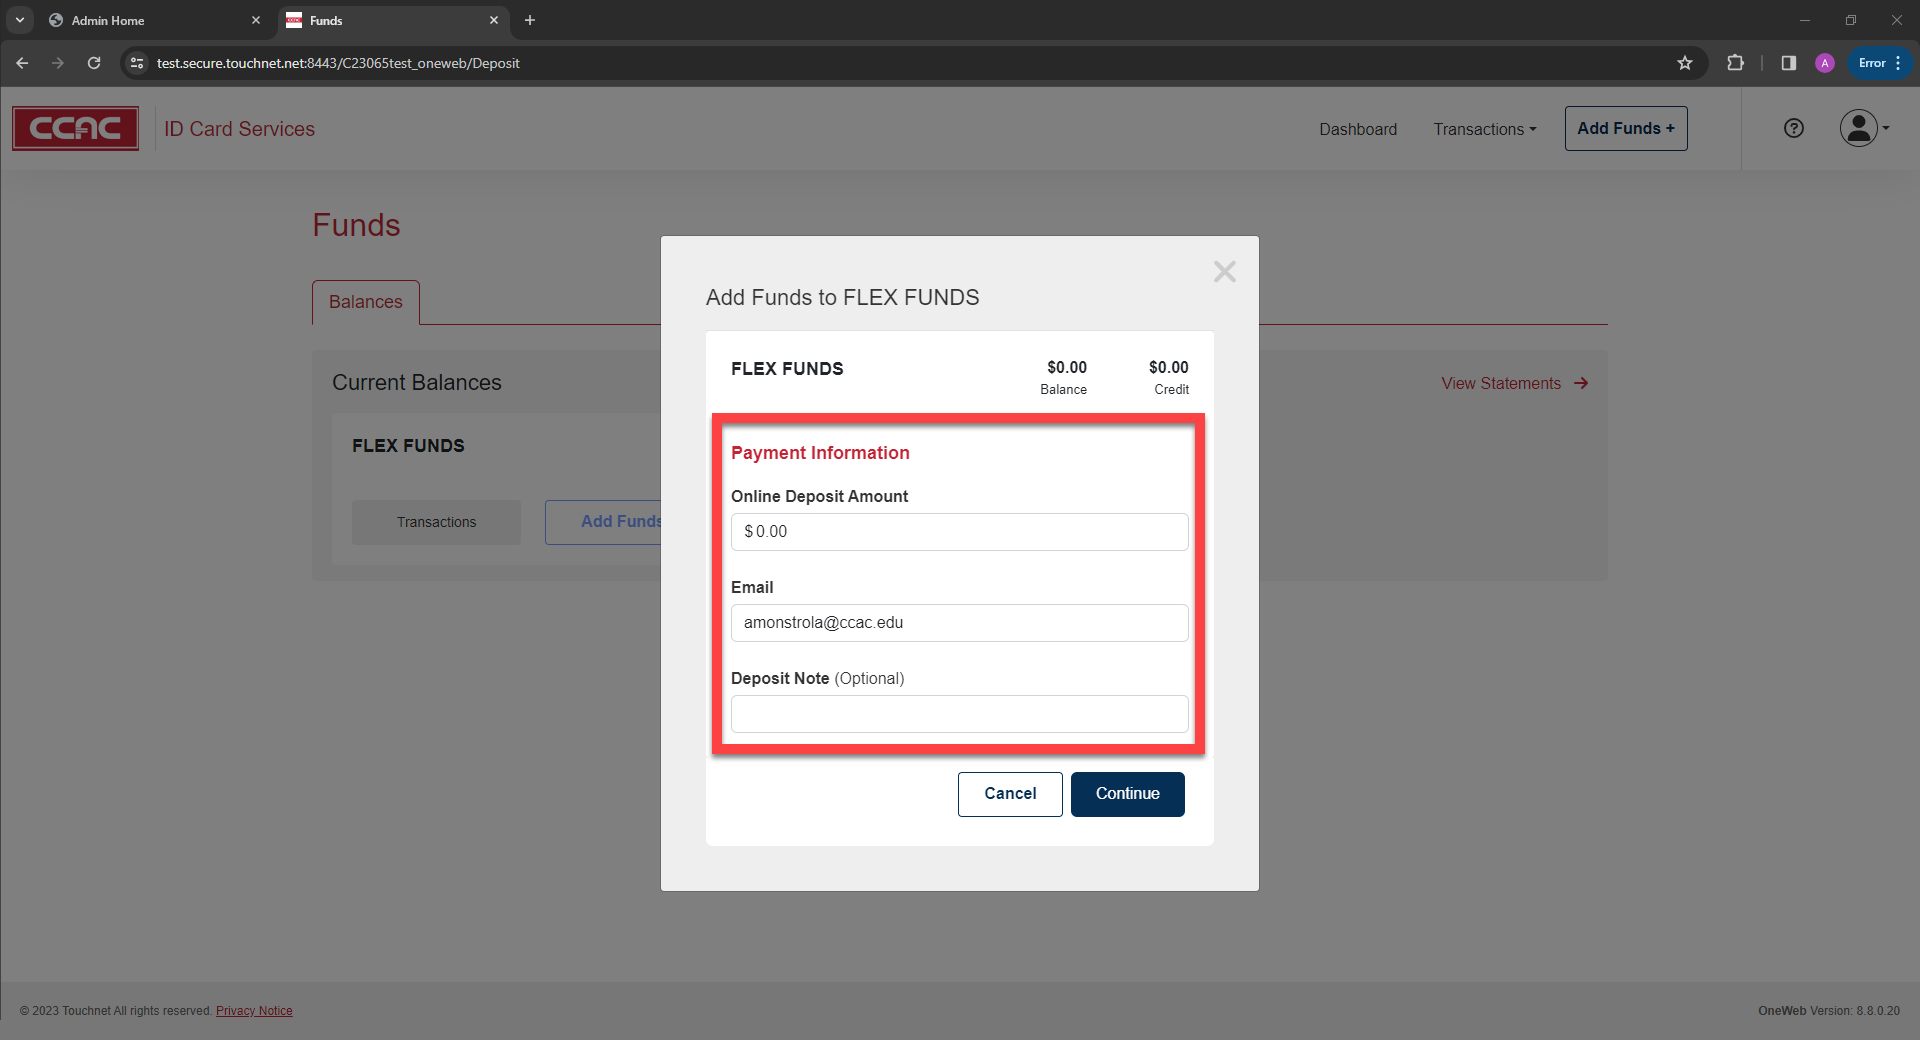
- Click Continue
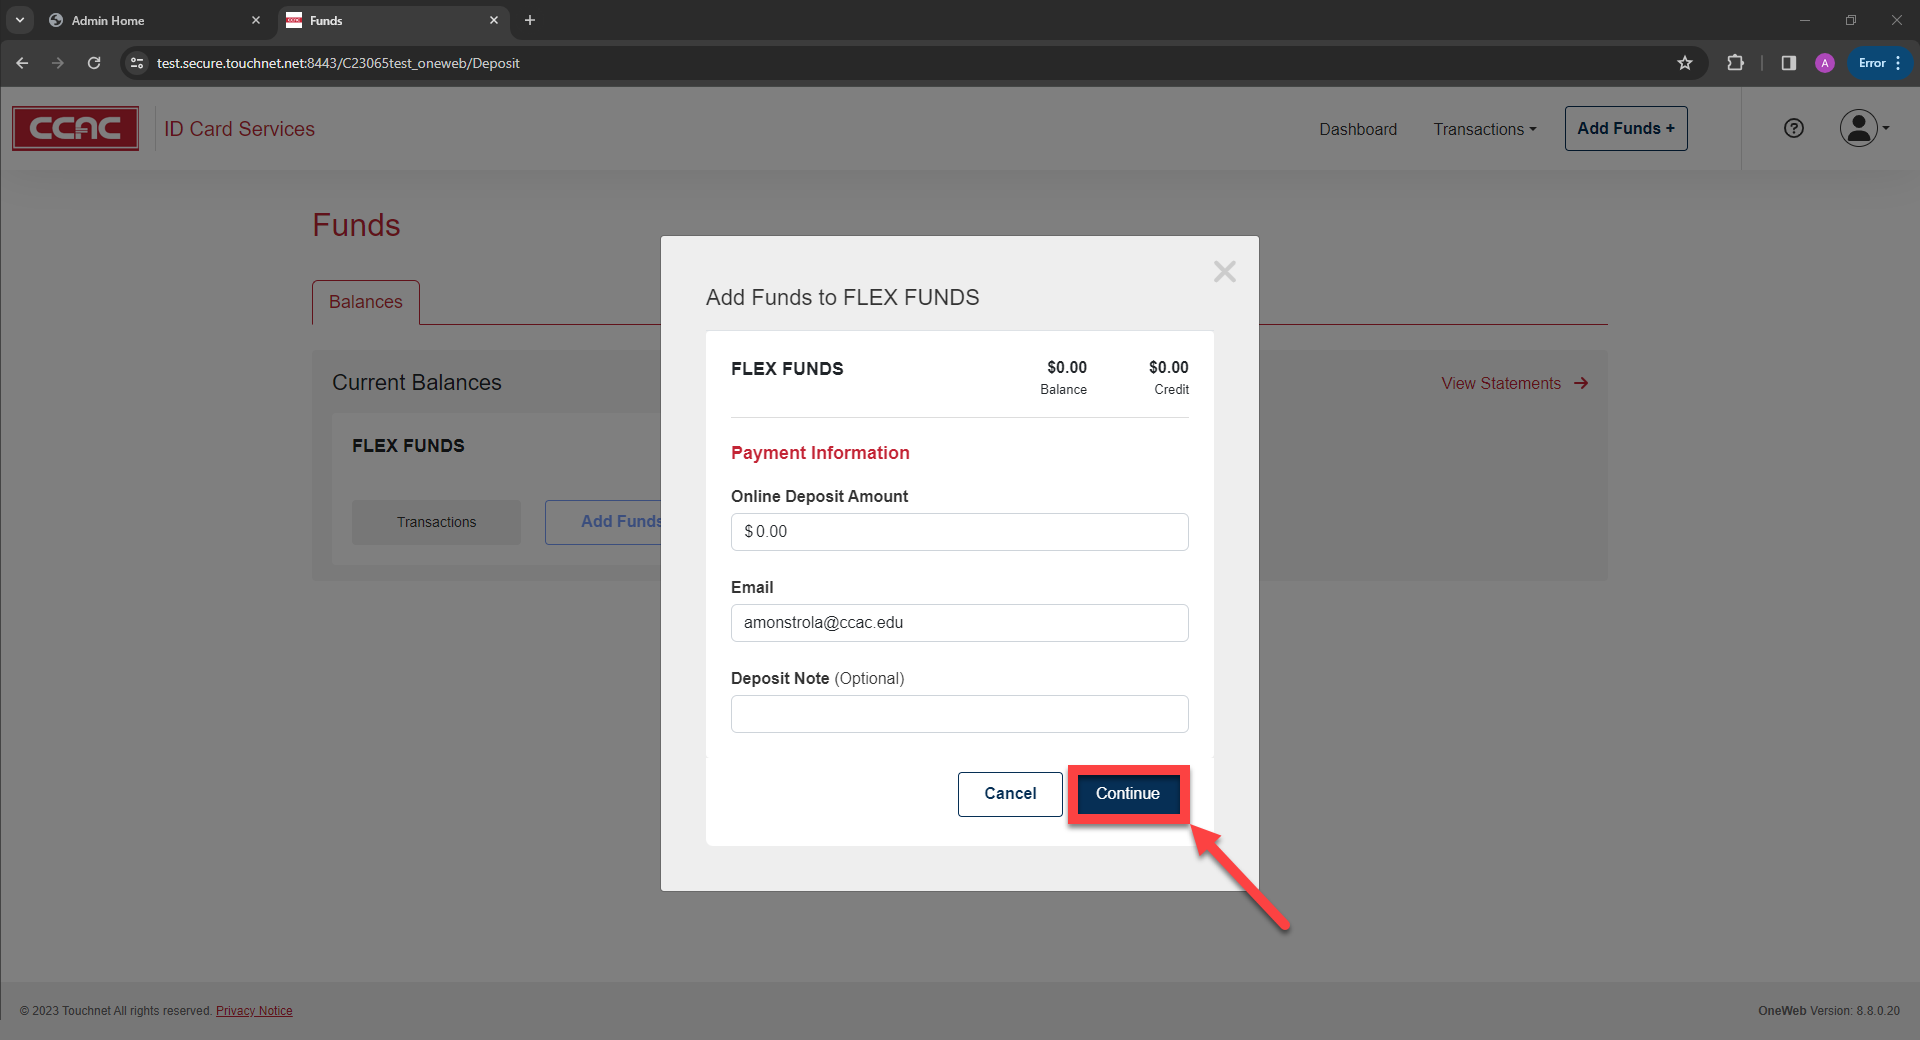
- Enter payment information
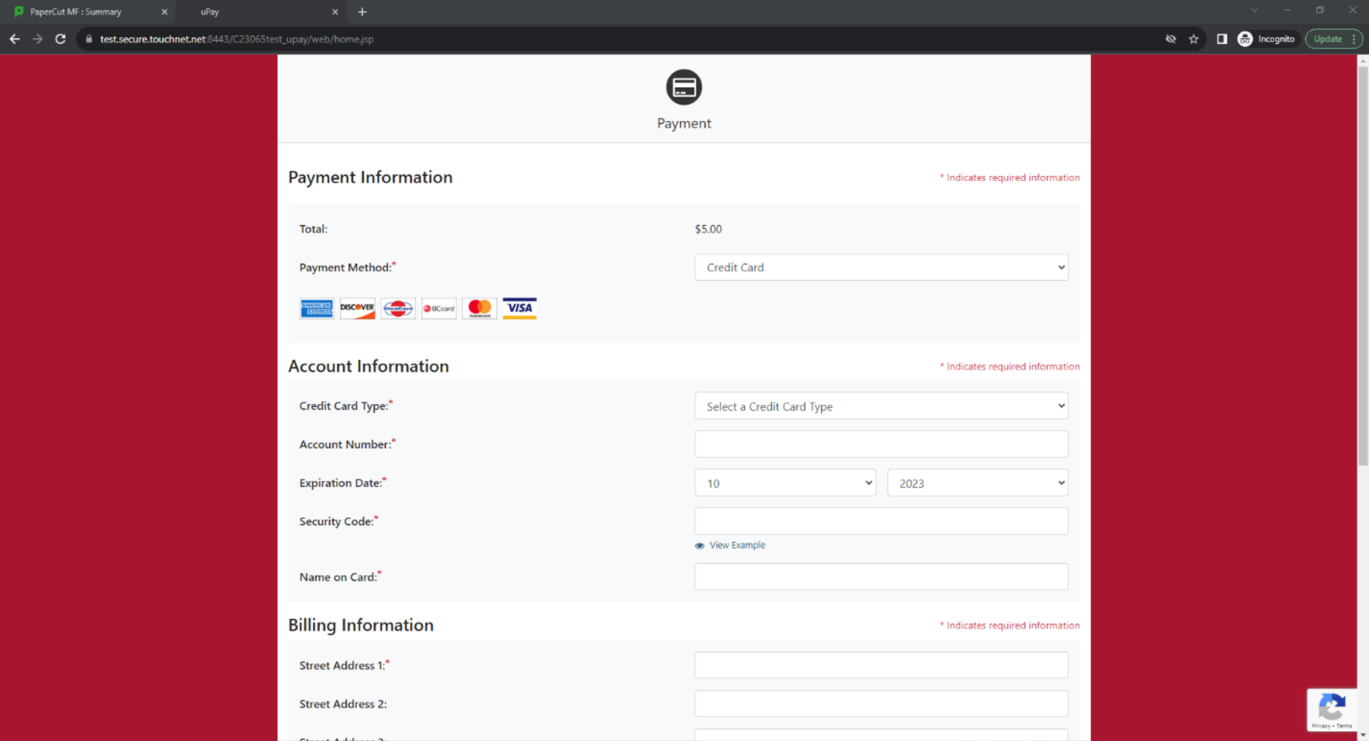
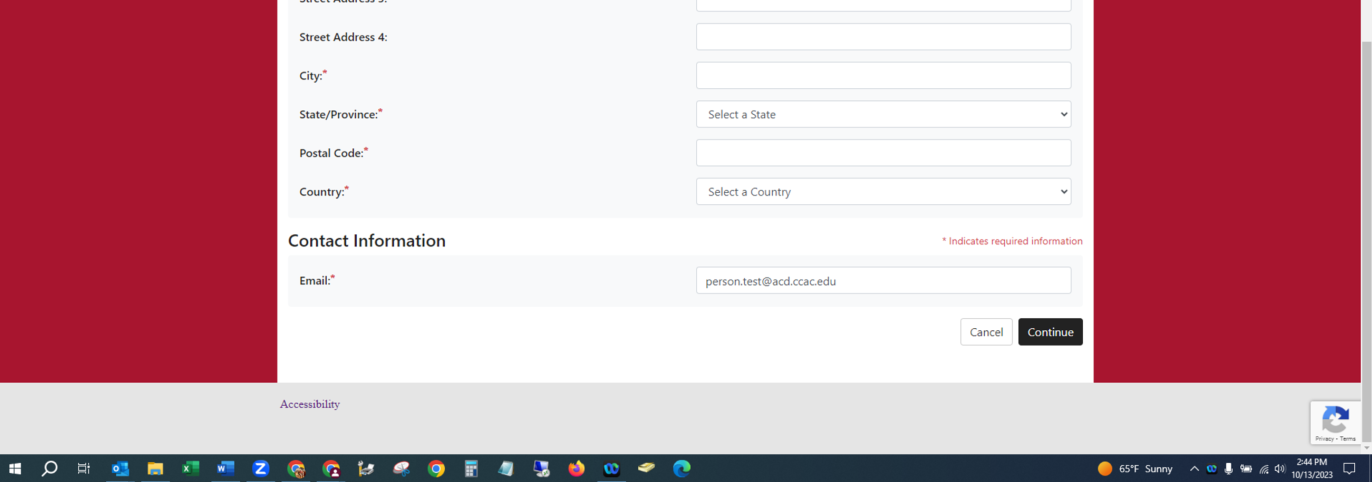
- Click Continue
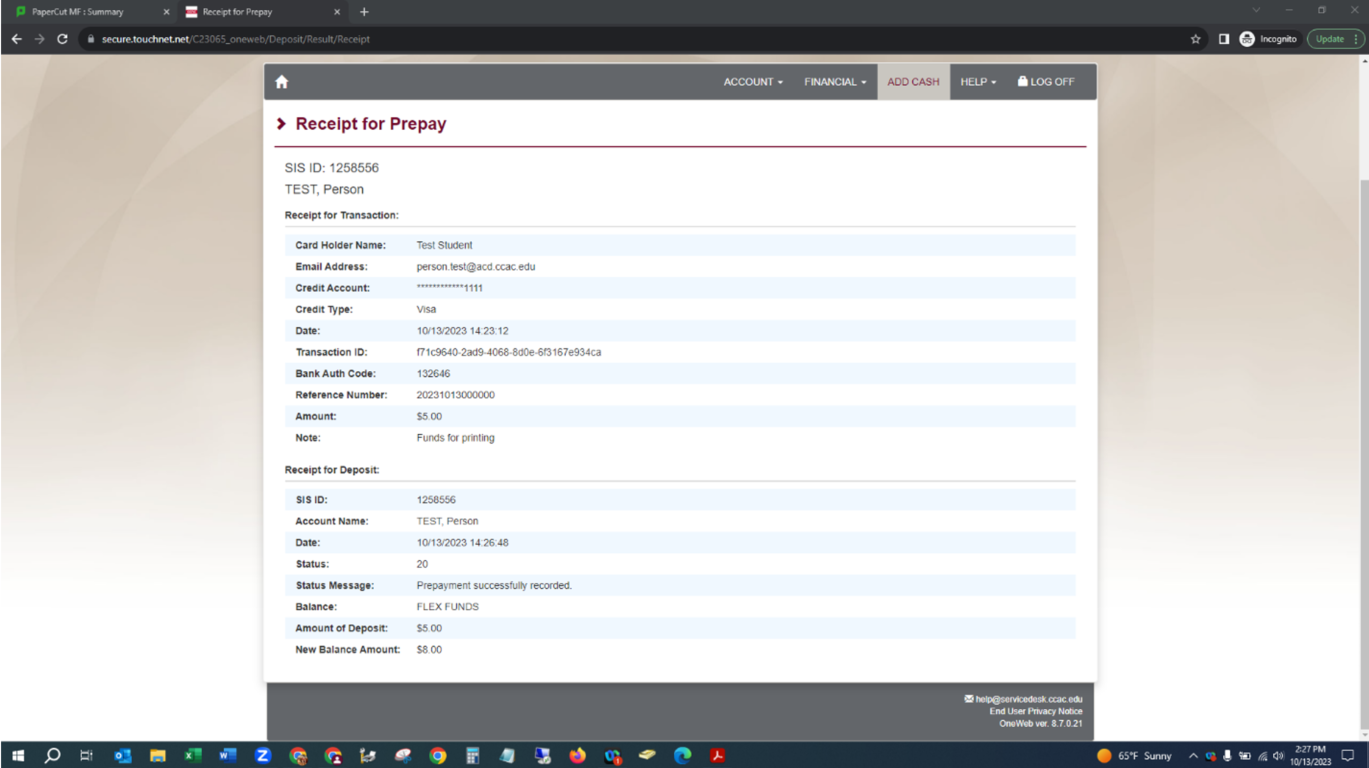
- A receipt will be displayed for your transaction
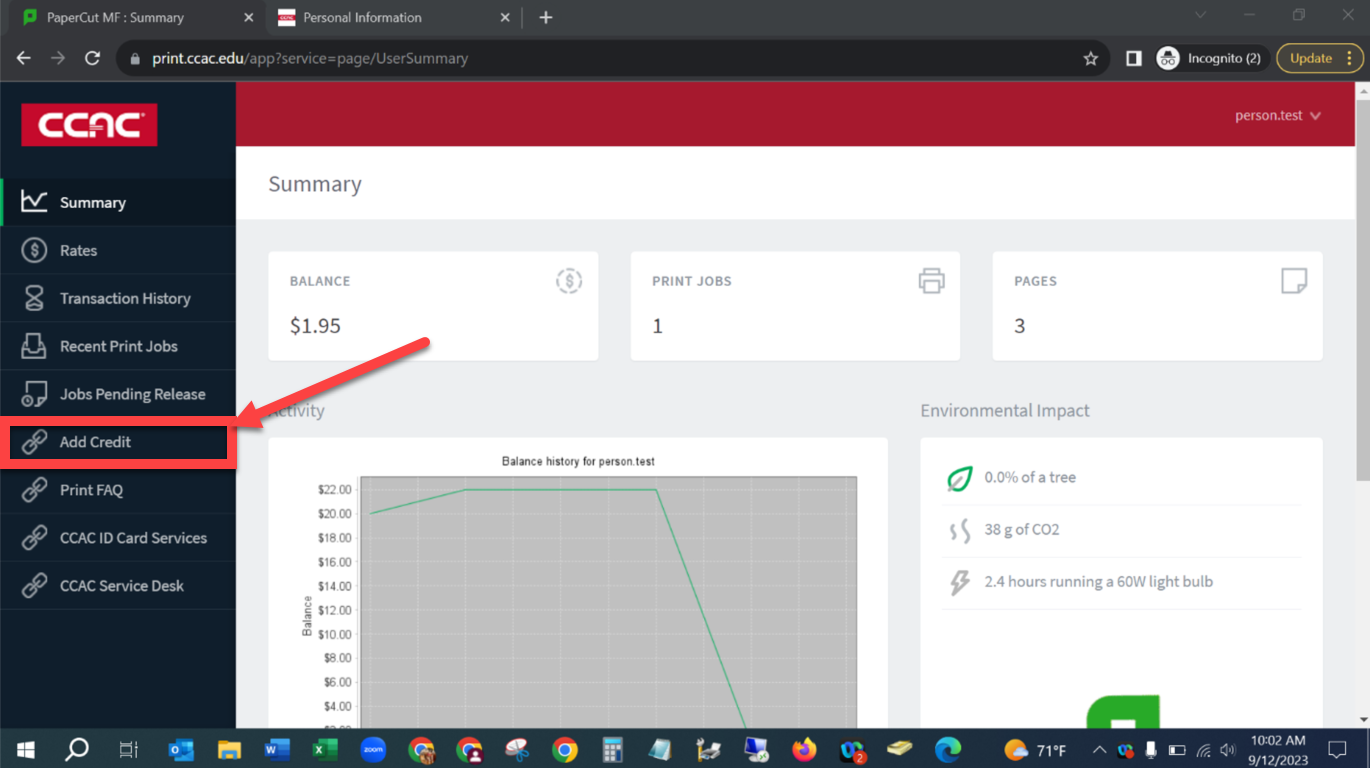
- Return to print.ccac.edu and click on the Add Credit tab
- Select the amount you would like to the print system. Click Add value
- PLEASE NOTE: These funds will NOT transfer from one semester to the next, so please be sure you are only transferring what you will use this semester. You can always transfer additional funds as needed.
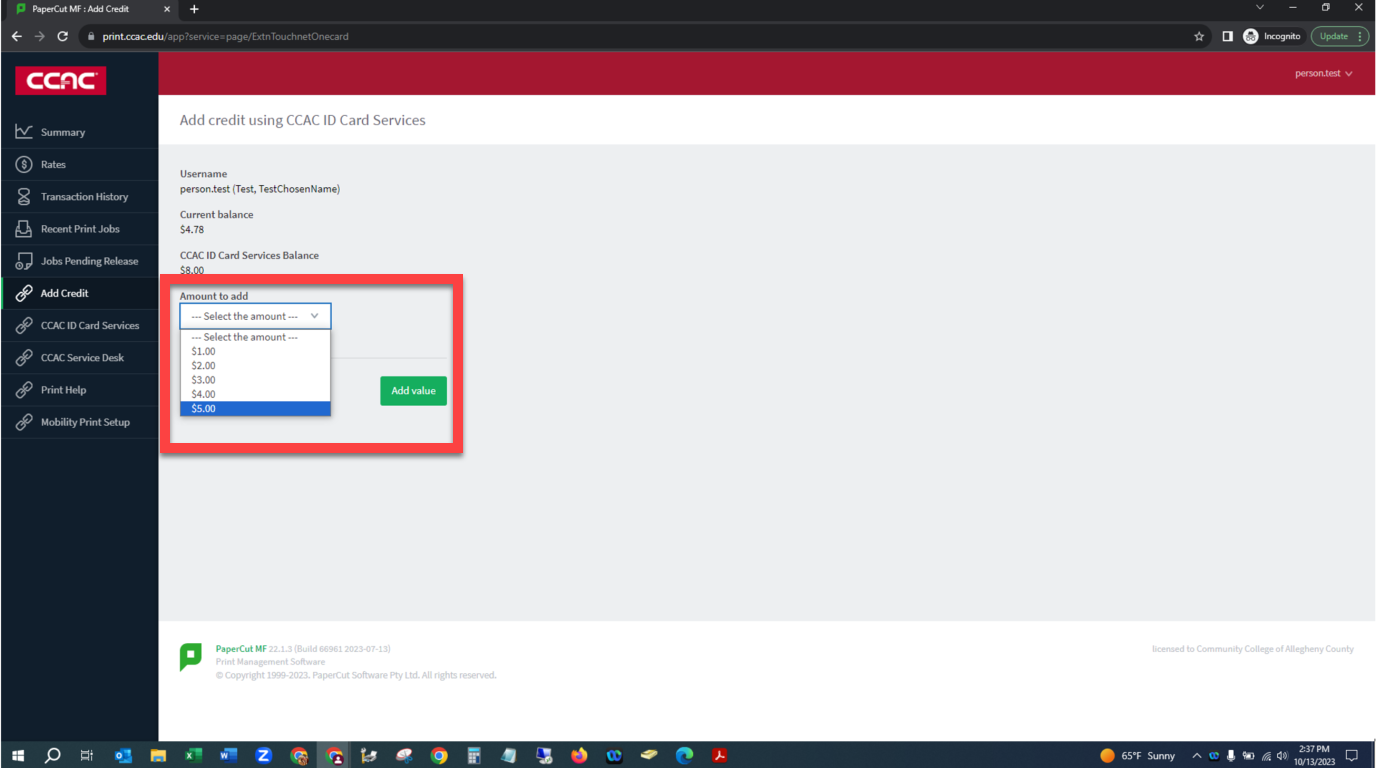
- PLEASE NOTE: These funds will NOT transfer from one semester to the next, so please be sure you are only transferring what you will use this semester. You can always transfer additional funds as needed.
- Once the transaction is completed, you will see a banner at the top of the page with a confirmation message and you can see your updated balance

Requesting a Refund for Print Jobs
Requesting a Refund for Print Jobs
- Open a web browser, and navigate to print.ccac.edu
- Enter your CCAC Netid and Password
- Click Recent Print Jobs
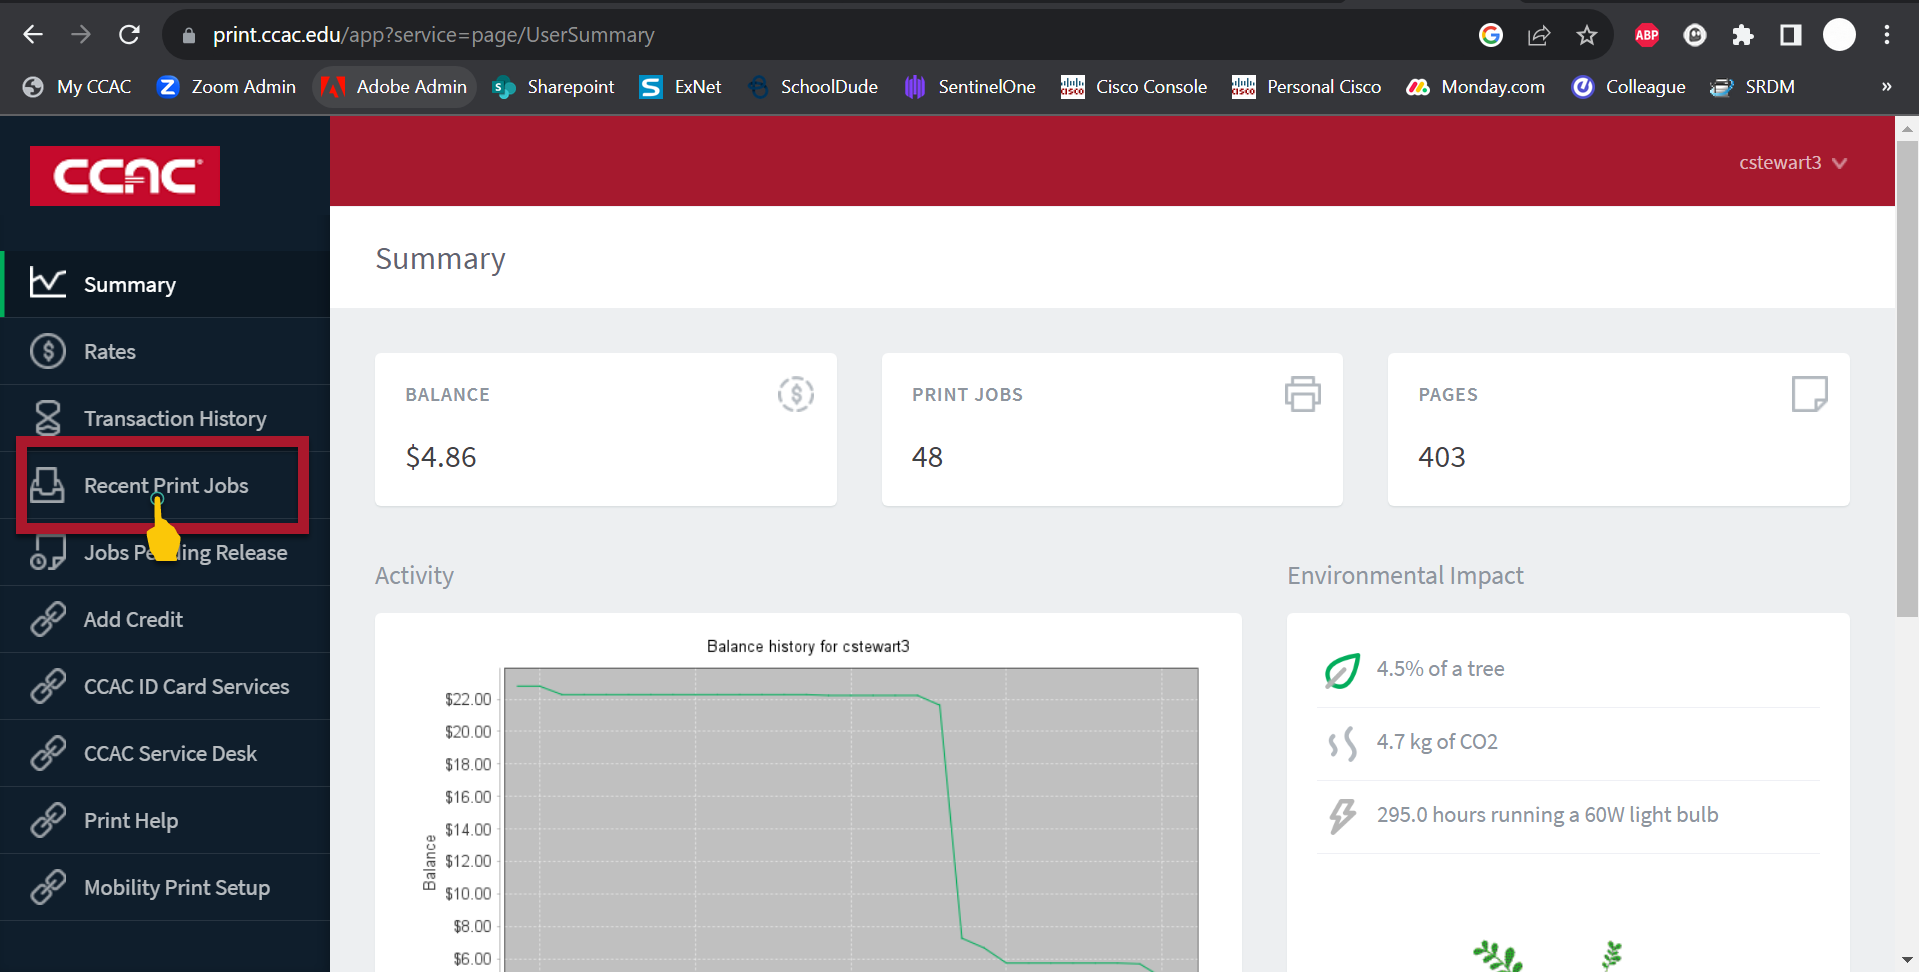
- Find the Job they want refunded
- Click Request Refund
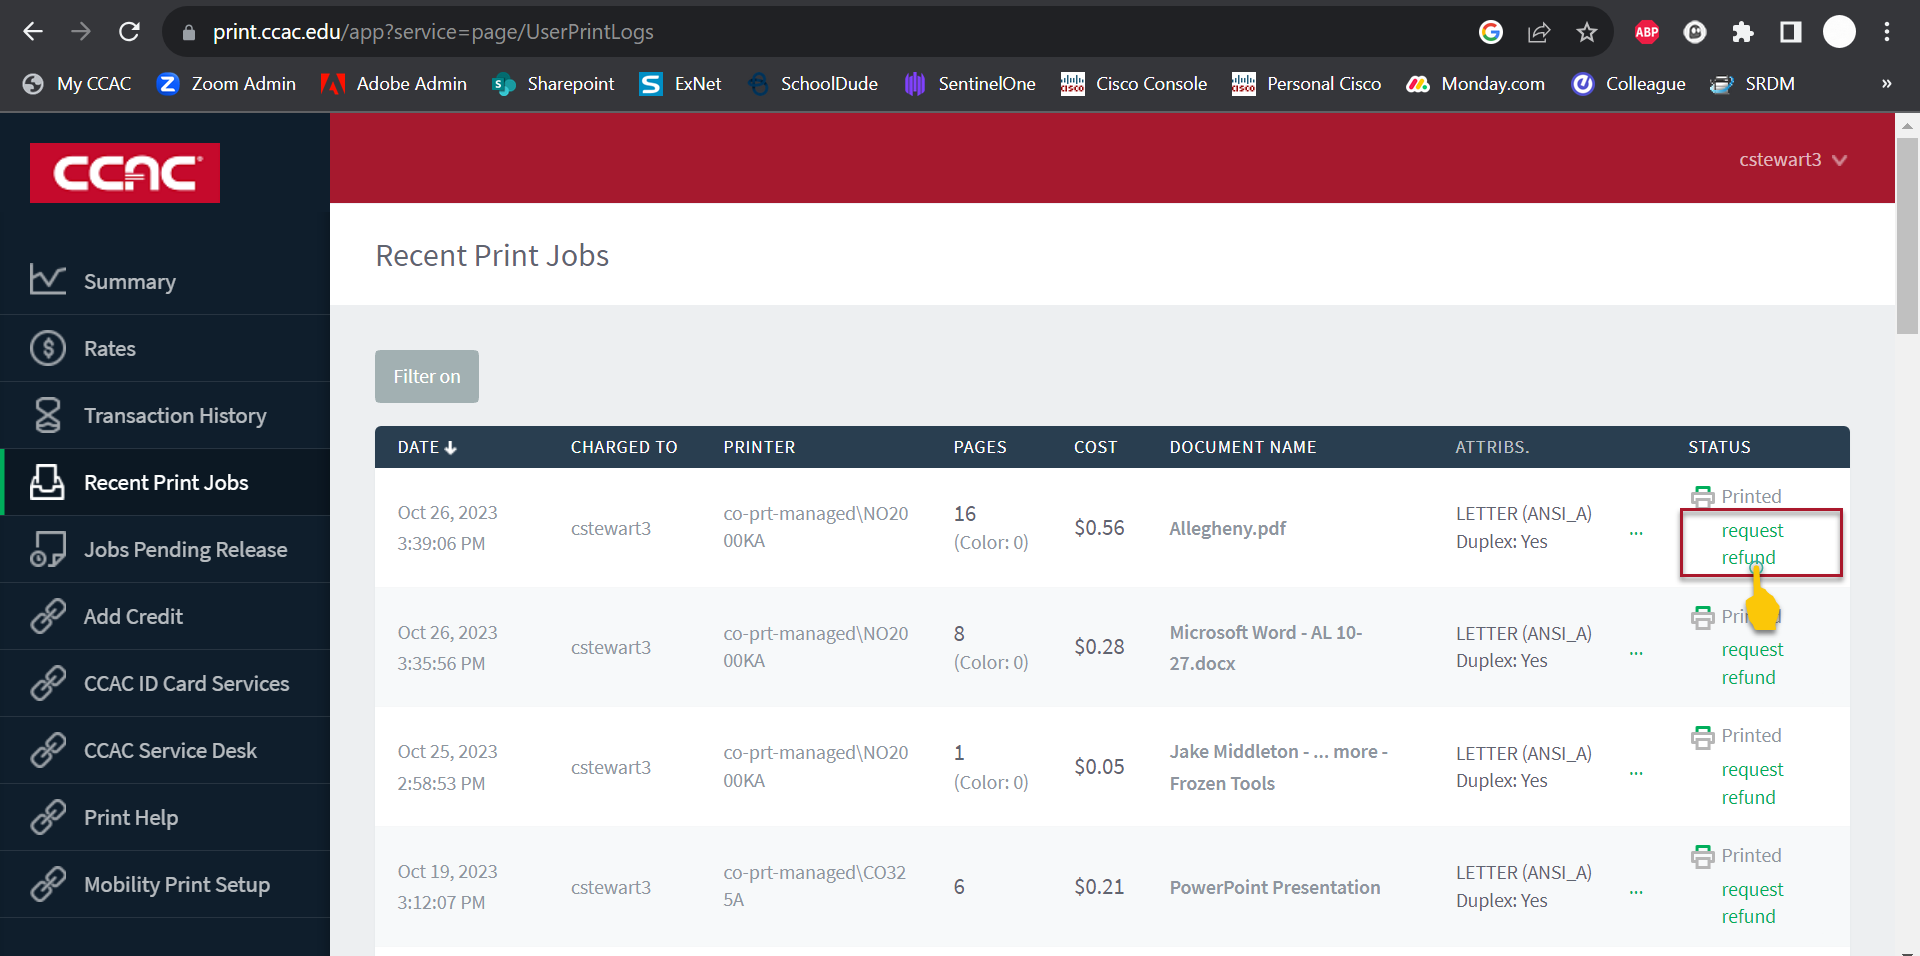
- Fill out the information
- Click Send
- An administrator will review your transaction
- You will see the status of the refund in your list of Recent Print Jobs
- Once a refund is granted, it should reflect in your account immediately
Printing from a Temporary CCAC Account
Printing from a Temporary CCAC Account
- Click File
- Click Print
- Select Printer in the drop-down
- CCAC-Black-and-White on printers.ccac.org
- CCAC-Color on printers.ccac.org
- CCAC-Booklet-Color on printers.ccac.org (only certain users will see this option)

- Adjust other printer settings to your needs
- Click Print
- After clicking print, your print job will be in a queue
- After clicking print, your print job will be in a queue
- Walk to a Printer

- On the touch pad, tap Username and password
- Enter your temp CCAC username and password

- Using Onscreen Keyboard

- Using Pull out Keyboard at printer

- Using Onscreen Keyboard
- Click Log in
- Print job will automatically be released at the printer
Printing from the Bypass Tray
- Click File

- Click Print

- Select Printer in the drop-down
- CCAC-Black-and-White on printers.ccac.org
- CCAC-Color on printers.ccac.org
- CCAC-Booklet-Color on printers.ccac.org (only certain users will see this option)

- Select Printer Properties from under the selected printer

- Select Paper Source, then change Paper Tray to Bypass Tray, then select OK. You do NOT need to change the Paper Type.

- Load the desired paper into the Bypass tray on the right side of the printer. The paper should be placed portrait-style, face-down.
- Log into the printer and print your job.This job will pull paper from the bypass tray.