Info
Windows 11 is the latest Microsoft operating system running on CCAC PCs. Click the accordion headings below to view more information on the different areas of Windows 11.
Microsoft 365
The CCAC computers with Windows 11 will feature the Microsoft 365 version of Microsoft Office on the desktop.
See directions for Signing into Office 365 on Windows 11 PC's.

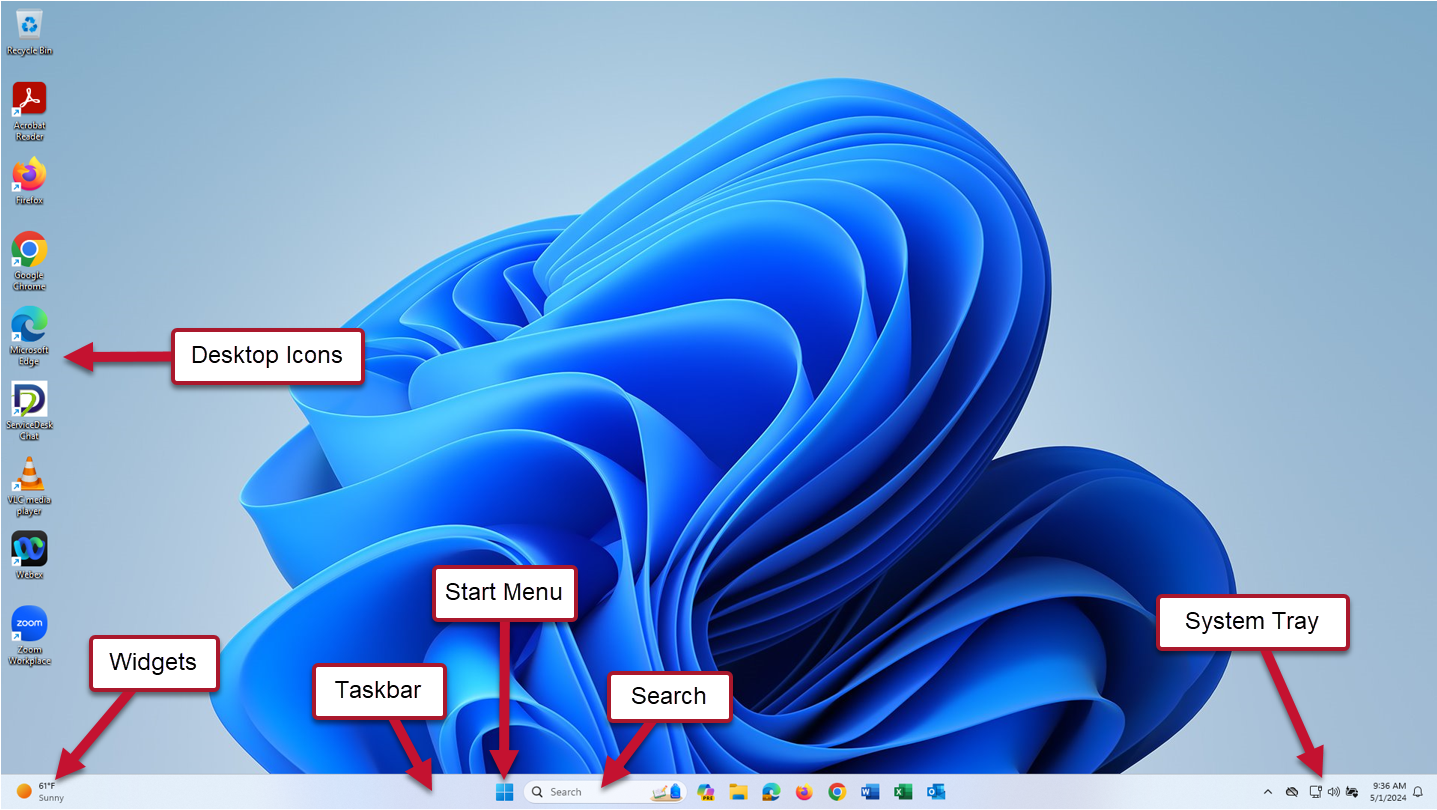
Desktop Overview
The desktop is your main display area where you can access your application icons, taskbar, start menu, search, widgets, and more.
These desktop elements will be discussed further in other accordion sections of this article.
Multiple Desktops
The multiple desktops feature allows you to create multiple additional desktops in addition to your main desktop. This provides you with extra workspace for applications.

Note that these desktops are virtual and accessible only within the operating system. This is not the same as extending your main desktop across multiple physical displays connected to your machine.
Before following any of these steps, the Task View  feature must be enabled on your taskbar. See “Taskbar Settings - Access and Overview” under the “Taskbar Overview” section below for more information on this.
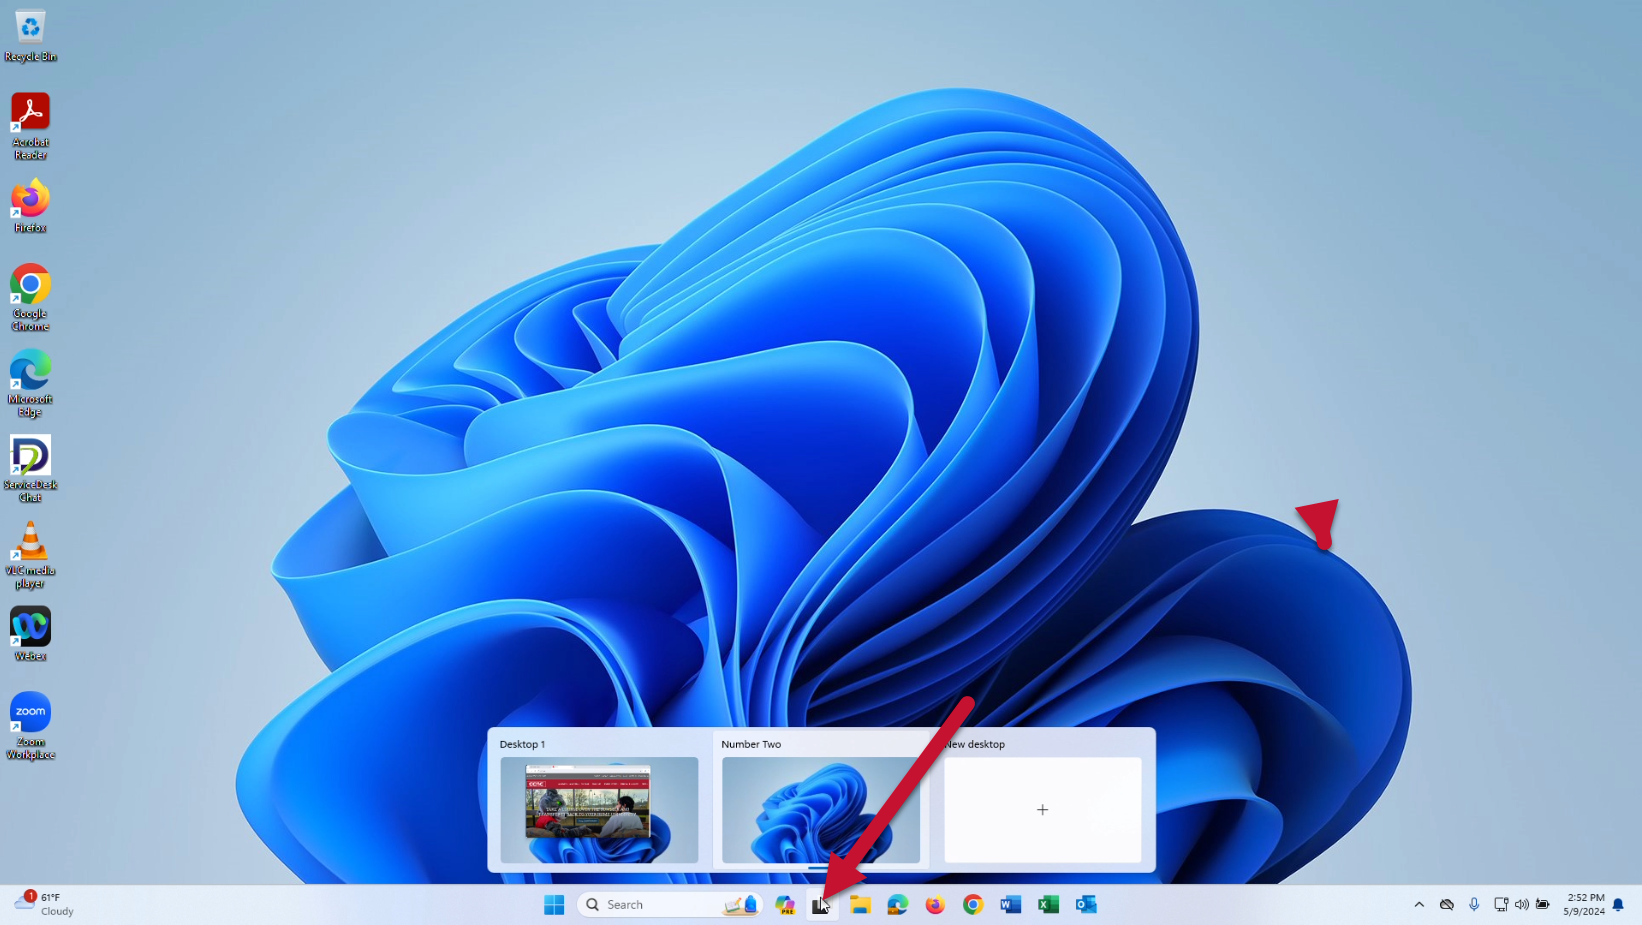
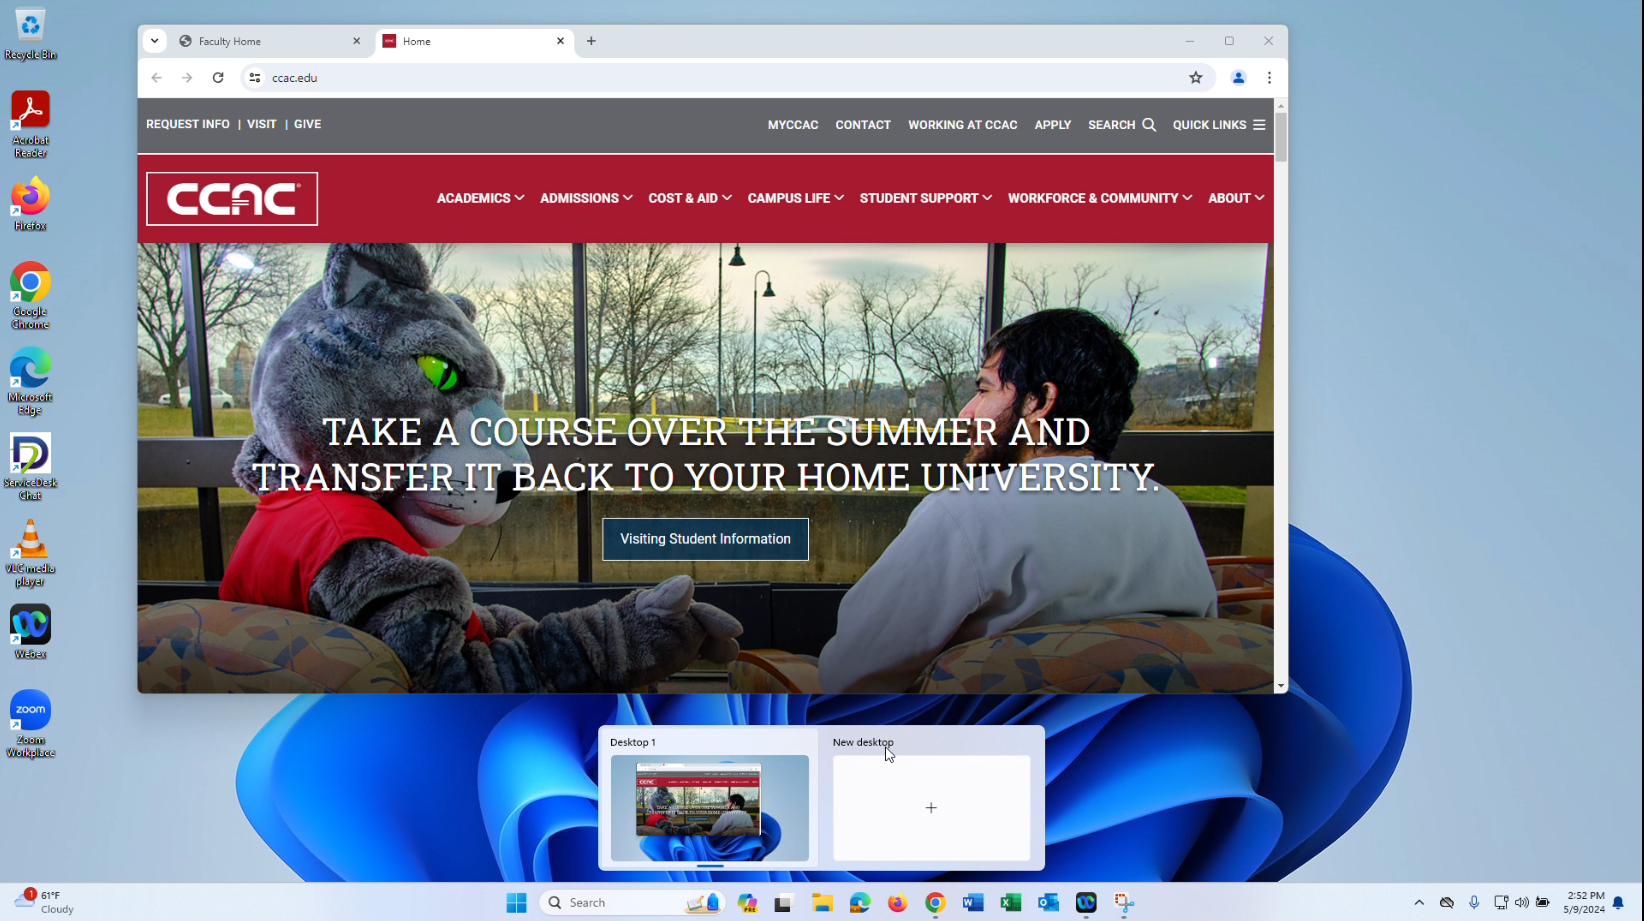
Creating Multiple Desktops
- Hover over (or click) Task View

- Click New desktop from the desktop preview

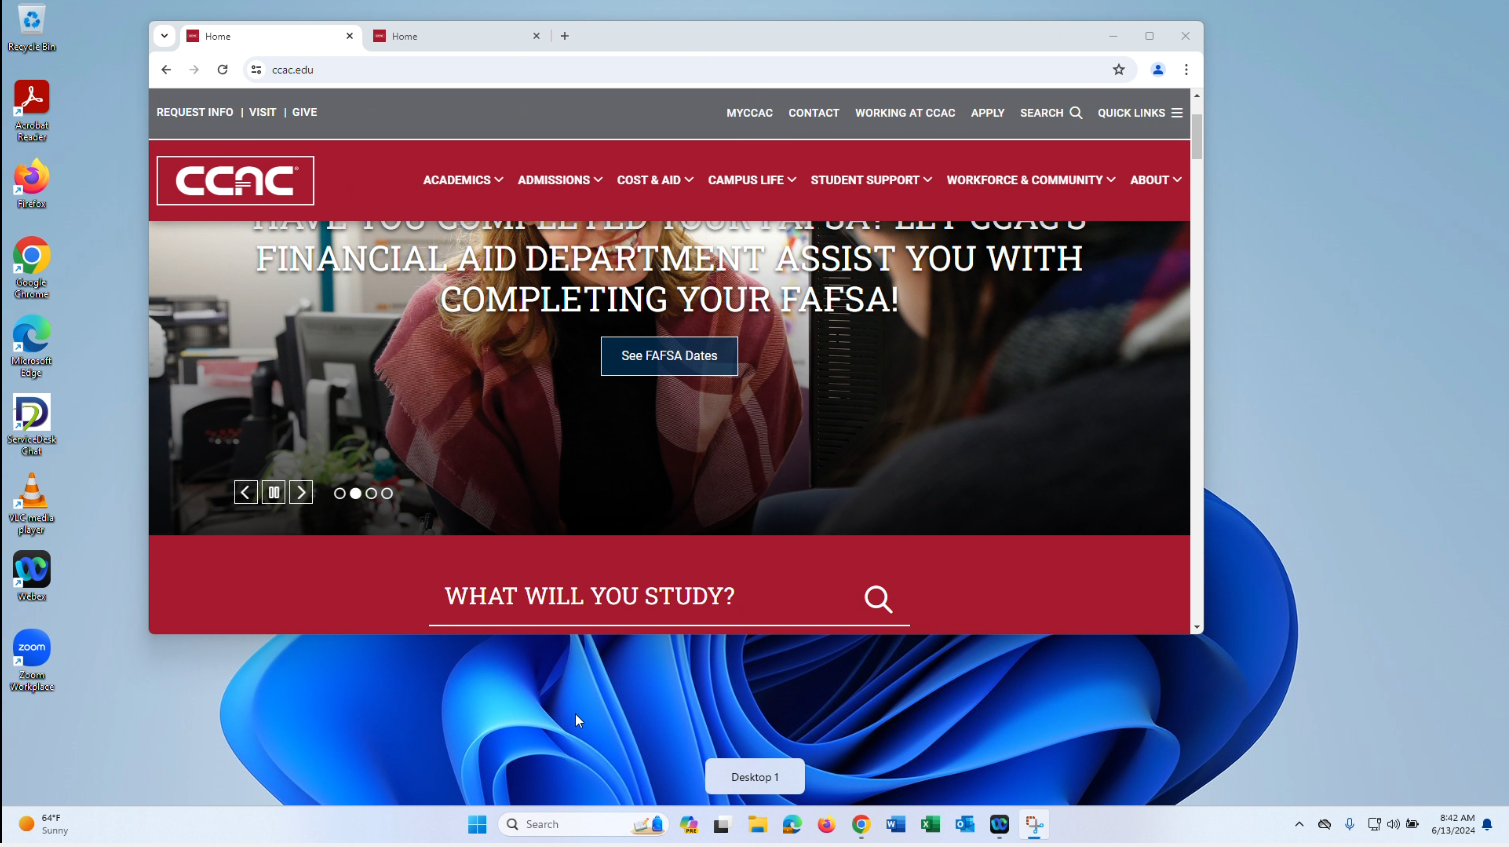
- You will be taken to the new desktop

Note that your running applications from your previous desktop do not carry over to the new desktop, but they will still continue to run on the previous desktop.
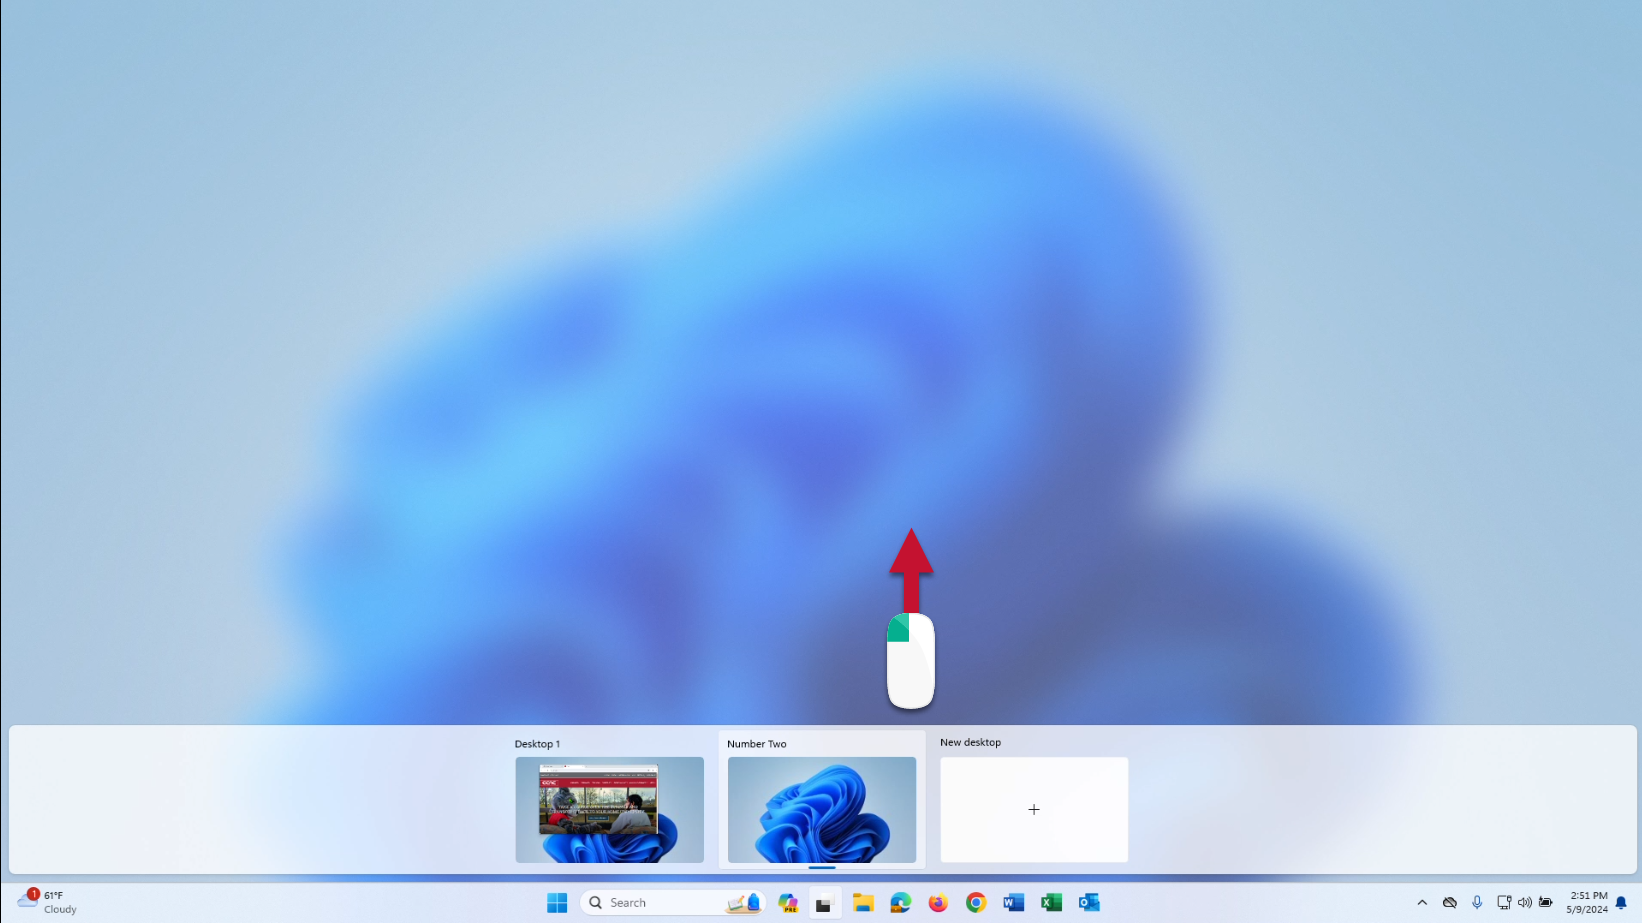
Switching Between Desktops
- Hover over (or click) Task View

- Click the desktop you wish to switch to
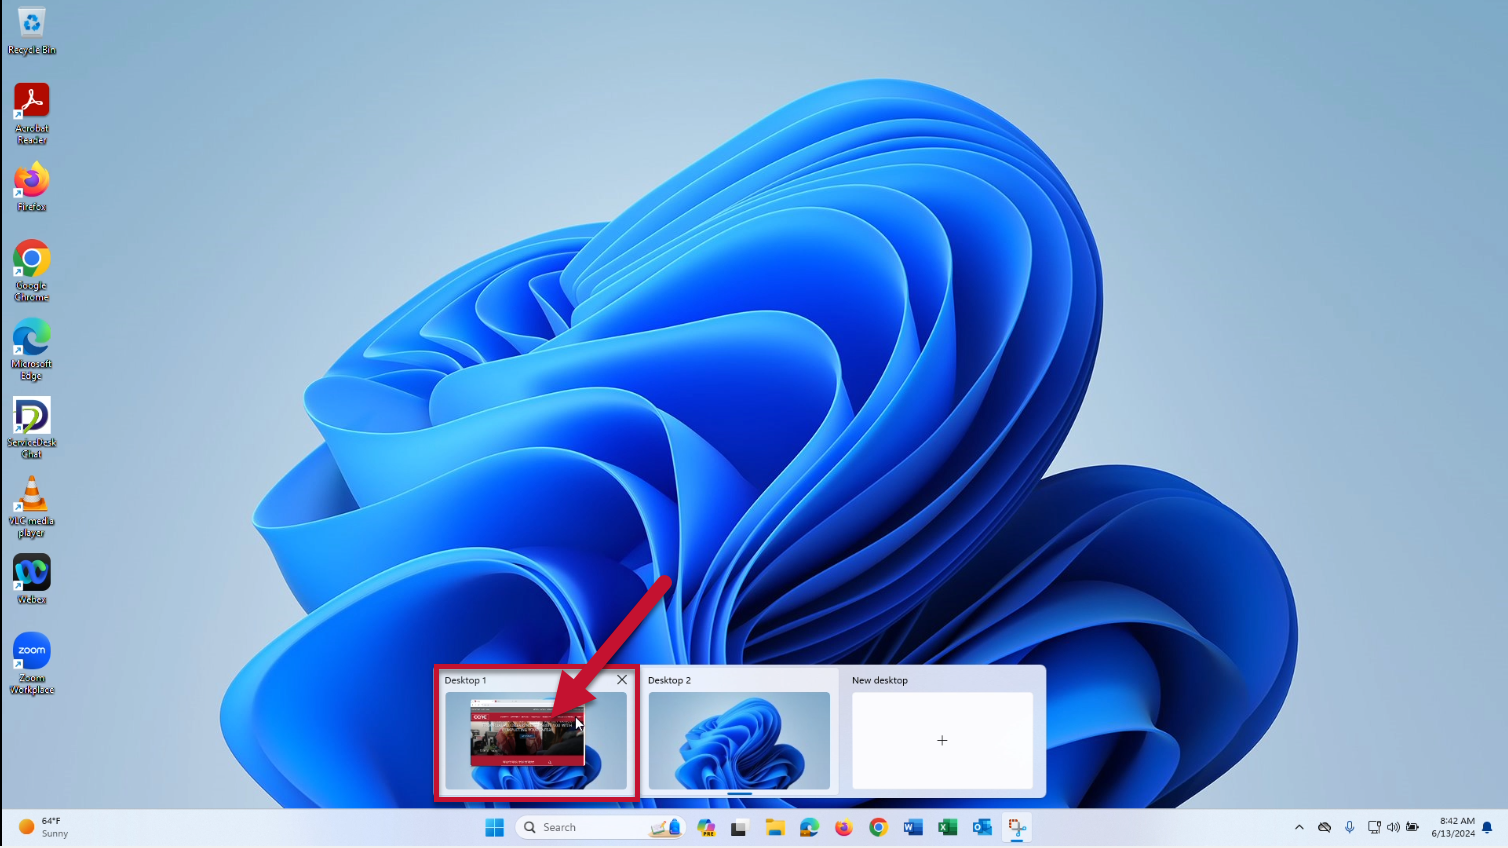
- You will be taken to the selected desktop
Renaming a Desktop
- Hover over (or click) Task View

- Click on the name of the desktop you wish to rename

- Type in the new name
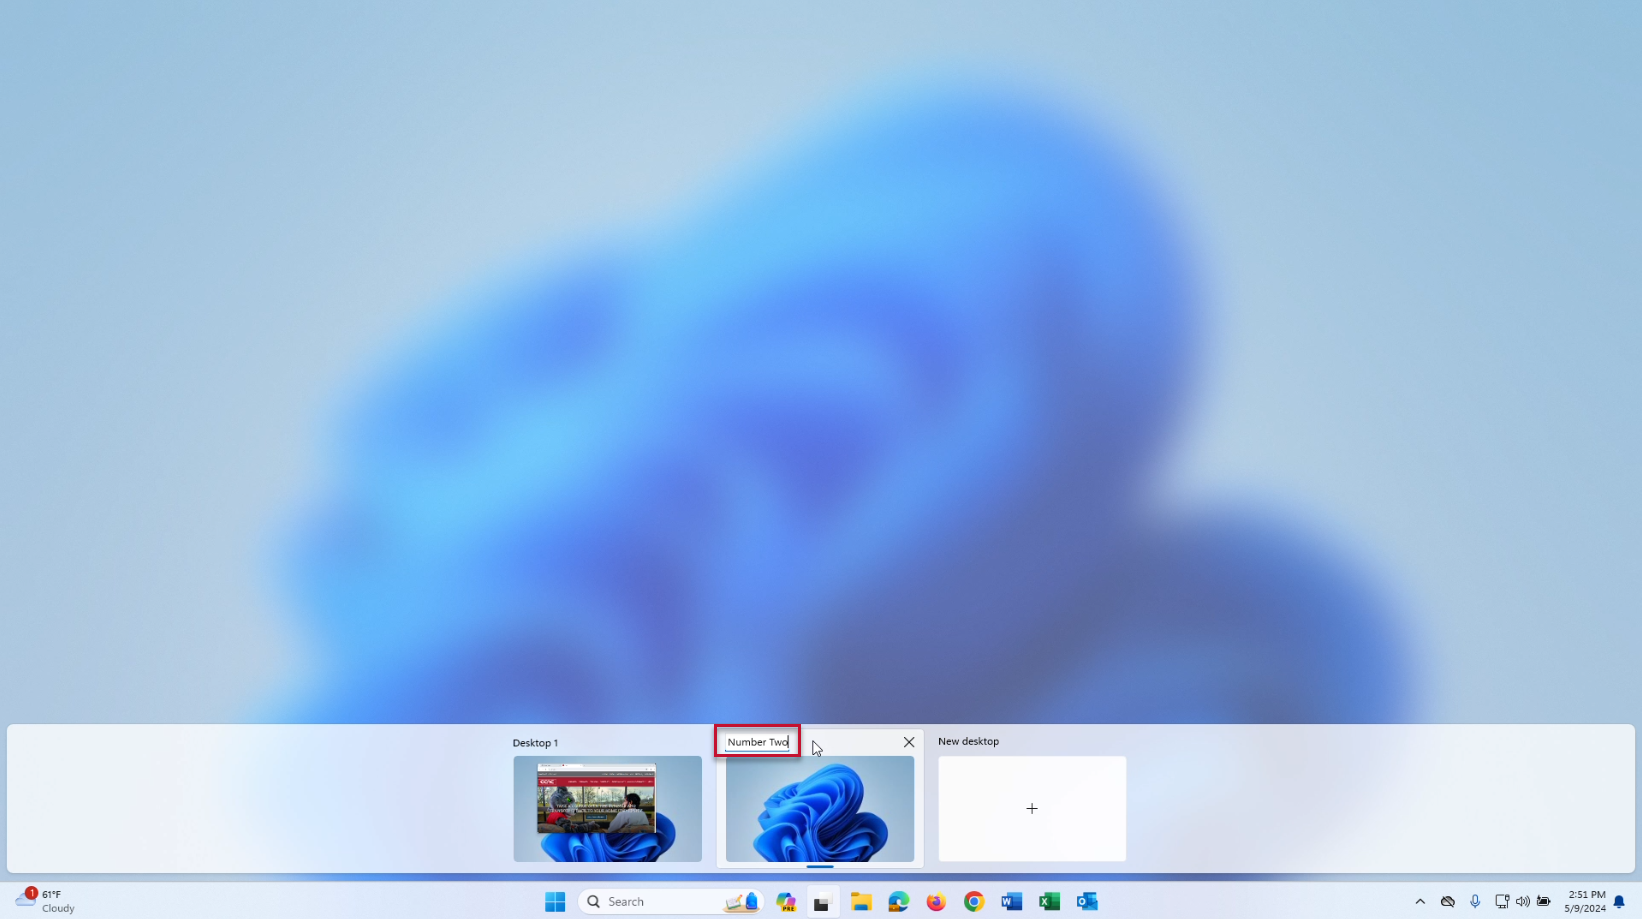
-
Click off the desktop preview to register the name
Deleting a Desktop
- Hover over (or click) Task View
- Click the X in the upper right corner of the desktop preview
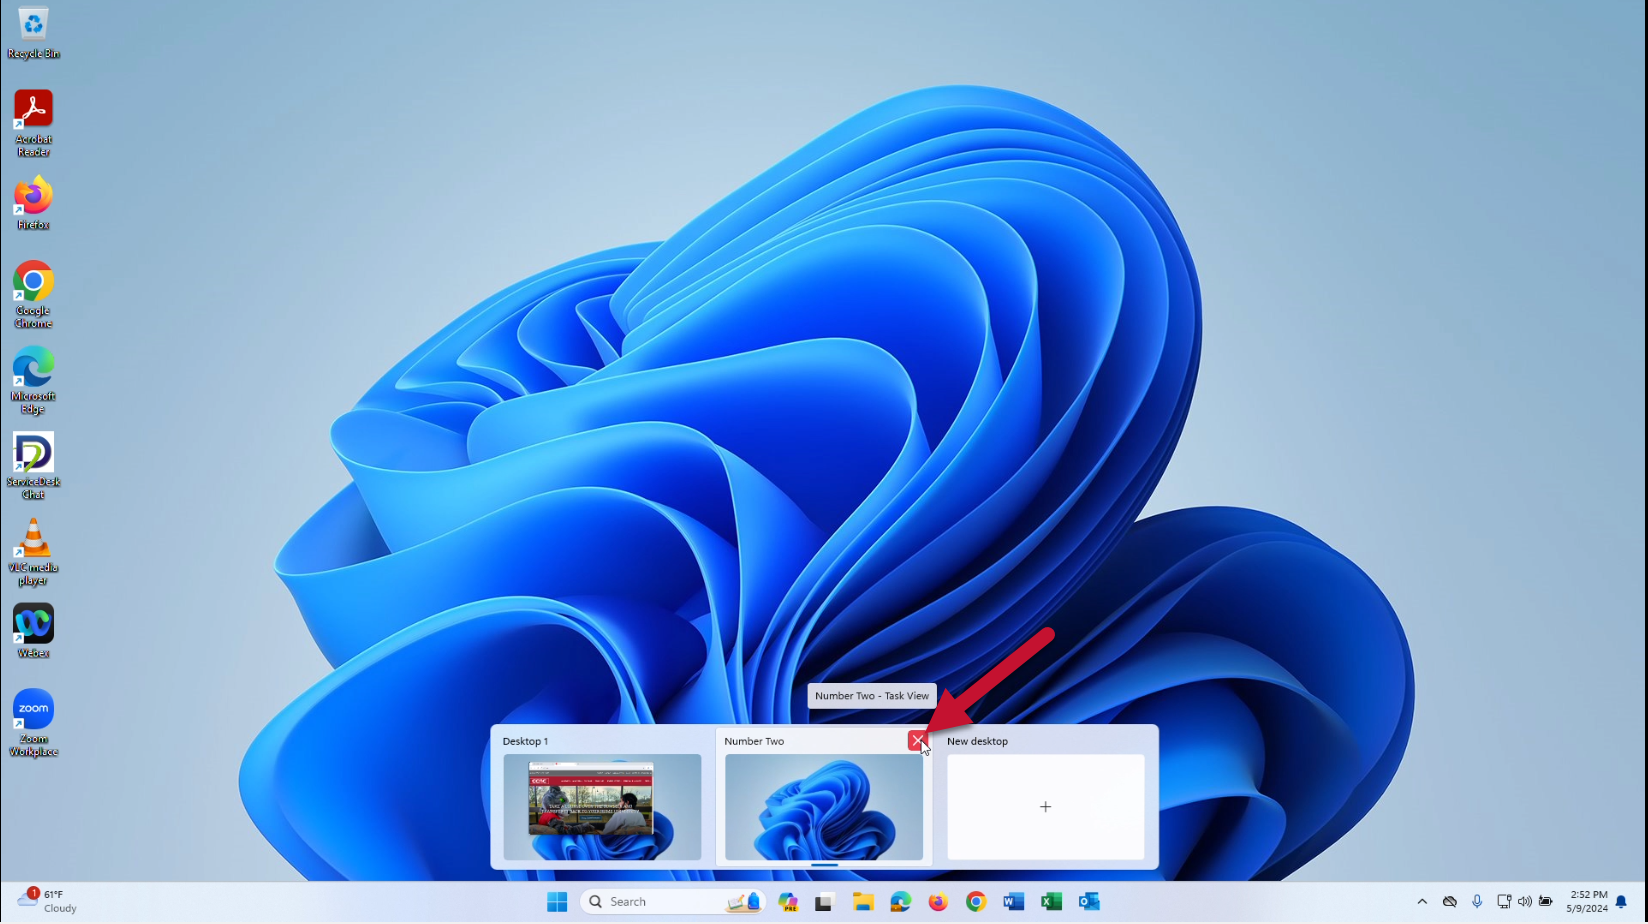
- The desktop will no longer appear in the preview
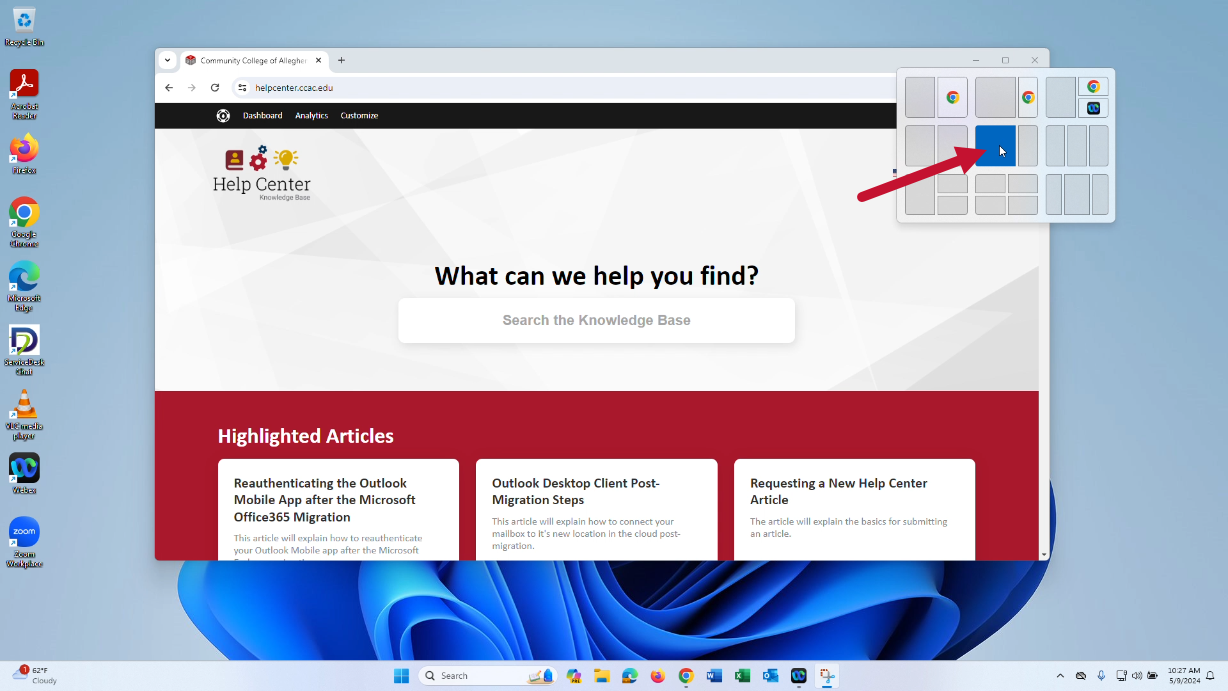
Snap Layouts
Snap layouts allow you to organize the display of multiple application windows at once on your screen by snapping them in set positions. The snap layout menu offers several options for dividing your snapped windows on screen.

The tabs below will provide directions on how to snap your windows.
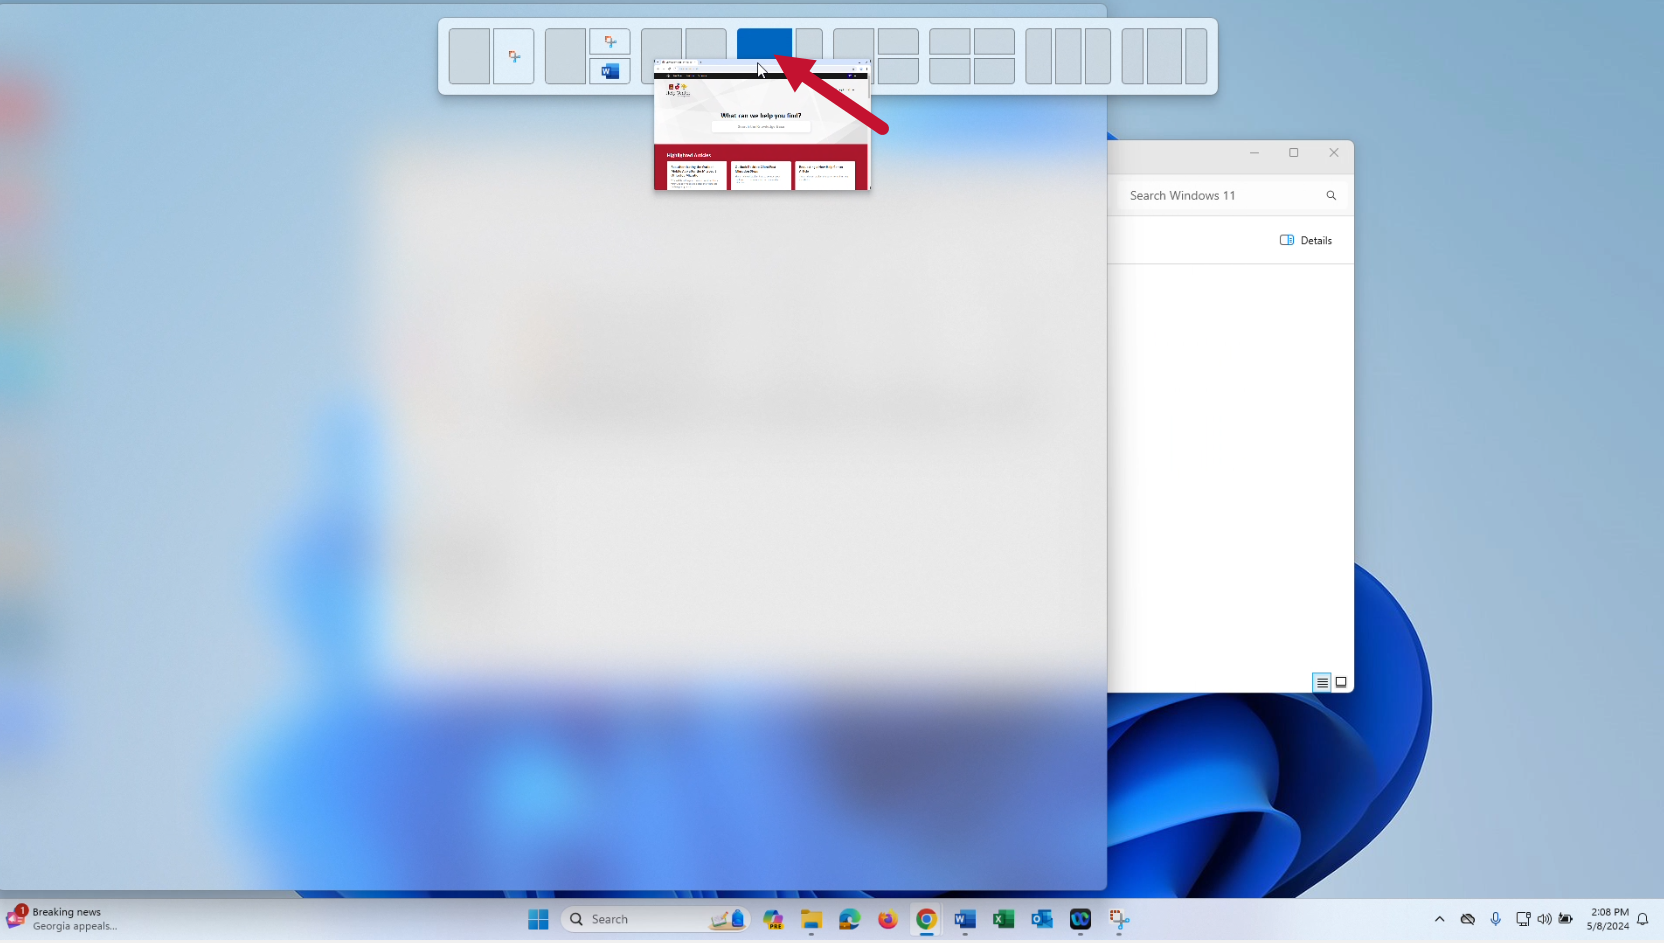
Drag & Drop Snapping
Video Example
- Click and drag the first window you wish to snap to the upper-middle edge of the screen
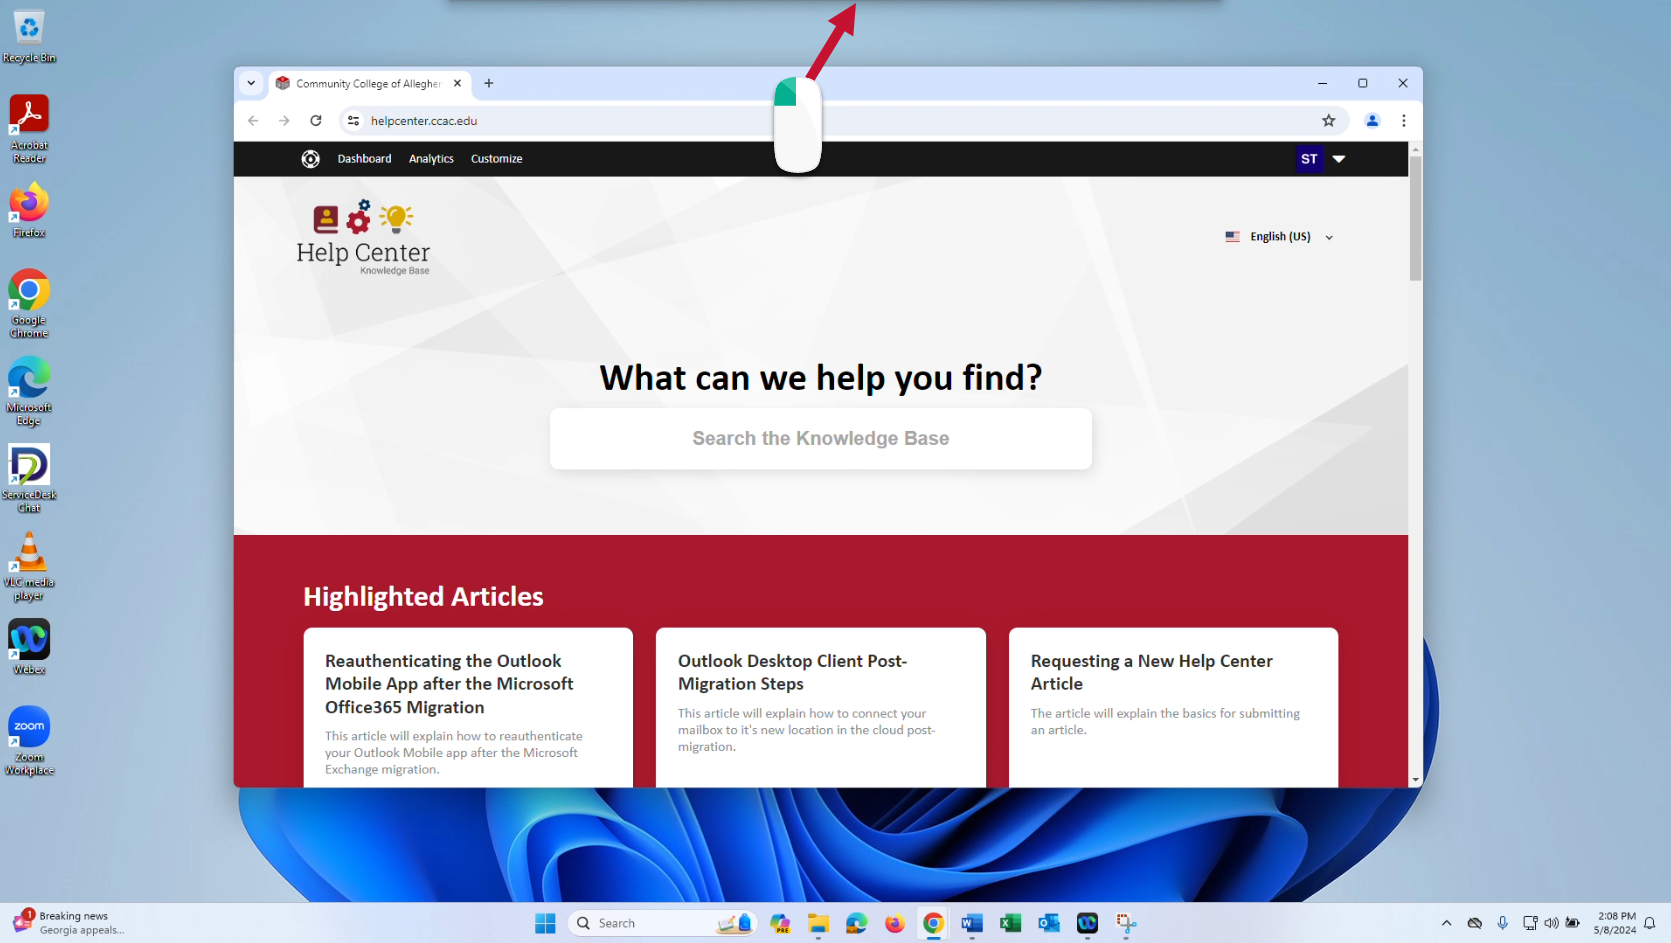
- The snap layout menu should appear from the top

- Drag the window over your snap layout selection
- Drop the window in place. This should snap the first window
Alternate Method
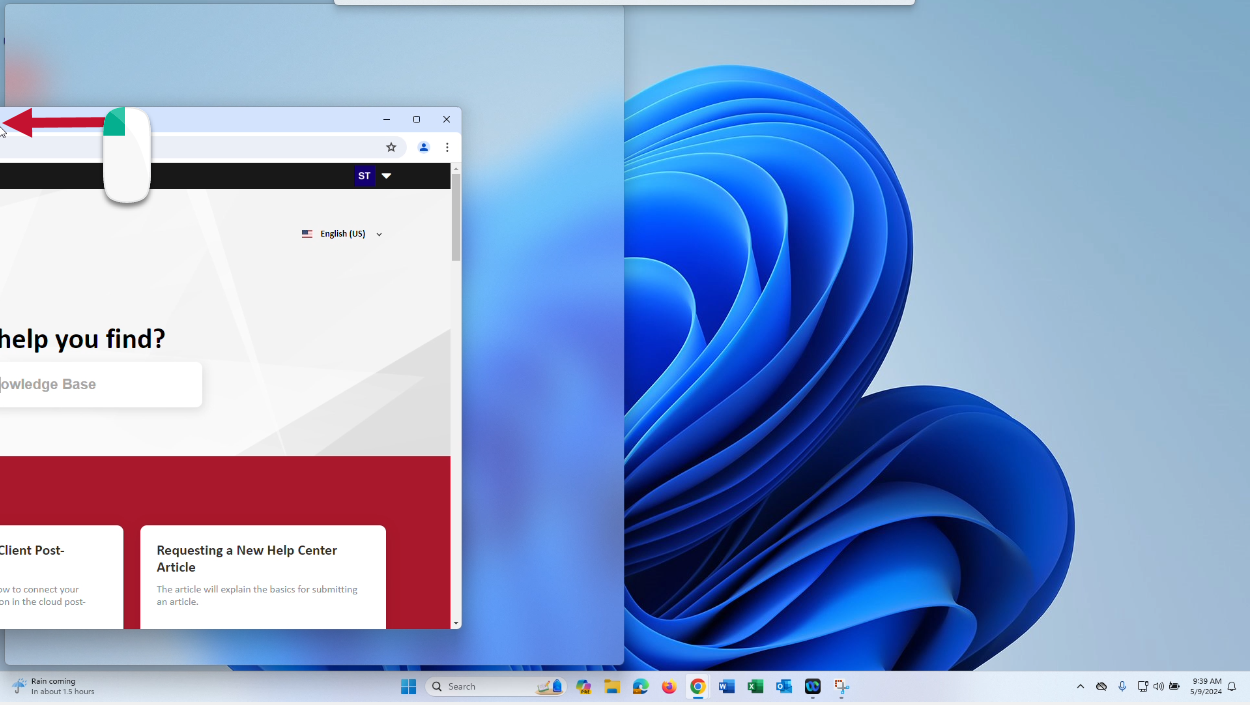
Alternatively, you can drag the window to either side edge to quickly snap it.
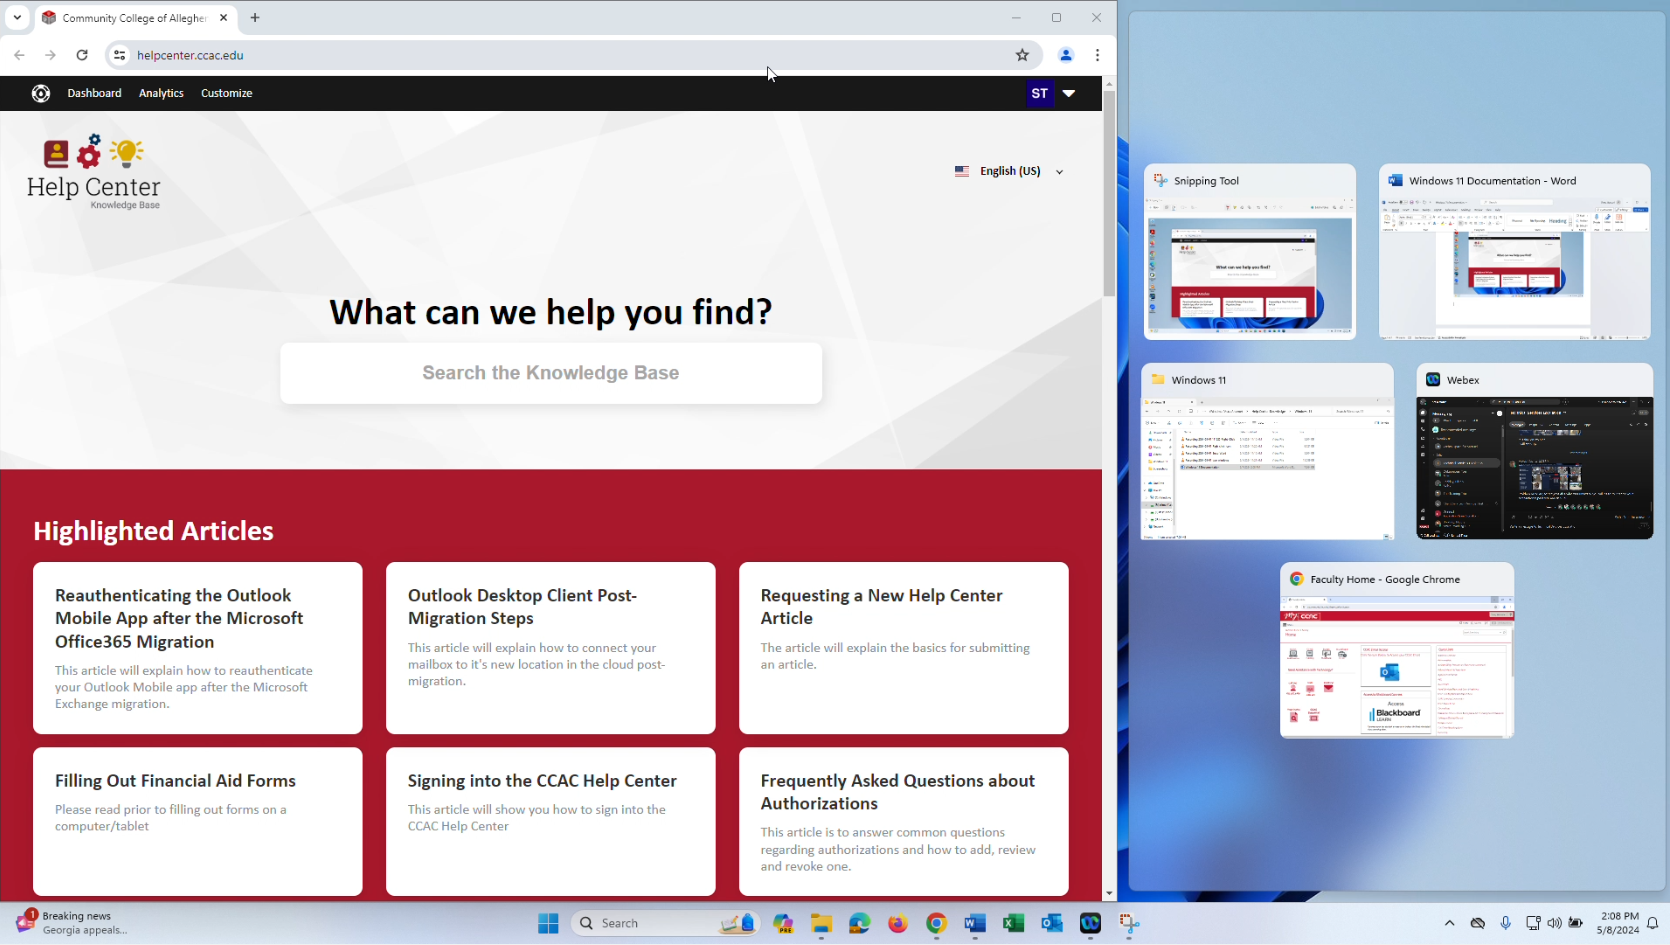
- Click on the next window you wish to snap in place from the Snap Assist selection
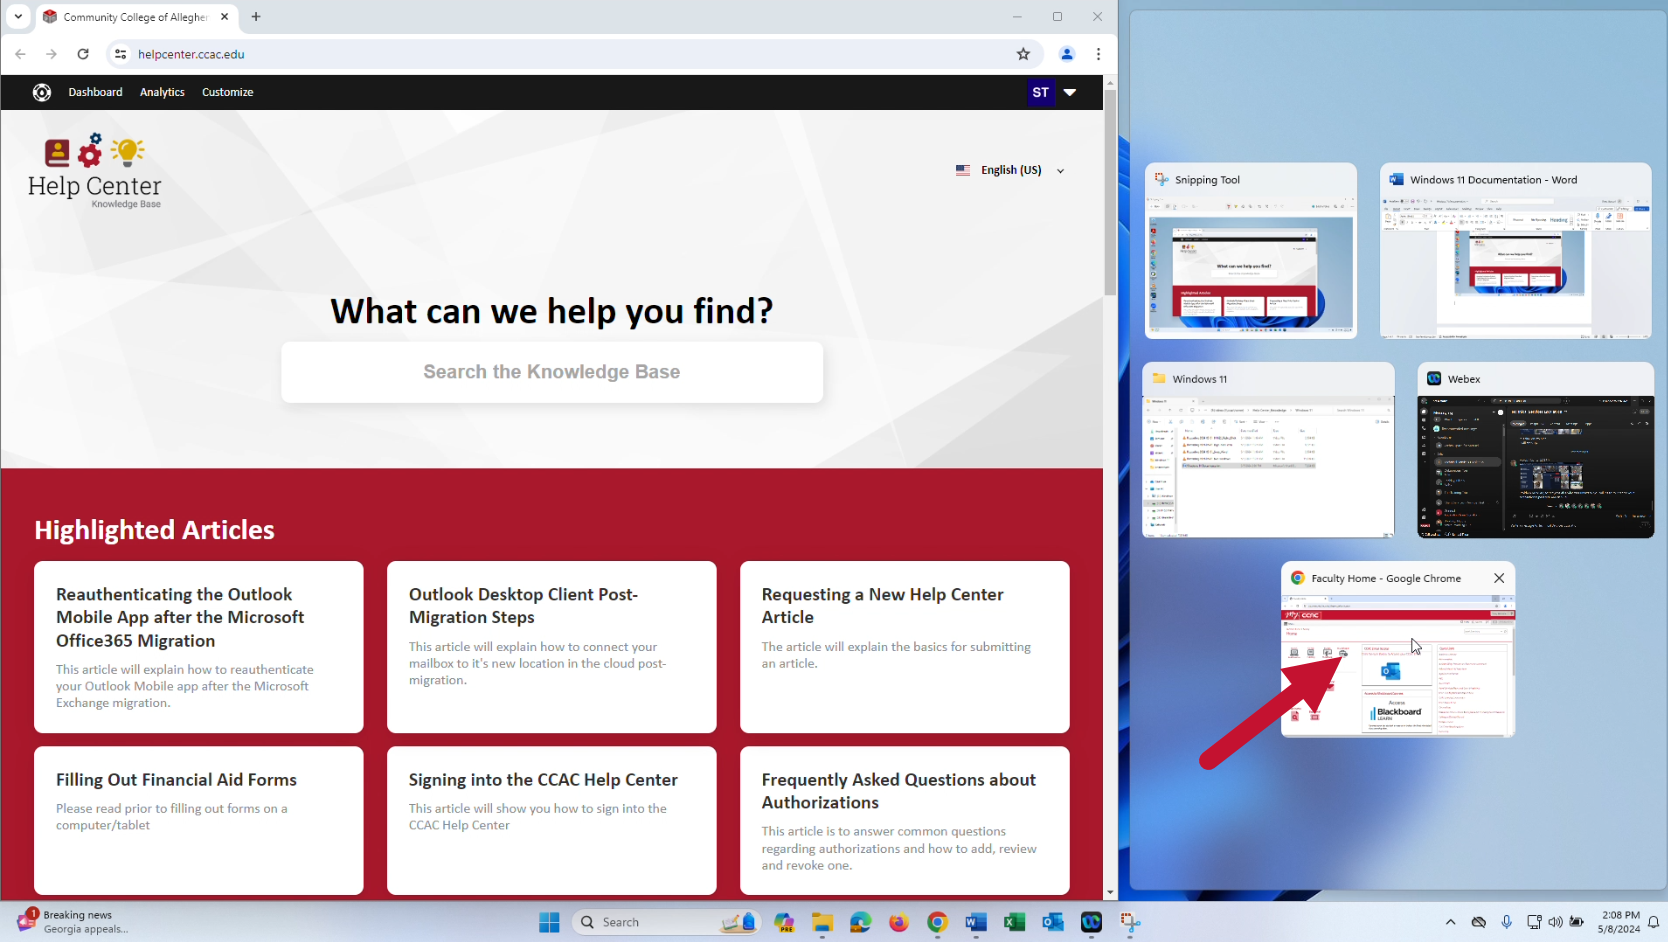
- Windows allows you to snap up to 4 windows at once. Repeat step 5 for any remaining windows, to select their position in Snap Assist
- The windows should be snapped
Maximize Button Snapping
Video Example
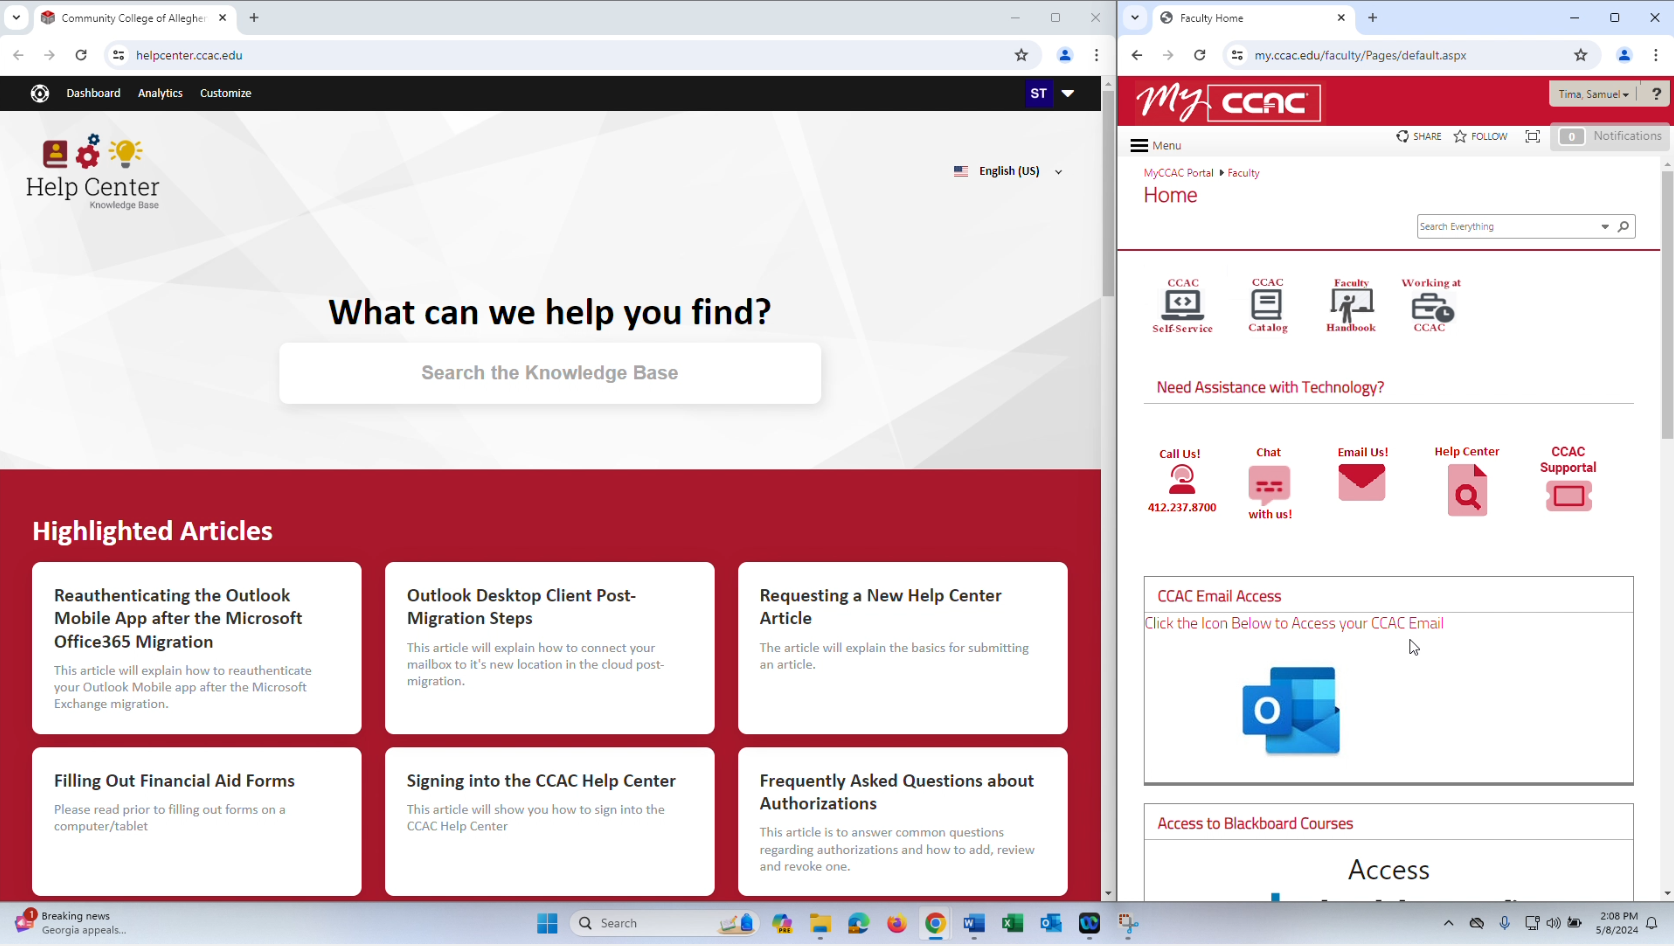
- Hover your cursor over the maximize button of the first window you wish to snap
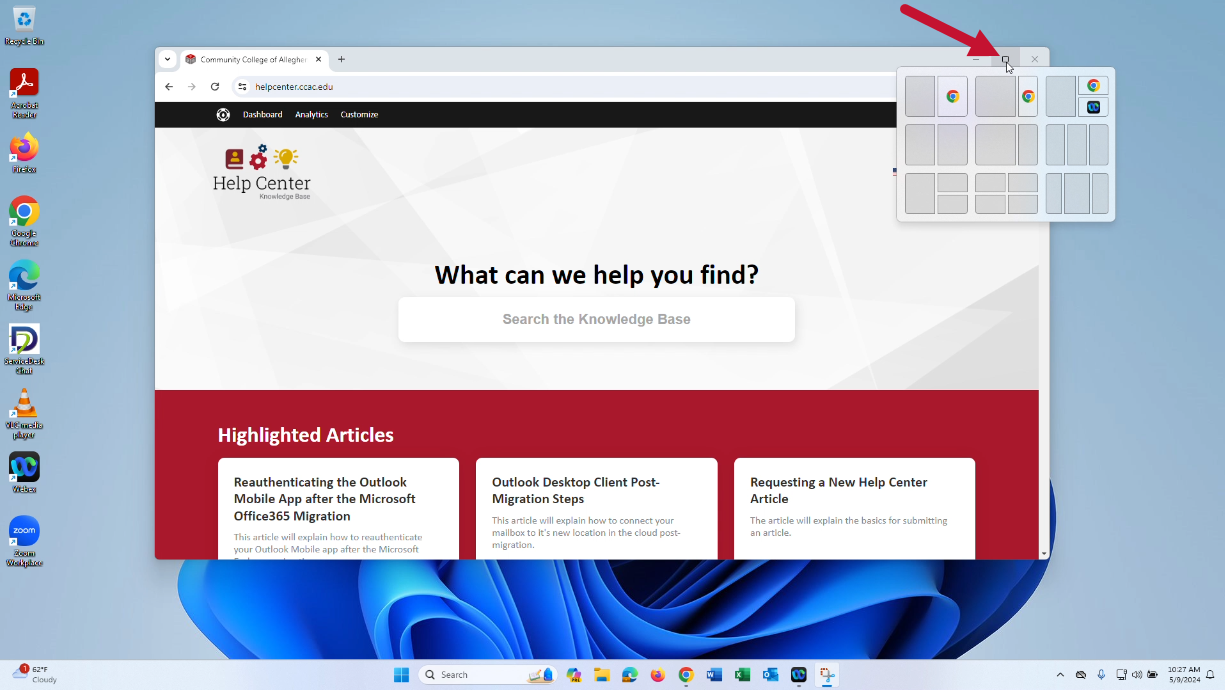
- Click on your desired snap layout selection from the menu that appears
- This should snap the first window
- Click on the next window you wish to snap in place from the Snap Assist selection
- Windows allows you to snap up to 4 windows at once. Repeat step 4 for any remaining windows, to select their position in Snap Assist
- The windows should be snapped
Taskbar Overview
The taskbar is located at the bottom of your desktop.

The taskbar gives you quick access to:
- Widgets
- Start menu - See “Start Menu Overview” section below
- Search - See “Search Feature” section below
- Taskbar icons
- System Tray
By default, the taskbar is aligned to the center. This differs from previous versions of Windows.
If you prefer the classic left alignment, click the accordion below for directions on adjusting it.
Note: The taskbar is fixed to the bottom. Unlike Windows 10, it cannot be moved to the sides or top of the screen.
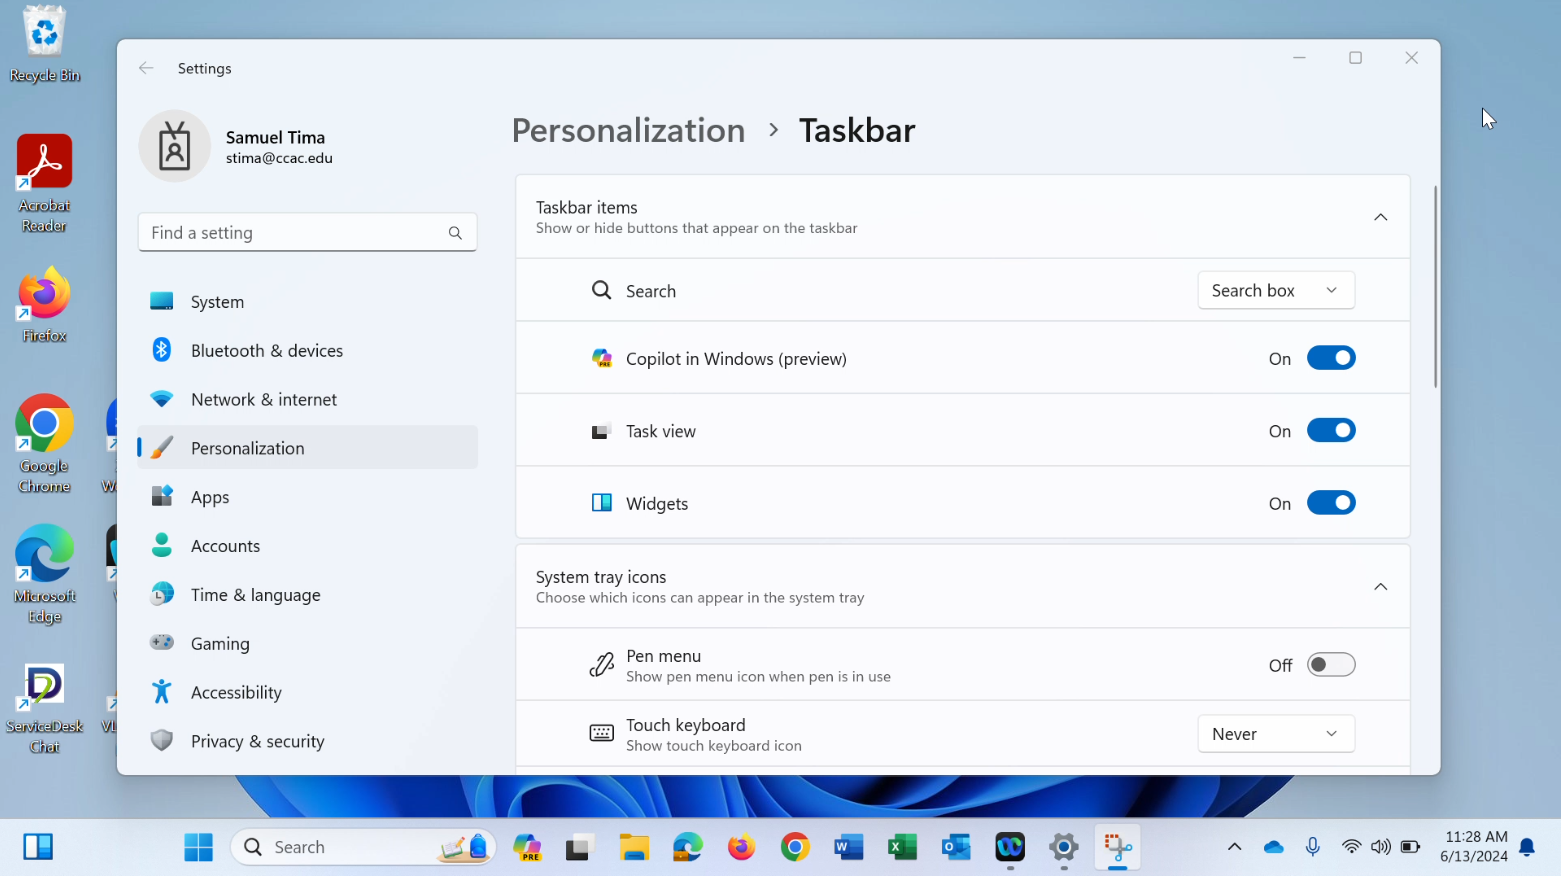
Taskbar Settings - Access and Overview
Accessing Taskbar Settings
Click the button below to quickly access your Taskbar settings.
Accessing from Desktop:
- Right-click on an open space on the taskbar

- Select Taskbar settings

Taskbar Settings Overview
The Taskbar settings allow you to customize some of the features that appear on your taskbar or system tray.
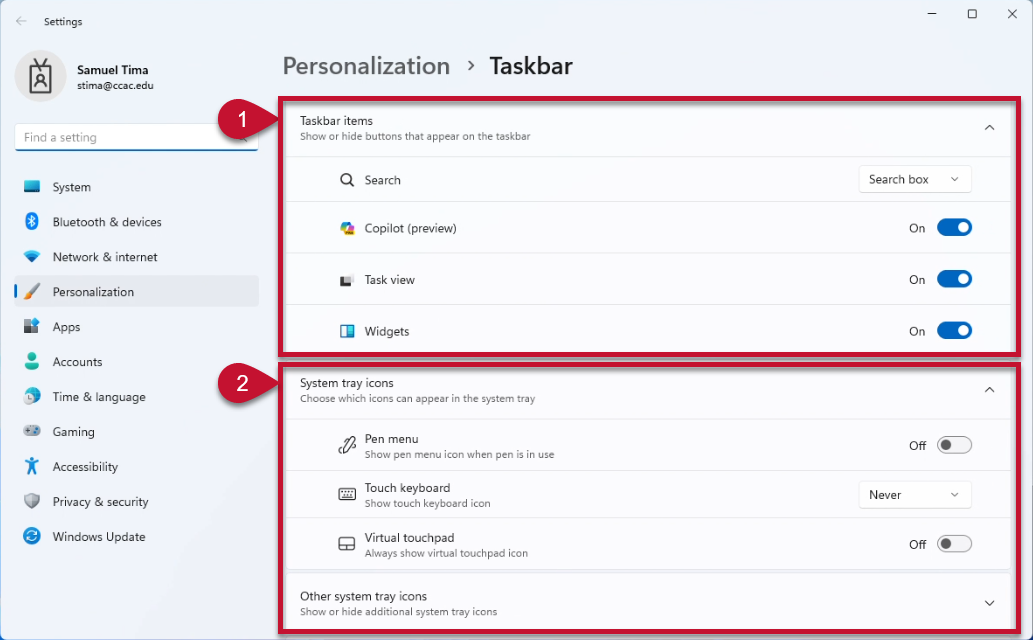
1.) Taskbar items: Allows you to show or hide the icons for “Search”, “Copilot”, “Task view”, or “Widgets” on the taskbar. The drop-down next to “Search” provides options for hiding or changing the display for the search feature on the taskbar. The other three features can be toggled “On” to show on your taskbar, or “Off” not to show on your taskbar.
Note: If you wish to use the multiple desktop feature, the “Task view” icon must be toggled “On”.
2.) System tray icons: Controls the appearance of icons on the system tray.
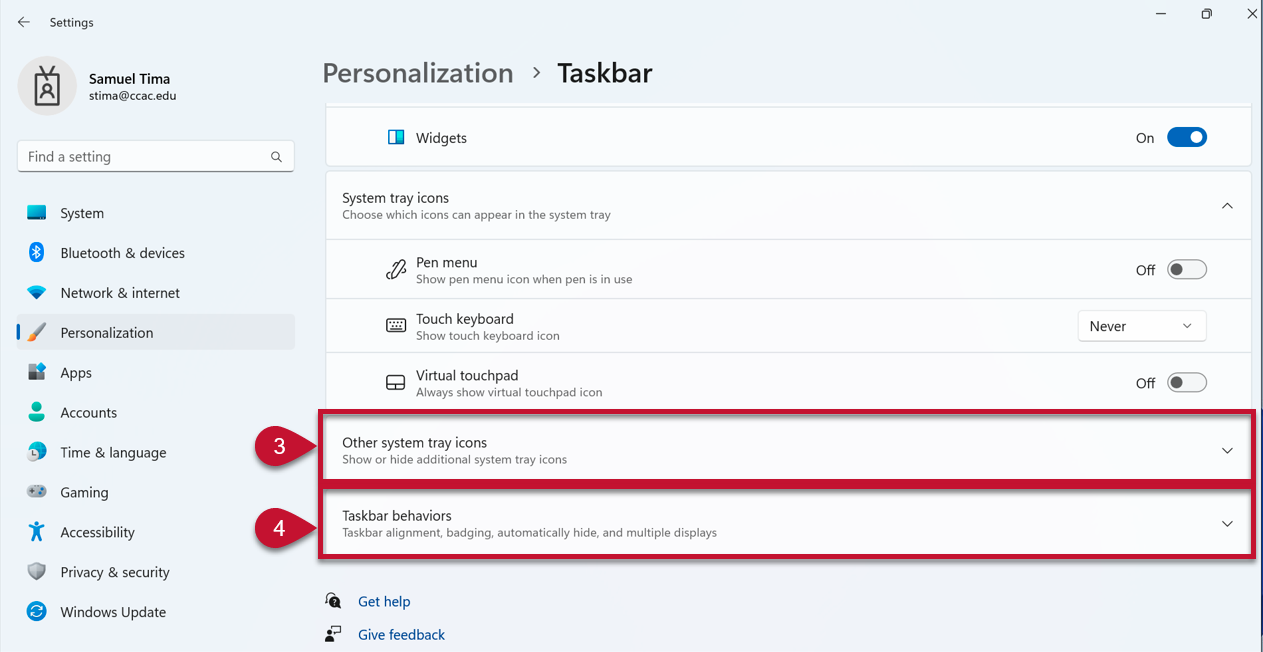
3.) Other system tray icons: Controls which application icons appear on the system tray. Icons that are toggled “Off” will appear in the Hidden Icons  tray. (Click to expand the menu.)
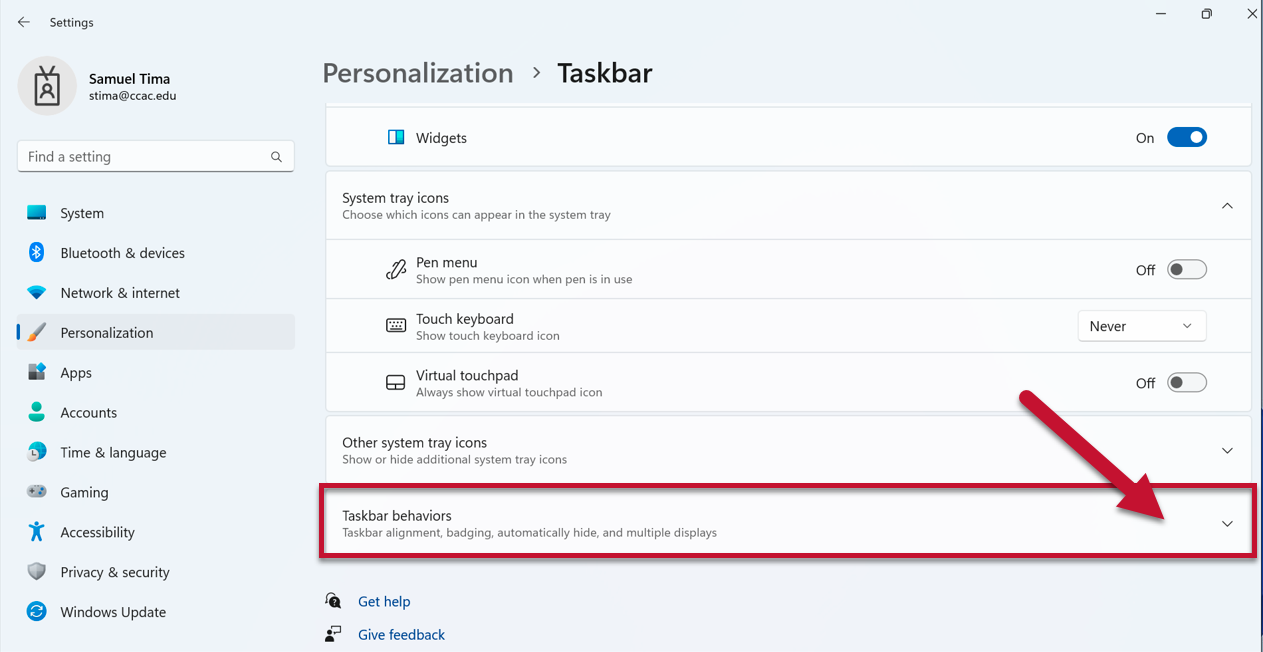
4.) Taskbar behaviors: Controls the alignment and other appearance features of the taskbar. (Click to expand the menu.)
Switching Taskbar to Classic/Left Alignment
Click the button below to quickly access your Taskbar settings.
- Access the Taskbar settings
- Scroll down and click Taskbar behaviors
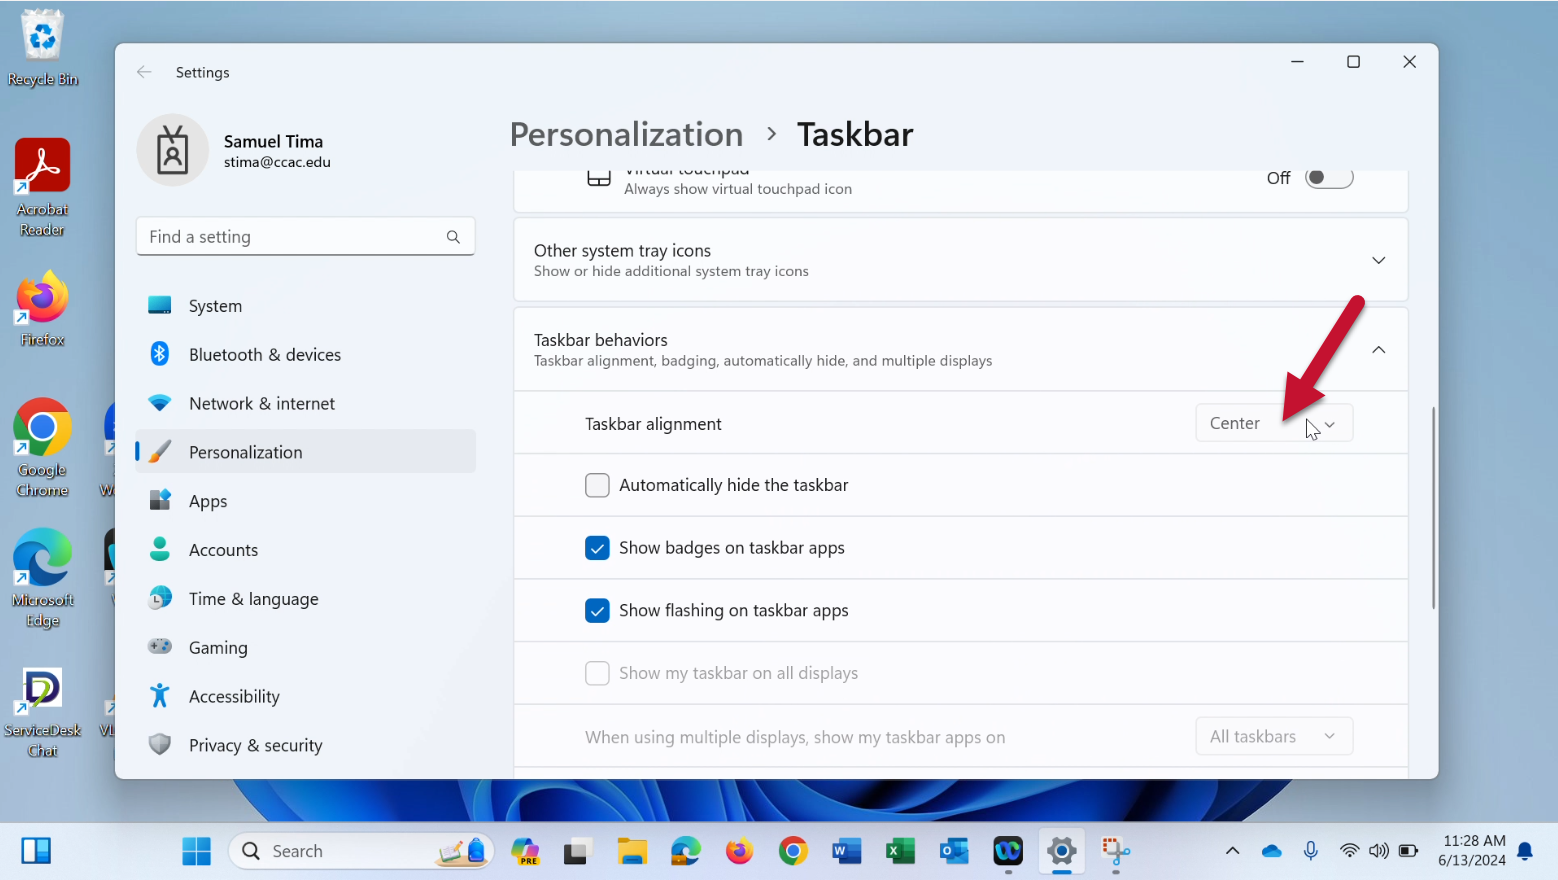
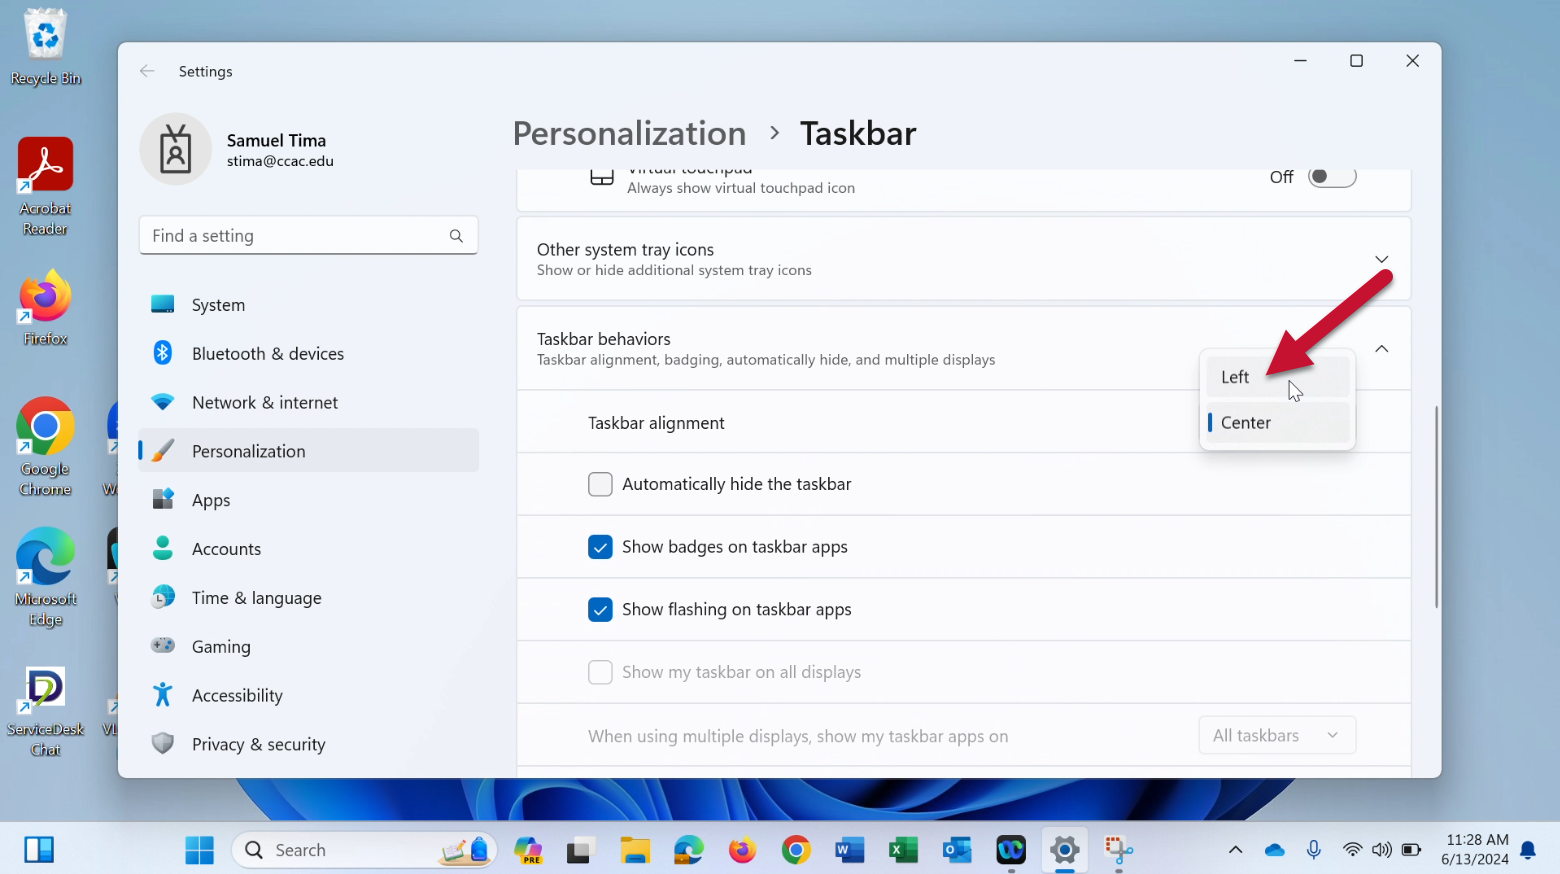
- Click the drop-down menu next to Taskbar alignment
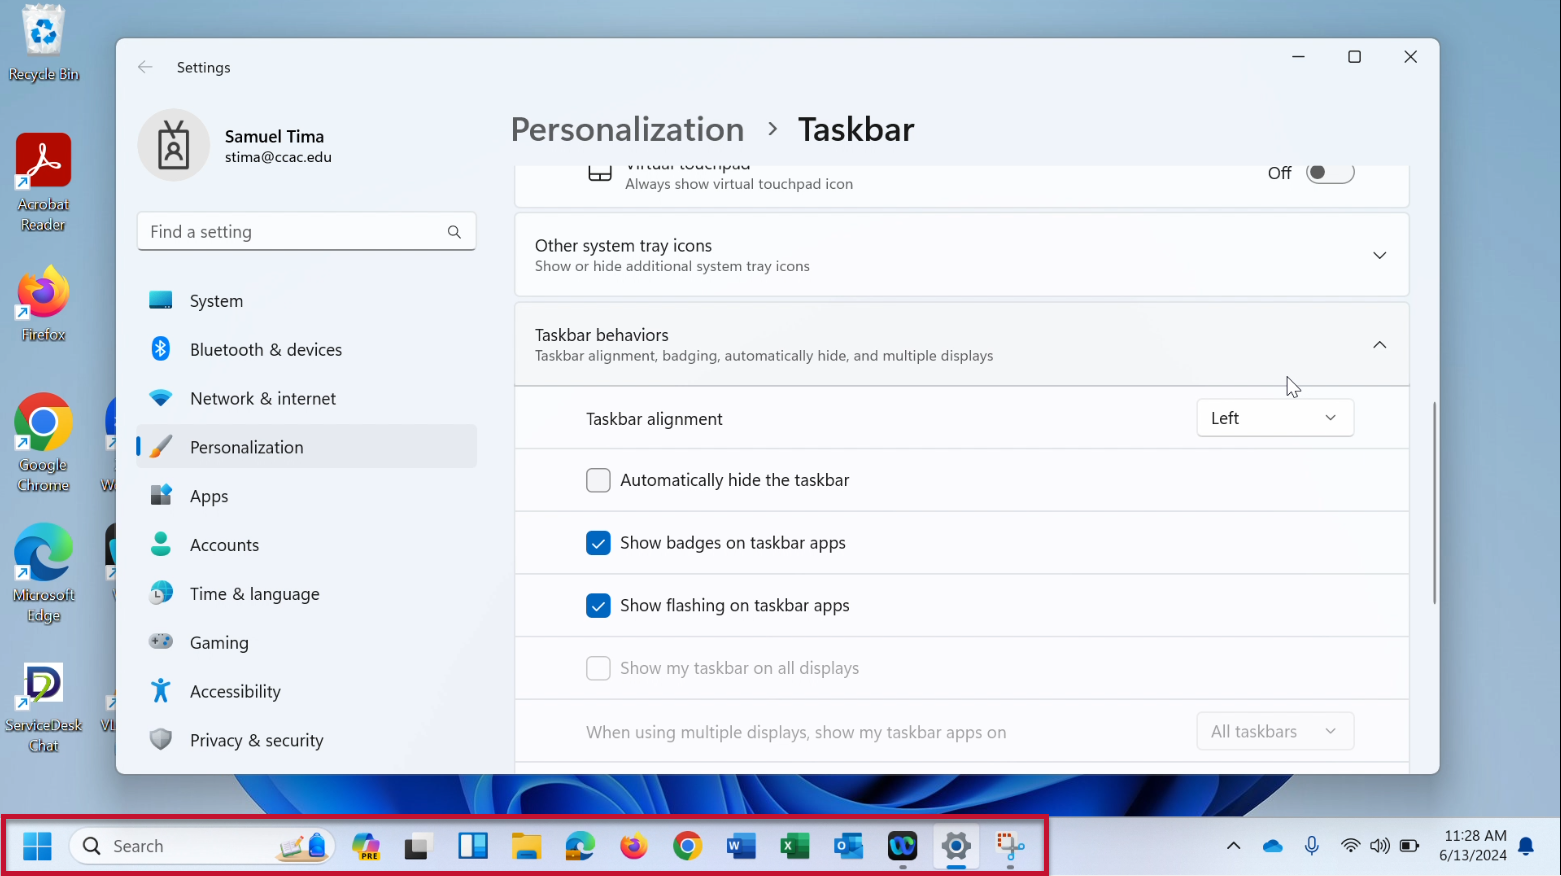
- Select Left
- The taskbar should realign to the left. Notice the start menu in the lower left corner as in previous versions of Windows
Pinning Icon to Taskbar
Desktop Icon: Right-Click Context Menu
- Right-click on the icon you wish to pin to taskbar

- Click Show more options
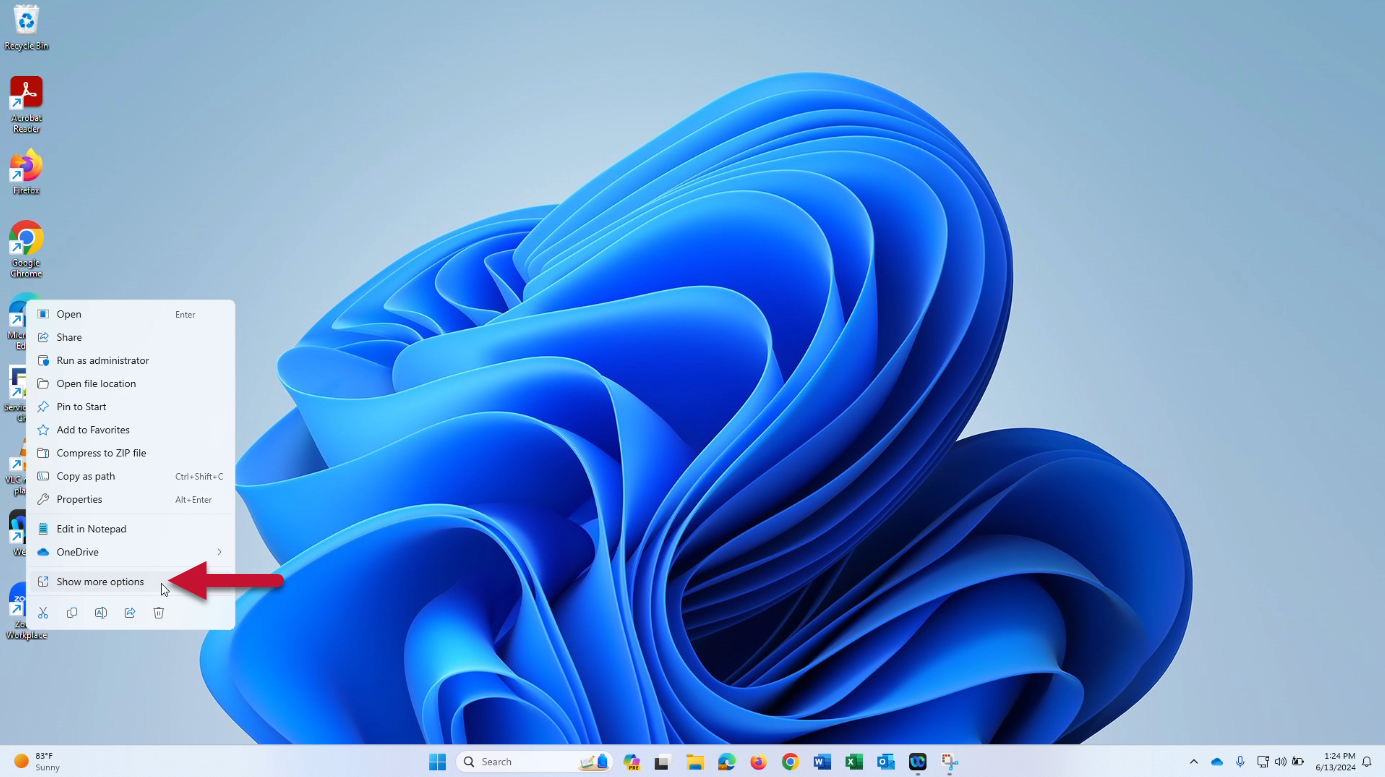
- Click Pin to taskbar

- The icon is now pinned to your taskbar

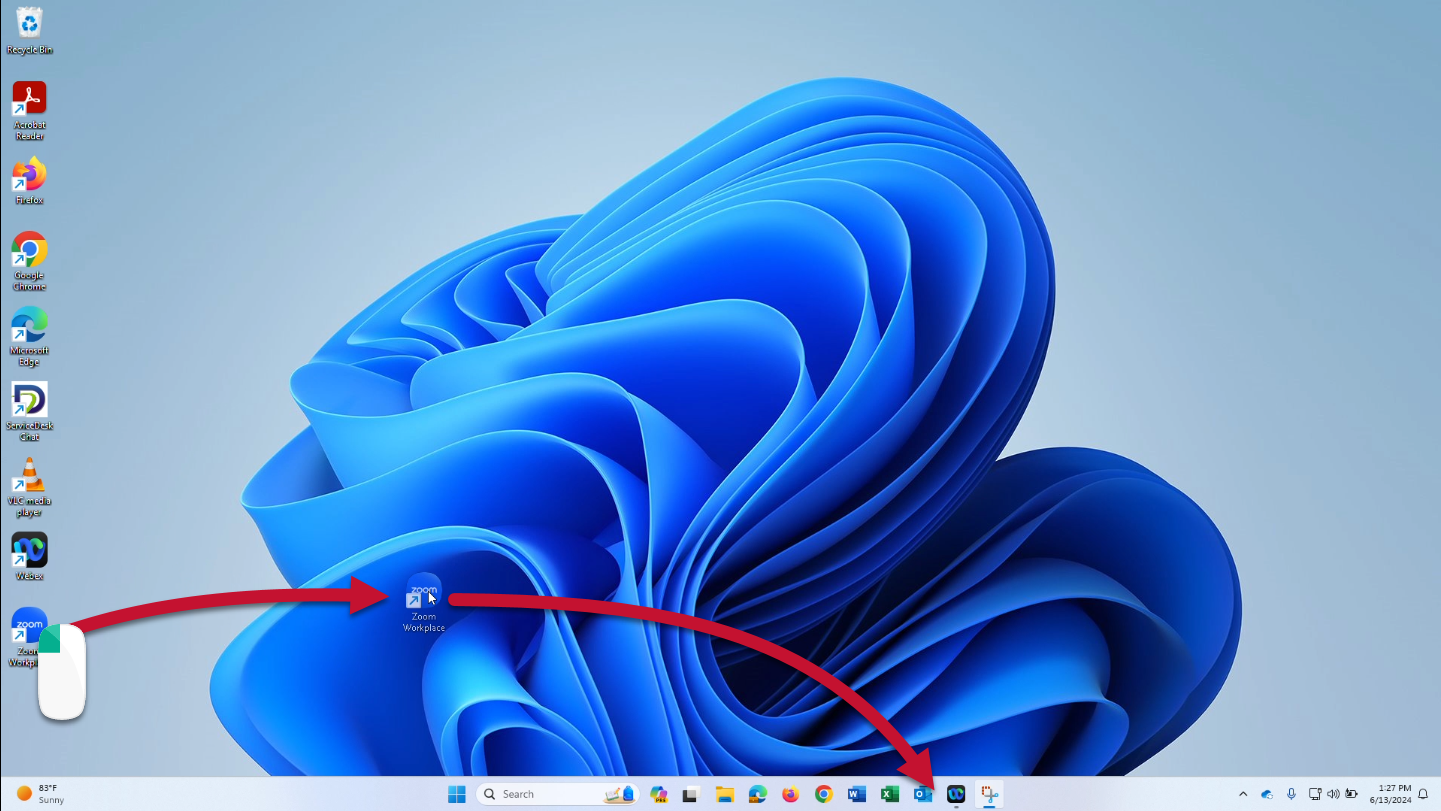
Desktop Icon: Drag & Drop
Video Example
- Click the icon and drag to desired position on the taskbar
Start Menu Icon: Right-Click Context Menu
- Click Start
- Click All apps
- Right-click on the app you wish to pin
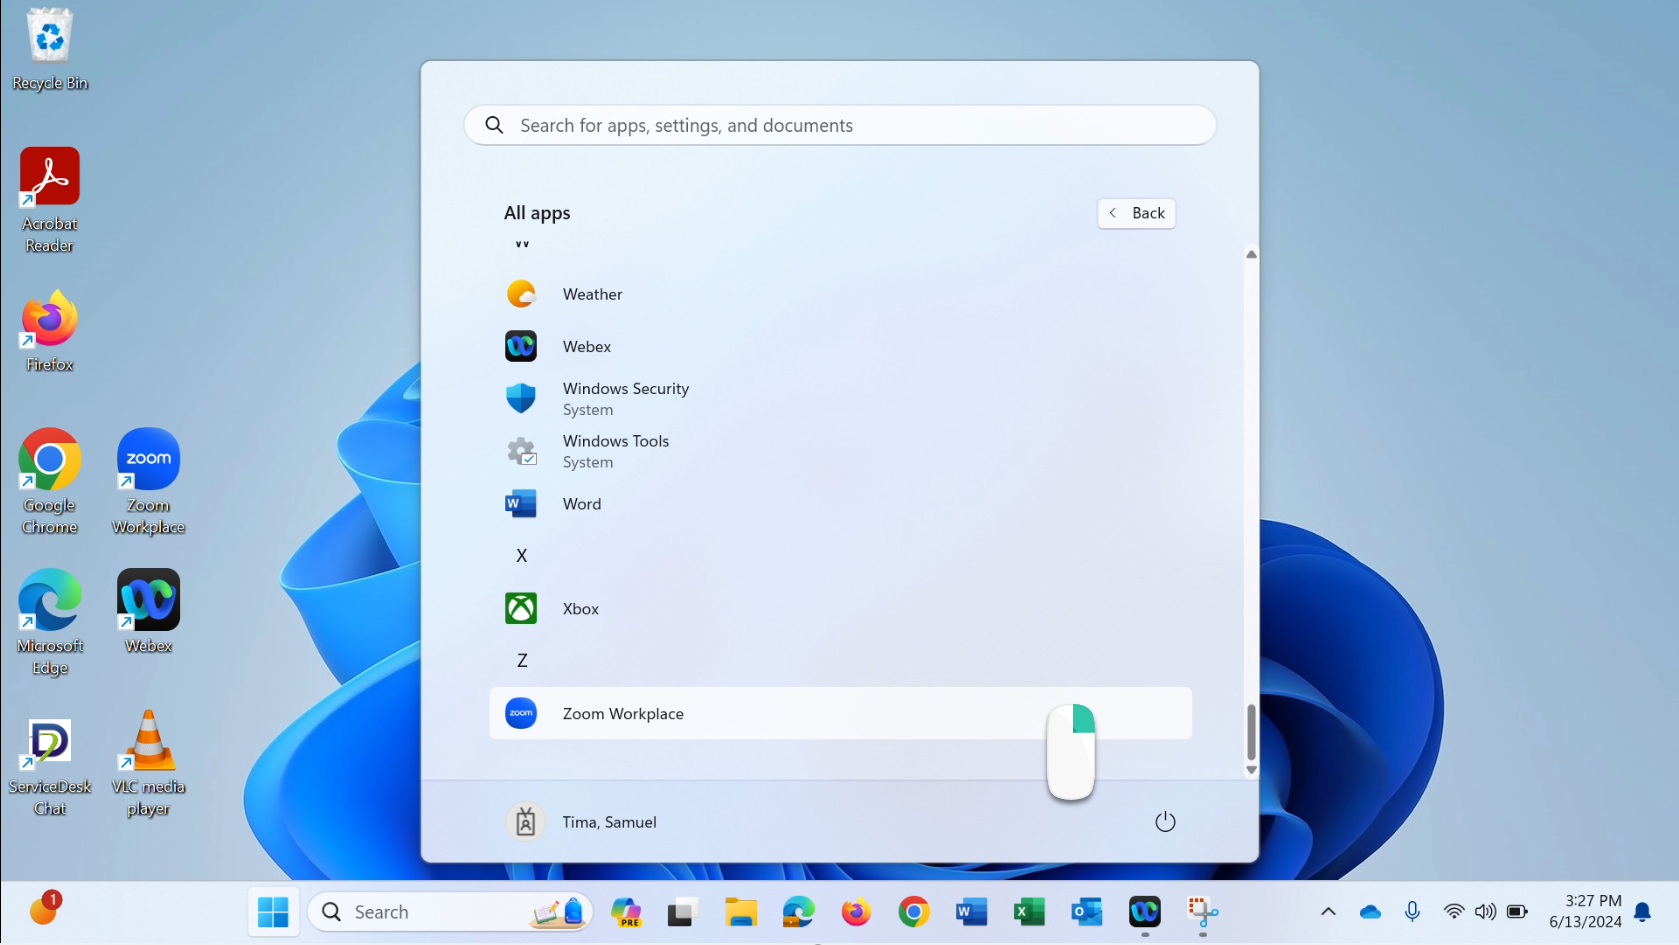
- Hover over More
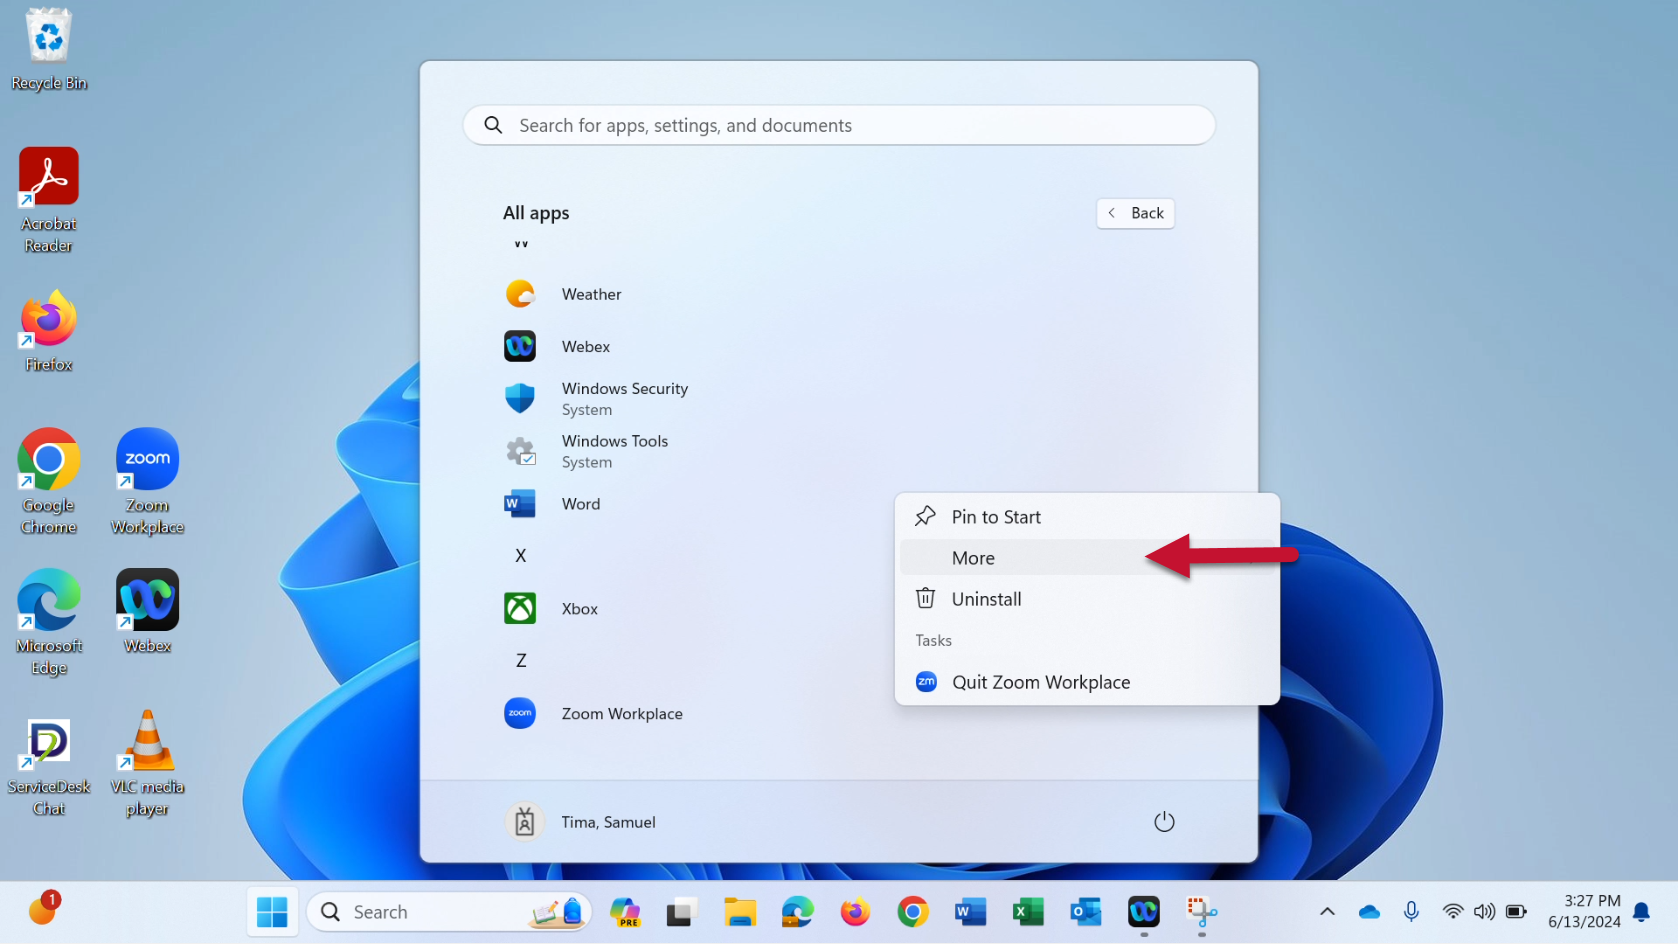
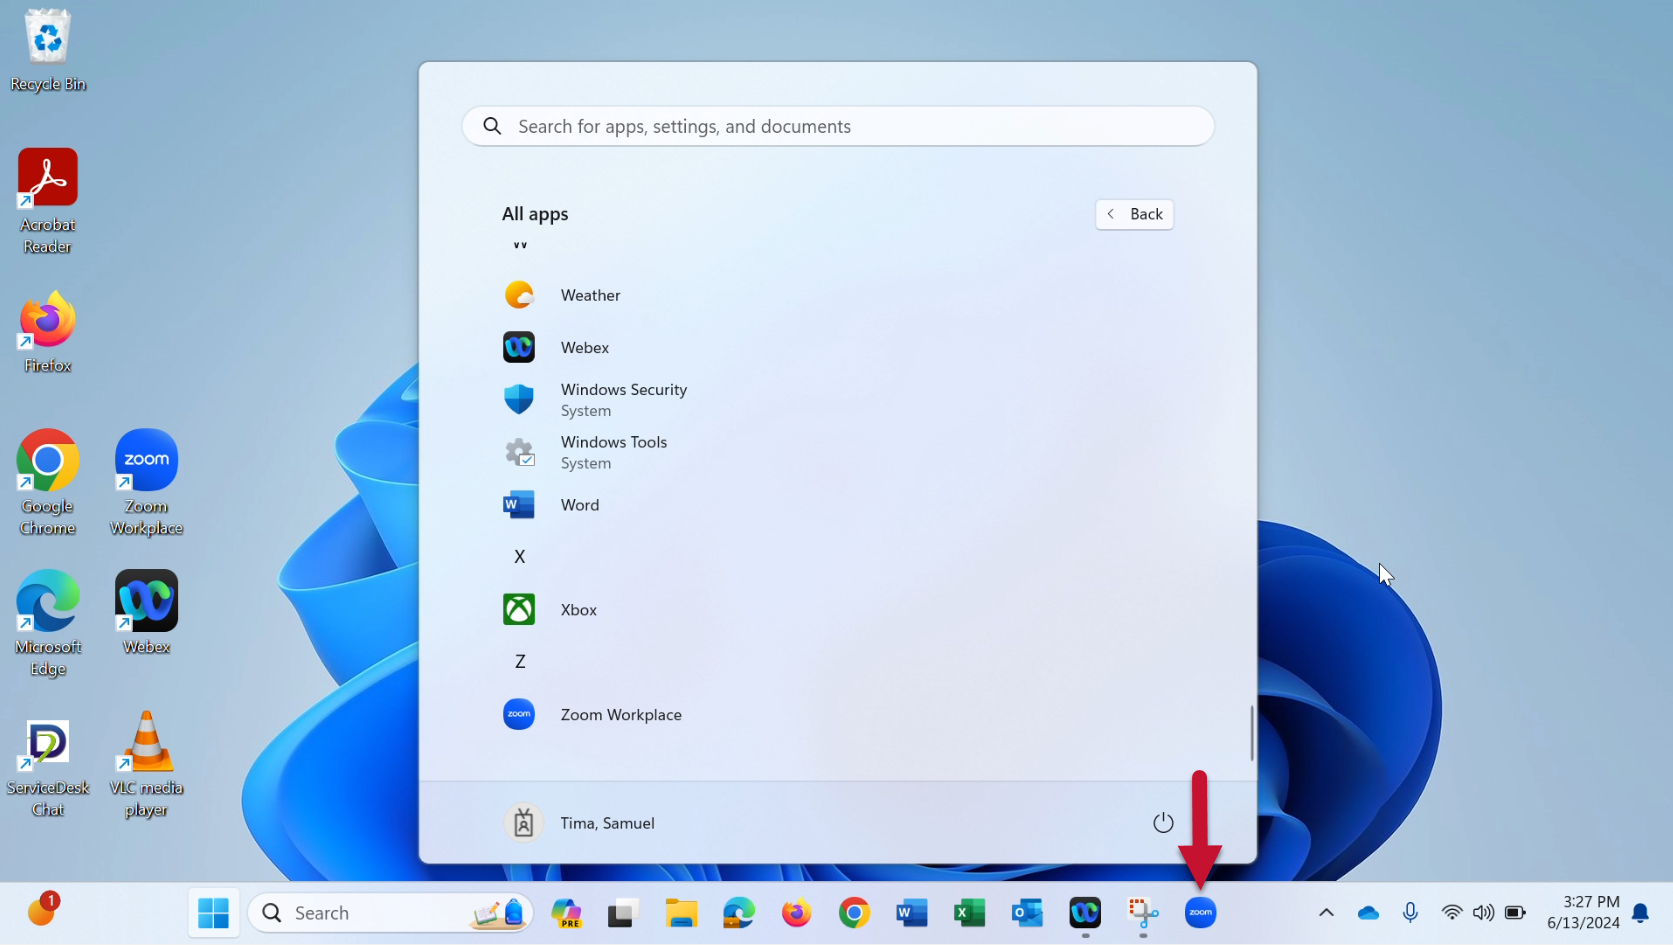
- Click Pin to taskbar
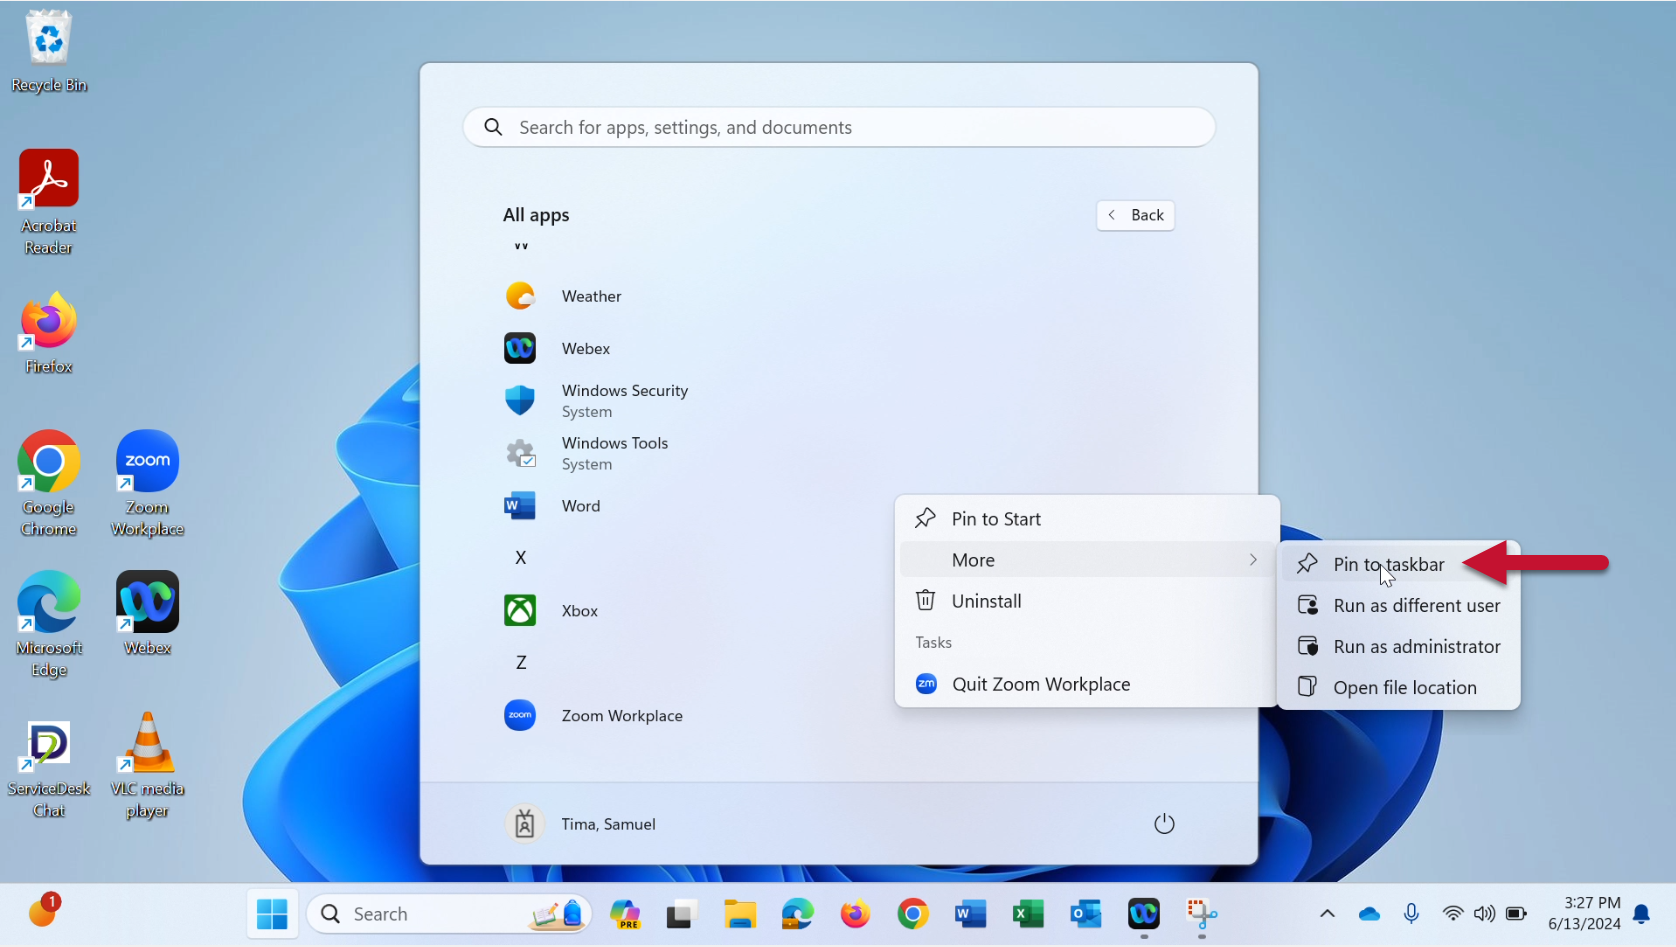
- The icon is now pinned to your taskbar
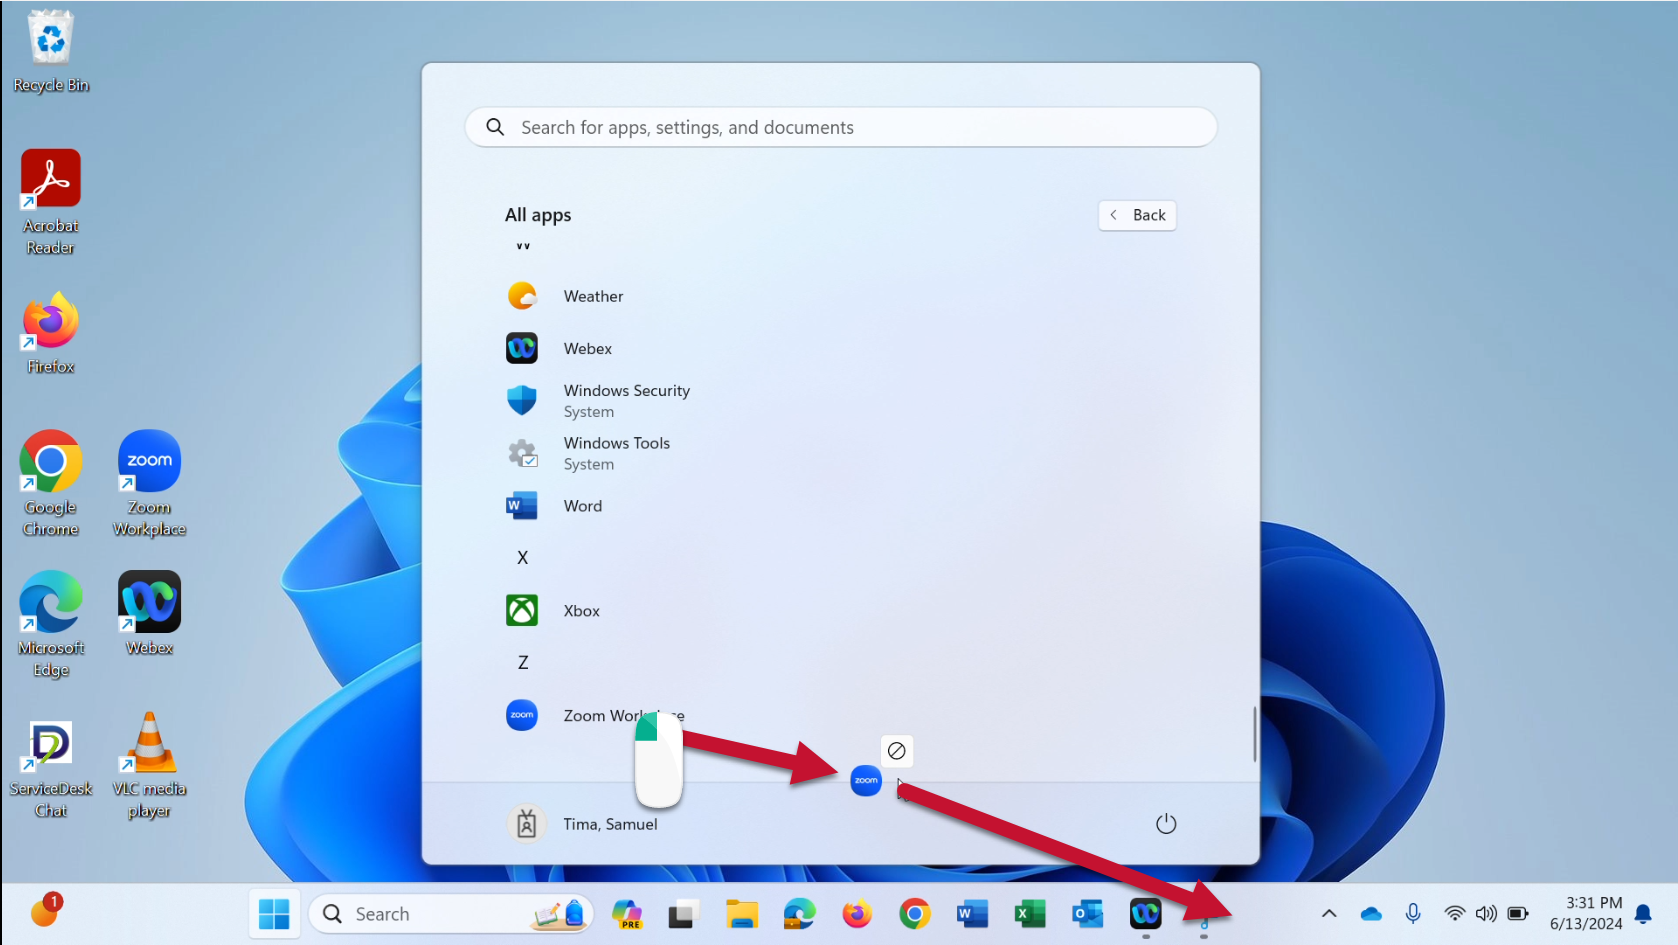
Start Menu Icon: Drag & Drop
Video Example
- Click Start
- Click All apps
- Click the app and drag to desired position on the taskbar
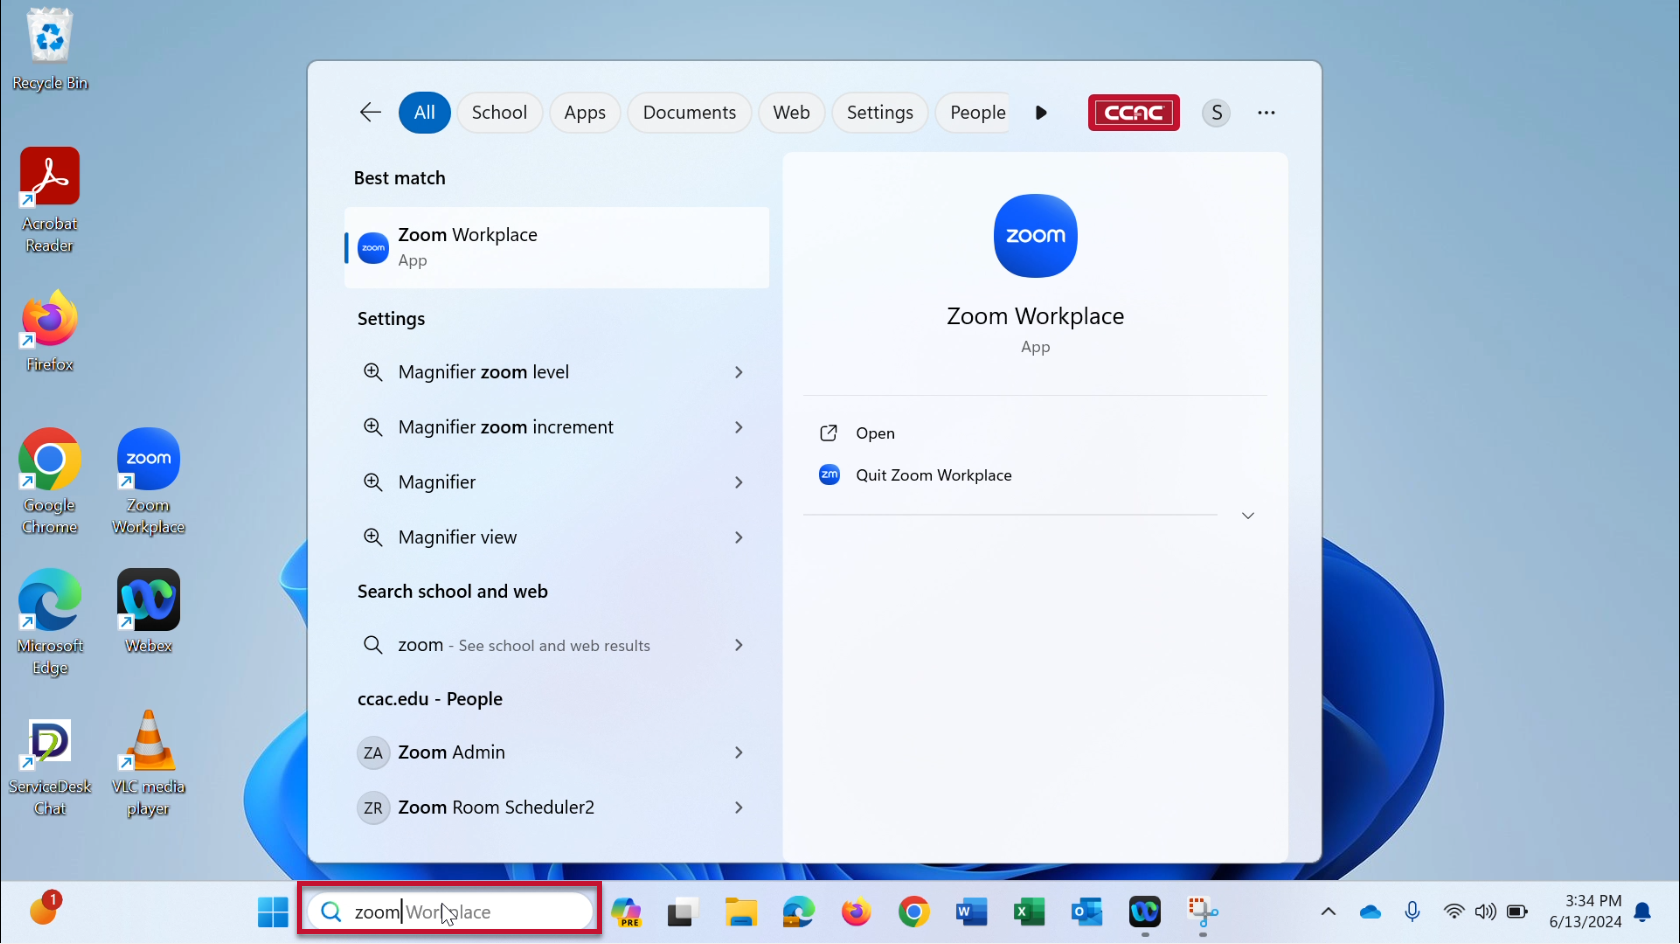
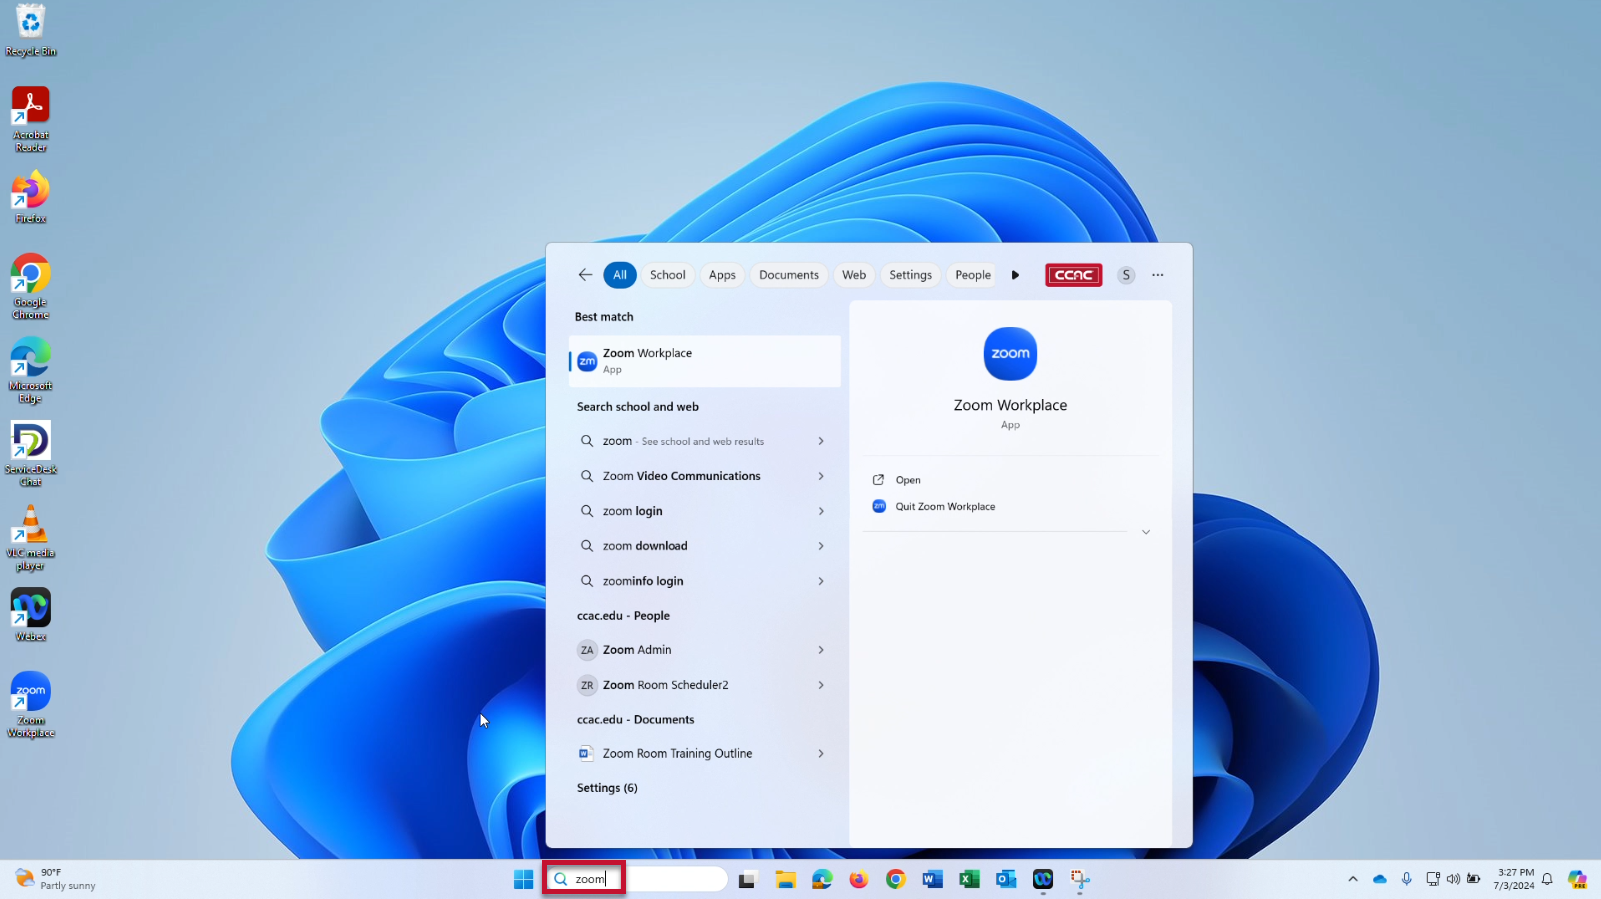
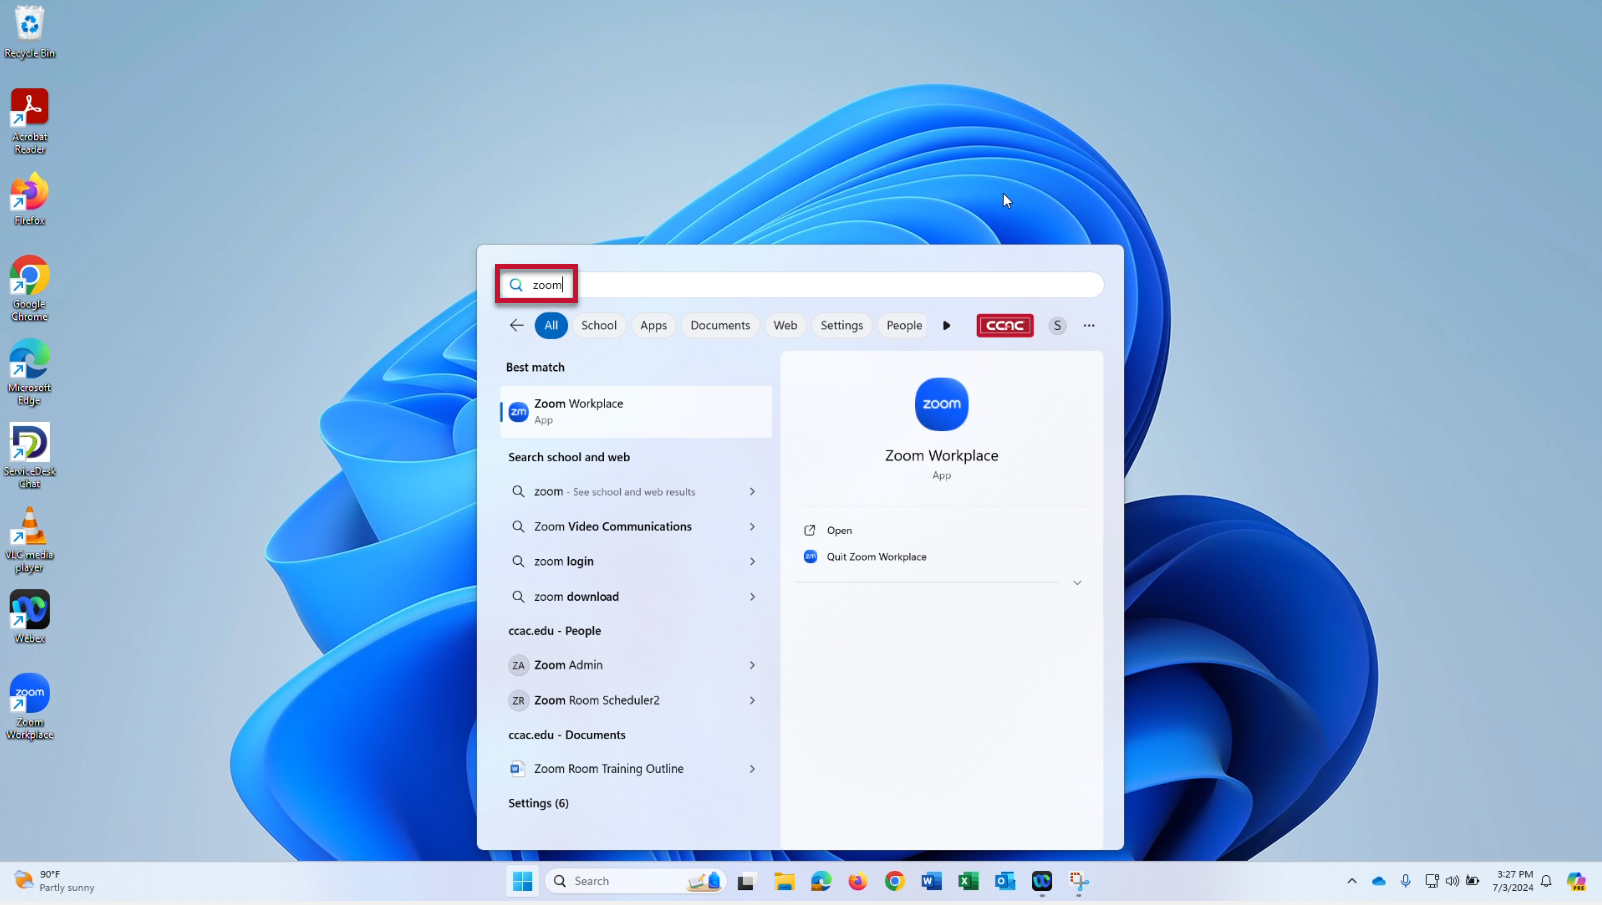
Pin App Icon from Search
- Search for the app using the Search feature
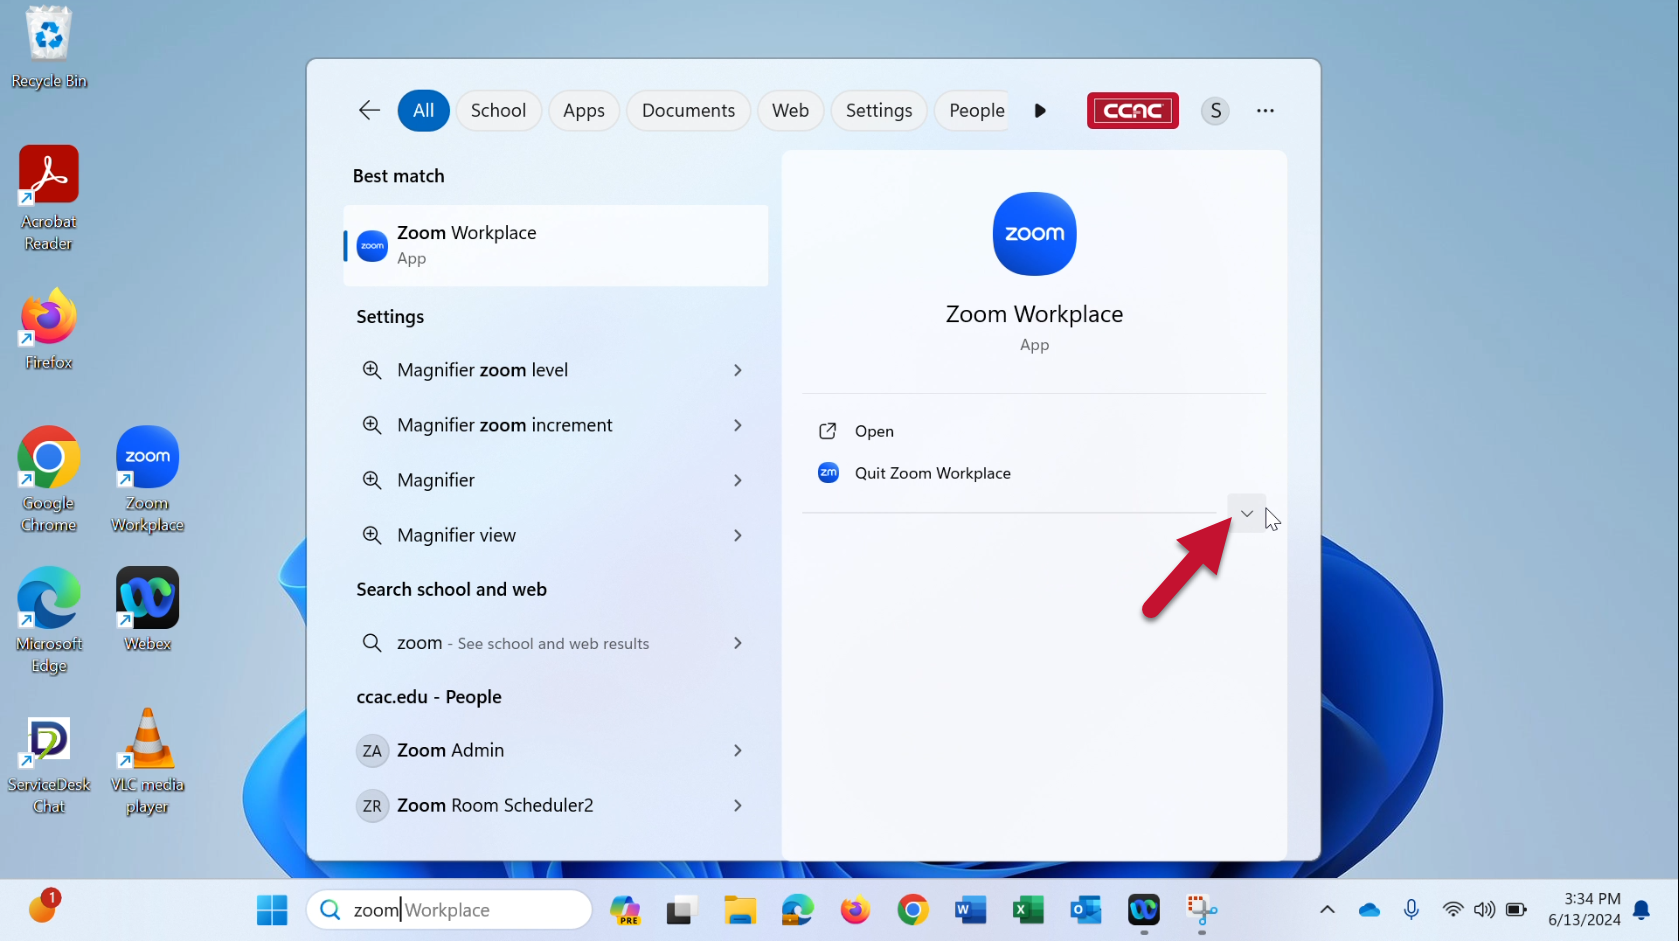
- In the search result, if the “Pin to taskbar” option is not visible, click the down arrow to expand
- Click Pin to taskbar
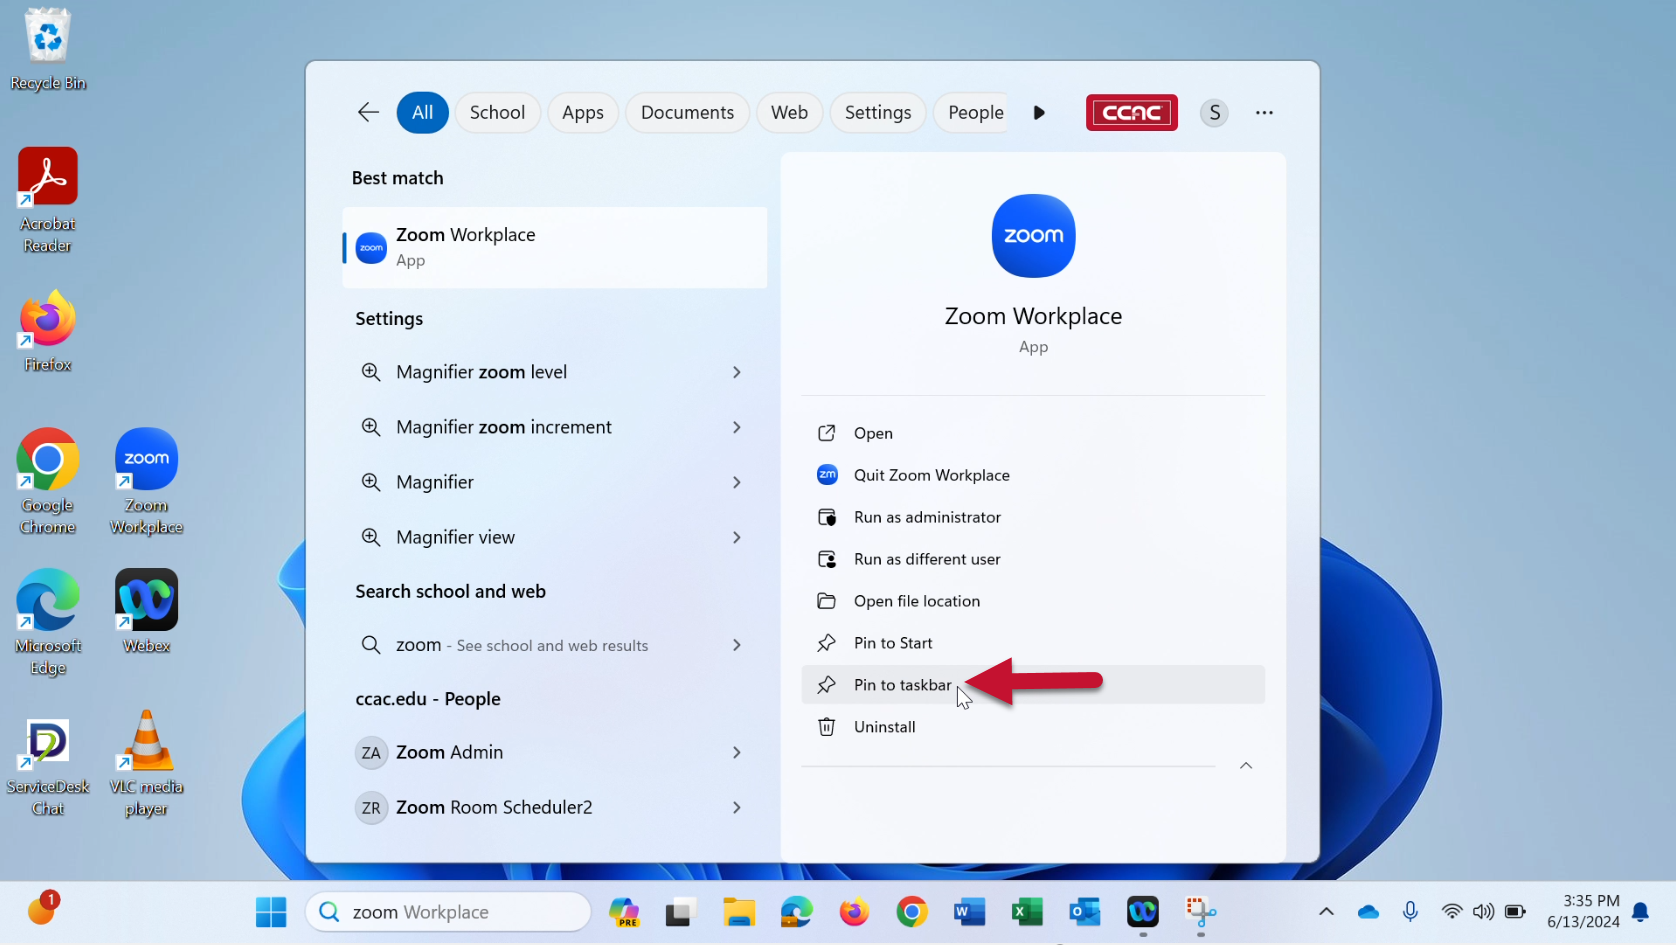
- The icon is now pinned to your taskbar
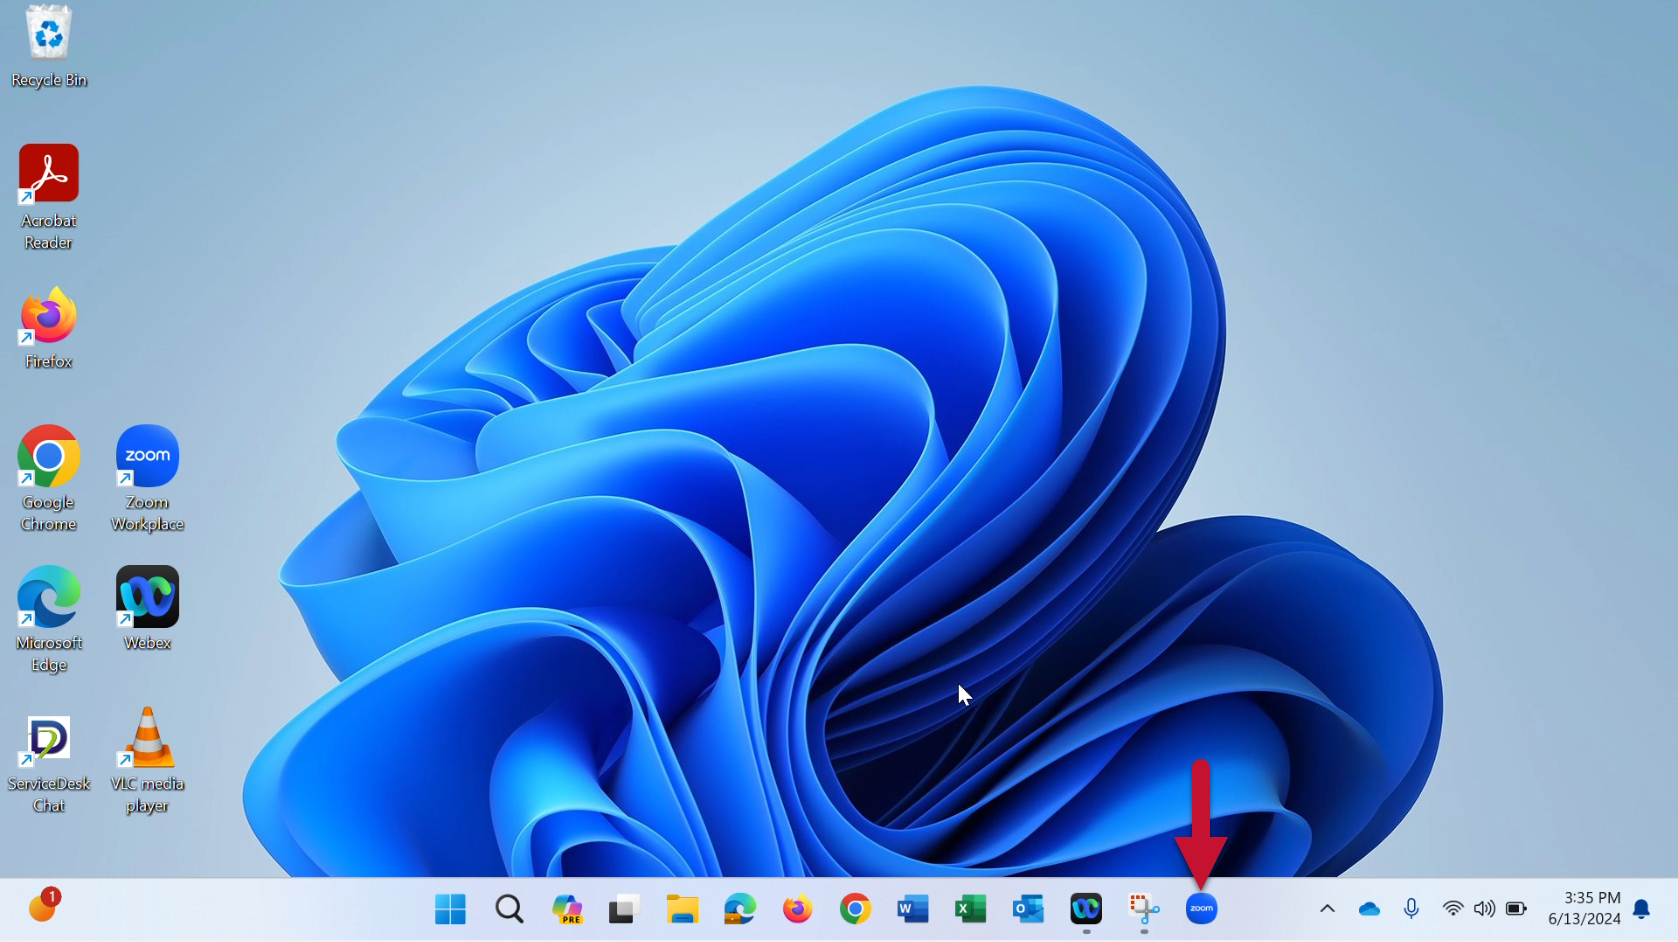
Unpin Icon from Taskbar
- Right-click on the taskbar icon you wish to unpin
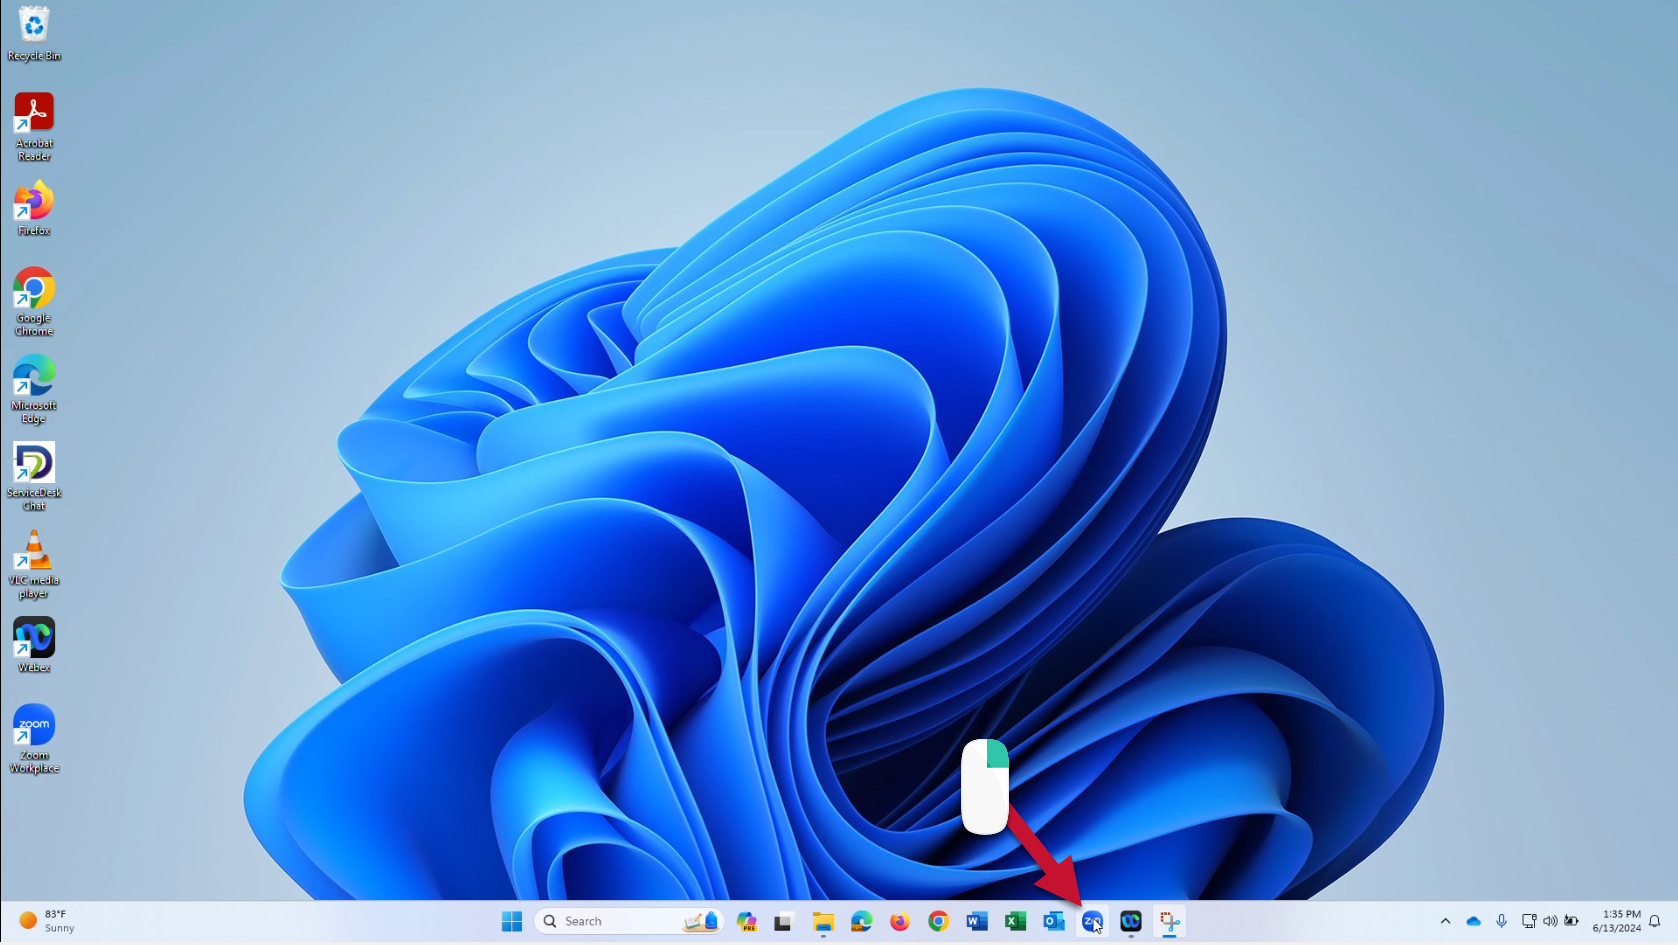
- Click Unpin from taskbar
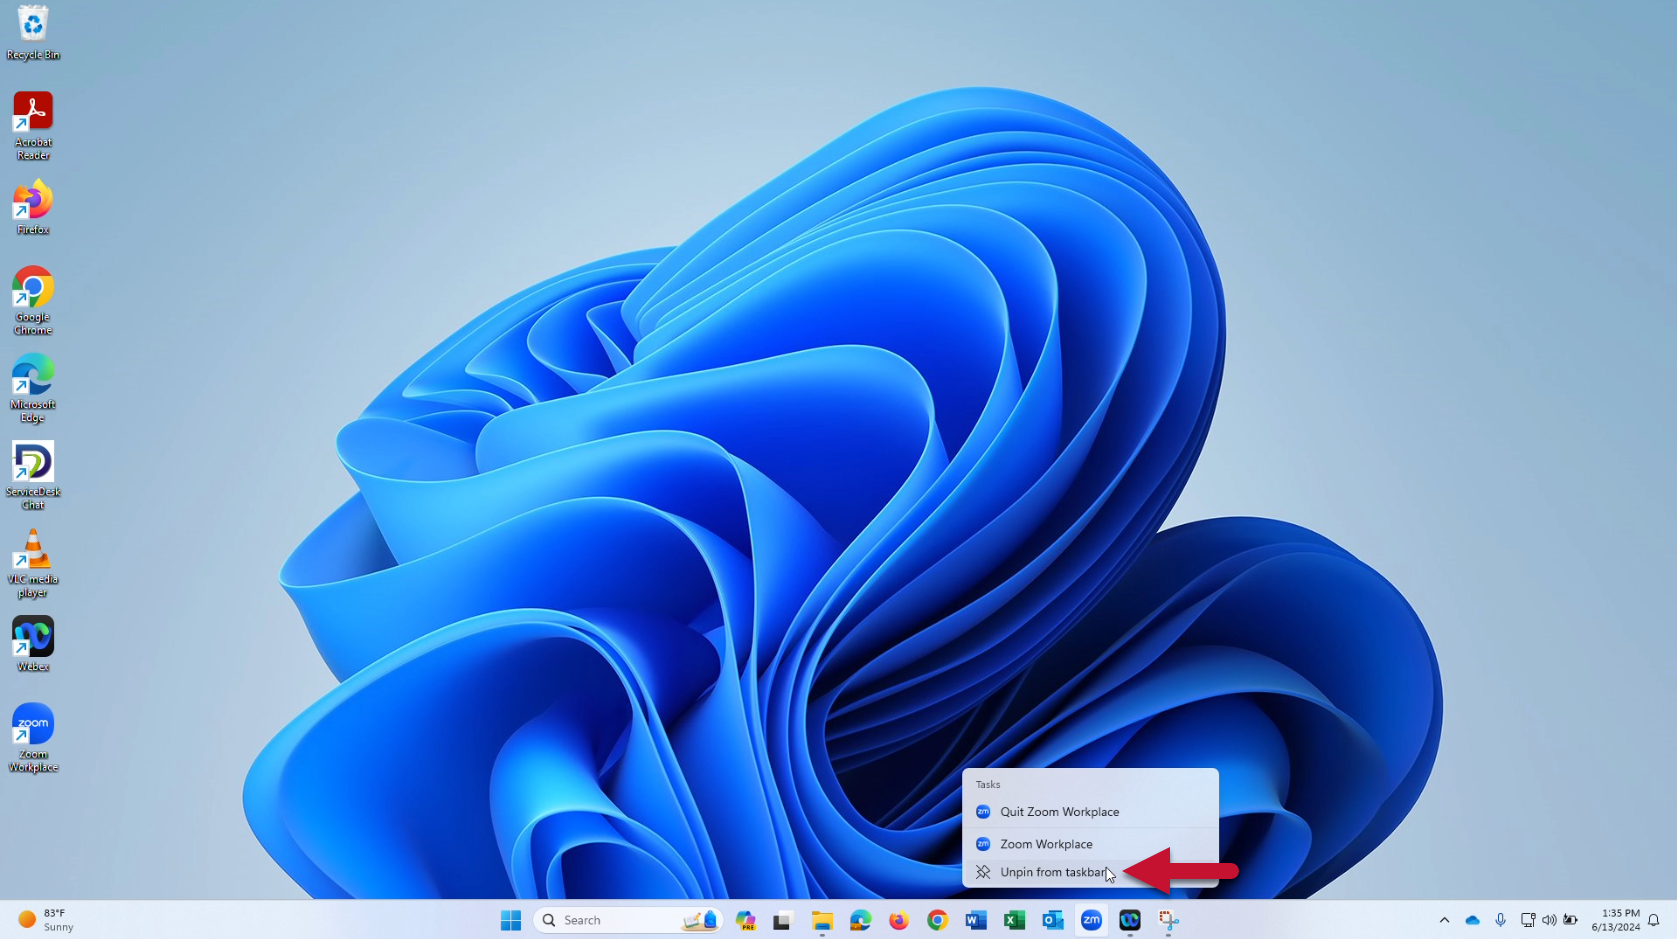
- The icon is now unpinned

System Tray
The system tray is located on the right end of the taskbar.

- It contains icons to quickly access:
- OneDrive
- Network & internet settings
- Sound settings
- Battery/Power indicator (laptops only)
- Date & time
- Notification settings
- Click
 to view hidden icons on your taskbar
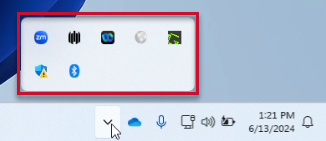
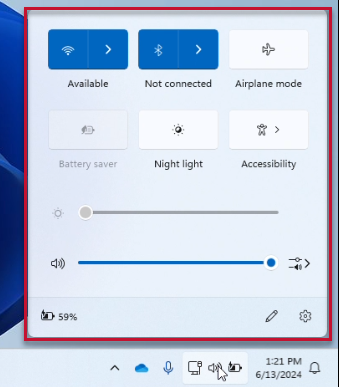
- Click
 to view:
- Network & internet: Check your network connection status - connect/disconnect and manage WiFi networks, place device in Airplane mode
- Sound settings: Adjust sound volume and check audio input/output devices
- Accessibility settings: Quick access to accessibility settings
-
Battery indicator (laptops only): Displays the power level of your device
- Click
 to view:
- Notification settings: Manage and view Windows notifications
-
Date & time: Displays current date and time
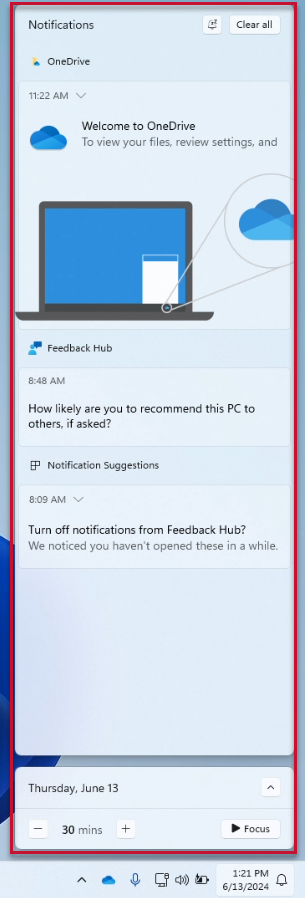
- Click the up arrow (^) next to the date & time to show the calendar
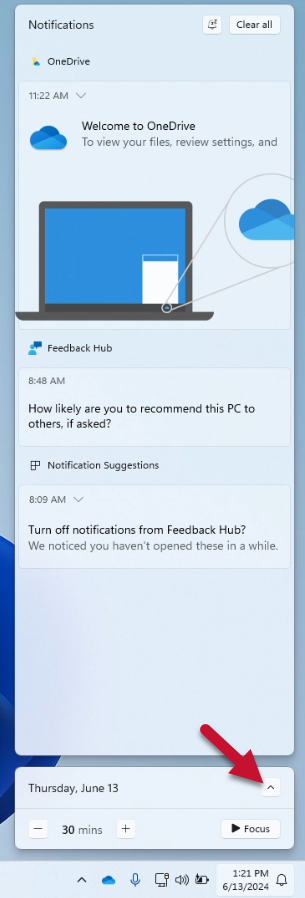
- Expanded calendar

- Click the down arrow (V) to re-hide the calendar
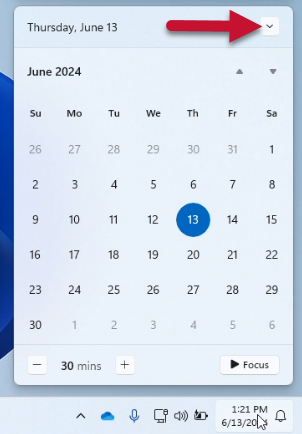
- Click the up arrow (^) next to the date & time to show the calendar
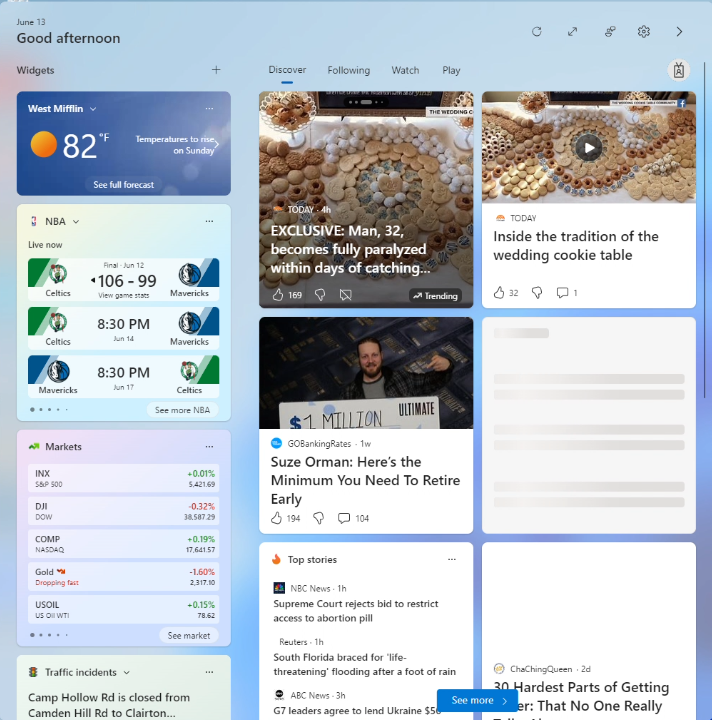
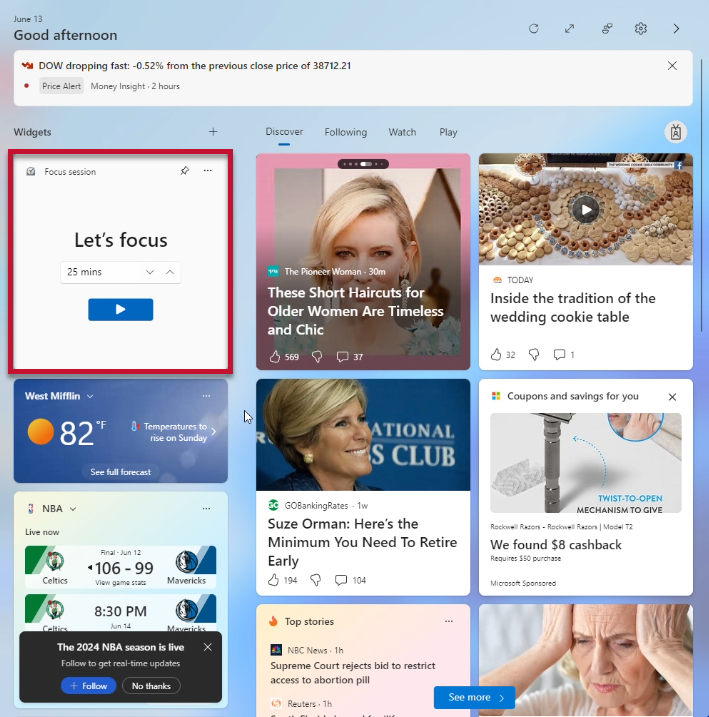
Widgets
Widgets provide quick access to various apps, such as weather, news highlights, calendar, and more.
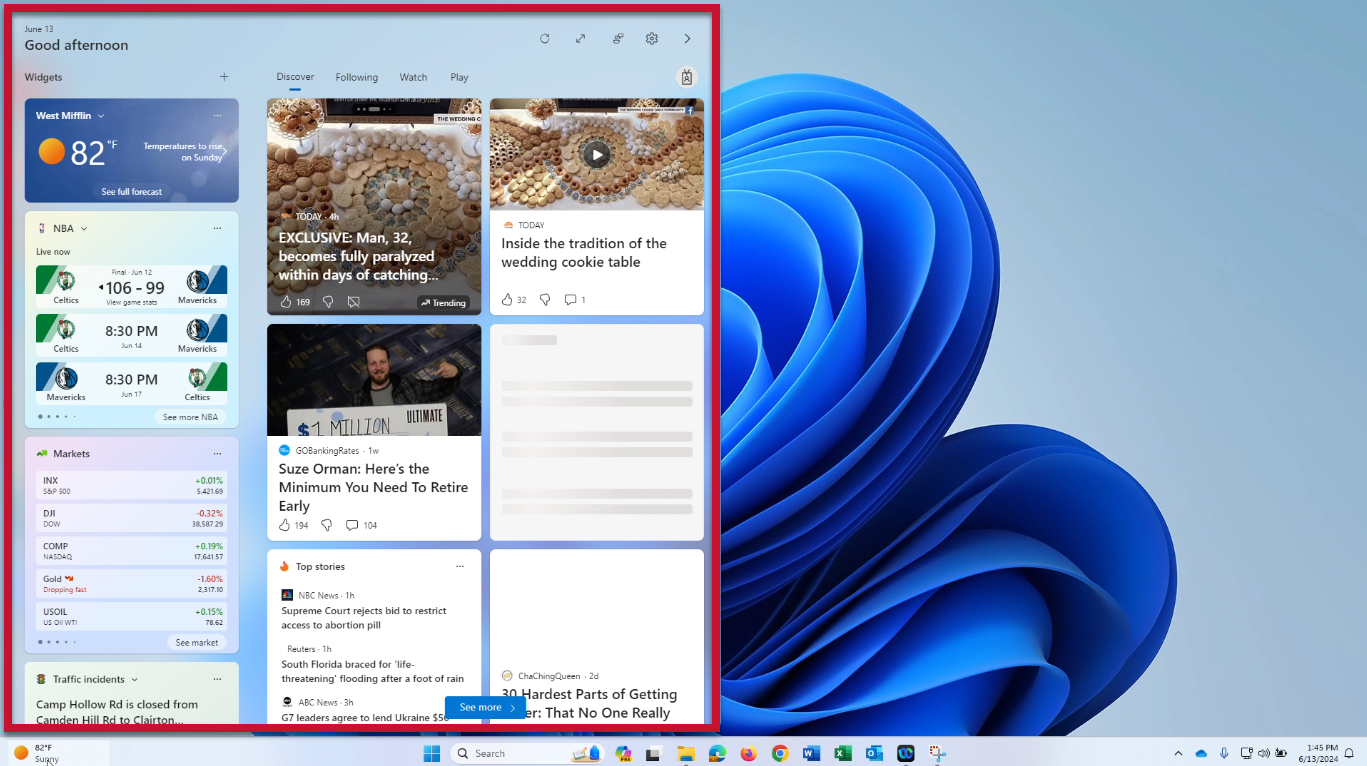
Accessing Widgets
- Click the Widget icon
- It usually appears as a weather or news icon
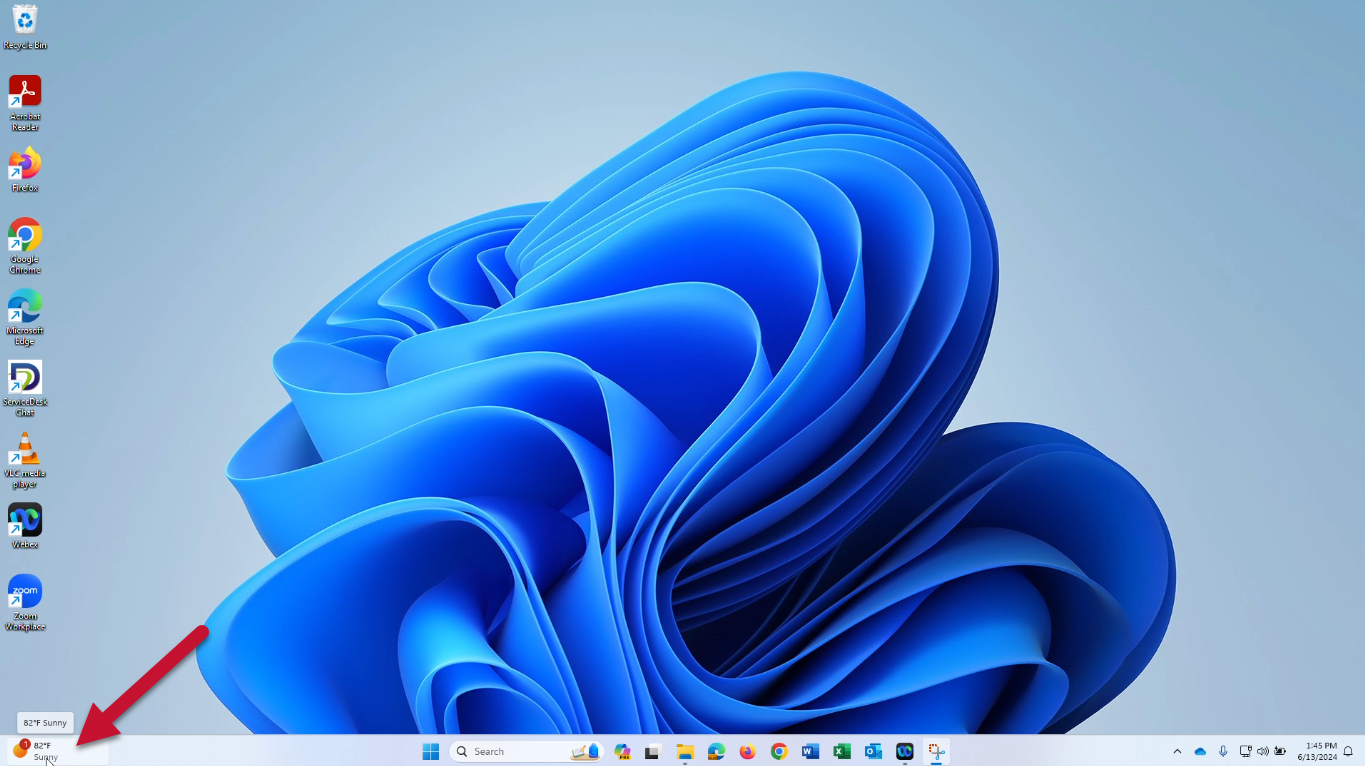
- It usually appears as a weather or news icon
- Your widgets will be displayed
Adding a Widget
- Click the plus sign (+)
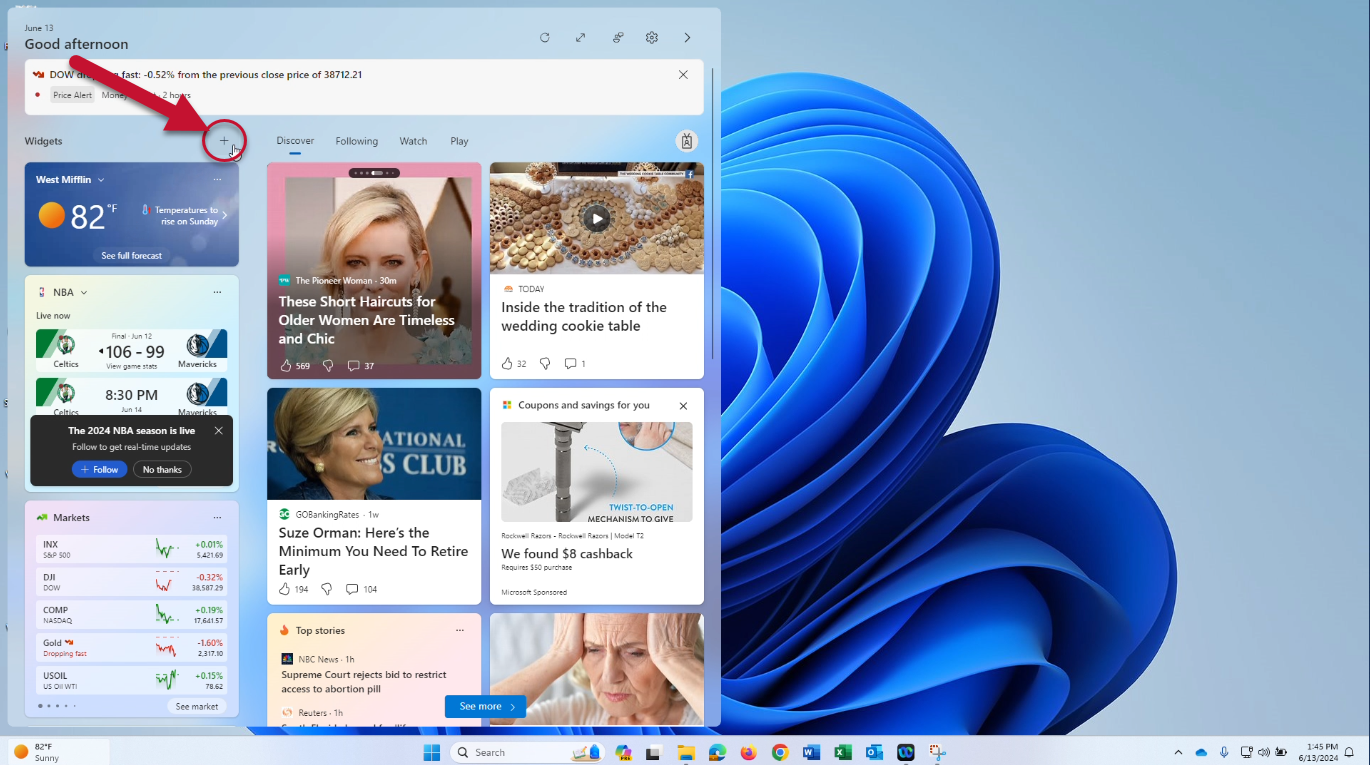
- Select the app you wish to create a widget for

- Click Pin

- Your new widget should now appear
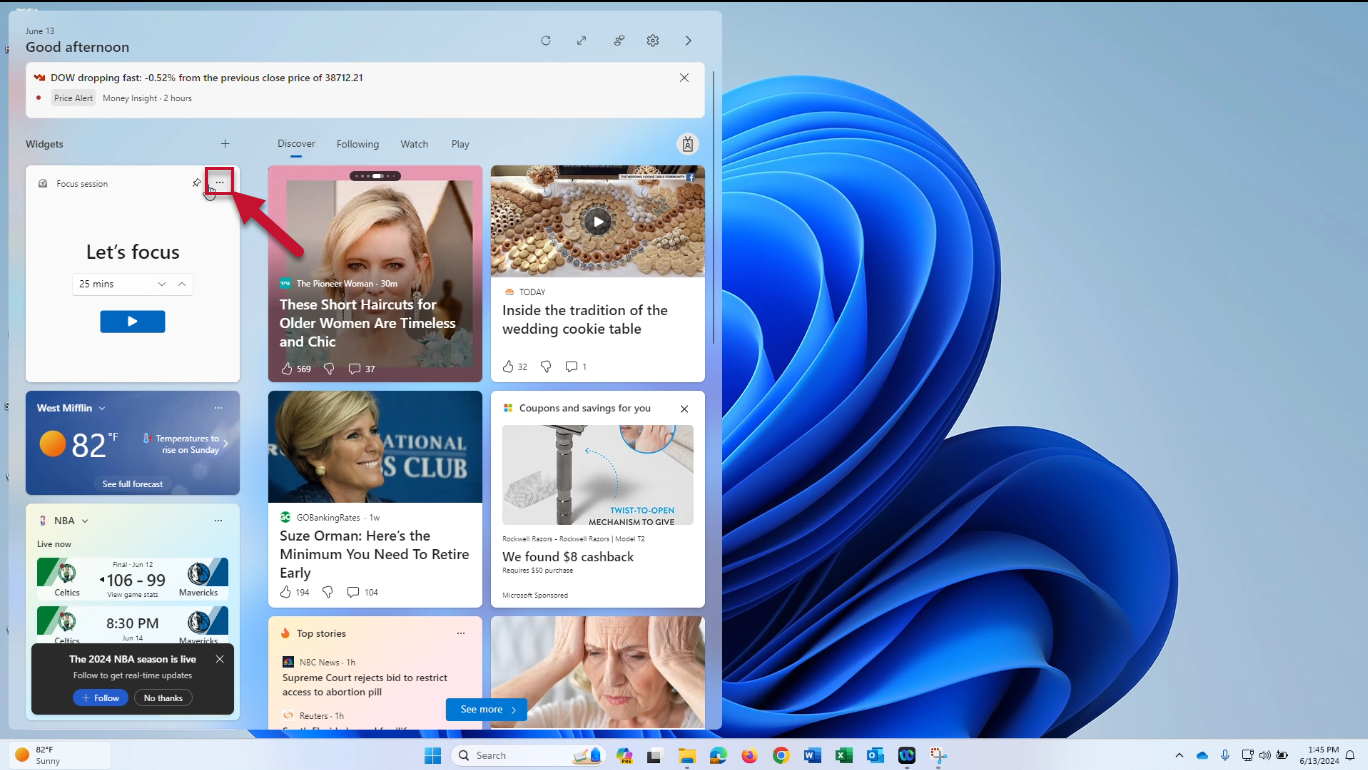
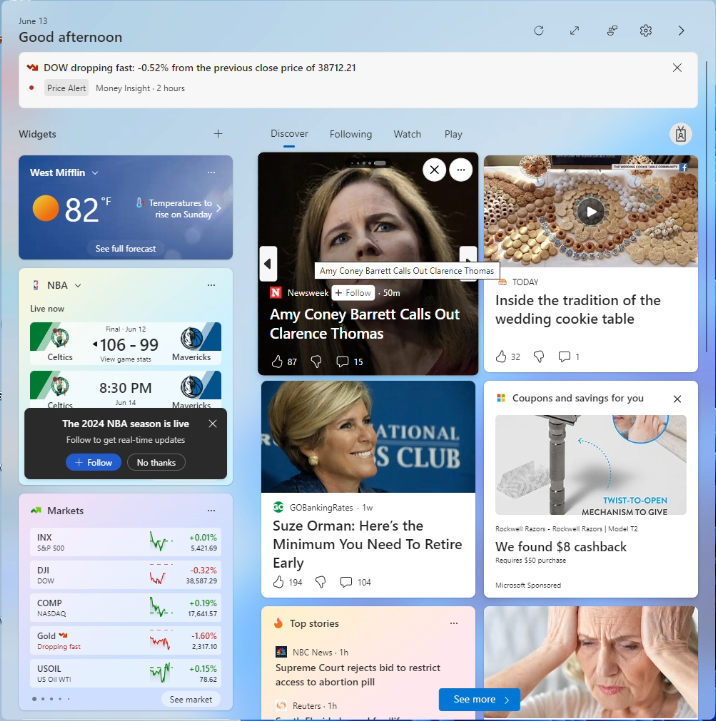
Unpinning/removing a Widget
- Click the ellipses (…)
- Click Unpin widget
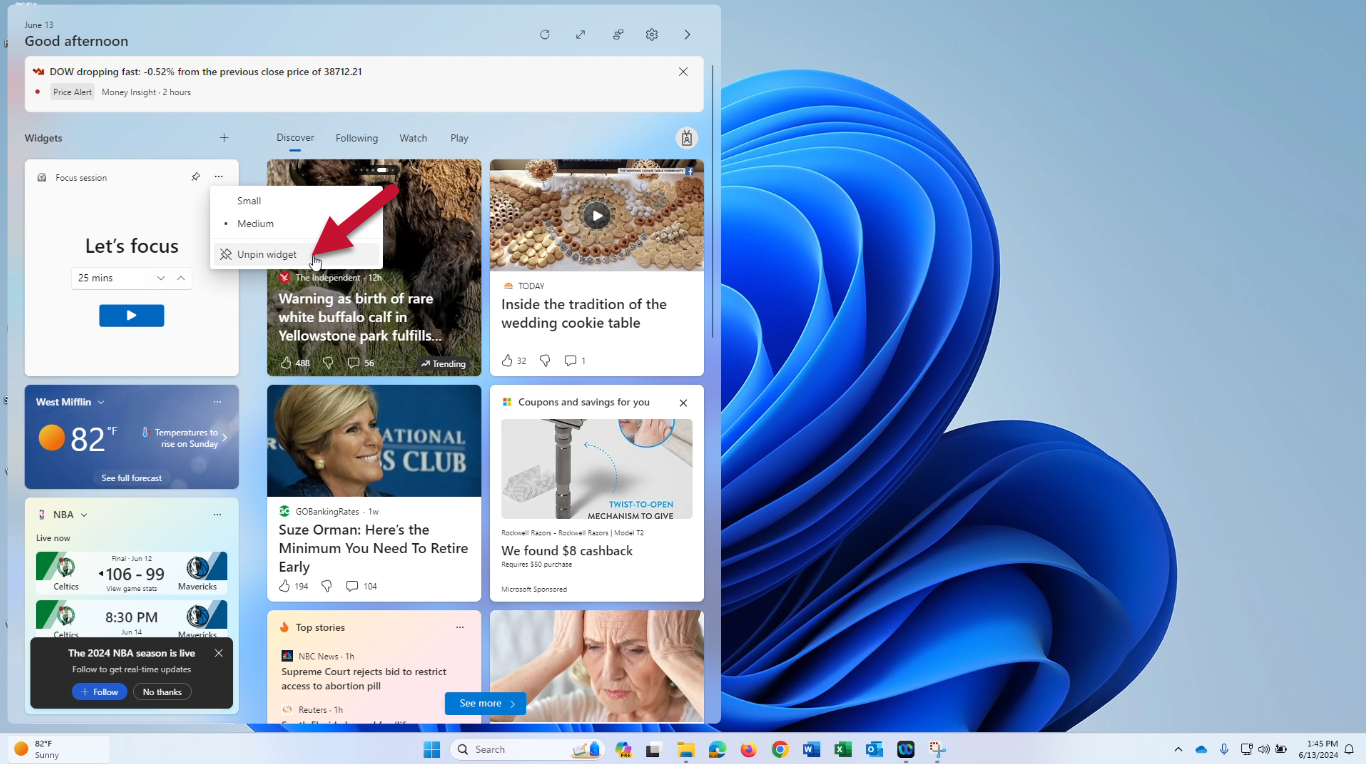
- The widget should now be removed
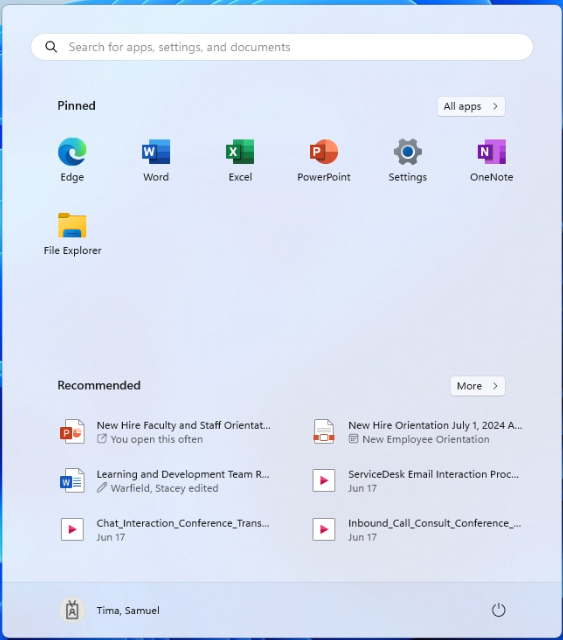
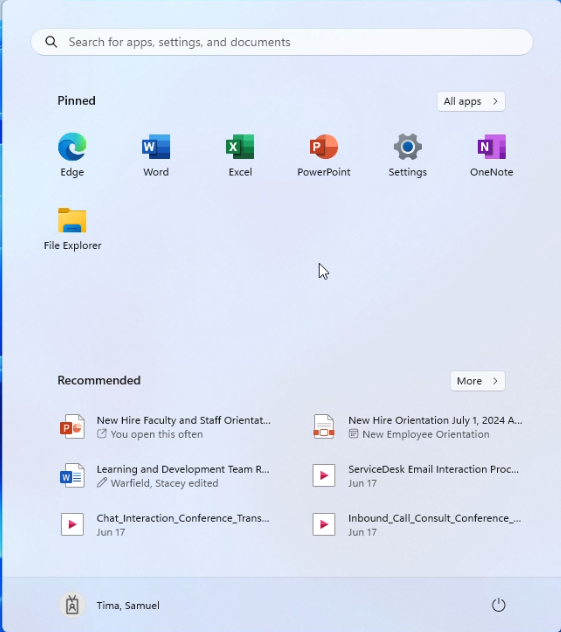
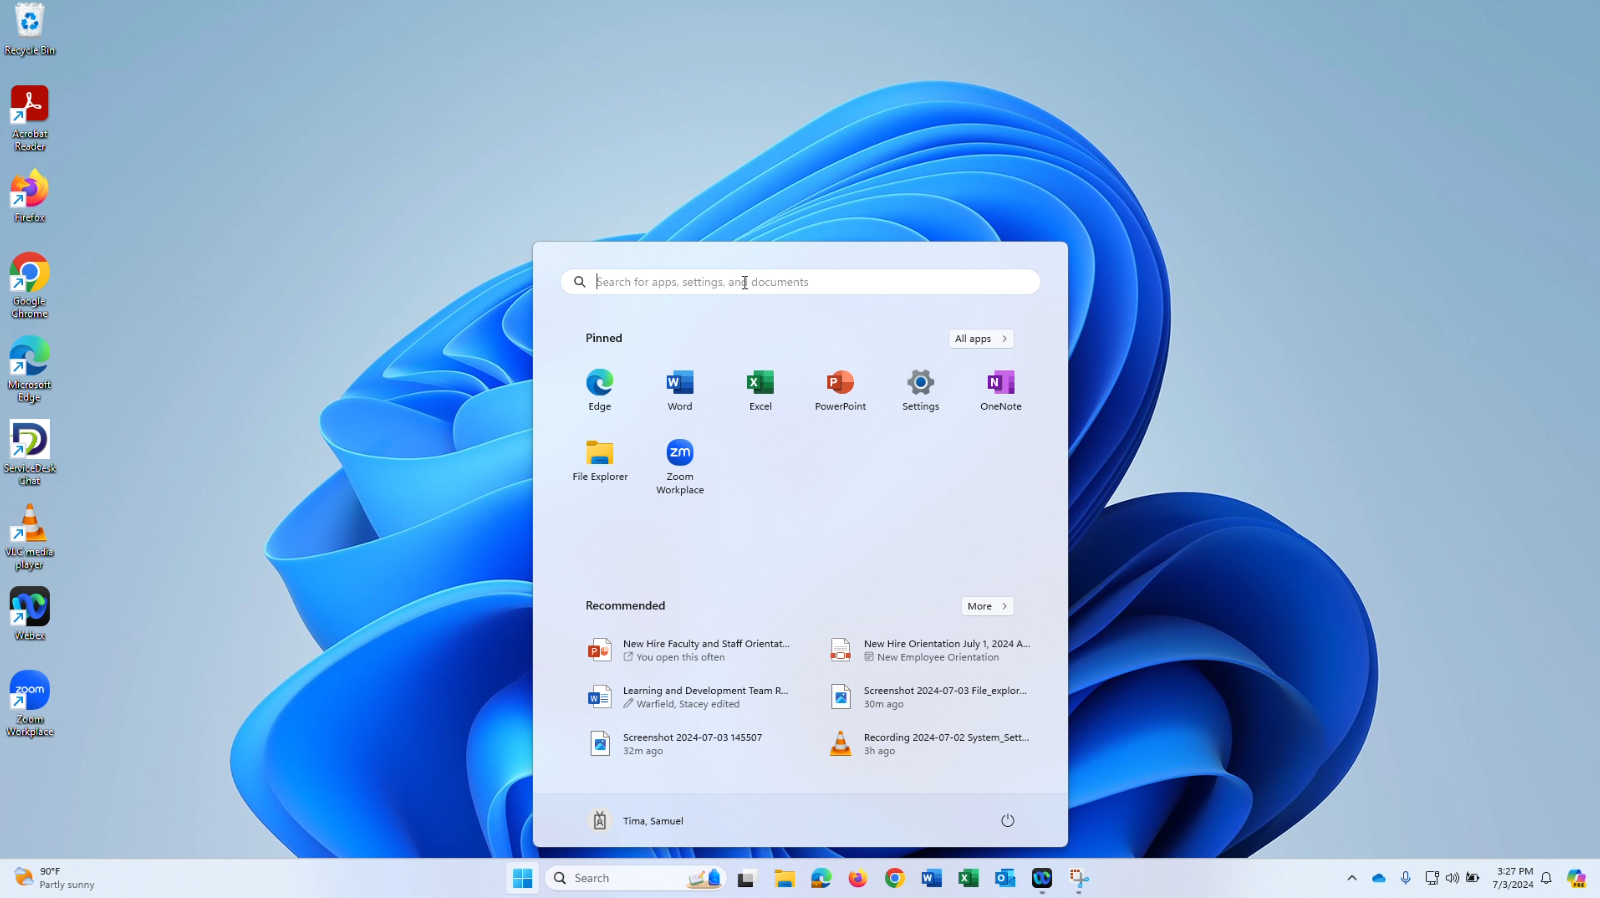
Start Menu Overview
The start menu contains pinned icons for quick access to:
- Pinned apps - for quick access
- Recommended (apps you use most often)
- Account options (Lock, Sign out, Switch user, etc.) - See “Sign out & Power Options” section below
- Power options (Sleep, Restart, Shut down, etc.) - See “Sign out & Power Options” section below
- List of all apps installed on your computer
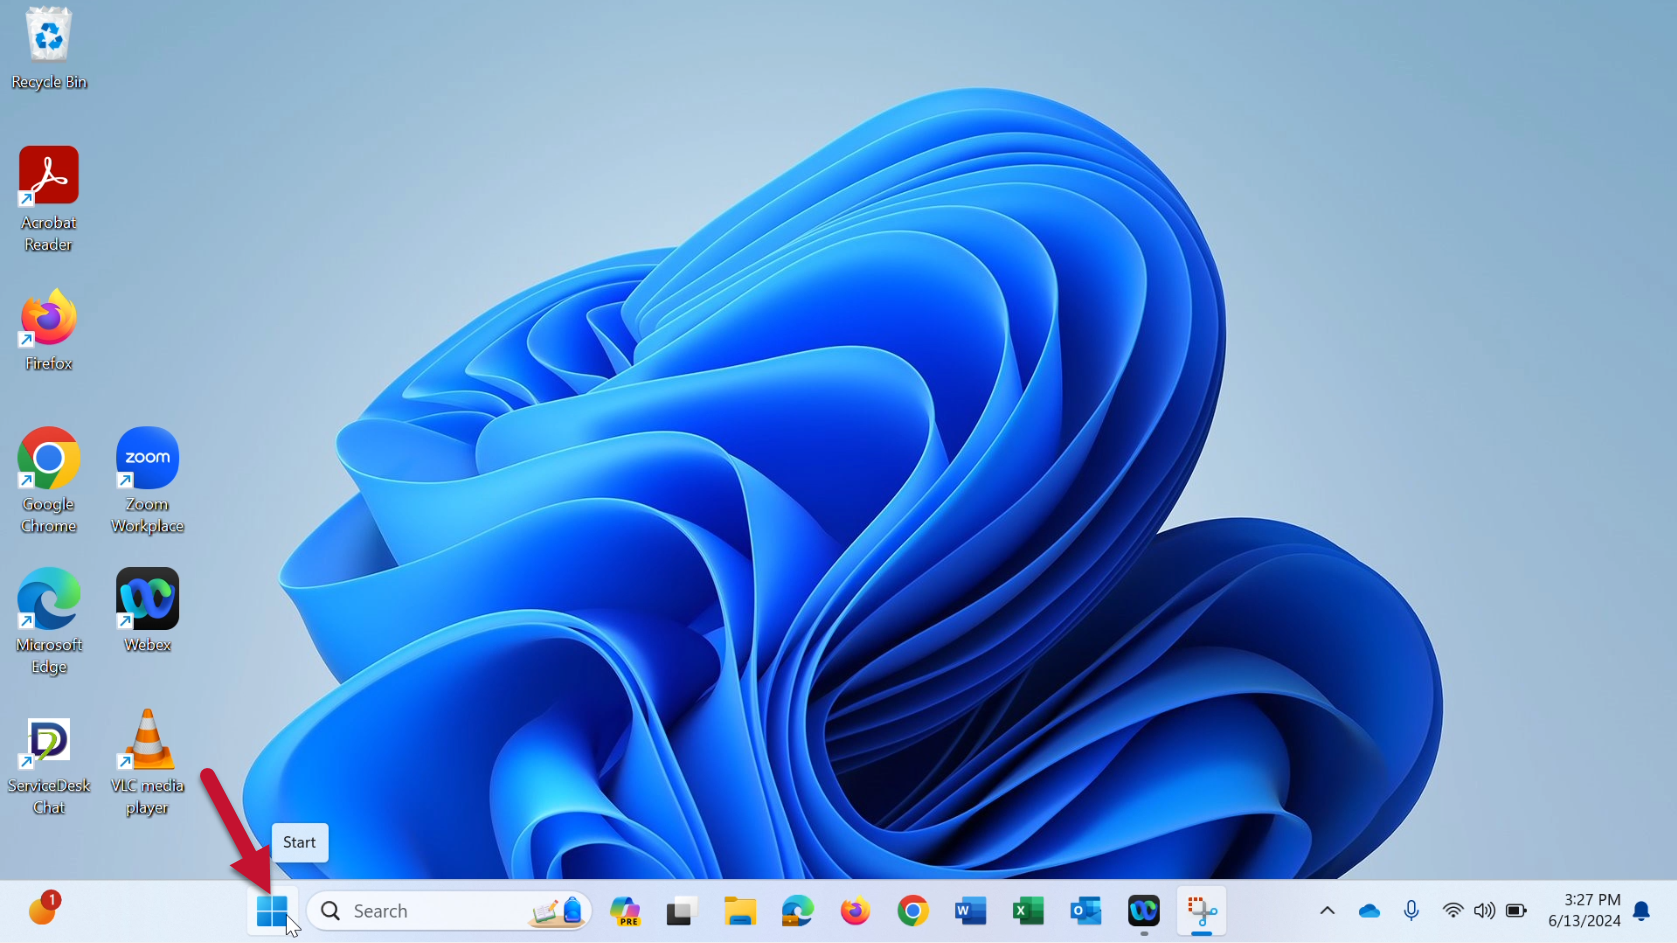
- Click the Start (Windows logo
 ) icon on the taskbar or press the Windows key
  on your keyboard to access the start menu.
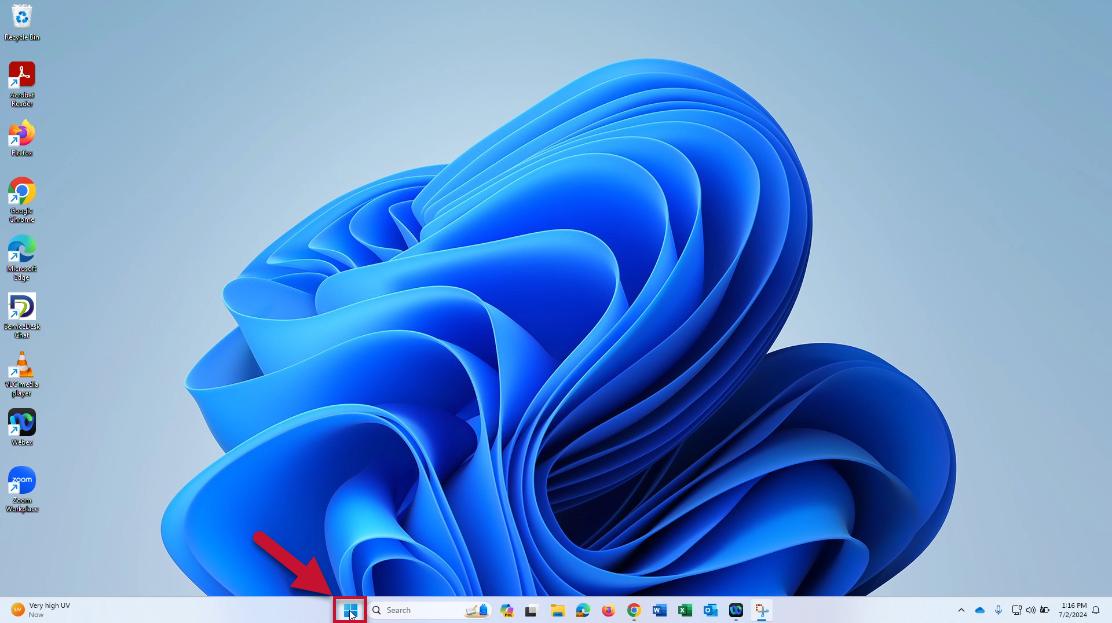
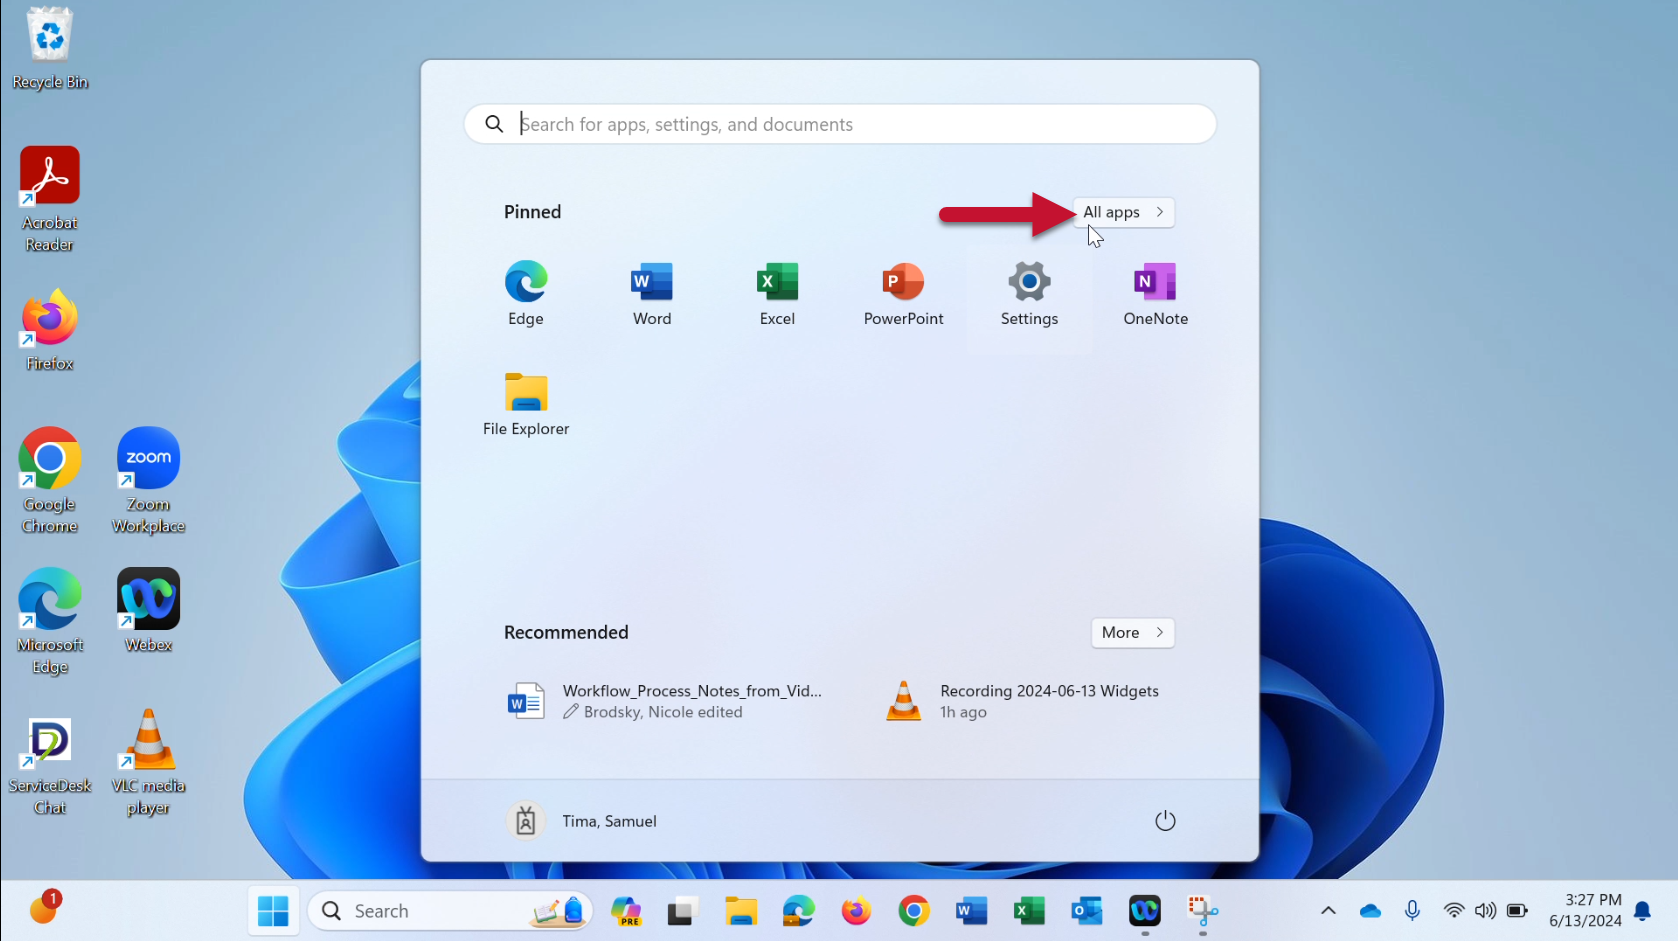
Accessing All Apps Menu
- Open the start menu
- Click All apps
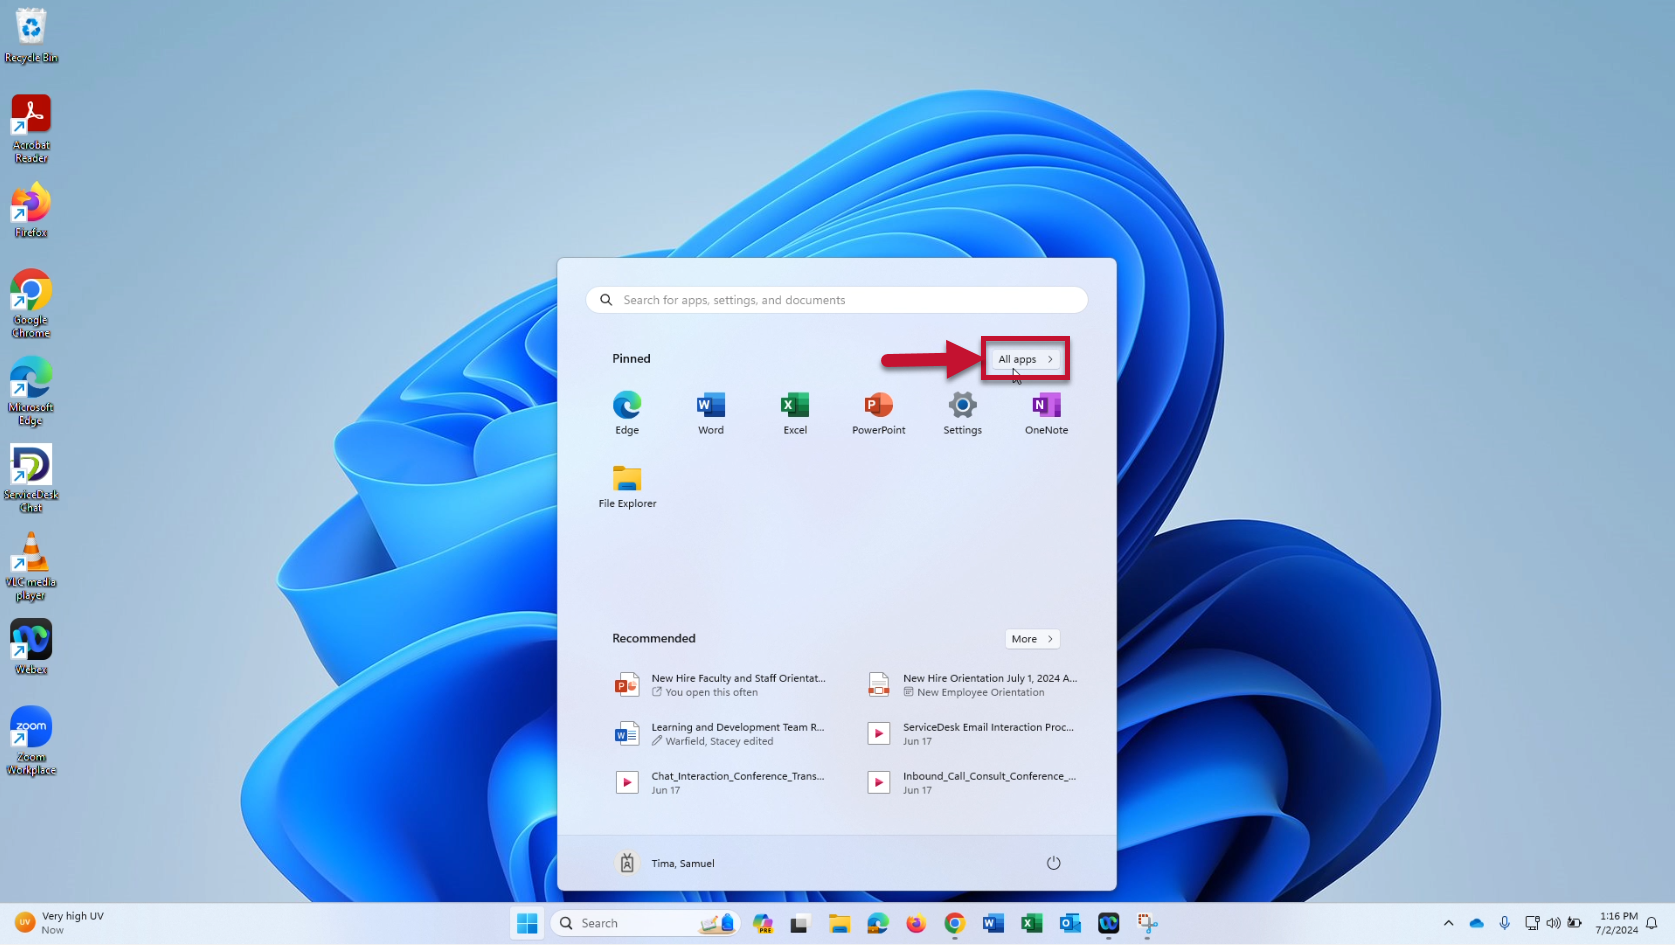
- The apps list is open. The apps should be listed in alphabetical order
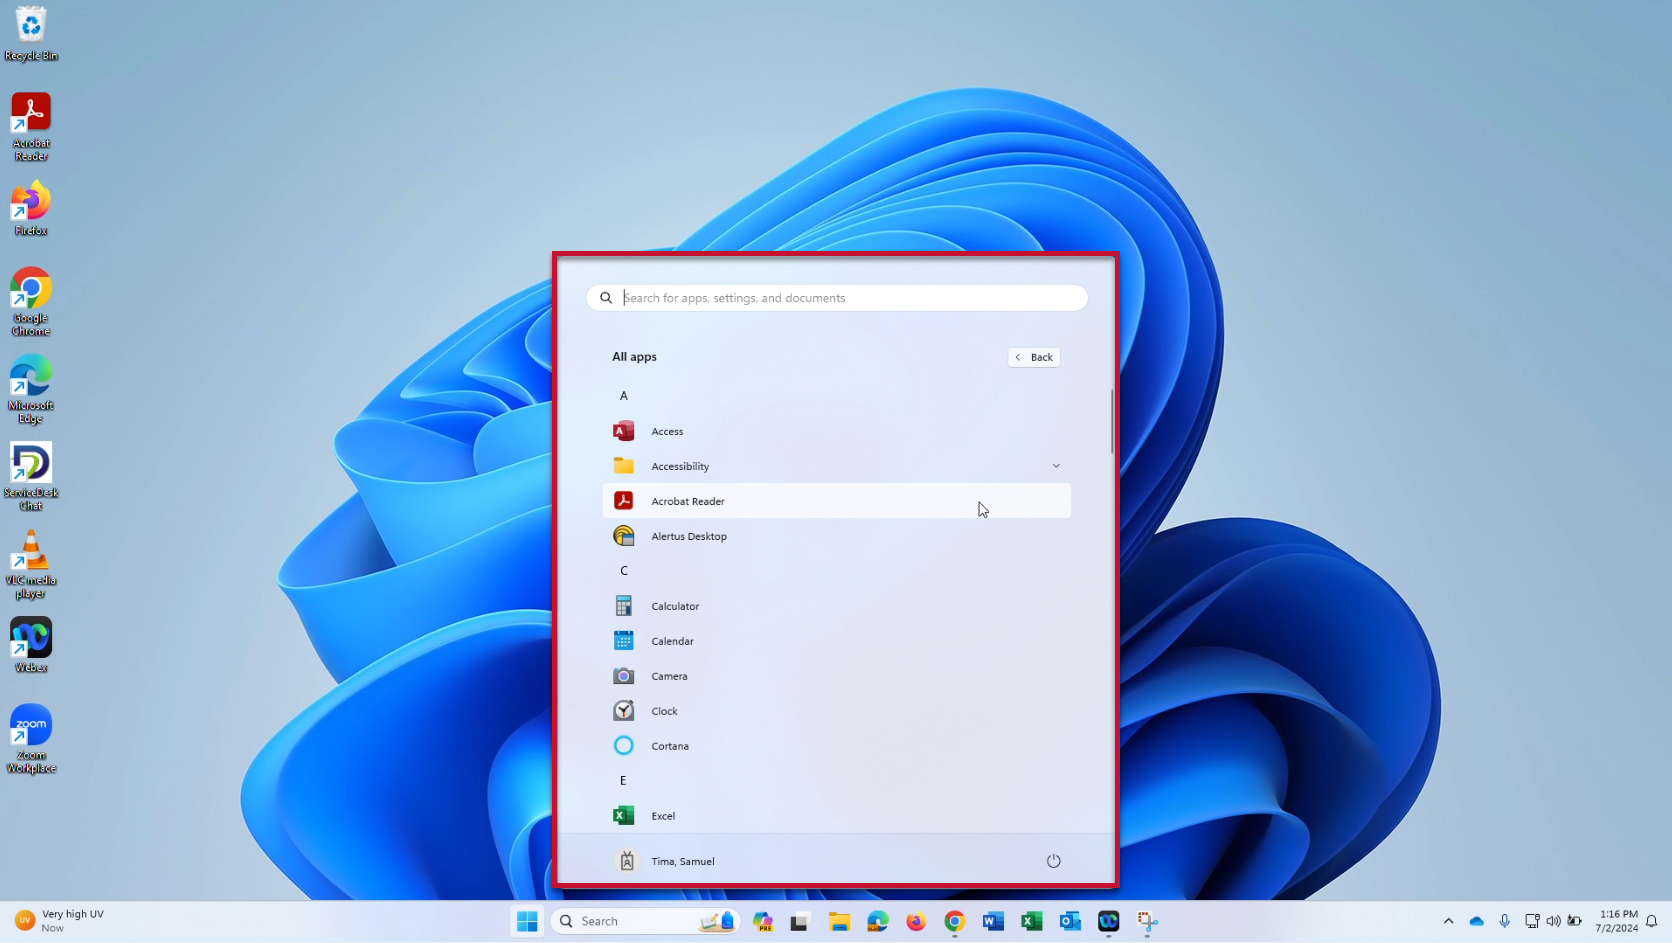
- Click on an app to launch it
Pinning Icons to Start Menu
Pinning Desktop Icon
- Right-click on the app icon you wish to app

- Click Pin to Start
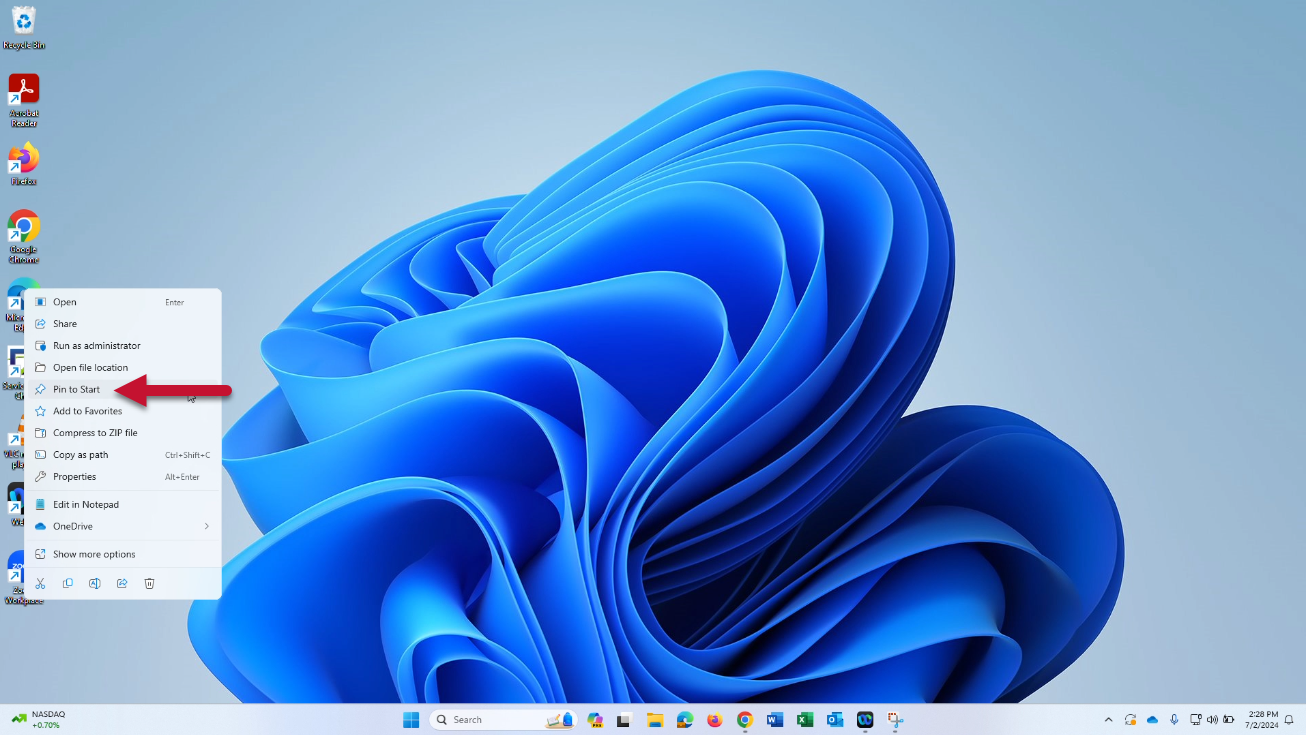
- The app is now pinned to the start menu
Pinning from App List
- Open the start menu
- Click All apps
- Right-click on the app you wish to pin

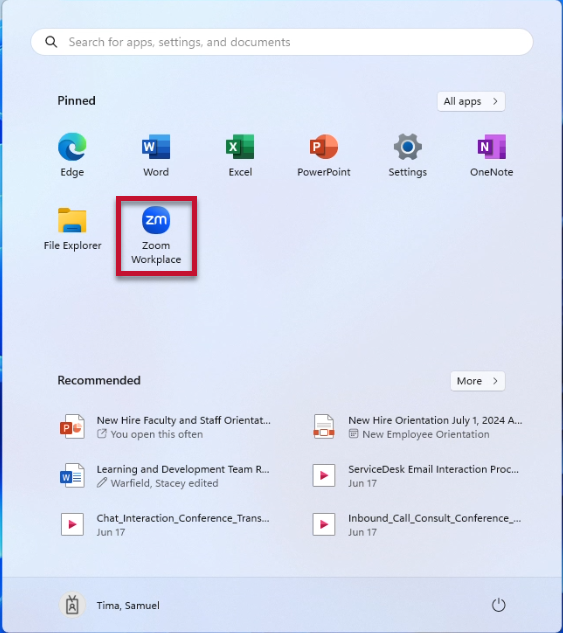
- Click Pin to Start
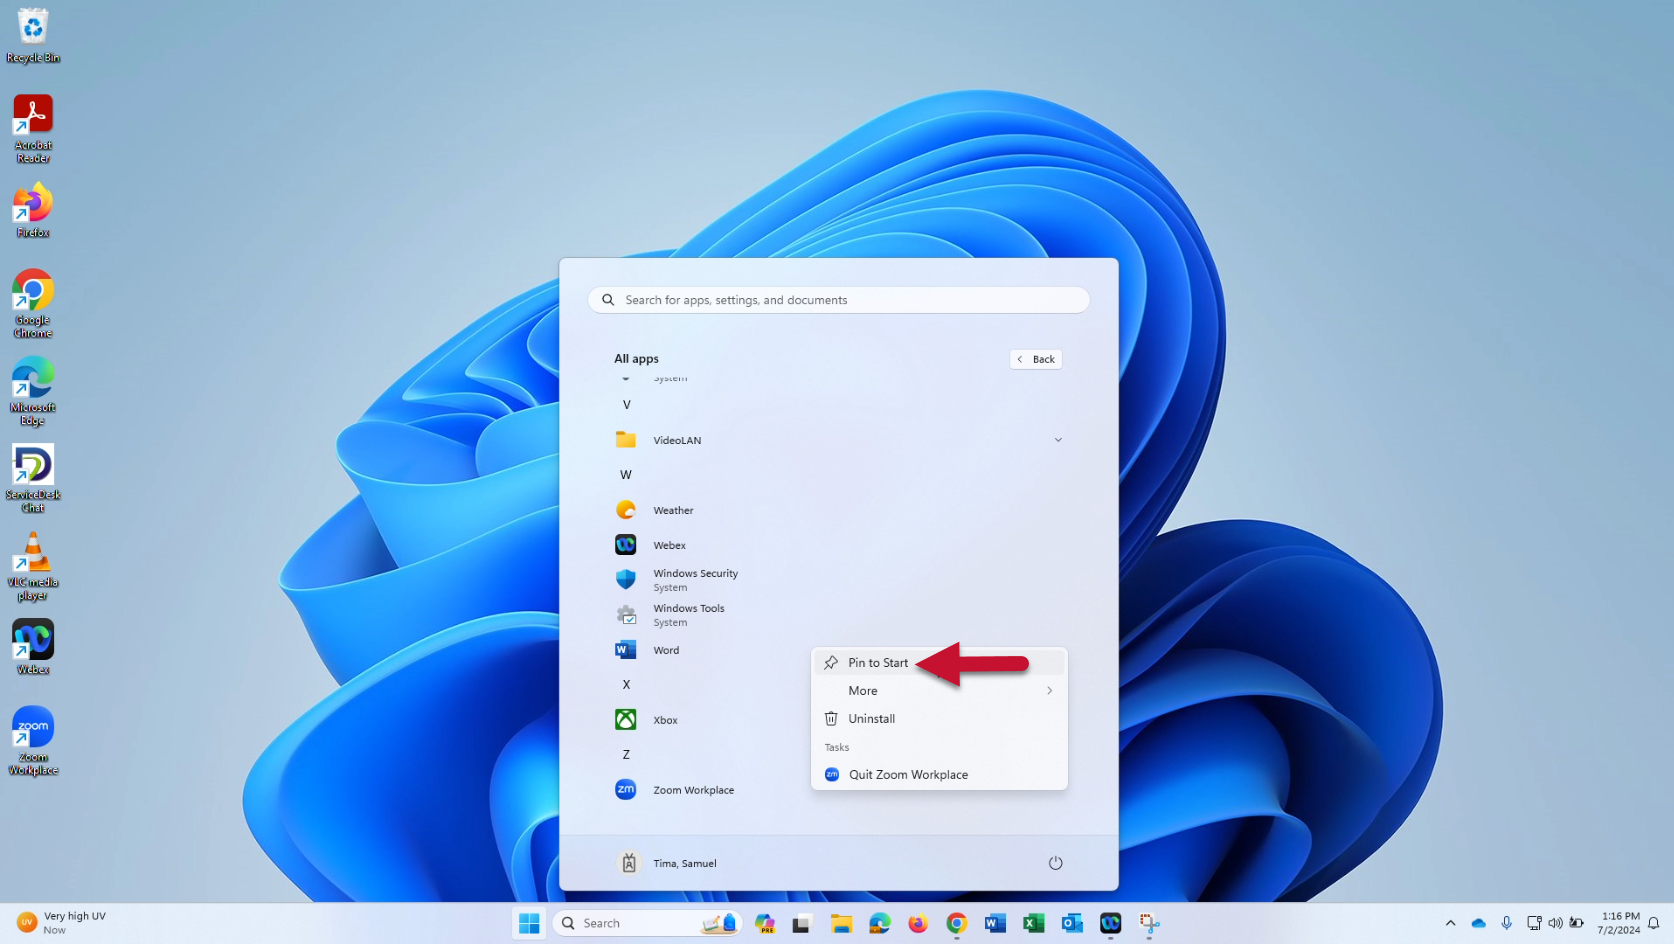
- The app icon is now pinned to the start menu
Unpinning Apps
- Open the start menu
- Right-click on the app you wish to unpin

- Click Unpin from Start
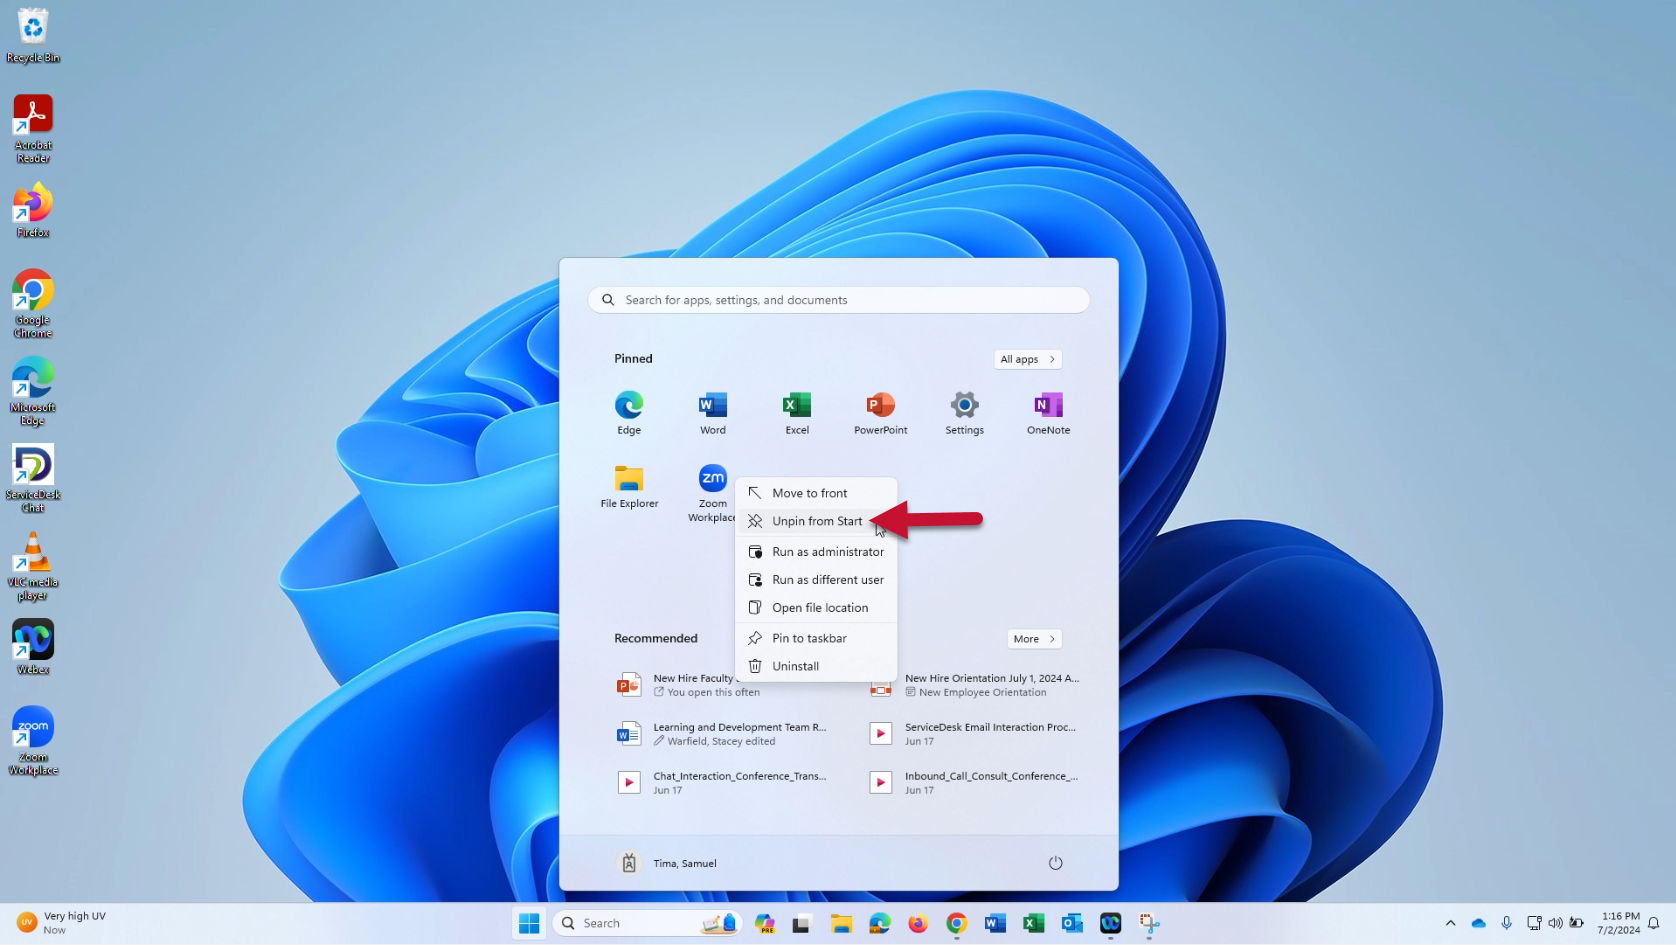
- The app is now unpinned
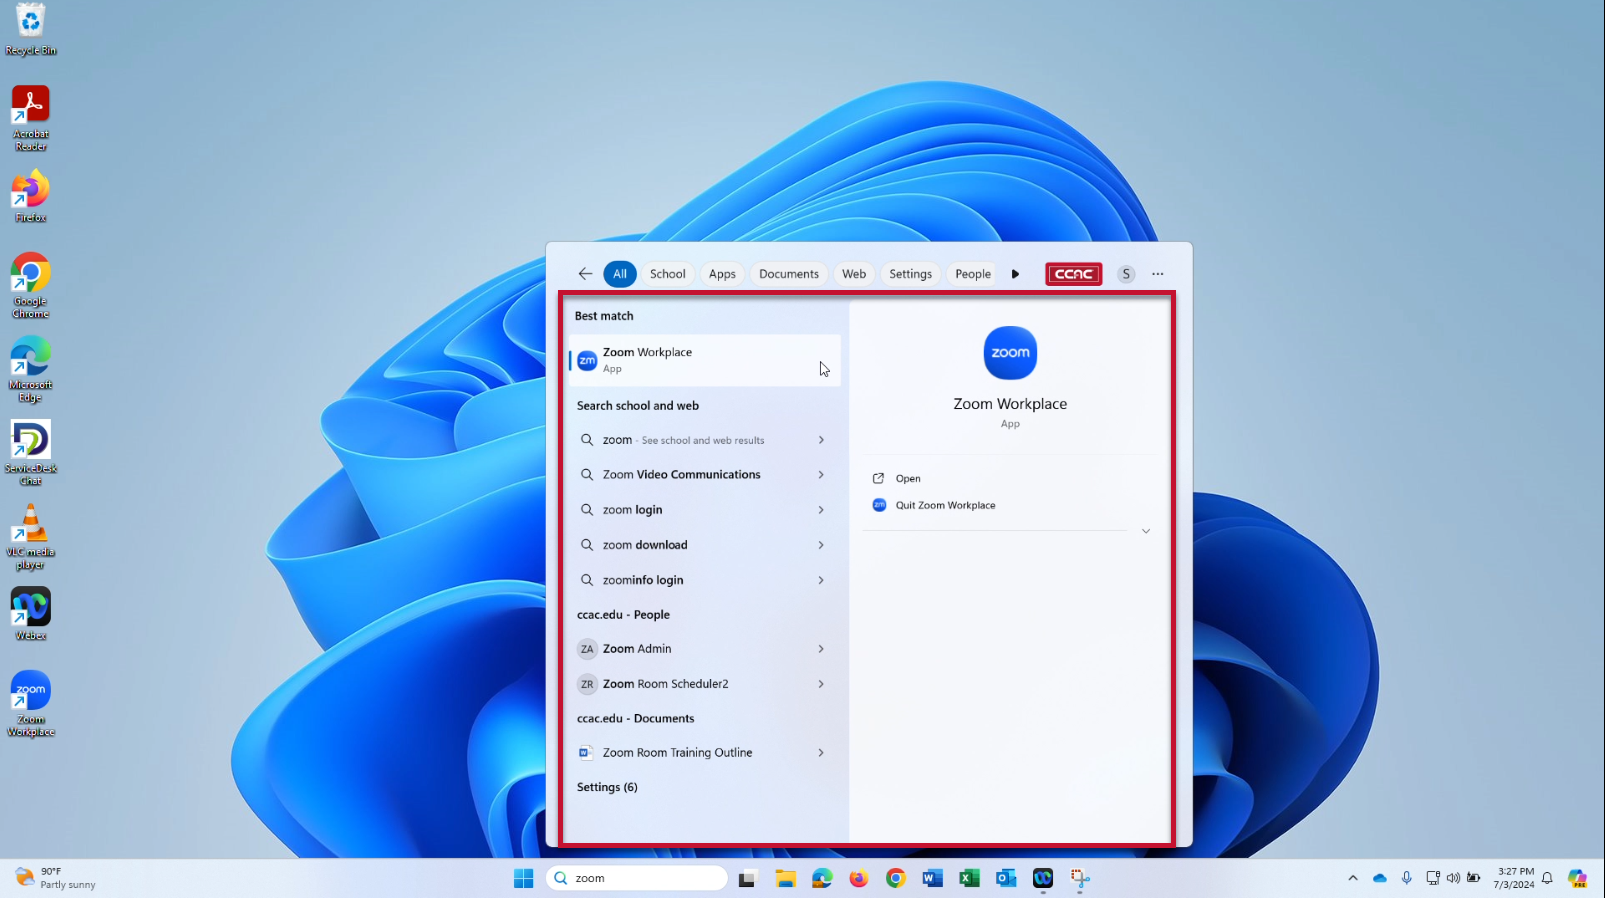
Search Feature
The search feature allows you to search for files, apps, settings, and more.

Using the Search Feature:
- Click on the search box or magnifying glass to begin a search
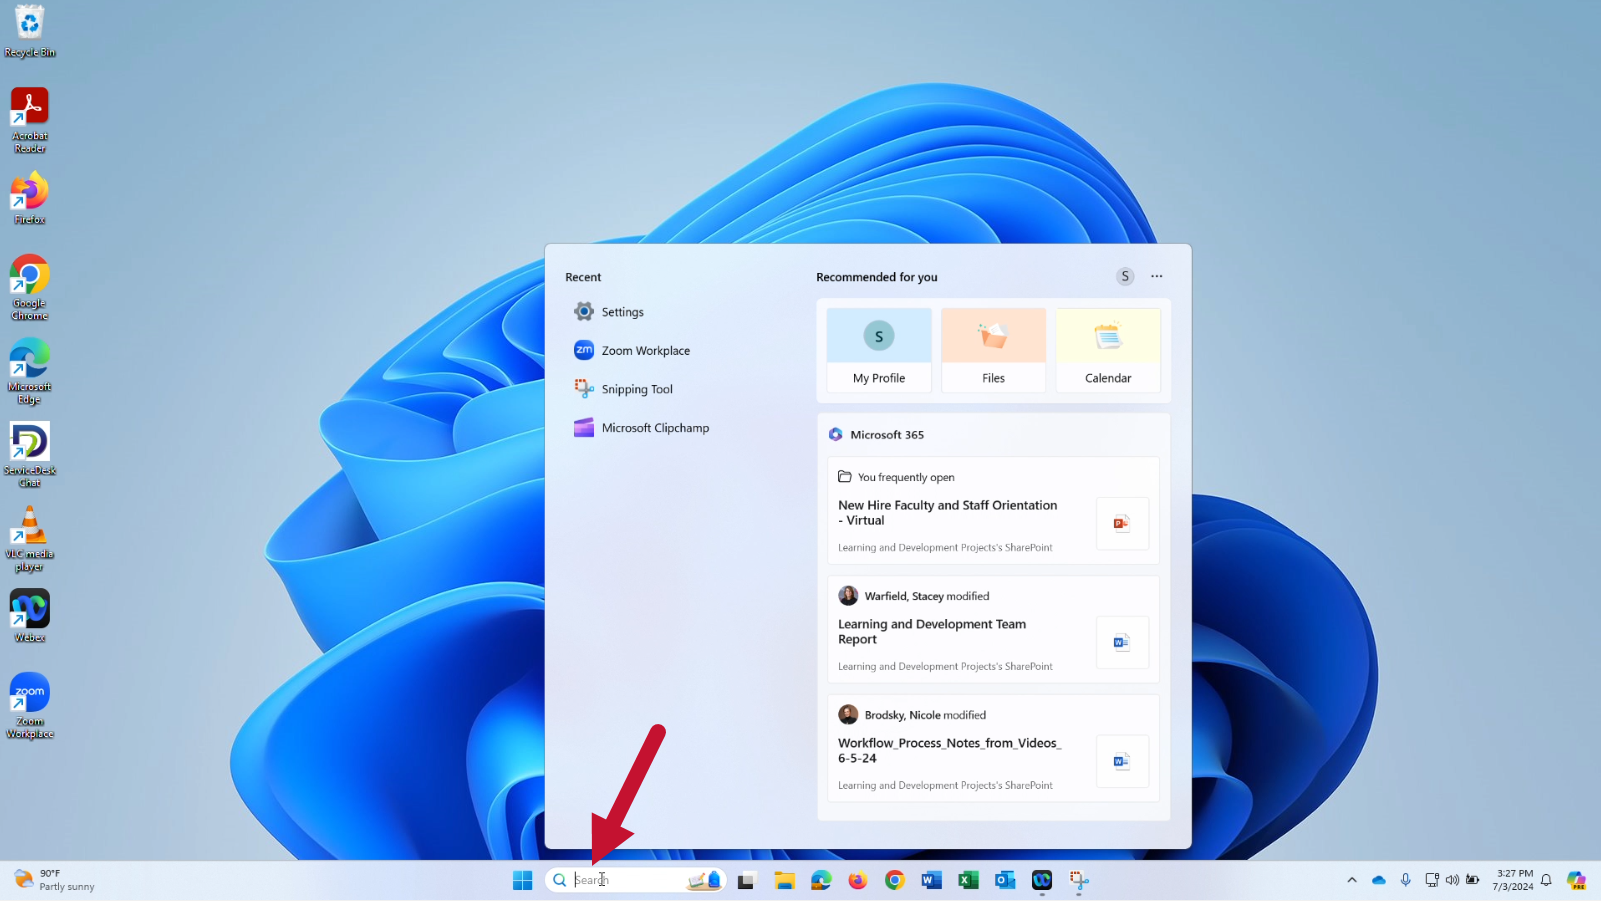
- Type keyword(s) into the search box
- (Optional) Press the Windows logo keyon your keyboard to open the start menu
- Start typing keyword(s). They will automatically appear in the search bar above
- (Optional) Press the Windows logo key
- The search results should be displayed
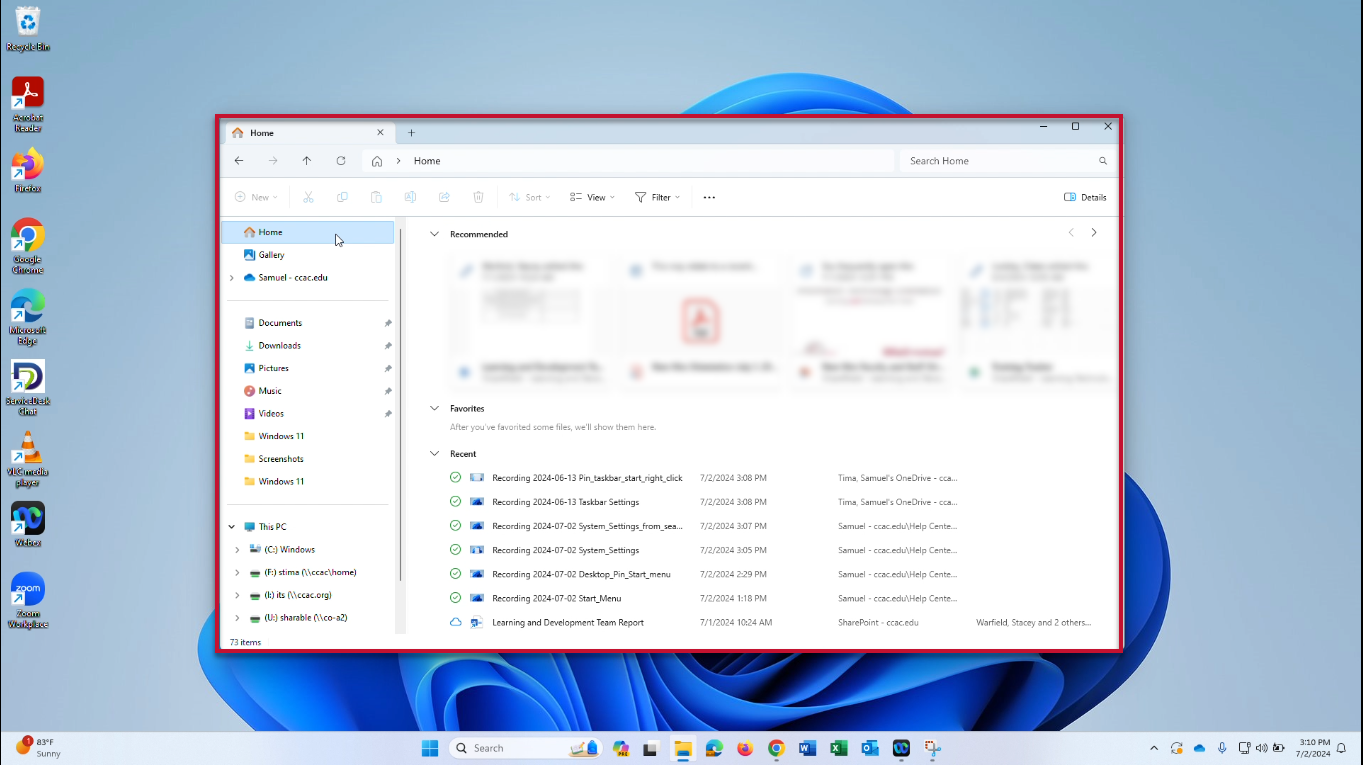
File Explorer
The File Explorer provides you access to your files and folders.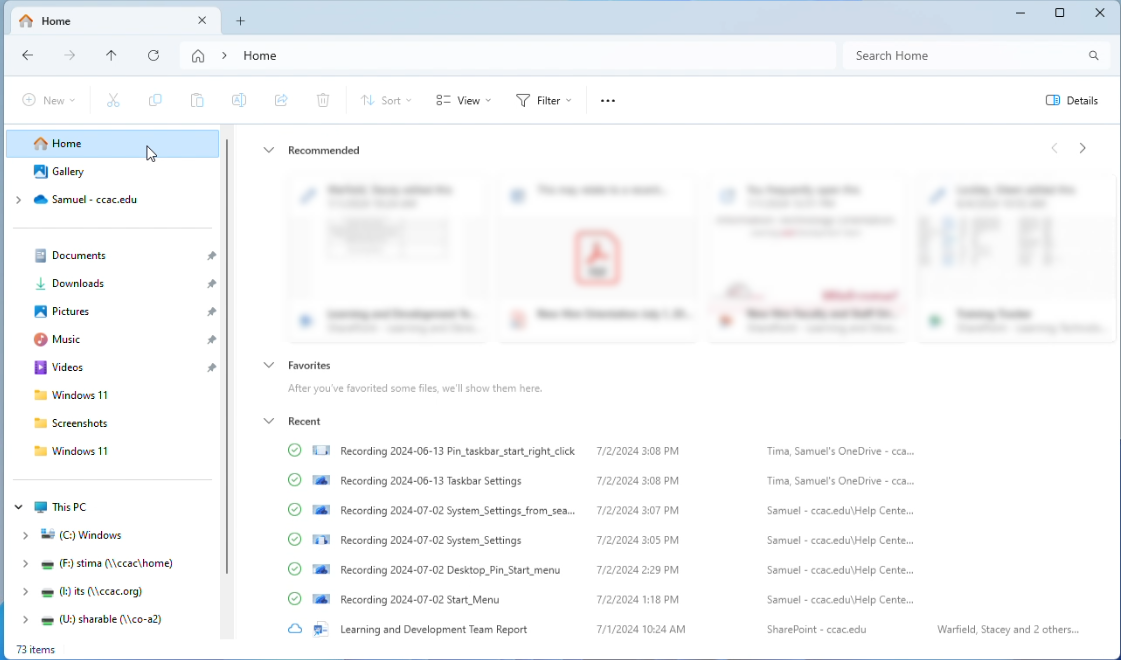
The File Explorer in Windows 11 is identical to the previous versions.
- Documents: General folder for saving documents to your computer's hard drive
- Downloads: Documents downloaded from the internet will be saved here by default
- Pictures: General folder for saving images to your computer's hard drive
- Music and Pictures: General folders for saving music and pictures, respectively
- This PC: Access files stored on all connected drives on your computer, including your hard drive and any mapped network drives
Two new notable new features include the “Home” and “Gallery” sections, as well as the ability to open new tabs similar to a web browser. They will be addressed in the corresponding accordion sections below.
Accessing File Explorer
- Click the file folder
 icon on your desktop
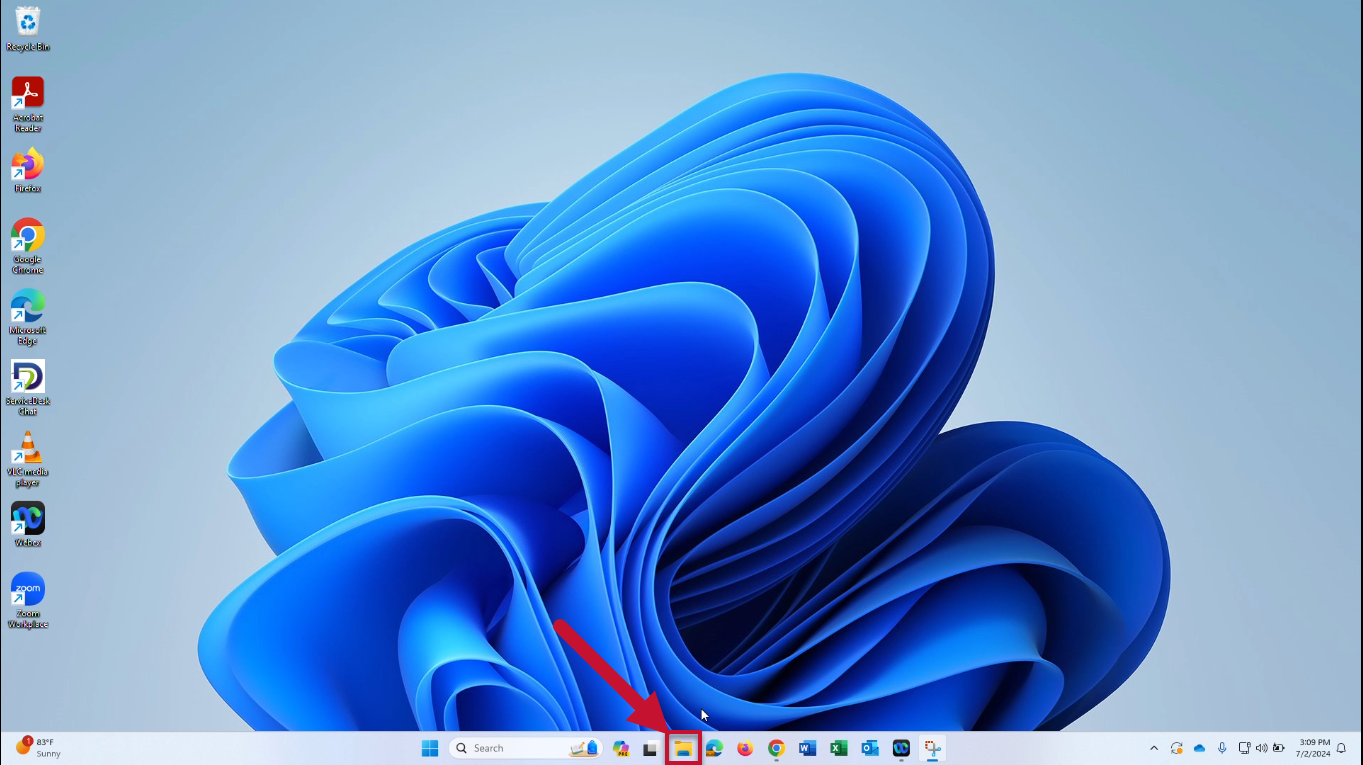
- File Explorer will open
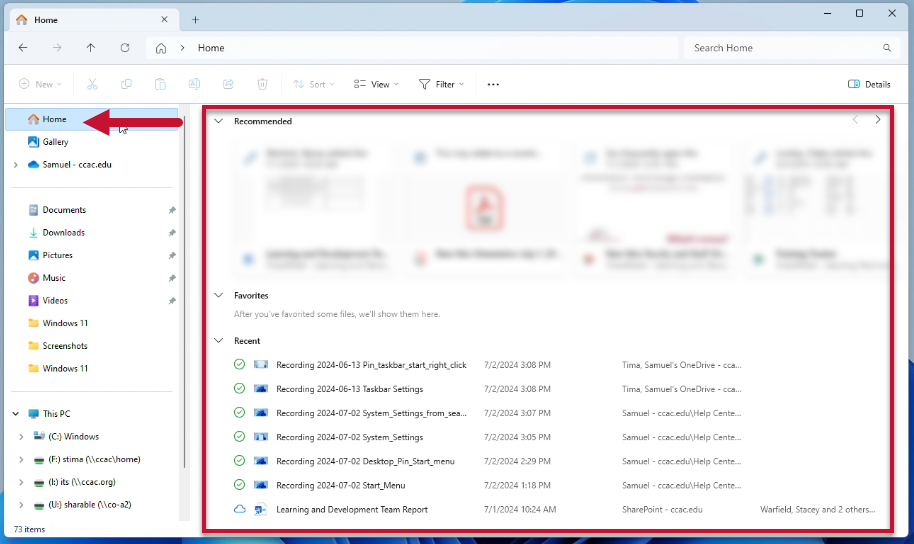
Home and Gallery Sections
-
Home: Displays files organized under “Recommended”, “Favorites”, and “Recent” listings for easy access
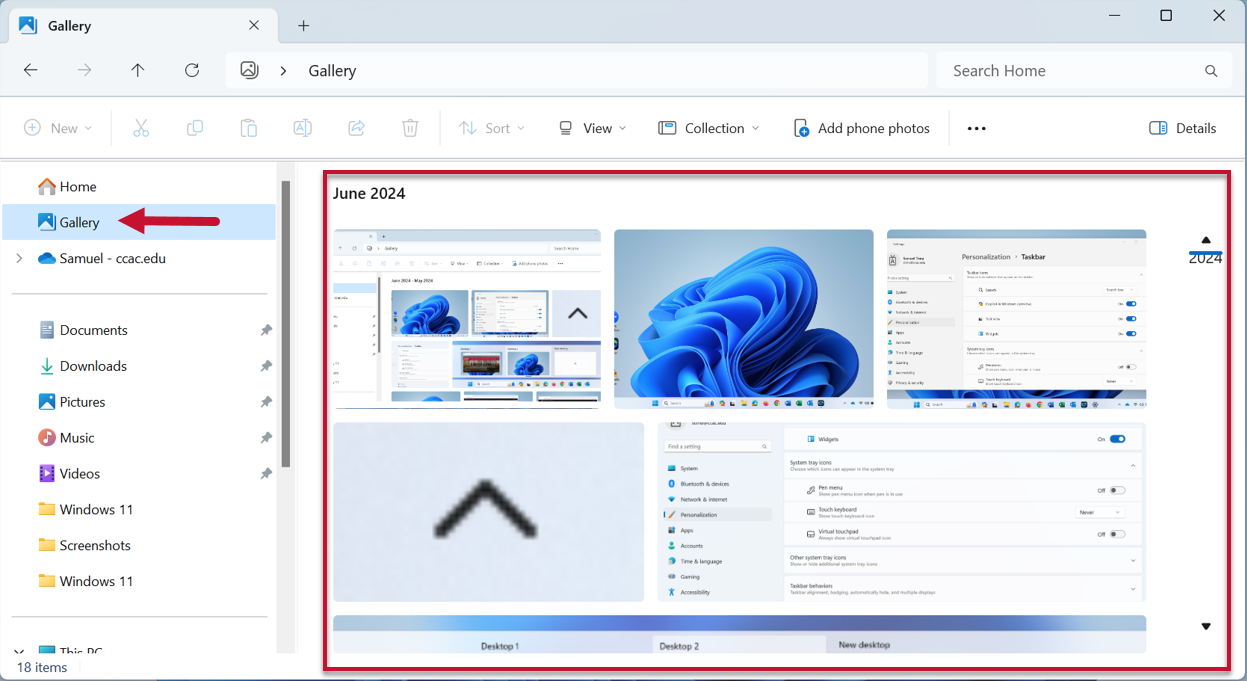
-
Gallery: Provides a way to organize images stored on your computer
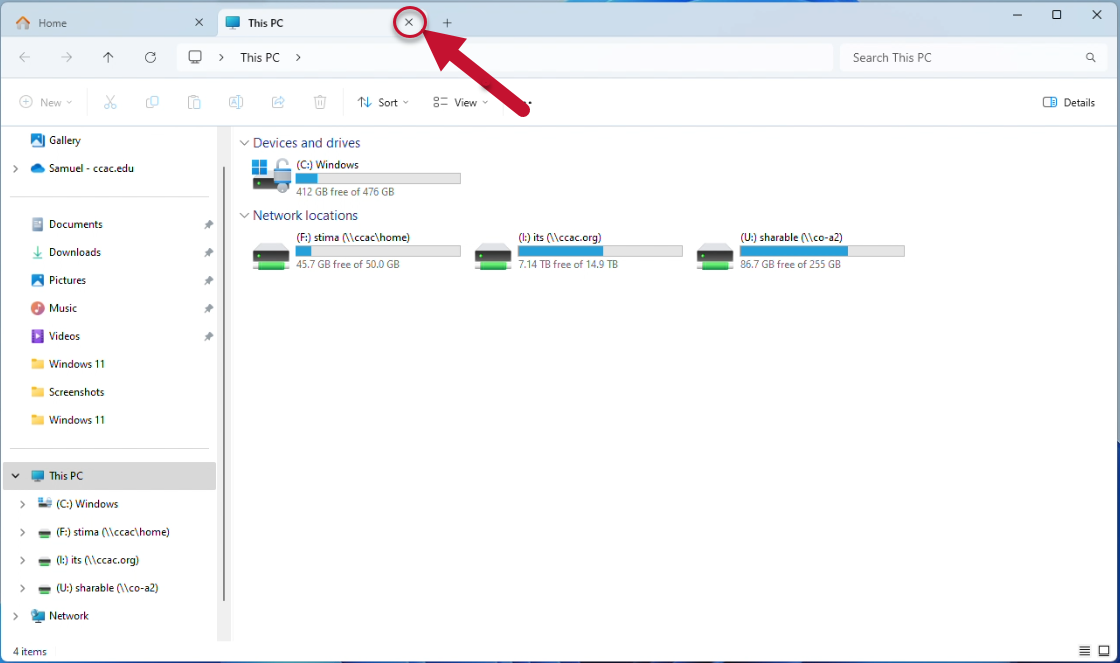
File Explorer Tabs
- Click the plus sign (+) to open a new tab

- The new tab will open and you may navigate through your files
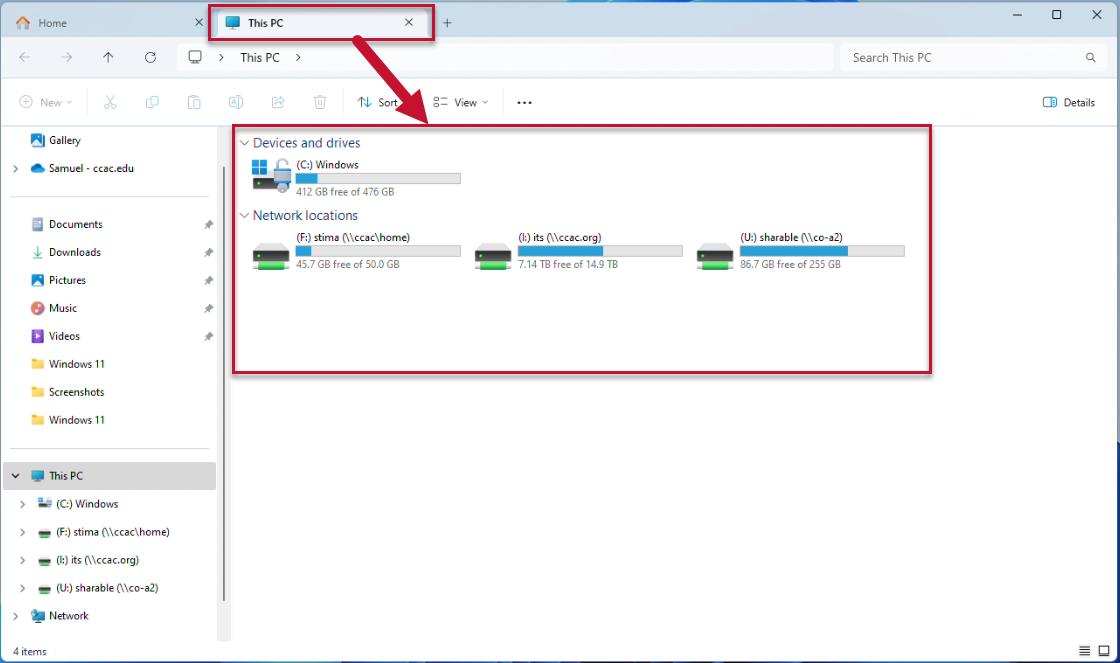
- Click on the tabs to switch between them
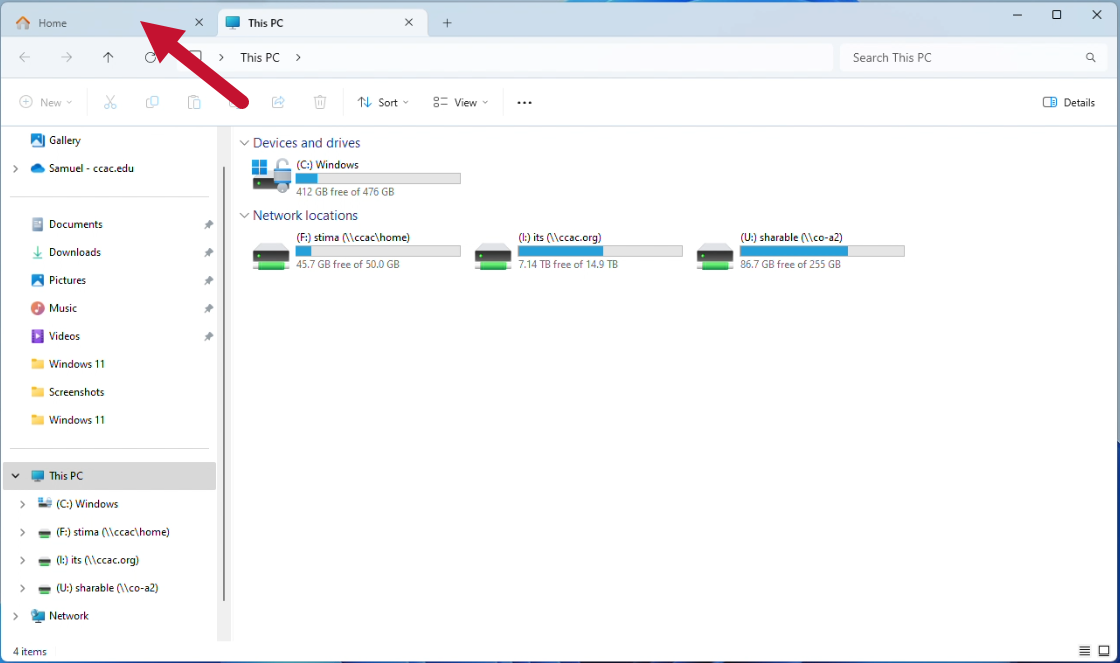
- Click the X to close a tab
Right-Click Context Menu
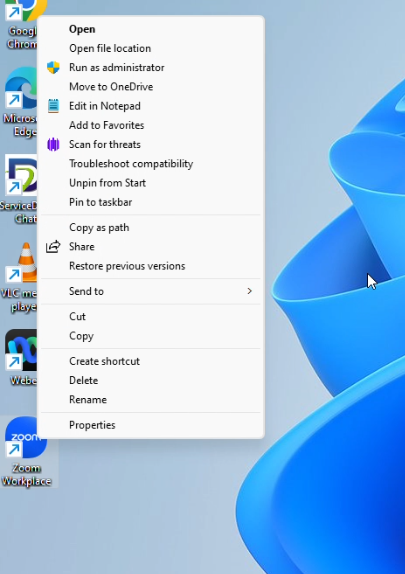
Windows 11 introduces a new context menu that appears when right-clicking on an item such as a file, folder, or desktop icon. The previous menu is still accessible in Windows 11, as shown below.
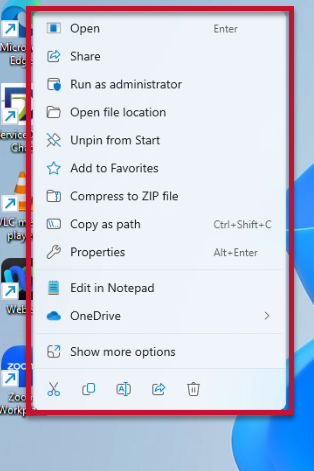
- Click Show more options to view the “classic” Windows context menu, containing the typical selections found on Windows systems
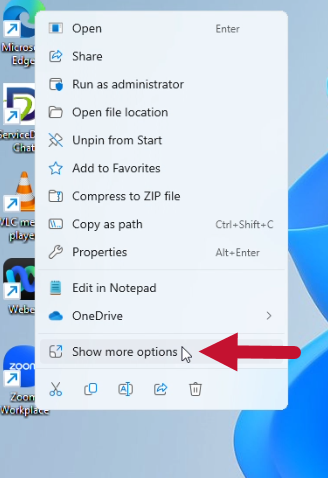
- The “classic” menu
Bypassing the New Context Menu
Hold Shift and right-click to bypass the new right-click context menu and go straight to the “classic” menu.
Settings Overview
The settings app provides you access to the settings for various areas of your system.
Accessing Settings App
Click the button below to quickly access your settings.
Accessing from Desktop:
- Open the start menu
- Click Settings
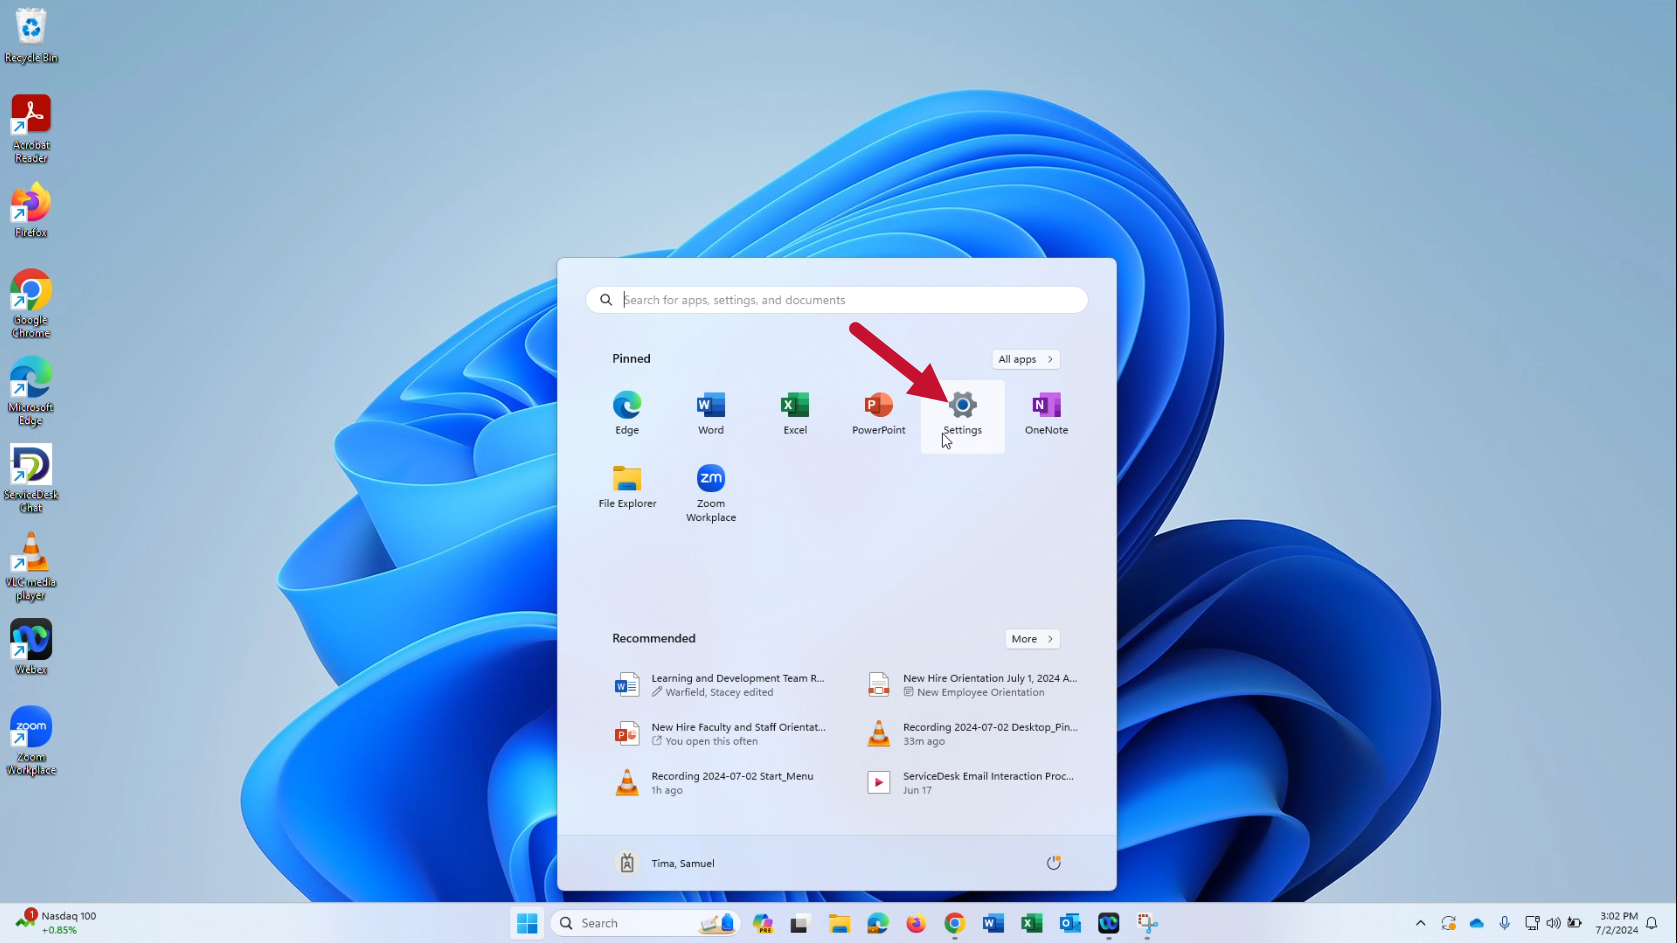
- The settings will open
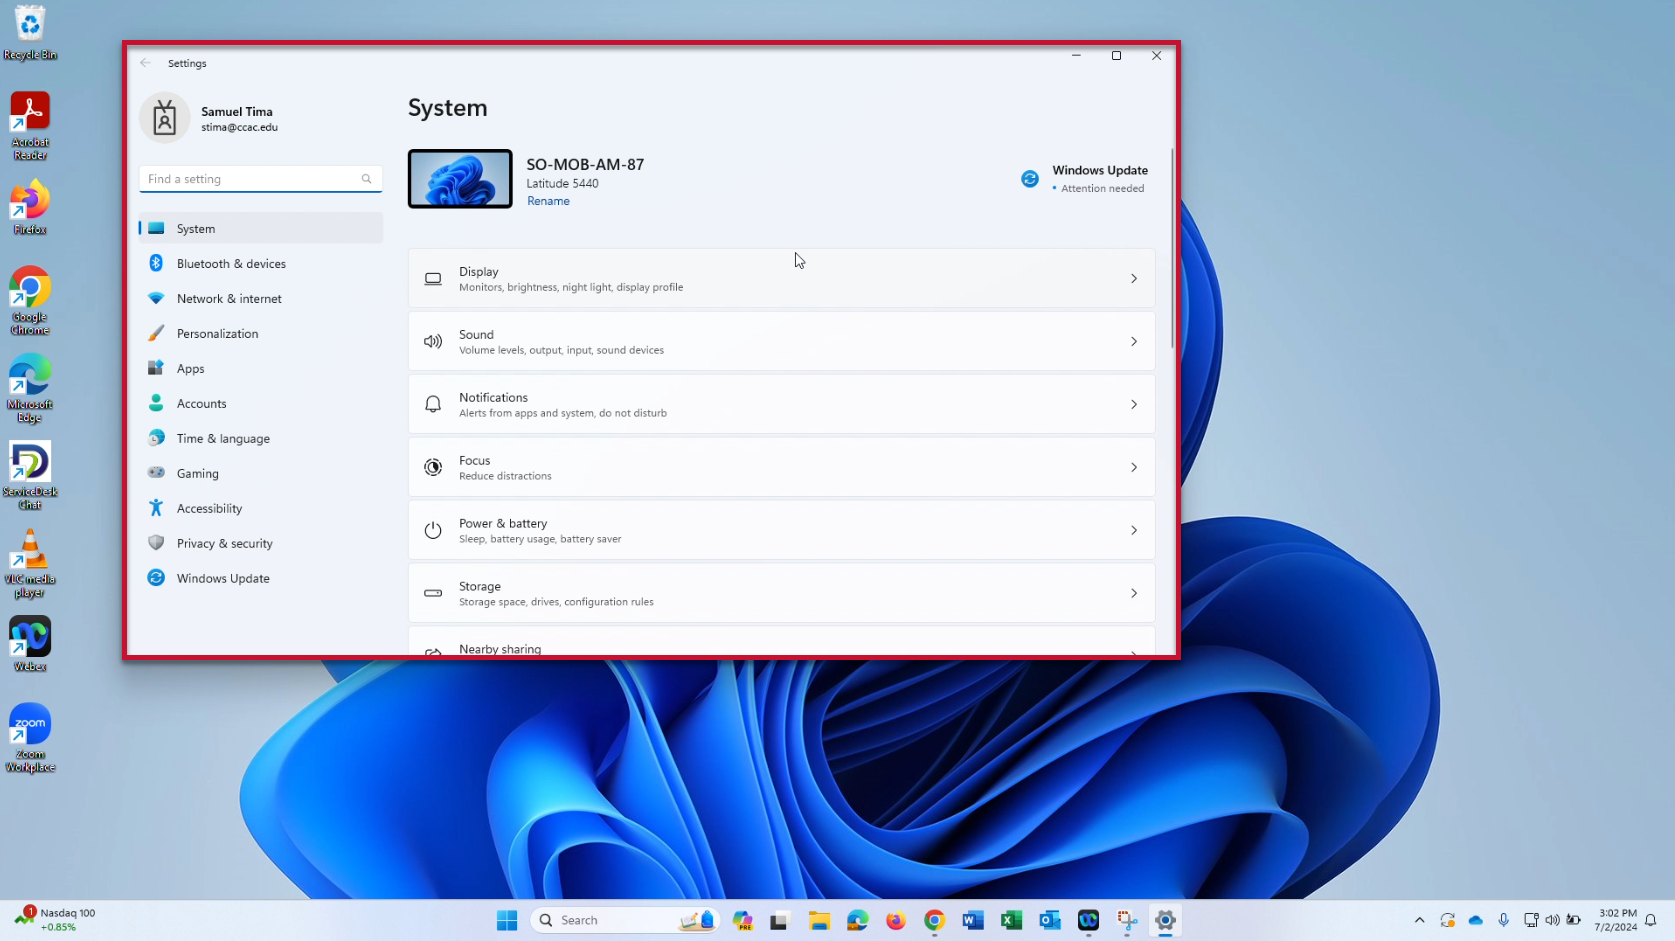
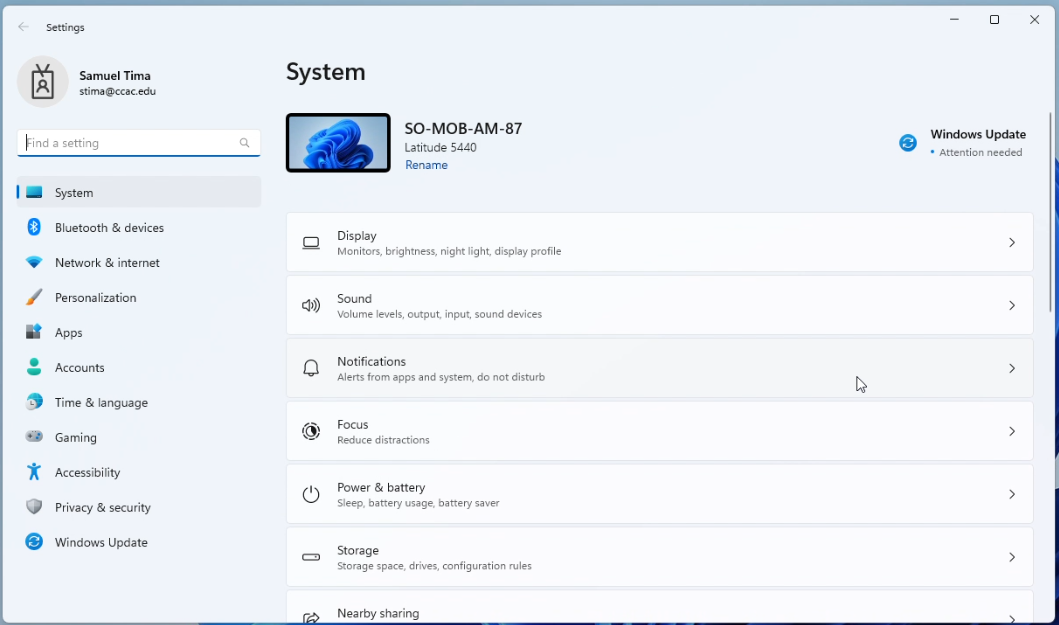
Settings App Overview
-
System: General settings related to your computer system
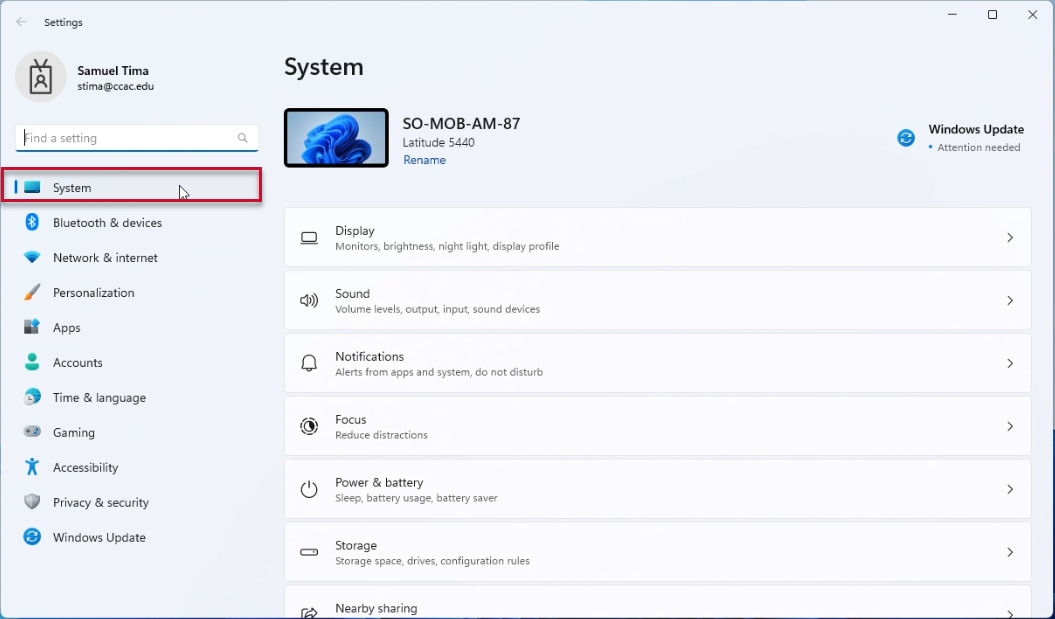
-
Note that your computer/object name is displayed at the top. ITS may request this when servicing your computer.
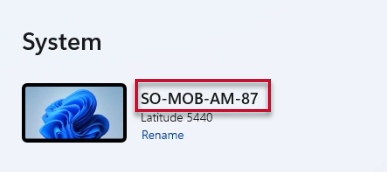
-
Note that your computer/object name is displayed at the top. ITS may request this when servicing your computer.
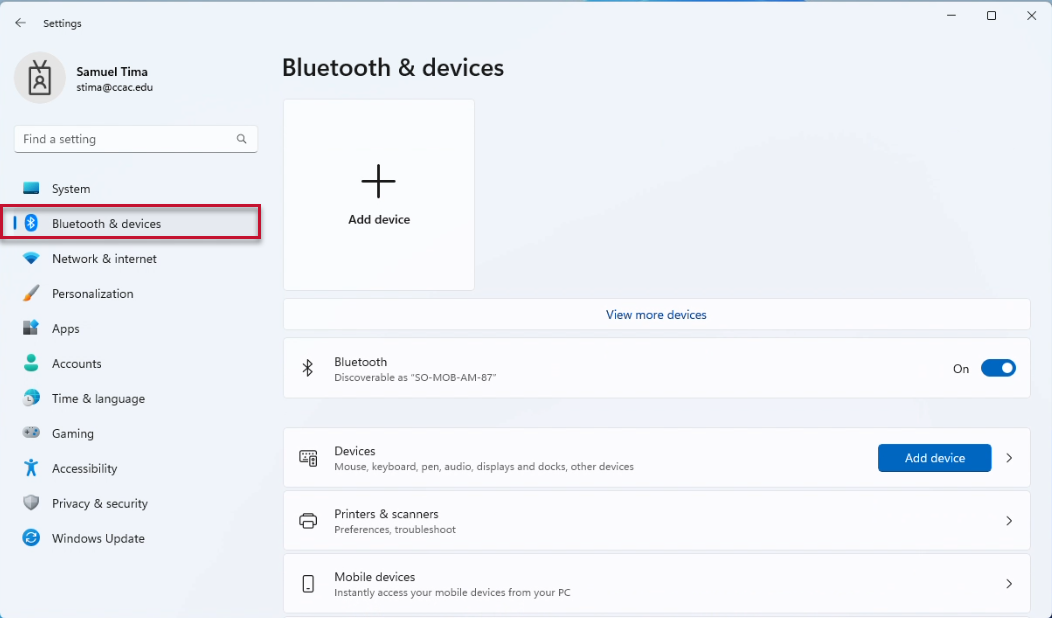
-
Bluetooth & devices: View and manage devices that are connected to your computer, such as Bluetooth devices, printers, scanners, etc.
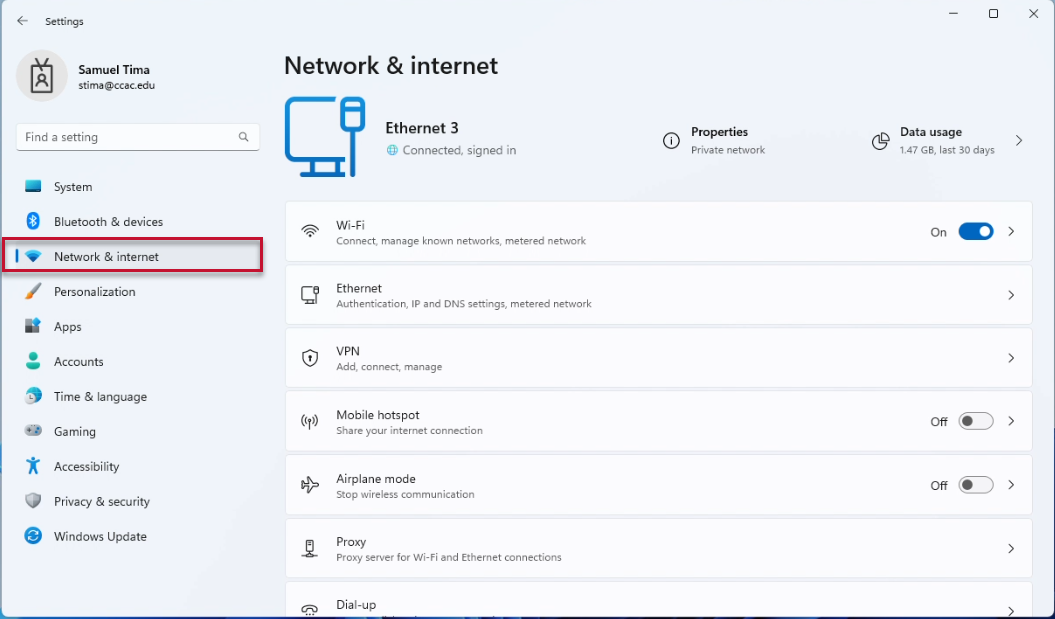
-
Network & internet: View and manage your internet and Wi-Fi network connections
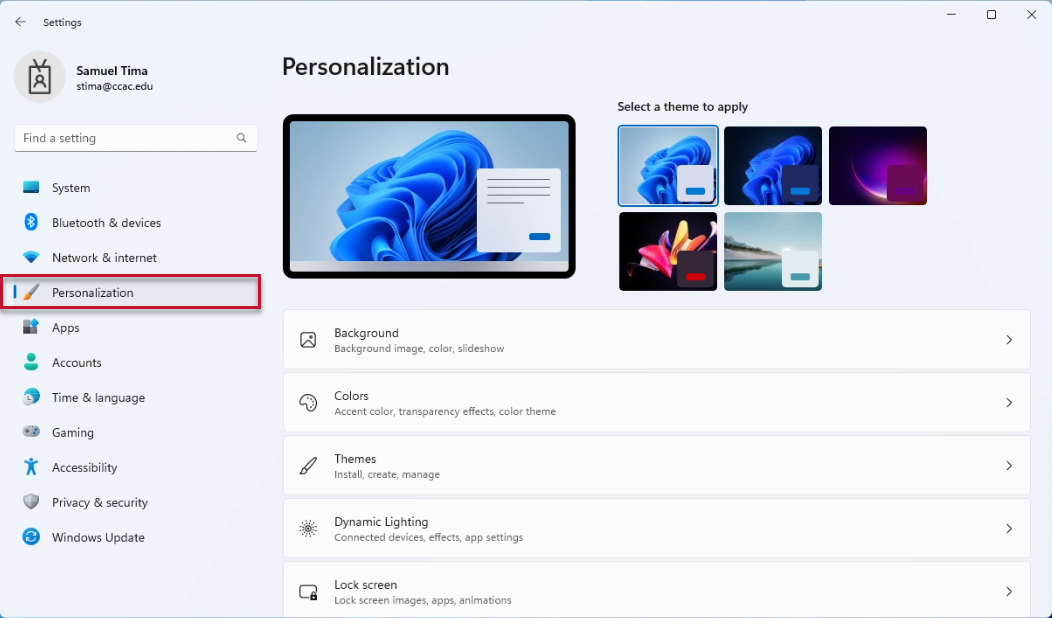
-
Personalization: Settings for personalizing your desktop background image, theme, lock screen, and more
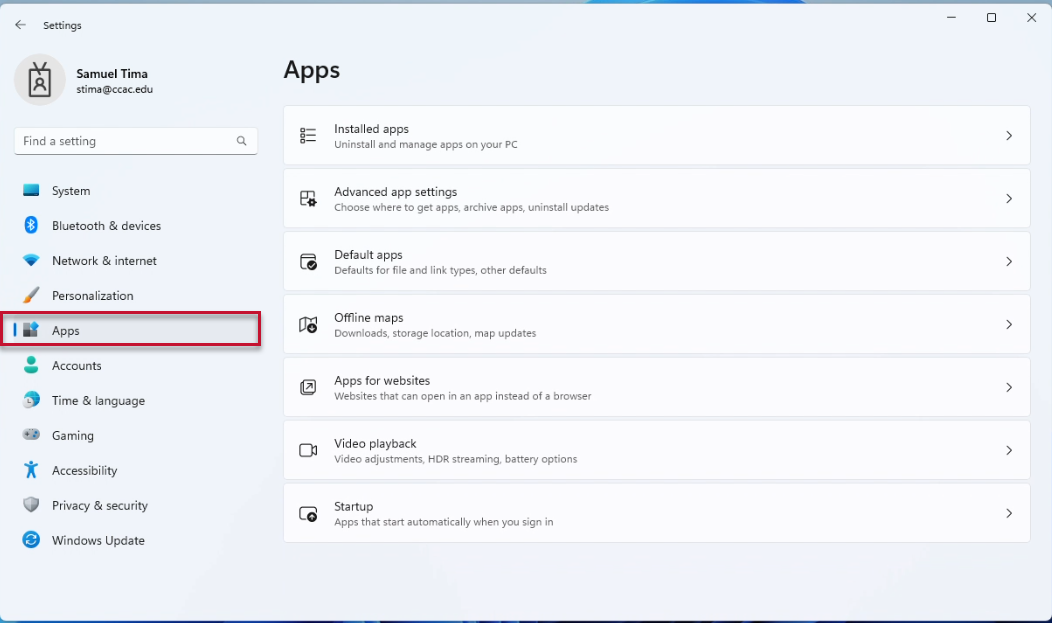
-
Apps: View and manage installed apps, default app settings, and others
-
Accounts: Information regarding your account. This should reflect your CCAC account information

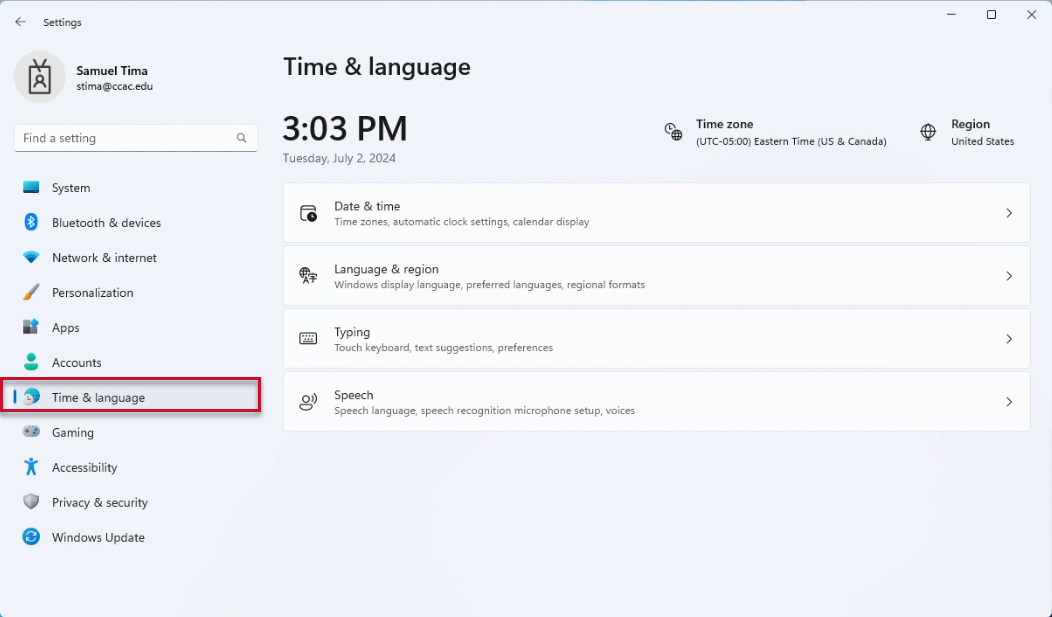
-
Time & language: Settings related to your time and language
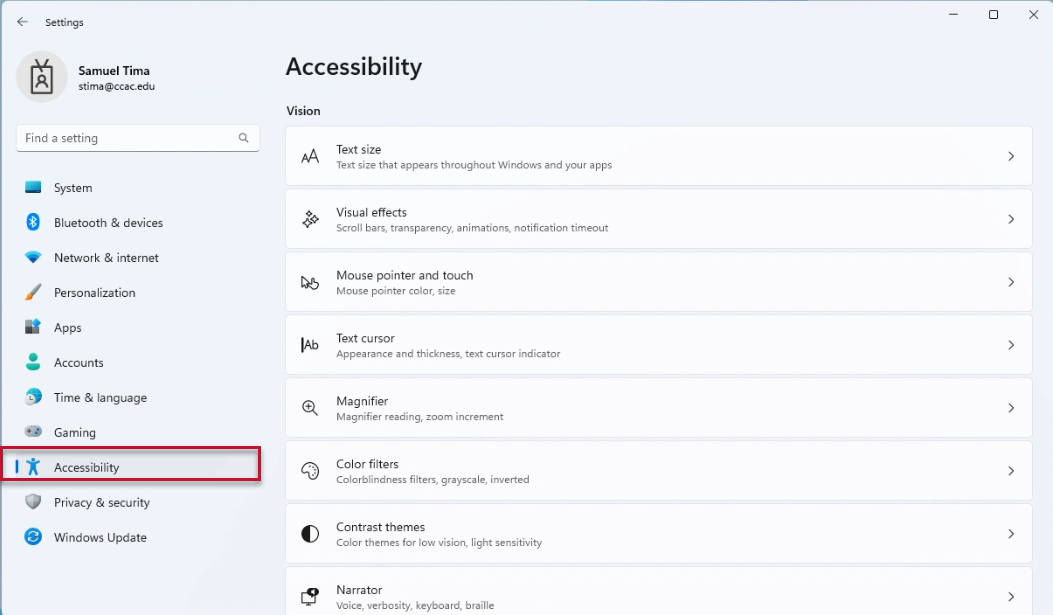
-
Accessibility: Settings related to accessibility, including vision, hearing, and screen interaction settings
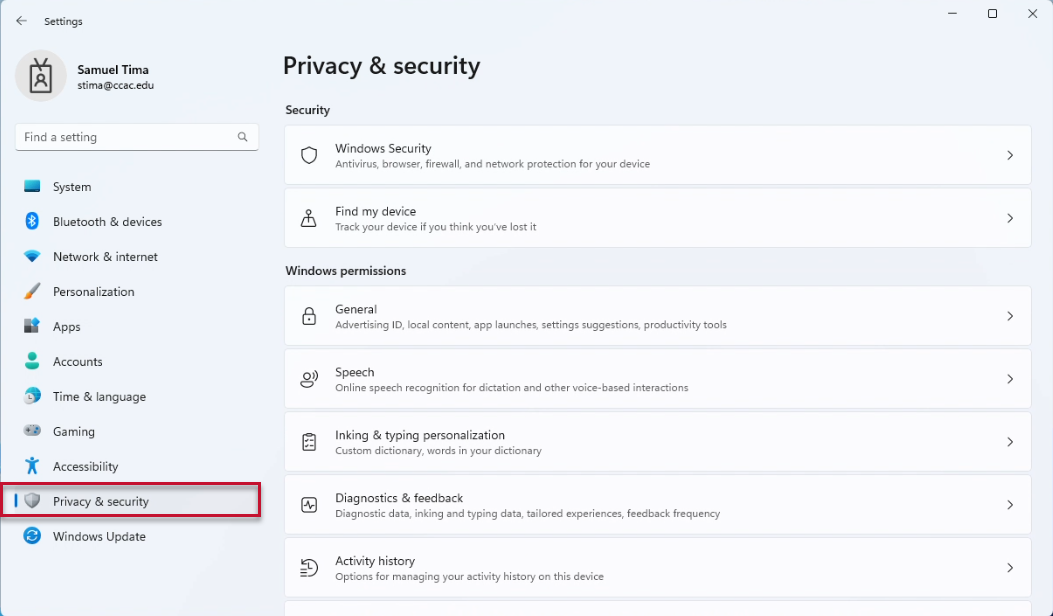
-
Privacy & security: Your system's privacy and security settings
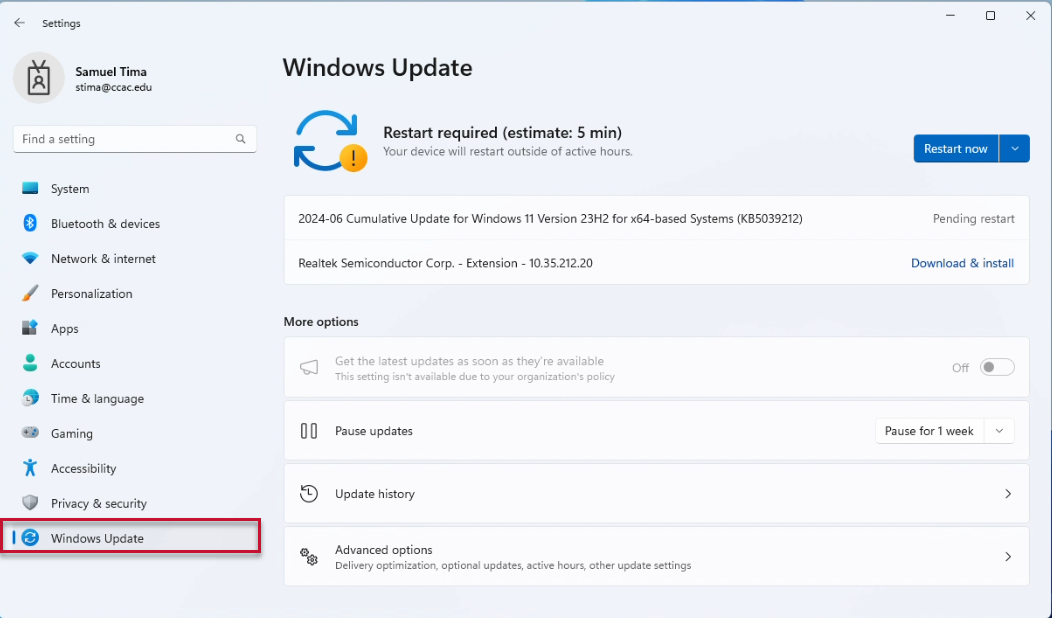
-
Windows Update: Check for any system updates, manage and schedule any upcoming updates, and view other update-related settings
Sound and Volume Settings
Viewing and Changing Sound Output Device from the Taskbar
- Click the speaker icon
 in the system tray
- Use the volume slider to adjust the volume level for your current audio output device

- Click the Select a sound output icon to display all of the connected audio output devices

- From here, you can view your connected audio output devices

- Alternatively, you can press WIN + Ctrl + V to open the sound output menu directly
- Alternatively, you can press WIN
- Click on the device you wish to make your primary audio device

Accessing Sound Settings
Click the button below to quickly access your sound settings.
From Settings App:
- Access the Settings App following the steps in the Settings Overview > Accessing Settings App accordion sections above
- Click Sound

From the Sound Device Output Menu:
- Access the Sound Device Output menu following the steps the Viewing and Changing Sound Output Device from the Taskbar accordion above
- Click More volume settings

- Following either method above, you will see the Sound Settings open

Sound Settings: Selecting Output and Input Devices
Output Devices
- Open the Sound Settings
- Locate your output device under the Choose where to play sound/Speakers area (Click on this section to expand it if it is collapsed)
- Click on the output device you wish to select
- Use the volume slider to adjust the volume level

Input Devices
- Open the Sound Settings
- Locate your input device under the Choose a device for speaking or recording/Microphone area (Click on this section to expand it if it is collapsed)
- Click on the input device you wish to select
- Use the volume slider to adjust the volume level

Advanced Sound Settings: View All Sound Devices
- Open the Sound Settings
- Click All sound devices

- Both your output and input devices will be displayed

- Click on a device to view more advanced settings for it

Advanced Sound Settings: Volume Mixer
- Open the Sound Settings
- Click Volume mixer

- This will display the master volume level as well as the volume level for each device and application

- Use the slider next to each item to adjust the volume level

More Advanced Sound Settings
- Open the Sound Settings
- Click More sound settings

- This will open more advanced sound settings

Sign-Out & Power Options
Signing Out/Account Options
- Open the start menu
- Click your name
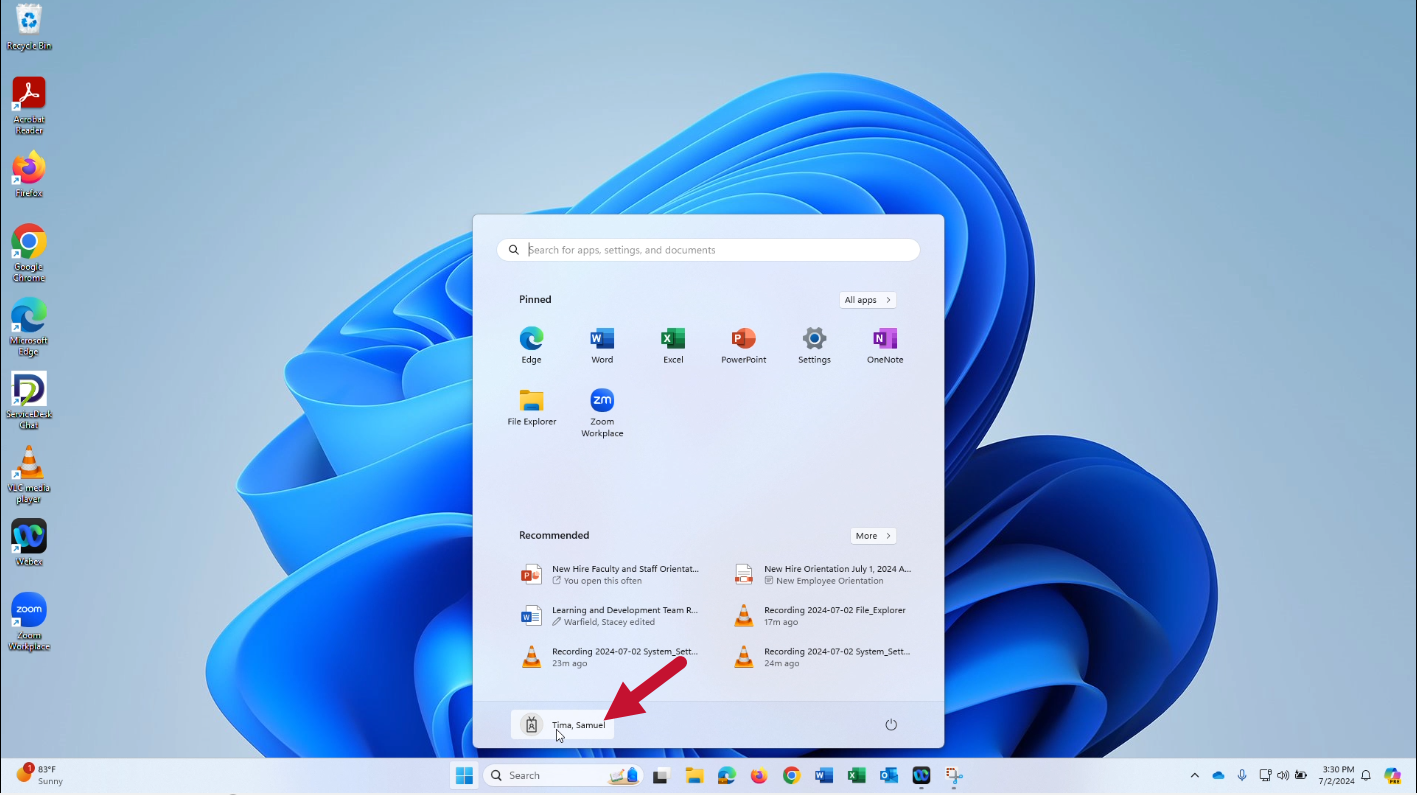
- Select an option

- Change account settings: View and change your account settings
- Lock: Locks your screen - Please use this when you to step away from your computer
- Sign out: Signs you out of your account - Please sign out of meeting room or classroom computers when finished
- Switch user: Keeps your account signed in and allows another user to log in
Power Options
- Open the start menu
- Click the power icon
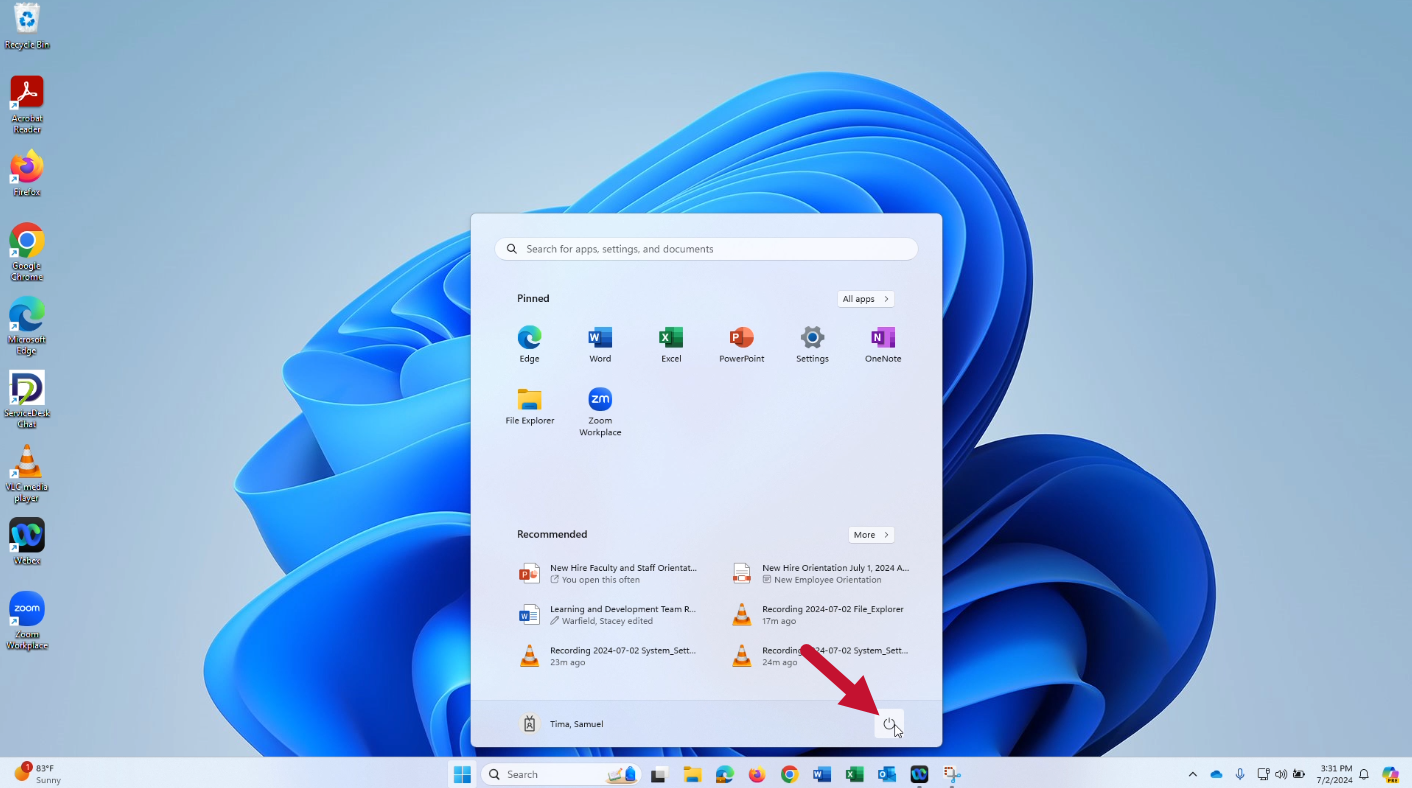
- Select an option

- Sign-in options: View and change sign-in options
- Sleep: Puts your computer to sleep (low power state still powered on)
- Shut down: Shuts your computer down
- Restart: Restarts your computer
Additional Productivity Applications
Note: Unsupported Applications
Please note that the CCAC ITS department does not support the applications listed in this section.
While you are welcome to use these applications at your discretion, we cannot provide technical assistance or troubleshooting for them.
Two additional productivity applications available on Windows 11 are Copilot and Power Automate.
Click the button below each application for more information from Microsoft.
Copilot
Copilot is an AI productivity assistant tool.
Click here to learn more about Copilot
Power Automate
Power Automate allows you to create “flows” to automate various tasks and processes on your computer.
Click here to learn more about Power Automate
Windows Shortcut Keys
Windows 11 includes a number of Windows logo key (WIN) keyboard shortcuts. Several common shortcuts are included below.
| WIN | Open Start Menu |
| WIN + Alt + D | Open date and time in Taskbar |
| WIN + E | Open File Explorer |
| WIN + I | Open System Settings |
| WIN + Ctrl + V | Open Sound Output Menu |
| WIN + L | Lock Screen |
| WIN + S or Q | Open Search |
| WIN + Shift + S | Open Snipping Tool |
| WIN + W | Open Widgets |
| WIN + Z | Snap windows side by side |
Click here to view additional keyboard shortcuts.